

Overview
In this tutorial, we will learn the steps to add apache POI to a standalone Java project in Eclipse IDE. Steps to download Apache POI jar can be found at:
https://www.testingdocs.com/download-apache-poi/
We need to add the jar files to the project in order to work with it. To configure the Apache POI to a project we need to add the jar files available in the downloaded folder.
Add Jar Files
Launch Eclipse IDE.
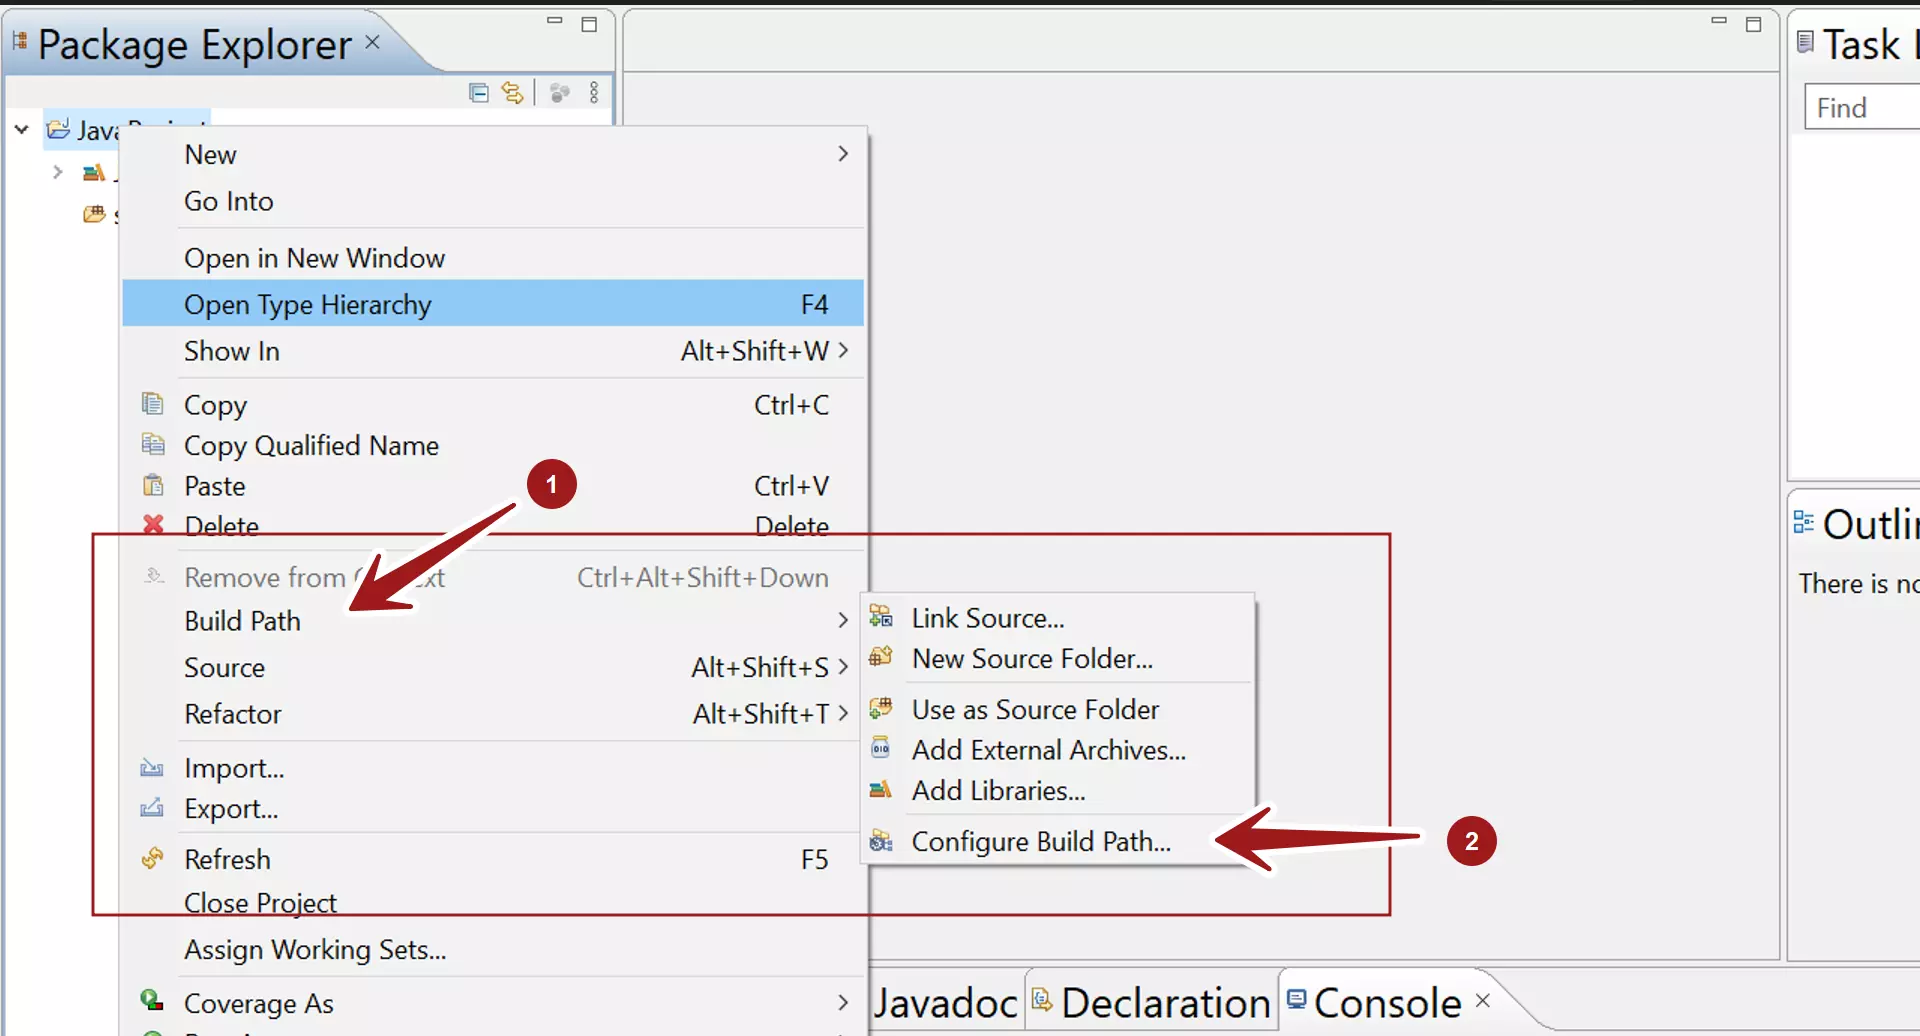
Go to Eclipse and right click on the created project and go to the option Build Path.
Under Build Path menu option, choose the option Configure Build Path.

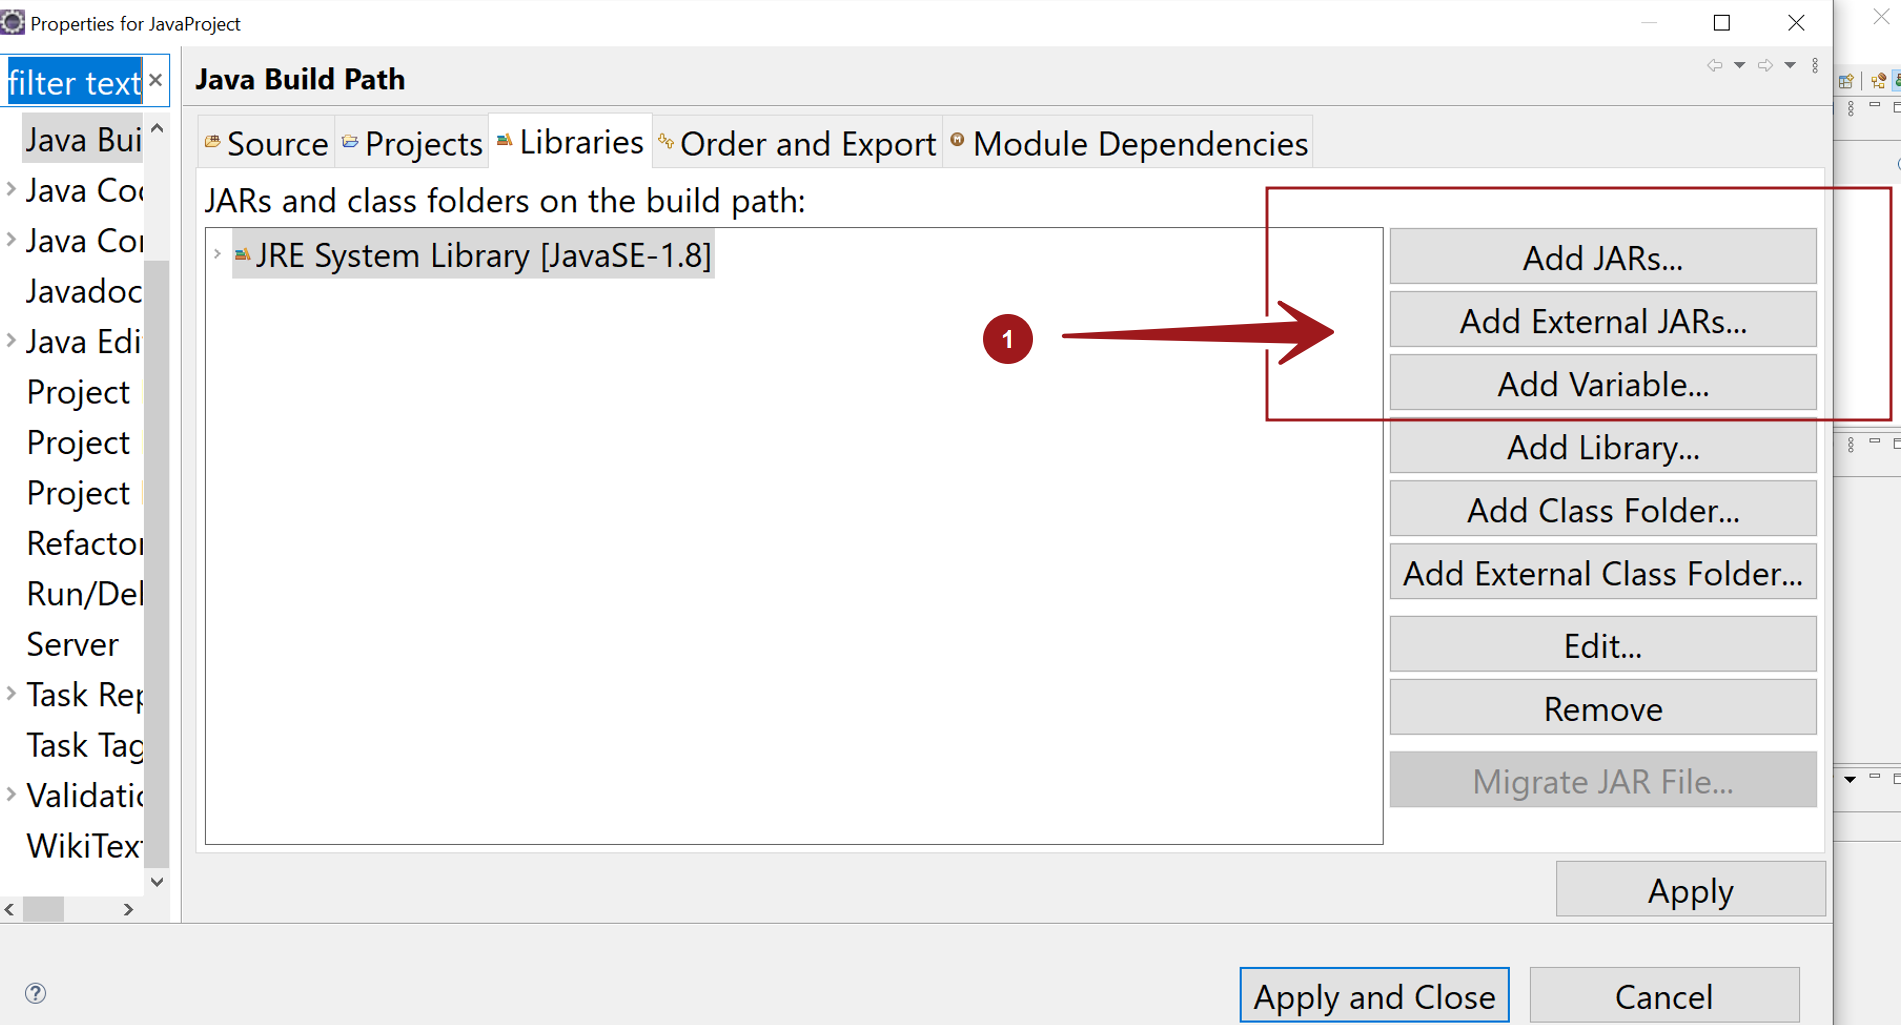
Click on the Libraries tab, and then click on the option Add External Jars button.

When we click on Add External Jars option, an another window gets displayed which gives you the option to browse the Jars files. Select all the Jar files to the project.
Note that the downloaded jar files might be in several folders.
- lib
- ooxml-lib
- auxiliary
Incase you don’t know which Jar file to add, to be on safe side and avoid errors in the project add all the jar files to the project build path.
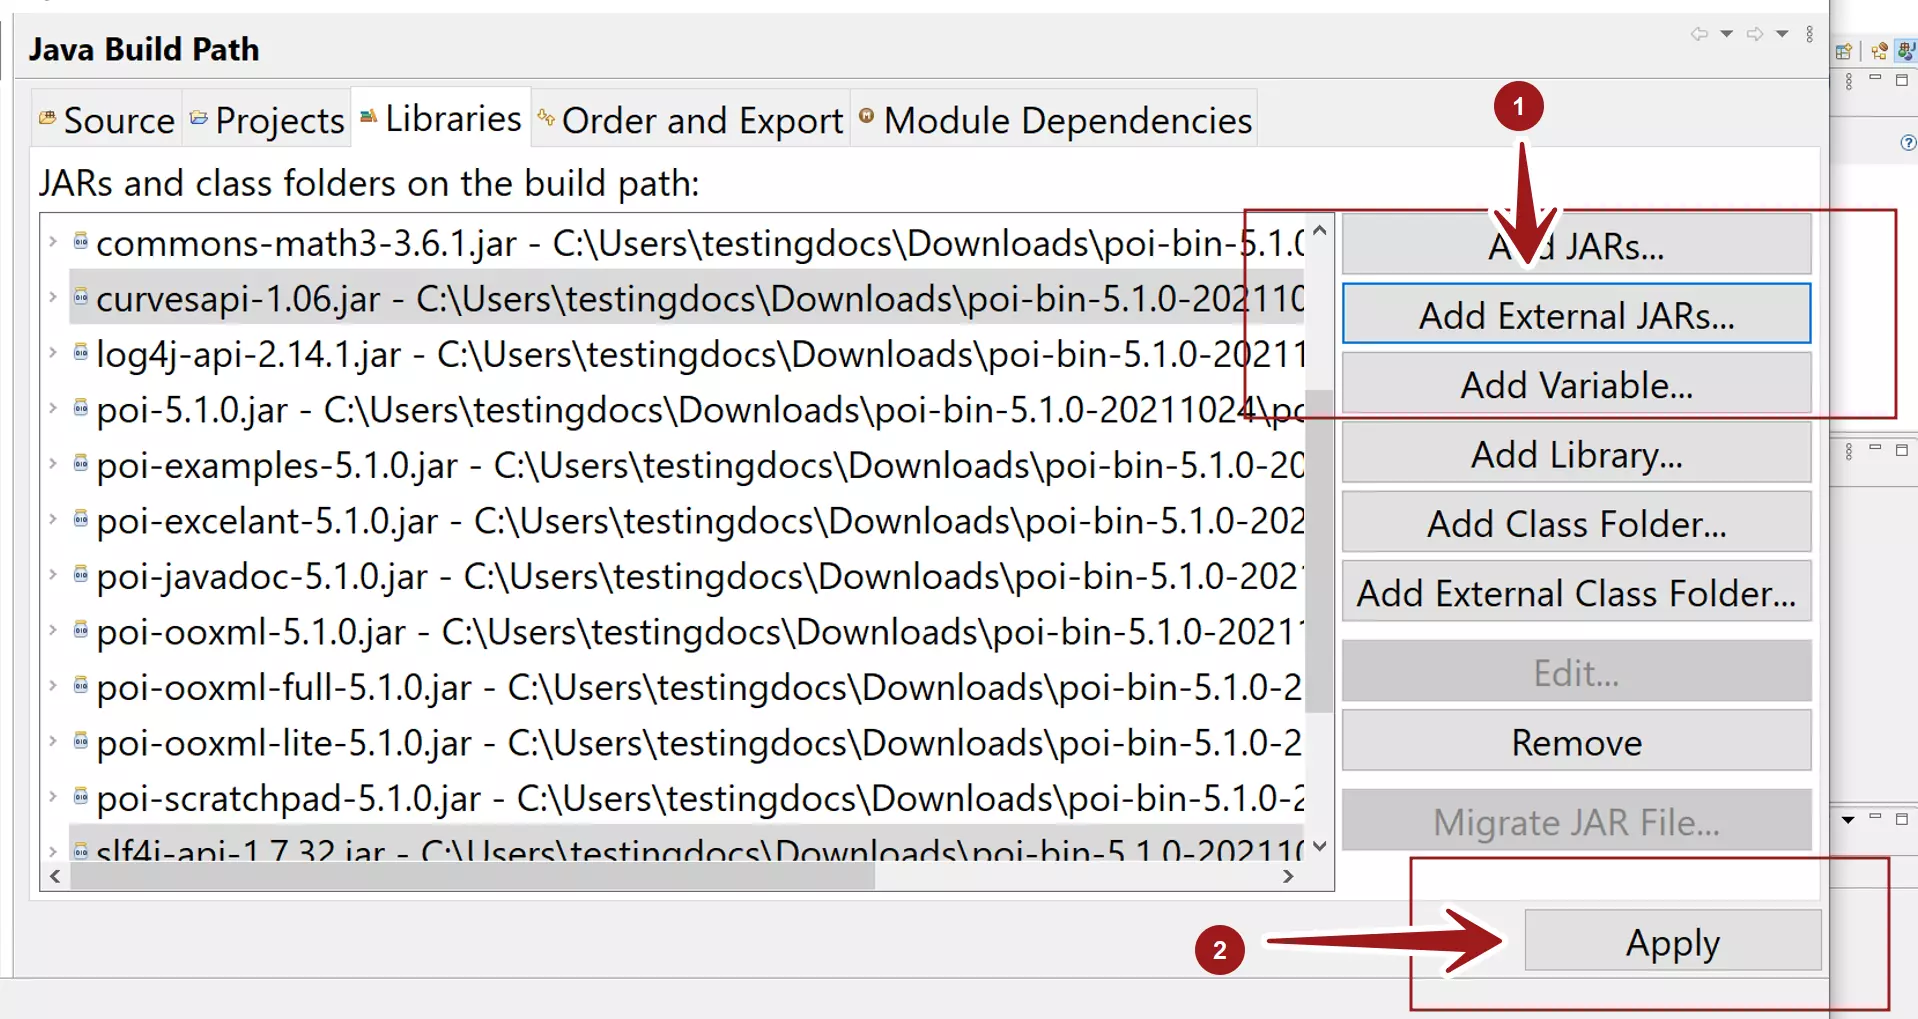

Click on the Apply button. To Apply and close the window click on the Apply and Close button.
That’s it. We have successfully configured Apache POI to the Java project in Eclipse IDE.
—
Apache POI Tutorials:
https://www.testingdocs.com/apache-poi-tutorials/
More Information on Apache POI API: