

Overview
In this tutorial, we will learn steps involved to add C++ source files in the Code::Blocks IDE. A C++ Project is a collection of C++ source code files( *.cpp) , C++ header files( *.h) and configuration artefacts.
Add C++ Source Files
Choose File >> New >> File… menu option to add files to the project.
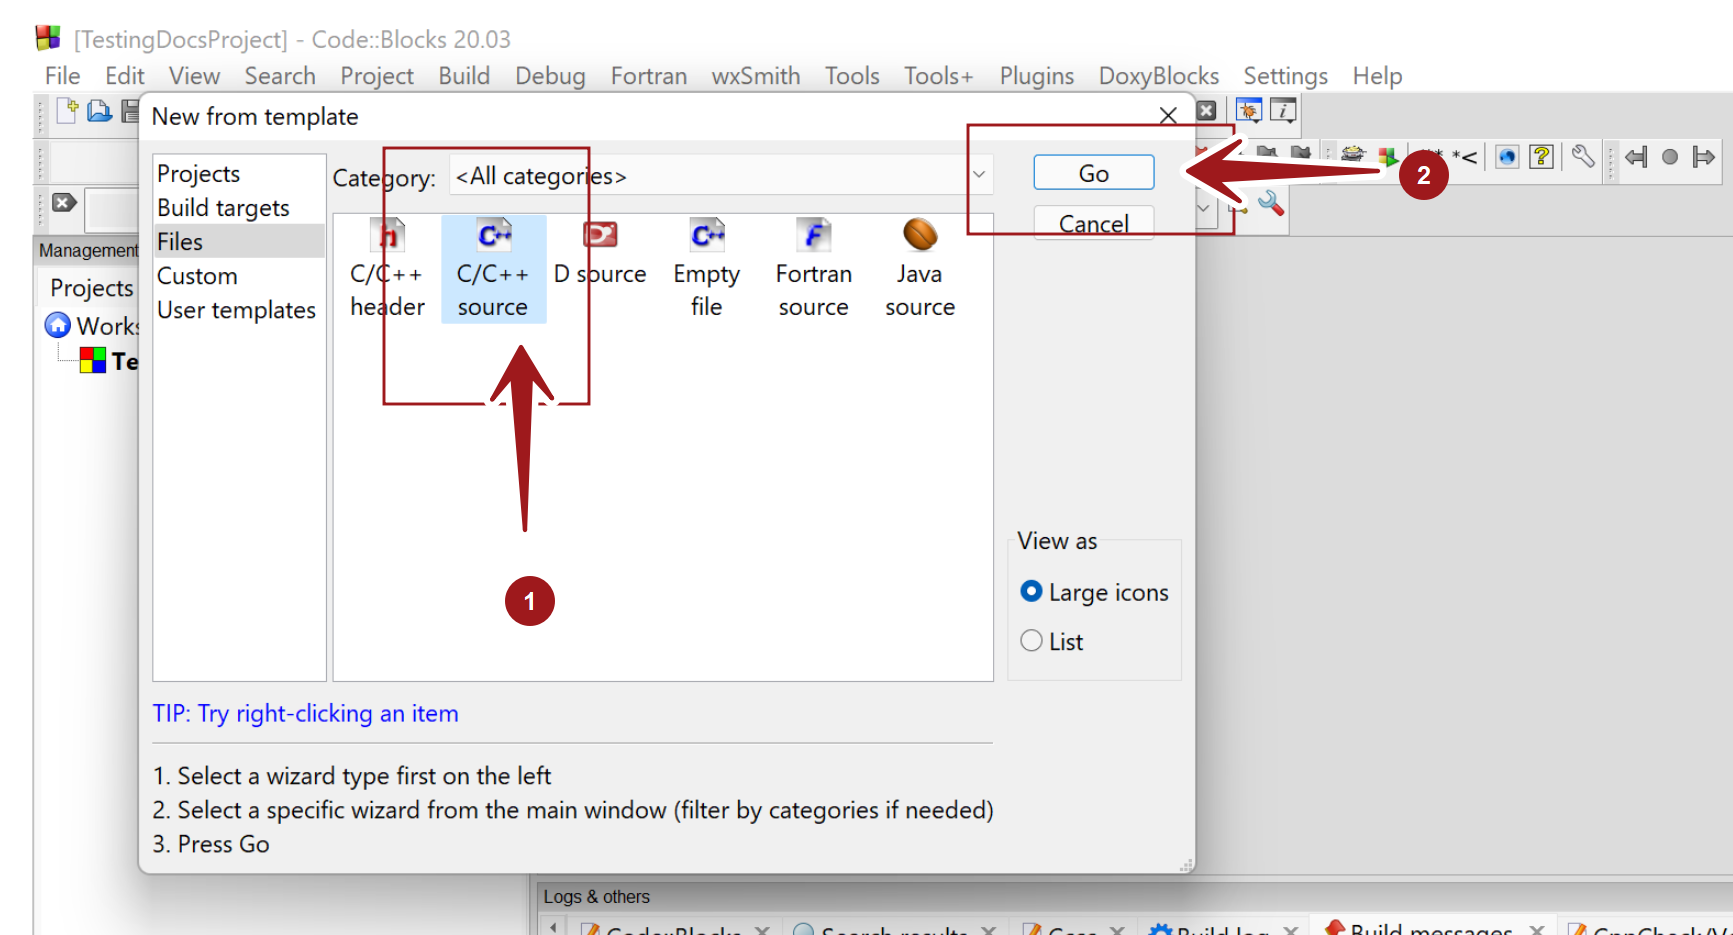
Choose “C/C++ source” Files category and click on the Go button.

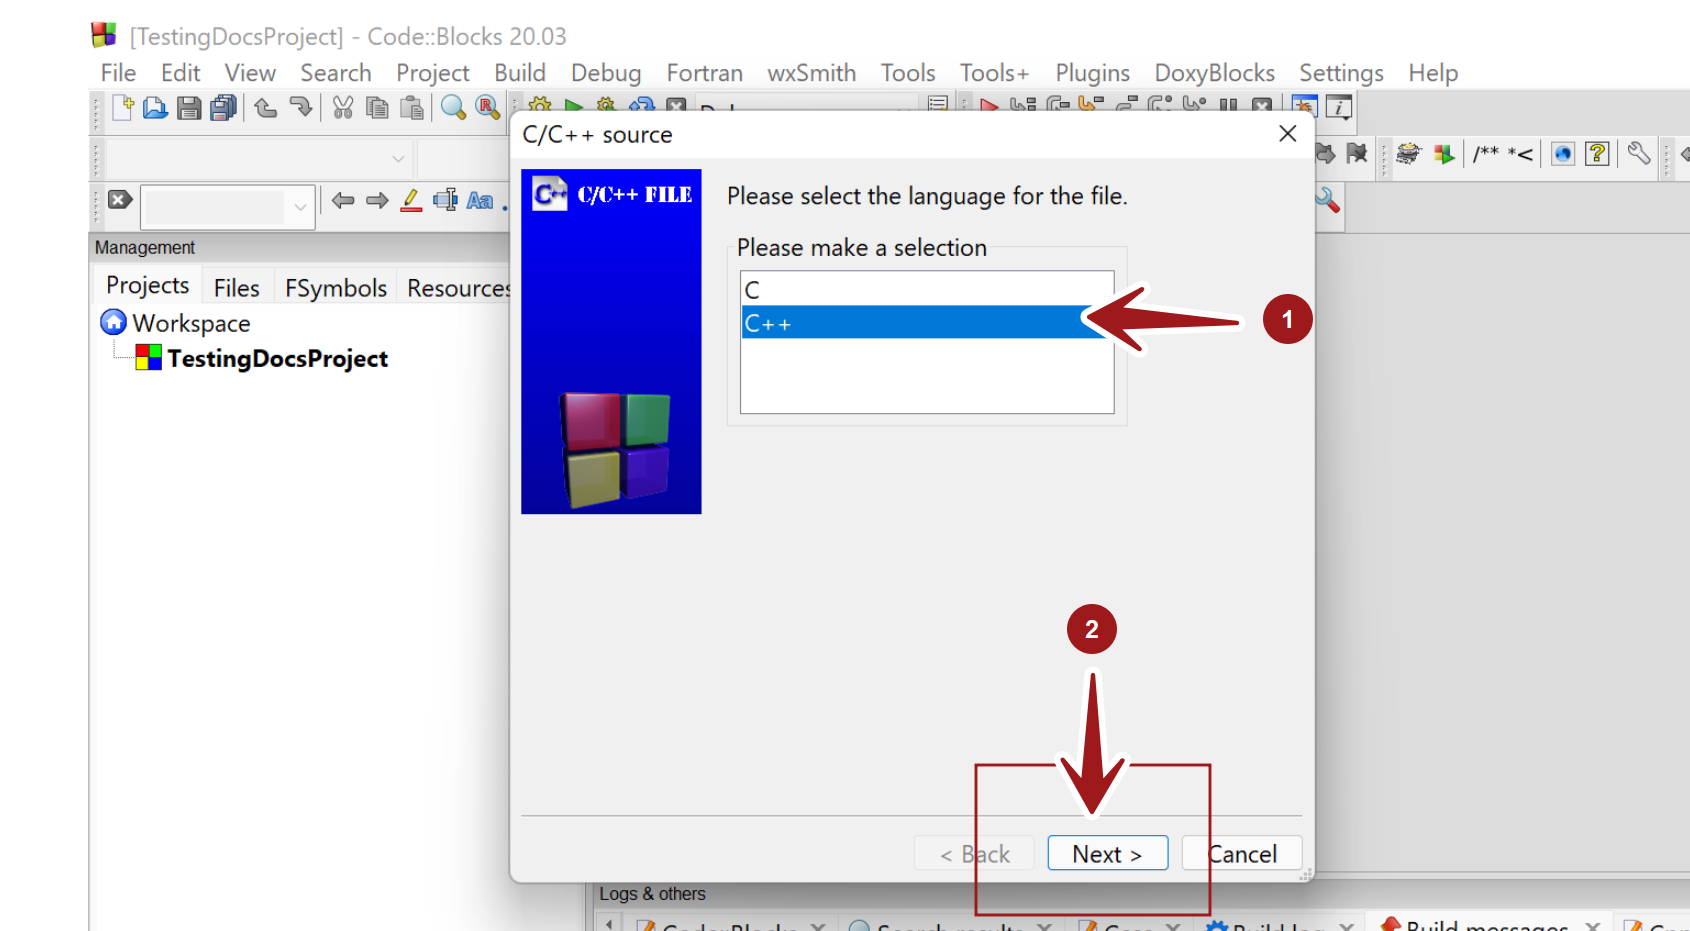
Select the language selection C++ and click on the Next > button.

Enter the file name and location. Click on the three dots button and browse to the file location. This should be ideally under the project directory. Click on the Save button to create the file.
Add it to the active project. Check the check box option Add file to active project.
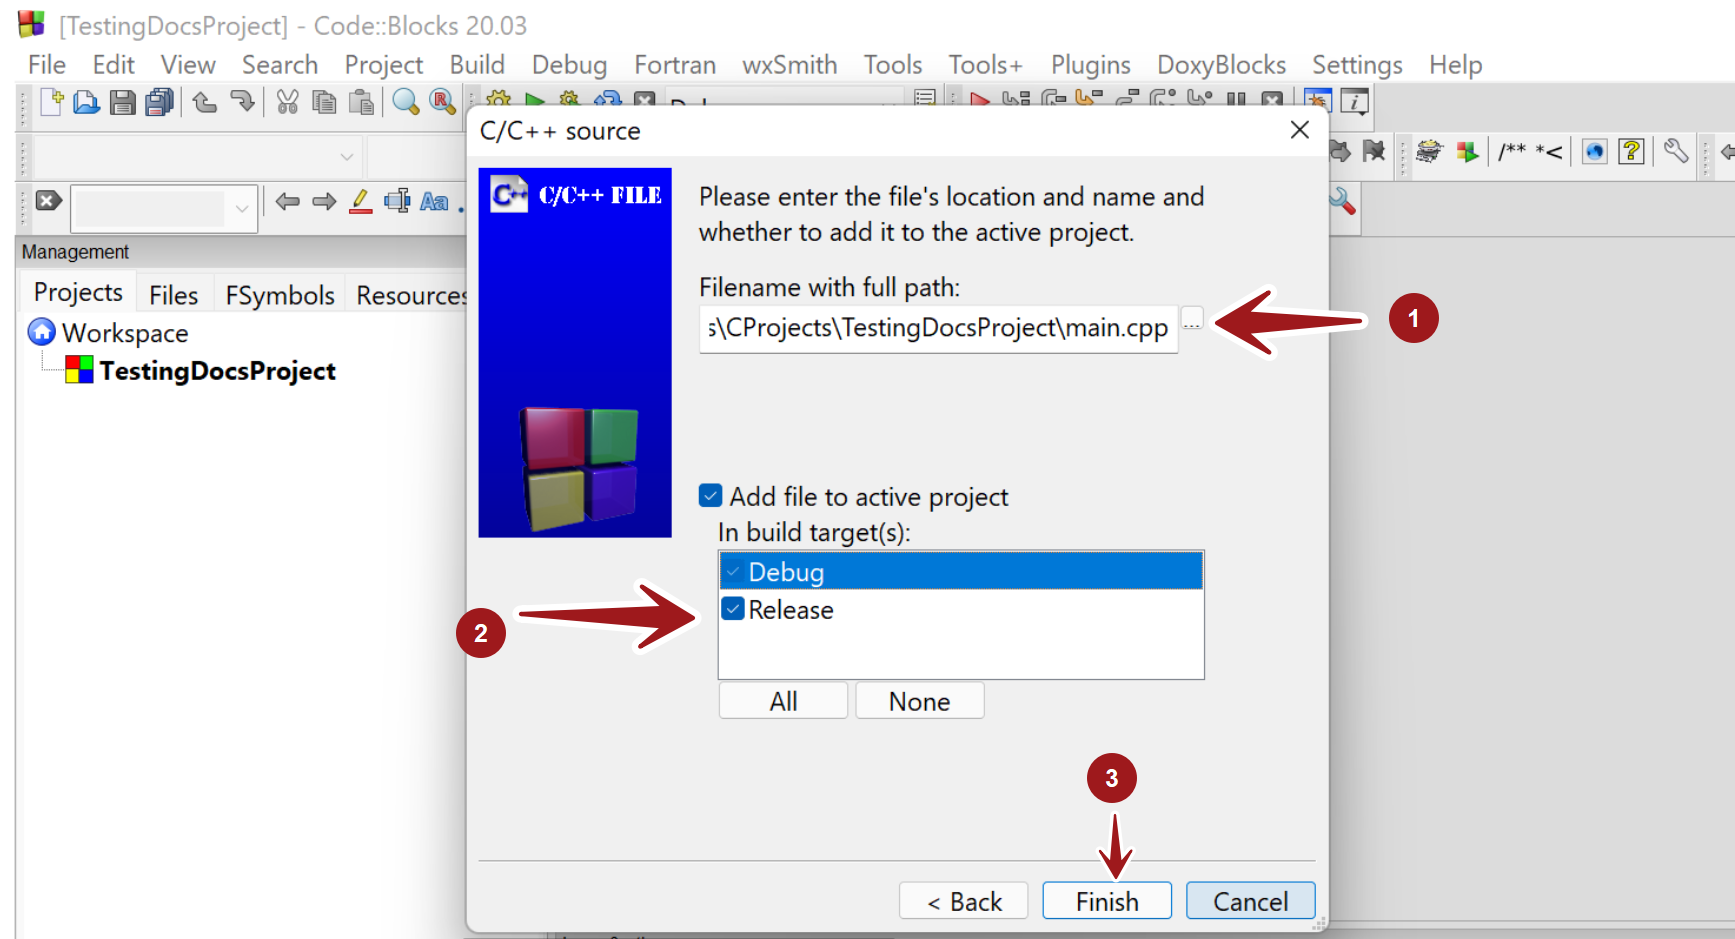

Check the Debug and Release build targets. Click on the All button to select both the build targets.
Click on the Finish button.
The source code file would be added to the C++ project. The file would be listed in
Project >> Sources
Add Empty File
We can use the menu option File >> New >> Empty file to add an empty file.
Click the Yes button in the Add File to Project dialog box.
Give a name to the file with the .cpp file extension and save the type as C/C++ files. Click on the Save button.
The file would be displayed in the code editor. We can add code to the file. That’s it.
Build C++ Project
https://www.testingdocs.com/build-c-project-in-codeblocks-ide/
—
Code::Blocks Tutorials
Code::Blocks Tutorials on this website can be found at:
https://www.testingdocs.com/code-blocks-tutorials/
For more information on Code::Blocks IDE, visit the official website: