

Overview
In this tutorial, we will learn the steps to add test cases to a Test Plan. We need to add the test cases to the test plan to execute them. Add/Remove Test Cases page allows this functionality.
Steps to add test cases
Steps to add test cases to a test plan are as follows:
Launch TestLink tool.
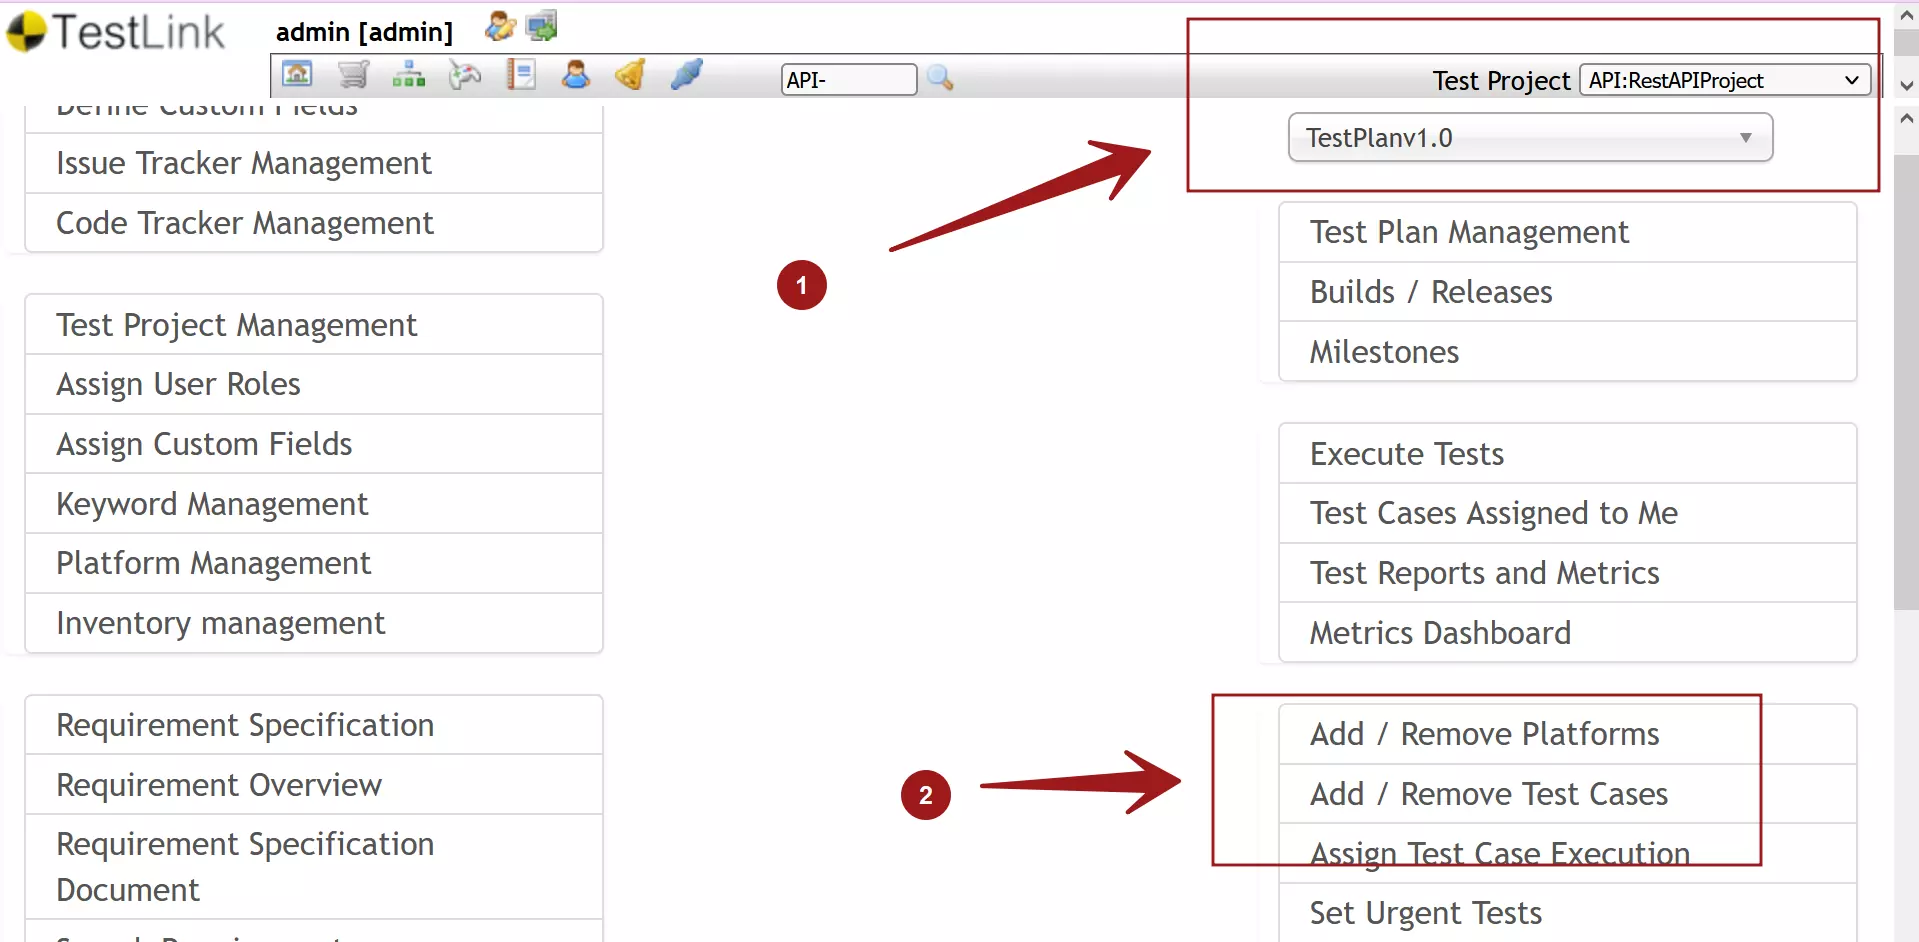
Select the project from the drop-down list.
Create a Test Plan and select the Test plan from the drop-down list.
Click on the Add/Remove Test Cases link to open the page.

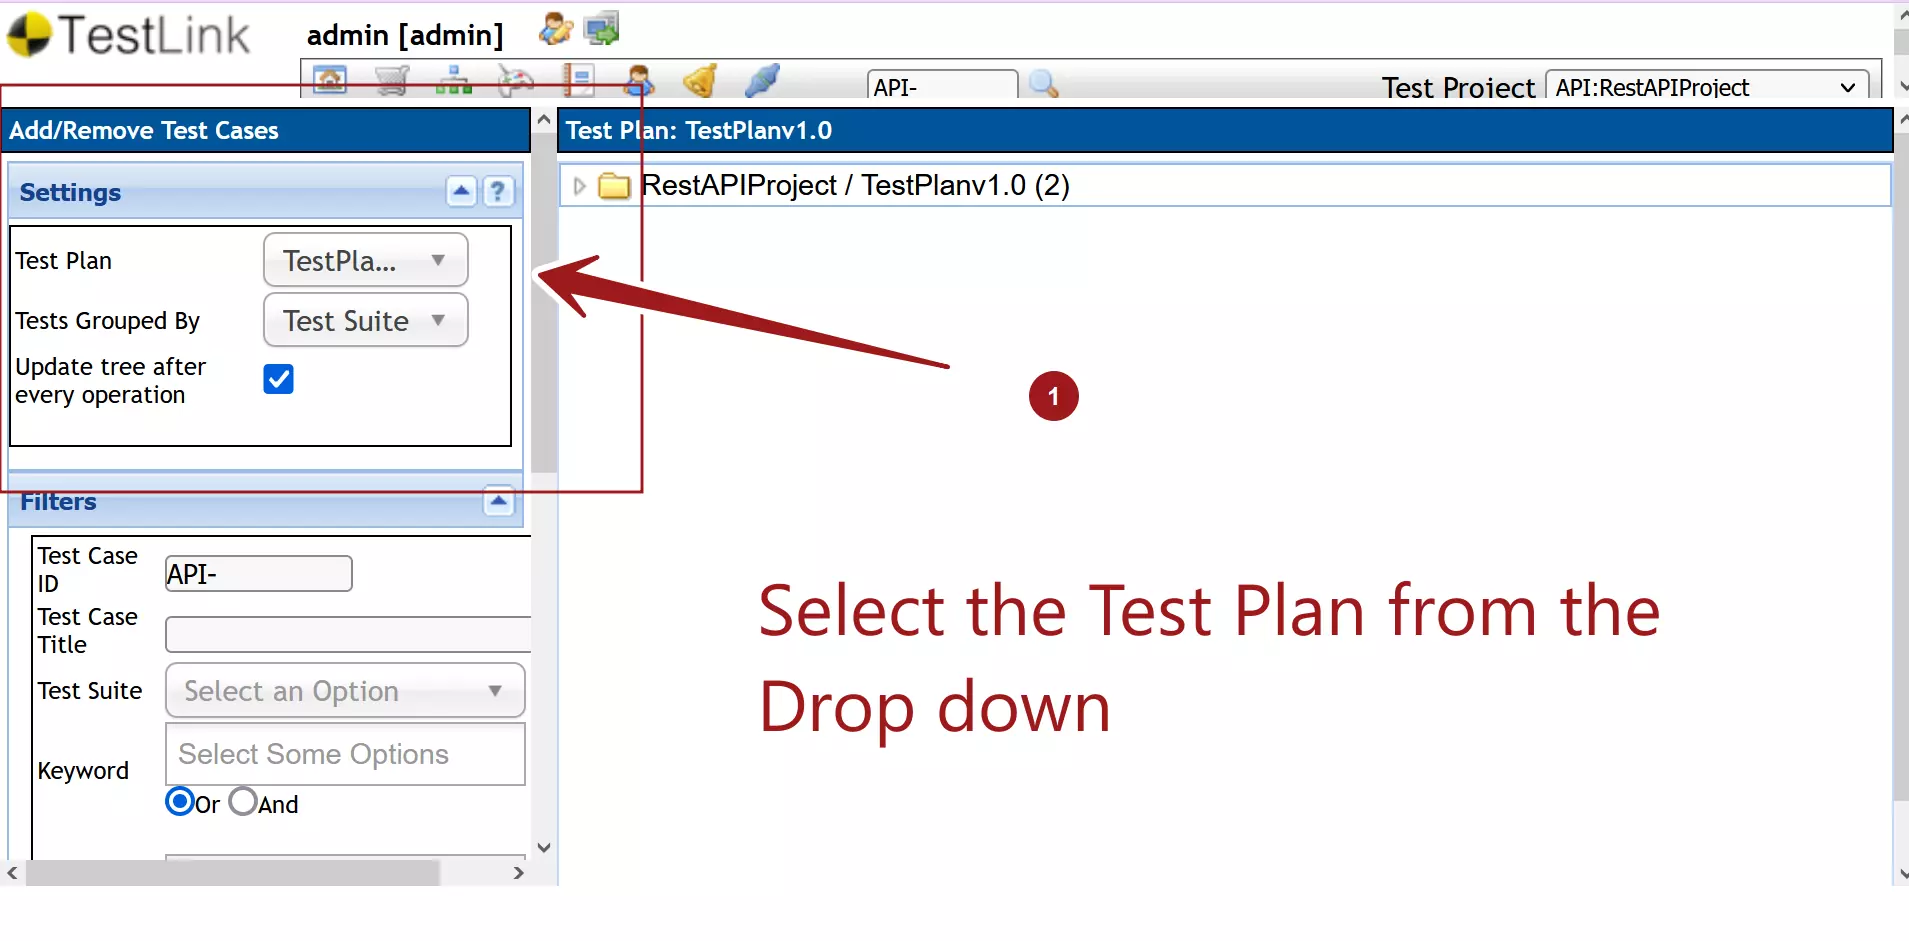
Select the Test Plan from the left Settings box drop-down list. Settings box allows you to select the test plan. According to the chosen test plan the appropriate builds will be shown.
Tests are grouped by Test Suite or Requirements. We can change this grouping by select the Tests Grouped By drop-down list. The default grouping of the test cases is Test Suite.

Check the test cases to add to the test plan.
Select the tester to assign the testcases. Assign to user on add drop-down list.
Select the build from the build drop-down list.
Click the Add selected button to add the test case.
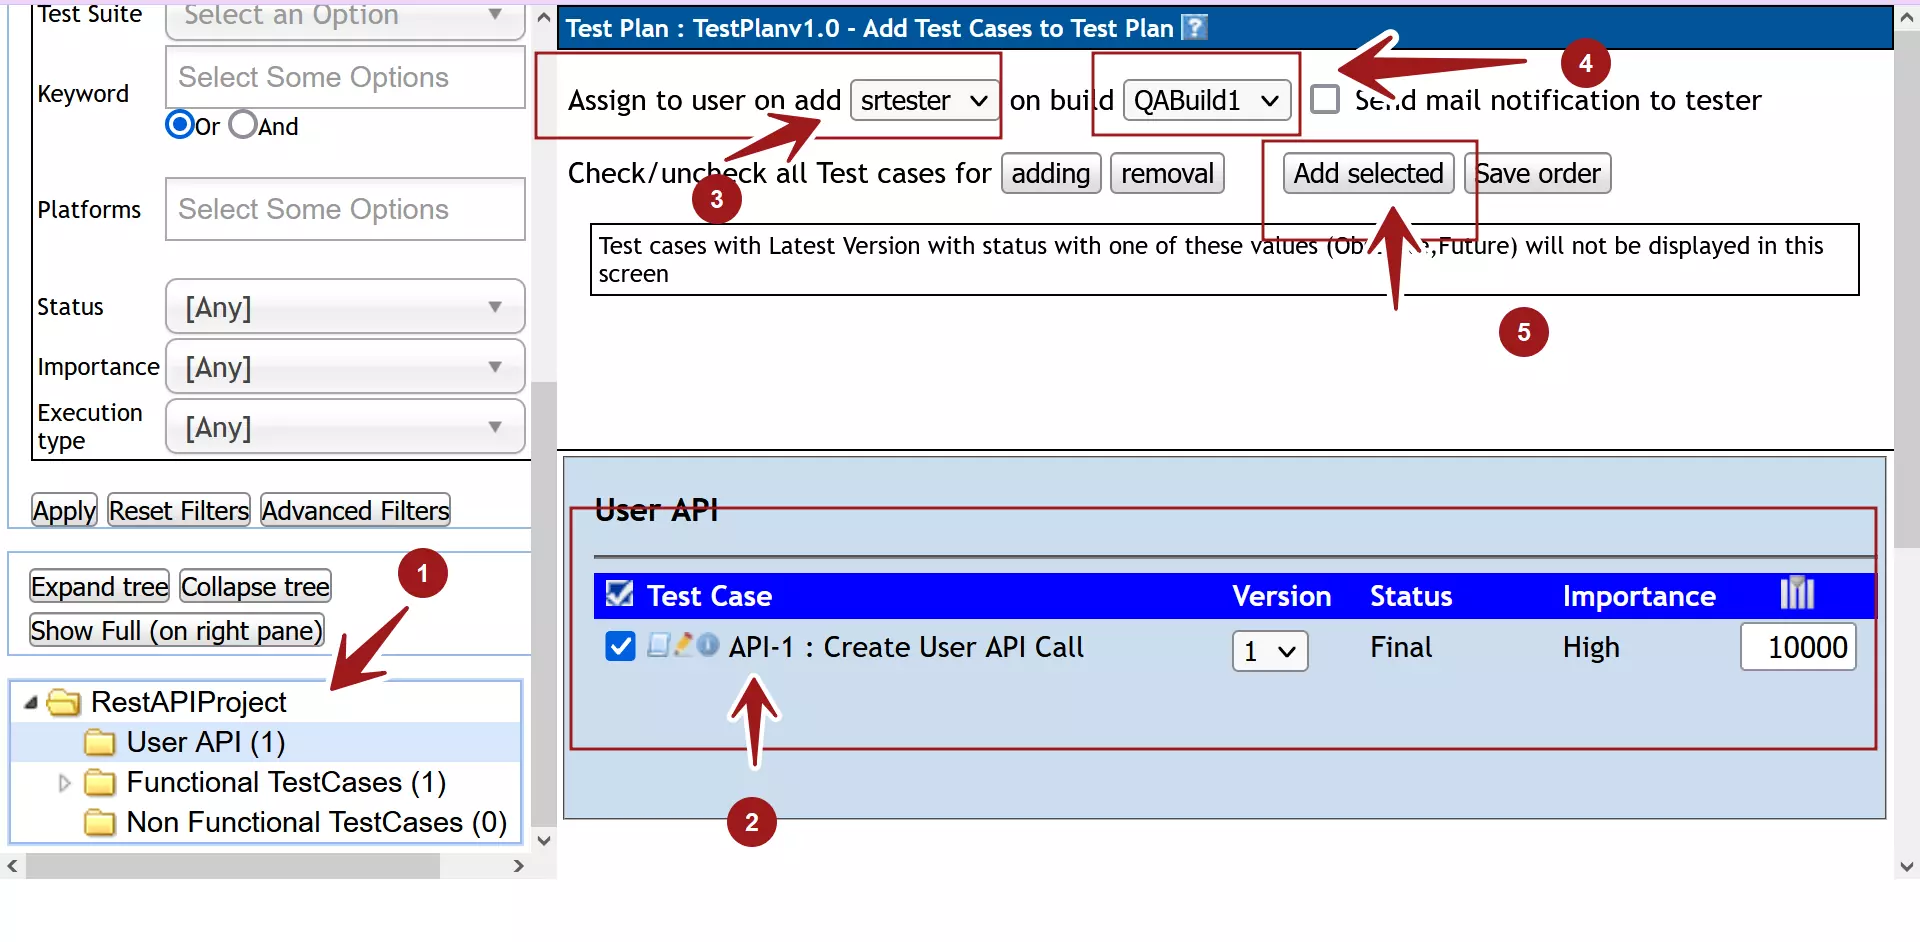

The test case is now assigned to the user for execution on the selected build.
After clicking the button, the test case gets highlighted with a different color. The Add selected button changes to Add / Remove selected.
That’s it. We have successfully added testcases to a build associated with the test plan. We can repeat the same steps to further add more test cases to the plan.
—
TestLink Tutorials
TestLink Tutorial on this website can be found at:
https://www.testingdocs.com/testlink-tutorials/
For more updates please like our Facebook page:
https://www.facebook.com/TestingDocs/