

Overview
Let’s learn the steps involved to configure JDBC Driver in a standalone Java Project using Eclipse IDE. In this article, we will configure the Oracle database JDBC Thin driver.
Download JDBC Driver
We can download the official and suitable JDBC thin driver from the database vendor’s website. There are different types of drivers to choose from to connect to the database.
Types of JDBC Drivers:
https://www.testingdocs.com/types-of-jdbc-drivers/
For example, ojdbc<version>.jar is a JDBC driver for the Oracle database. Oracle database JDBC driver URL:
https://www.oracle.com/database/technologies/appdev/jdbc-downloads.html
Alternatively, we can find the JDBC driver under the following directory on the database machine.
Windows:
%ORACLE_HOME%\jdbc\lib
Configure JDBC Driver
JDBC driver should be set up and added to the project build path. The steps to configure in Eclipse IDE are as follows:
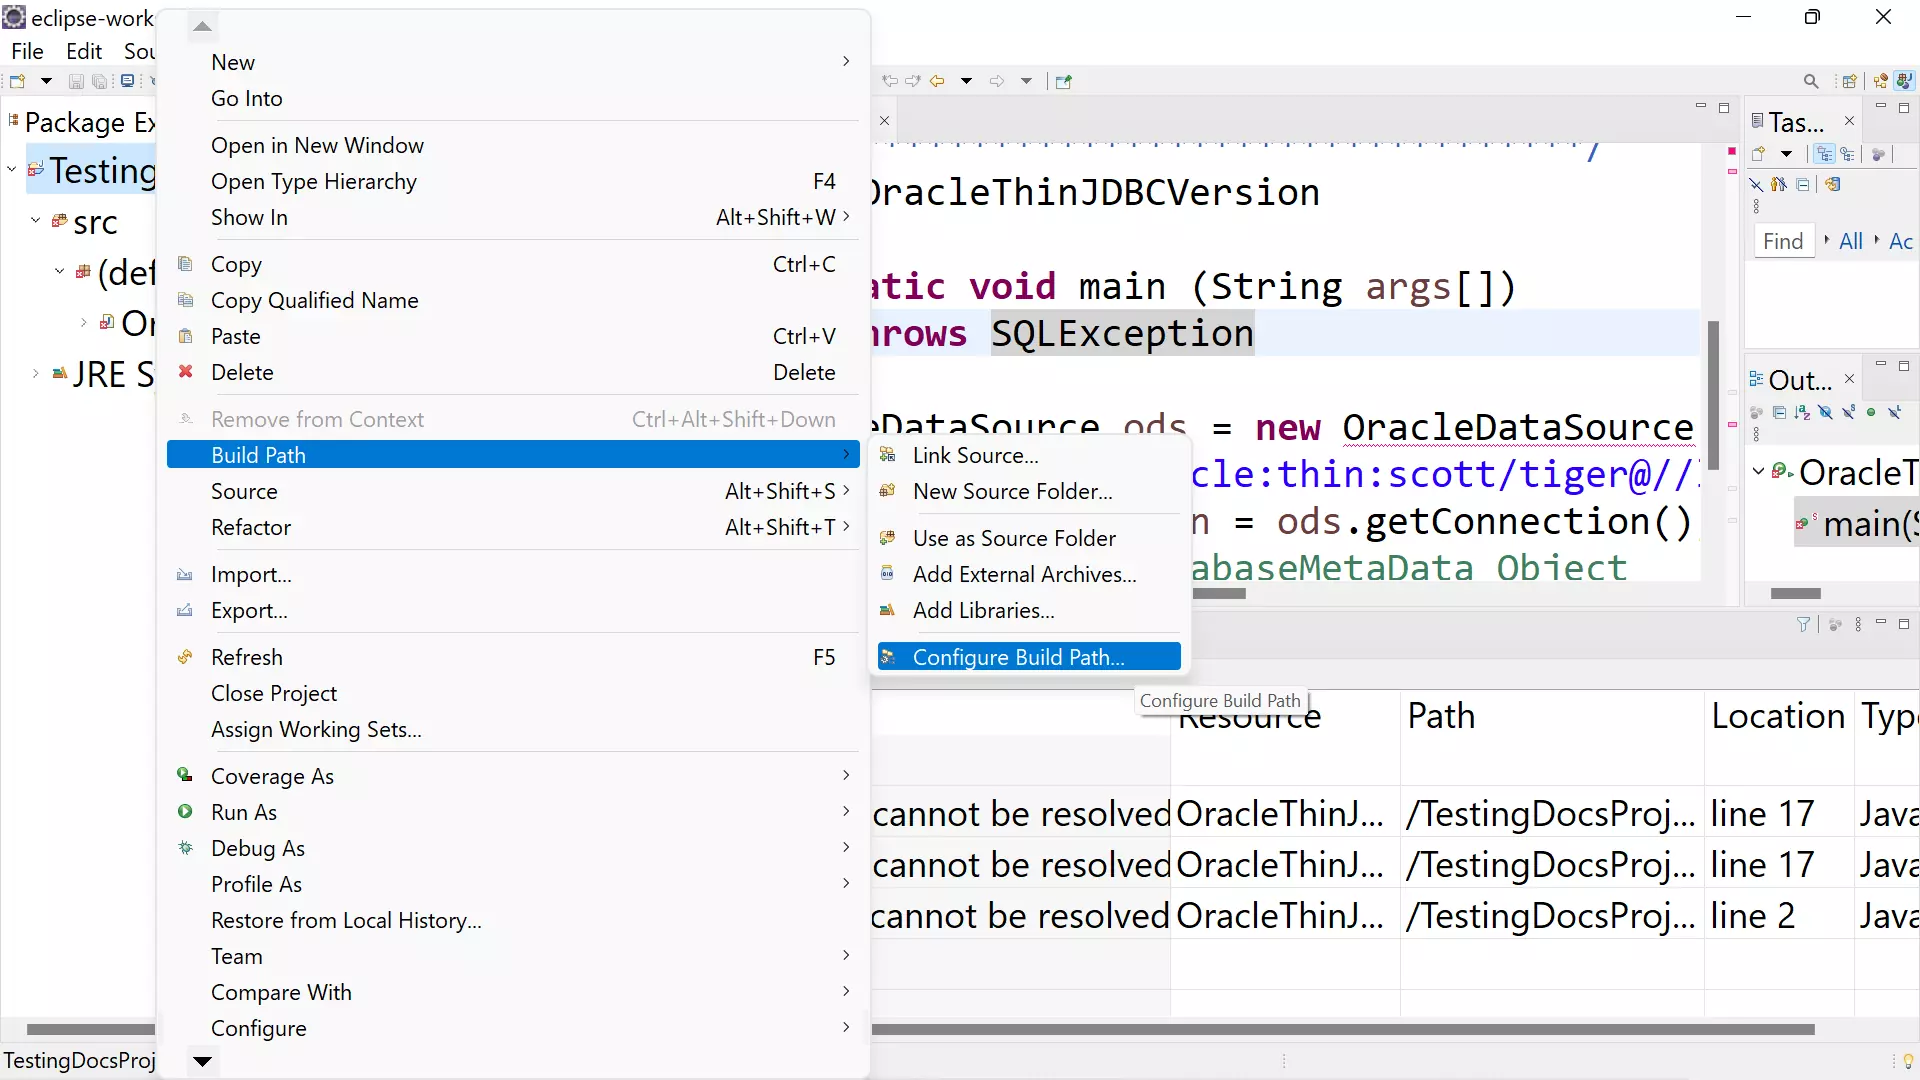
Right-click on the project in the Eclipse IDE and choose the menu option ->> Build path ->> Configure Build Path..

Choose the Java Build Path ->> Click on the Classpath
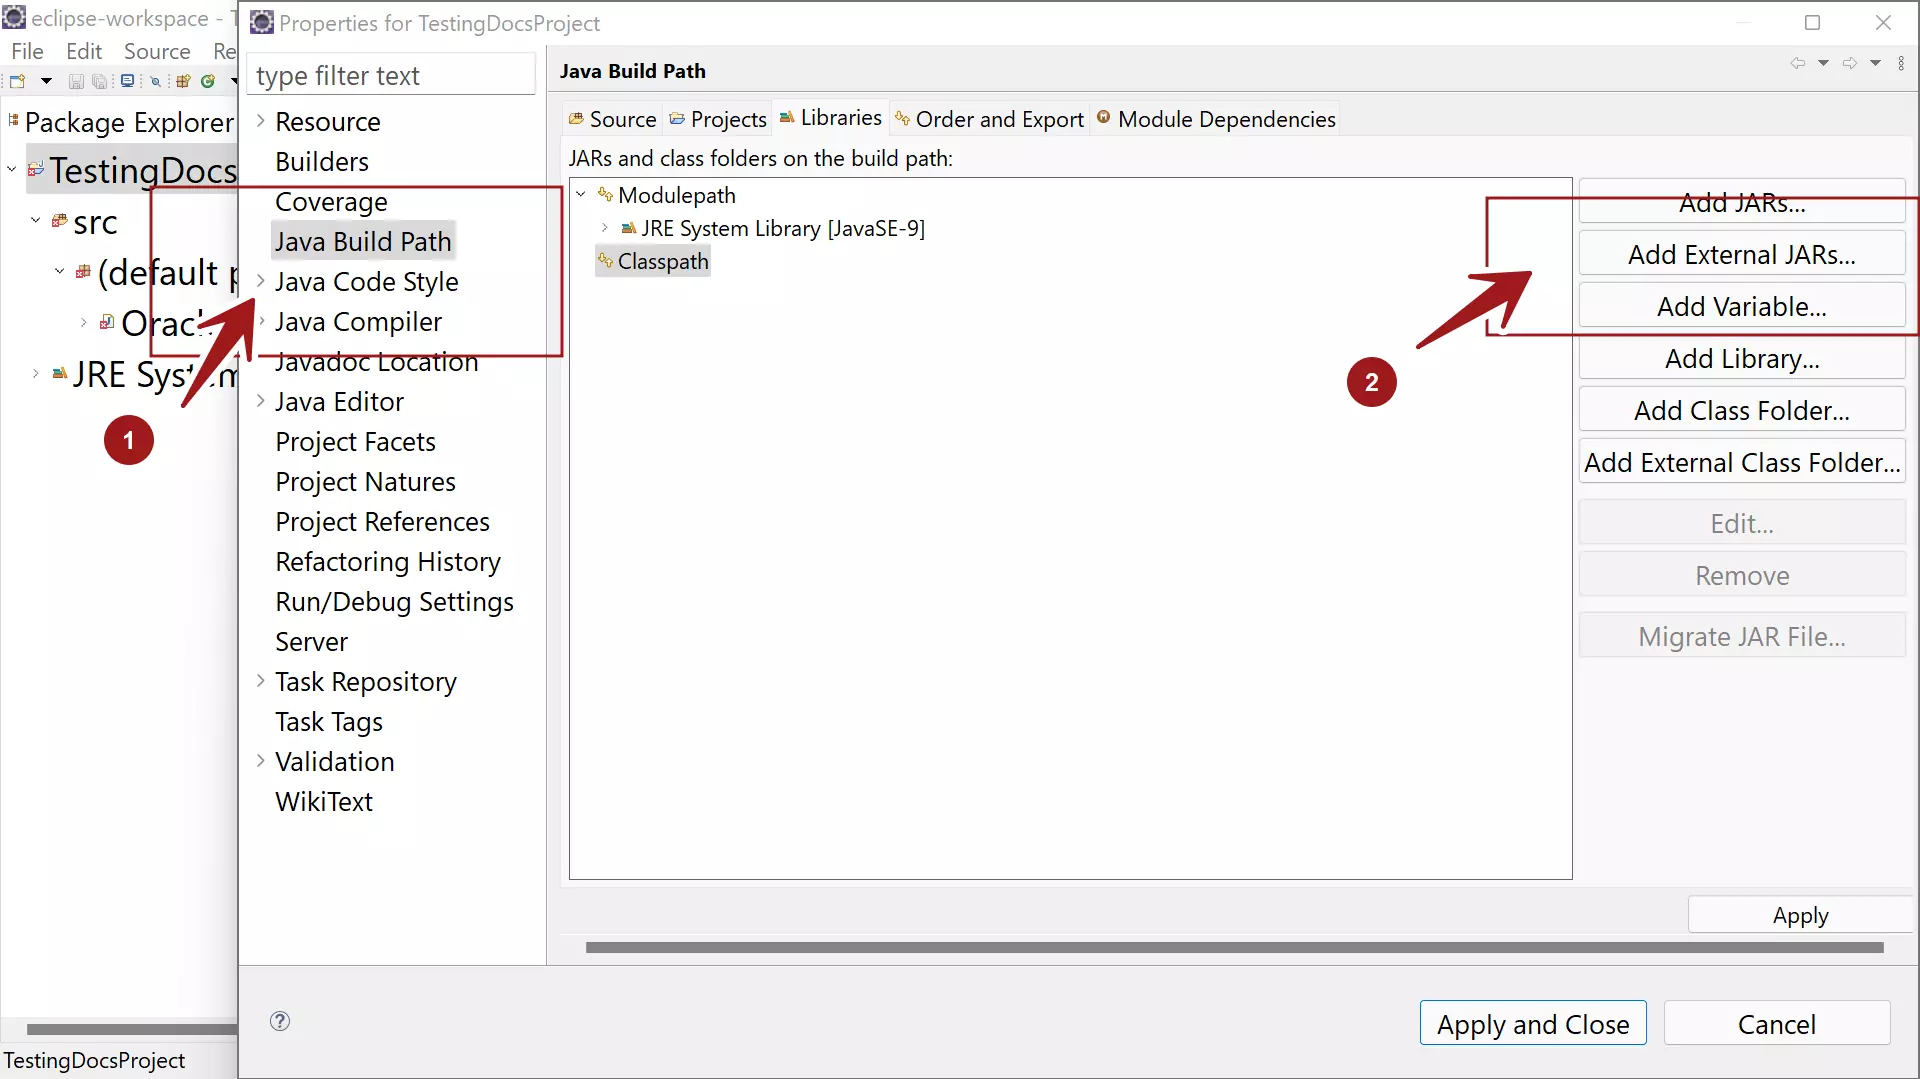

Click Add External JARs… ->> Browse to the JDBC driver location and Select the JDBC driver ->> Open
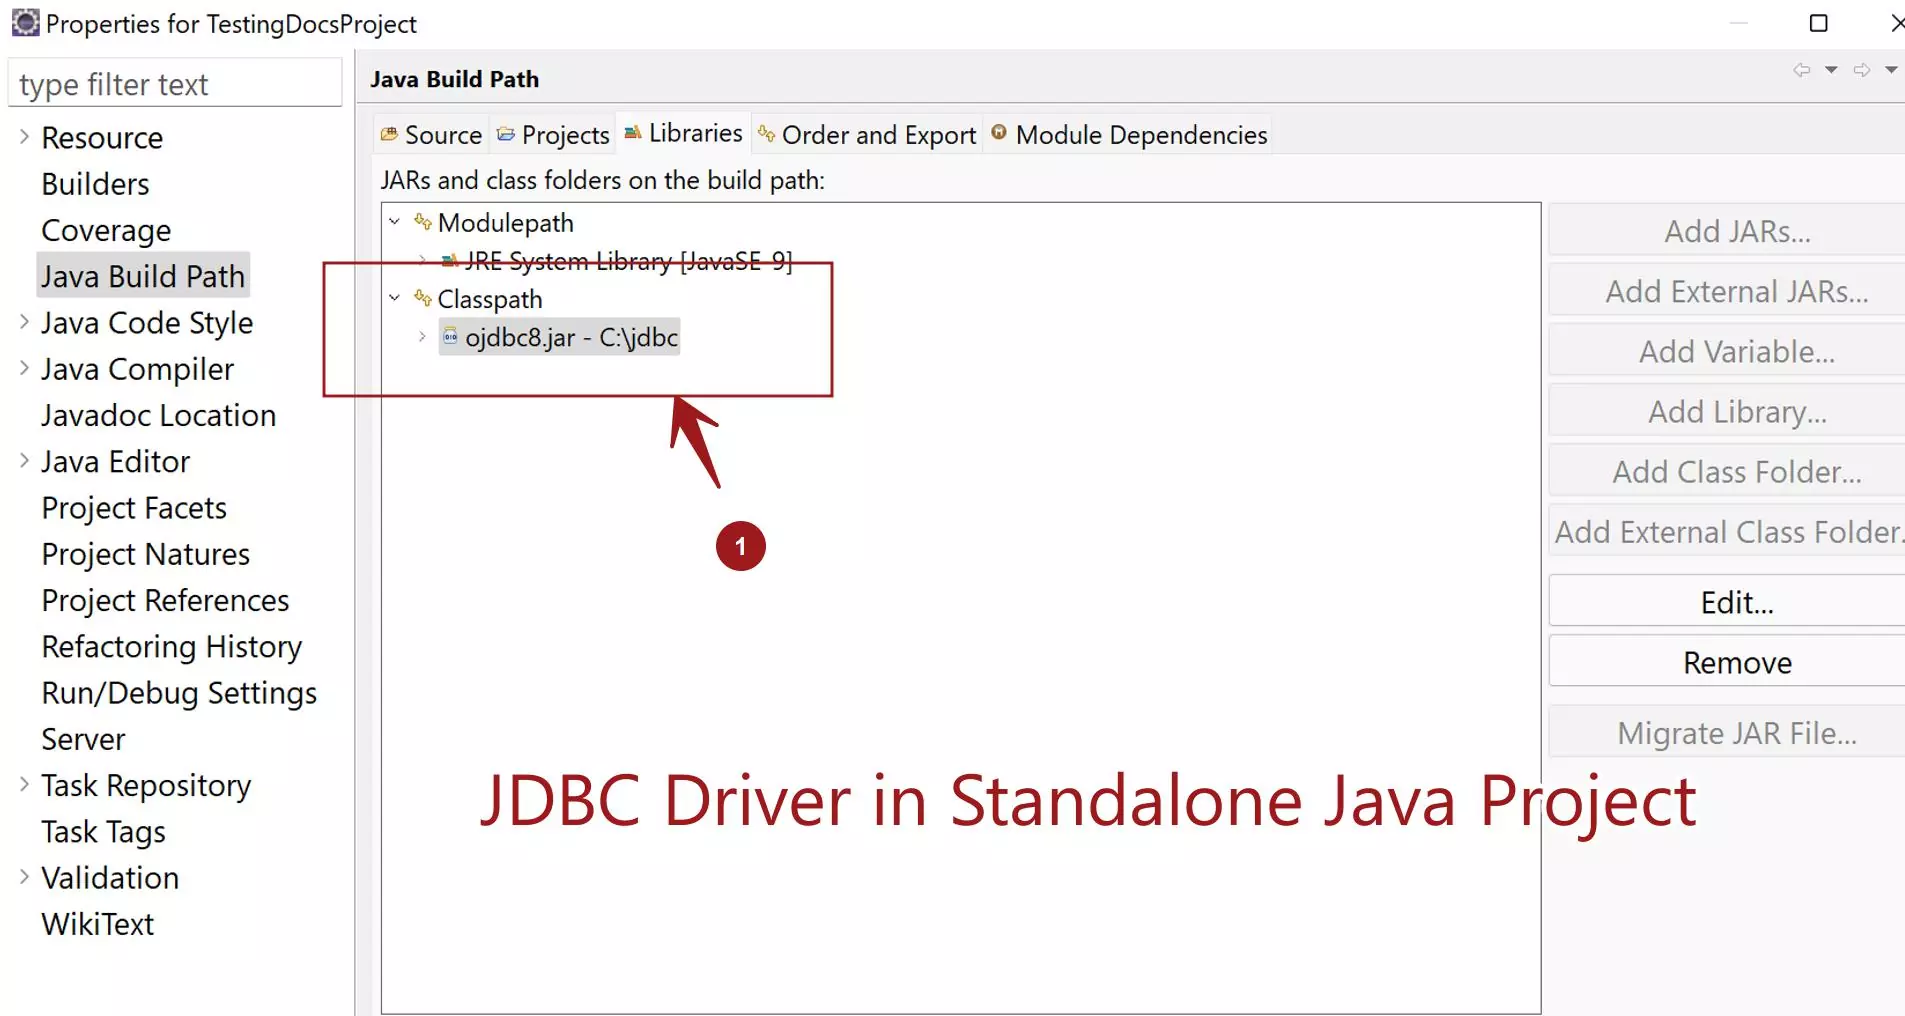

Click the Apply and Close button to close the window.
This should resolve the JDBC-related errors in the IDE editor. That’s it. We have successfully configured the JDBC driver in the project.
—
Java Tutorials
Java Tutorial on this website:
https://www.testingdocs.com/java-tutorial/
For more information on Java, visit the official website :
More information about Oracle Database:
https://www.oracle.com/database/