

Overview
A role is a set of permissions or rights assigned to it. We can then assign the role to users to define what the user can do in the TestLink application. This is to set Access Control on the resources of the project to the users. Let’s see how to create a role in TestLink.

The main advantage of role is to separate the duties among the project members. We can pack different functions into separate roles and assign them to different users.
Default Roles
By default TestLink provides predefined roles. To know more about the predefined TestLink roles:
https://www.testingdocs.com/testlink-built-in-roles/
Create a Role
If we want more customized roles that suits the organization test setup. We can create a custom role.
Steps to create a role in TestLink:
Click on the Users/Roles button in the menu. This opens User management screen.


In the User Management screen click on the View Roles button to open Role management screen.
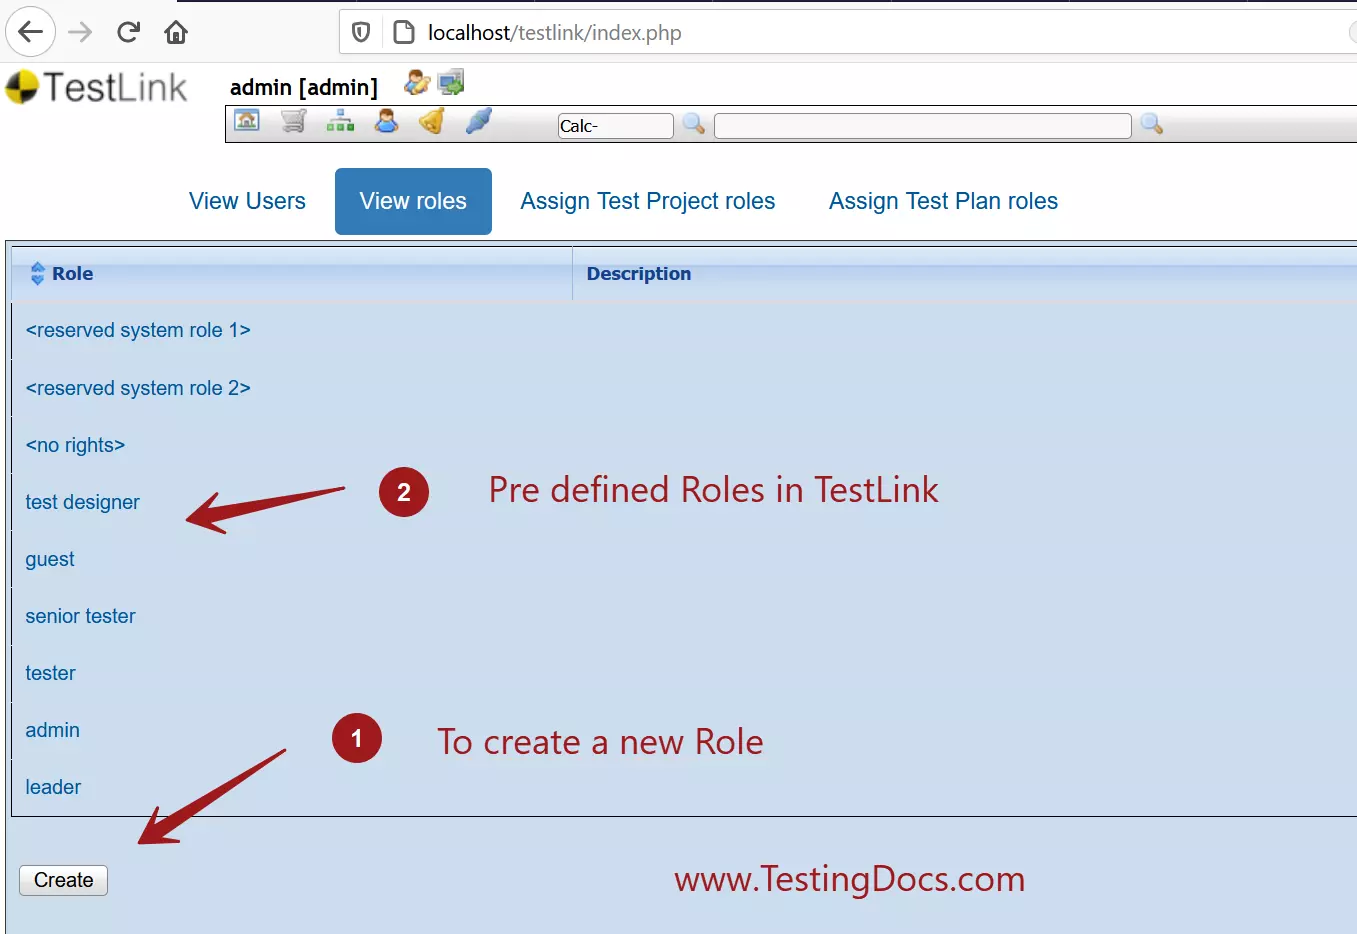

To create a new Role click on the Create button.
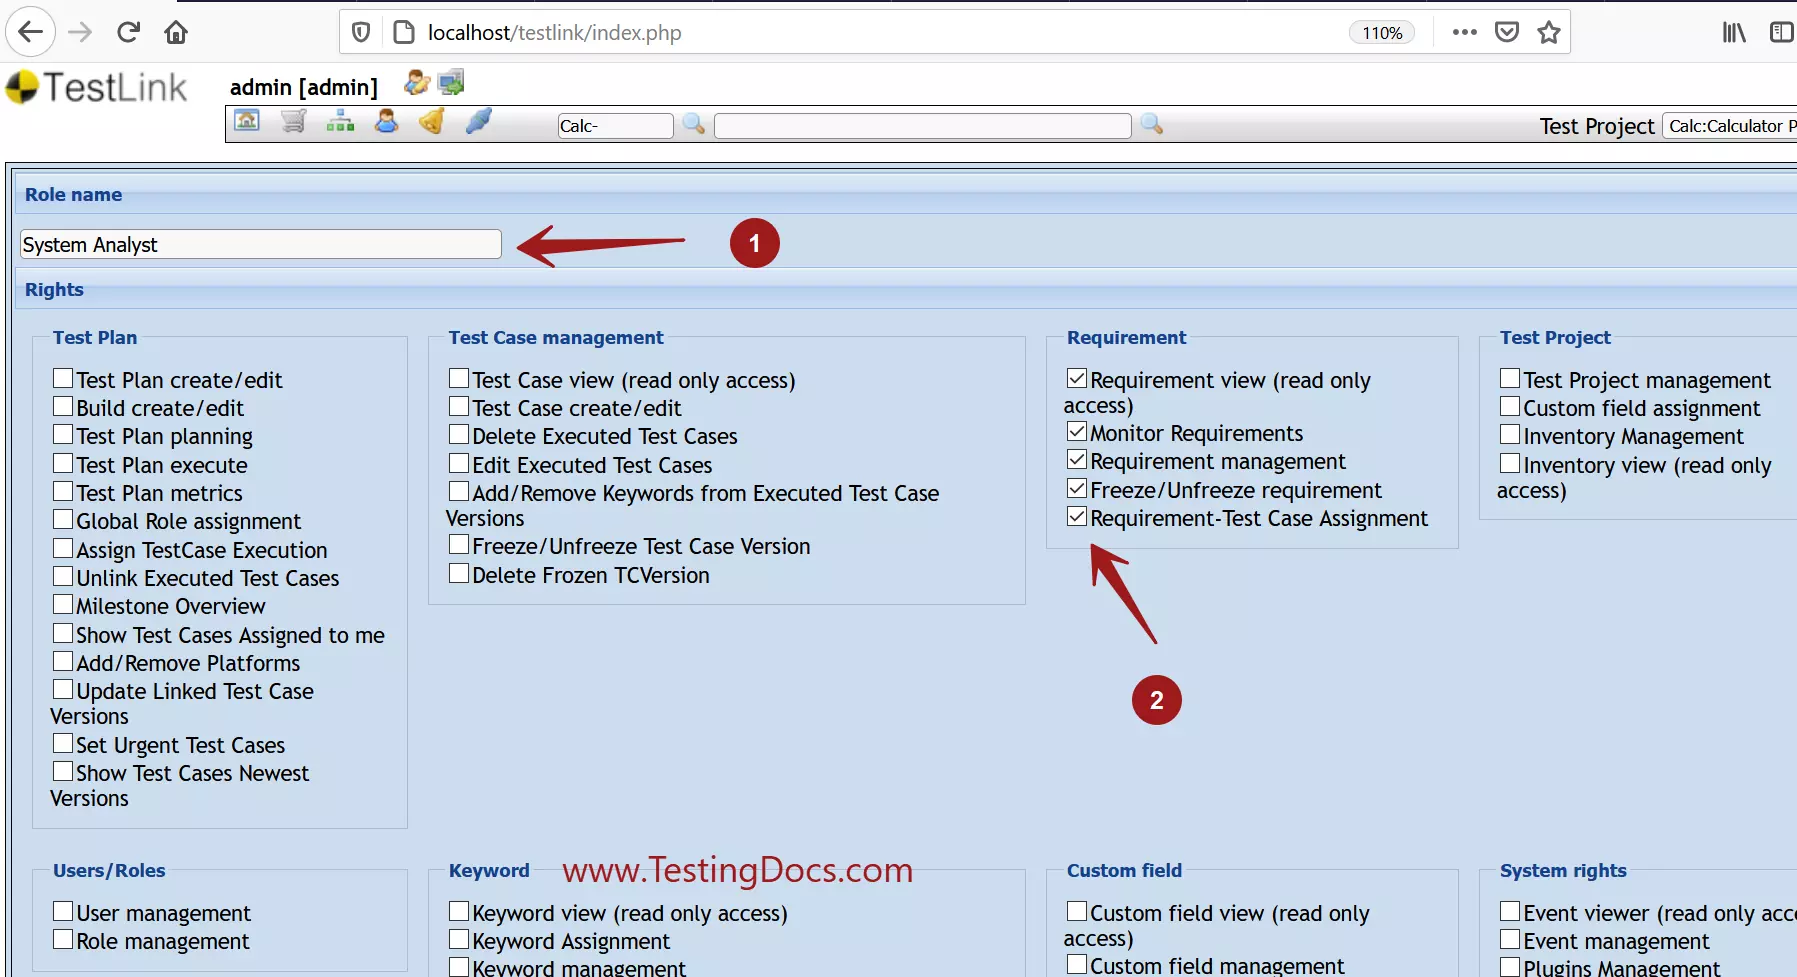
Give a name to the Role, choose the rights for the role.
For example, we have created a System Analyst role and added the Requirements related rights to the role.

Describe the role in the description box.
Click on the Save button to create the role.
Now we can assign this role to users who are serving in the System analyst role in the organization or in the project.
—
TestLink Tutorials
TestLink Tutorial on this website:
https://www.testingdocs.com/testlink-tutorials/