

Overview
In this tutorial, we will learn steps to create New Java Class in NetBeans IDE.
Create a new Java Project:
Steps to create a new Java project in Apache NetBeans IDE are outlined here:
https://www.testingdocs.com/java-project-using-netbeans-ide/
Create New Java Class
Select the package in the left Projects window, Right-click on the package, and choose from the context menu:
New >> Java Class…
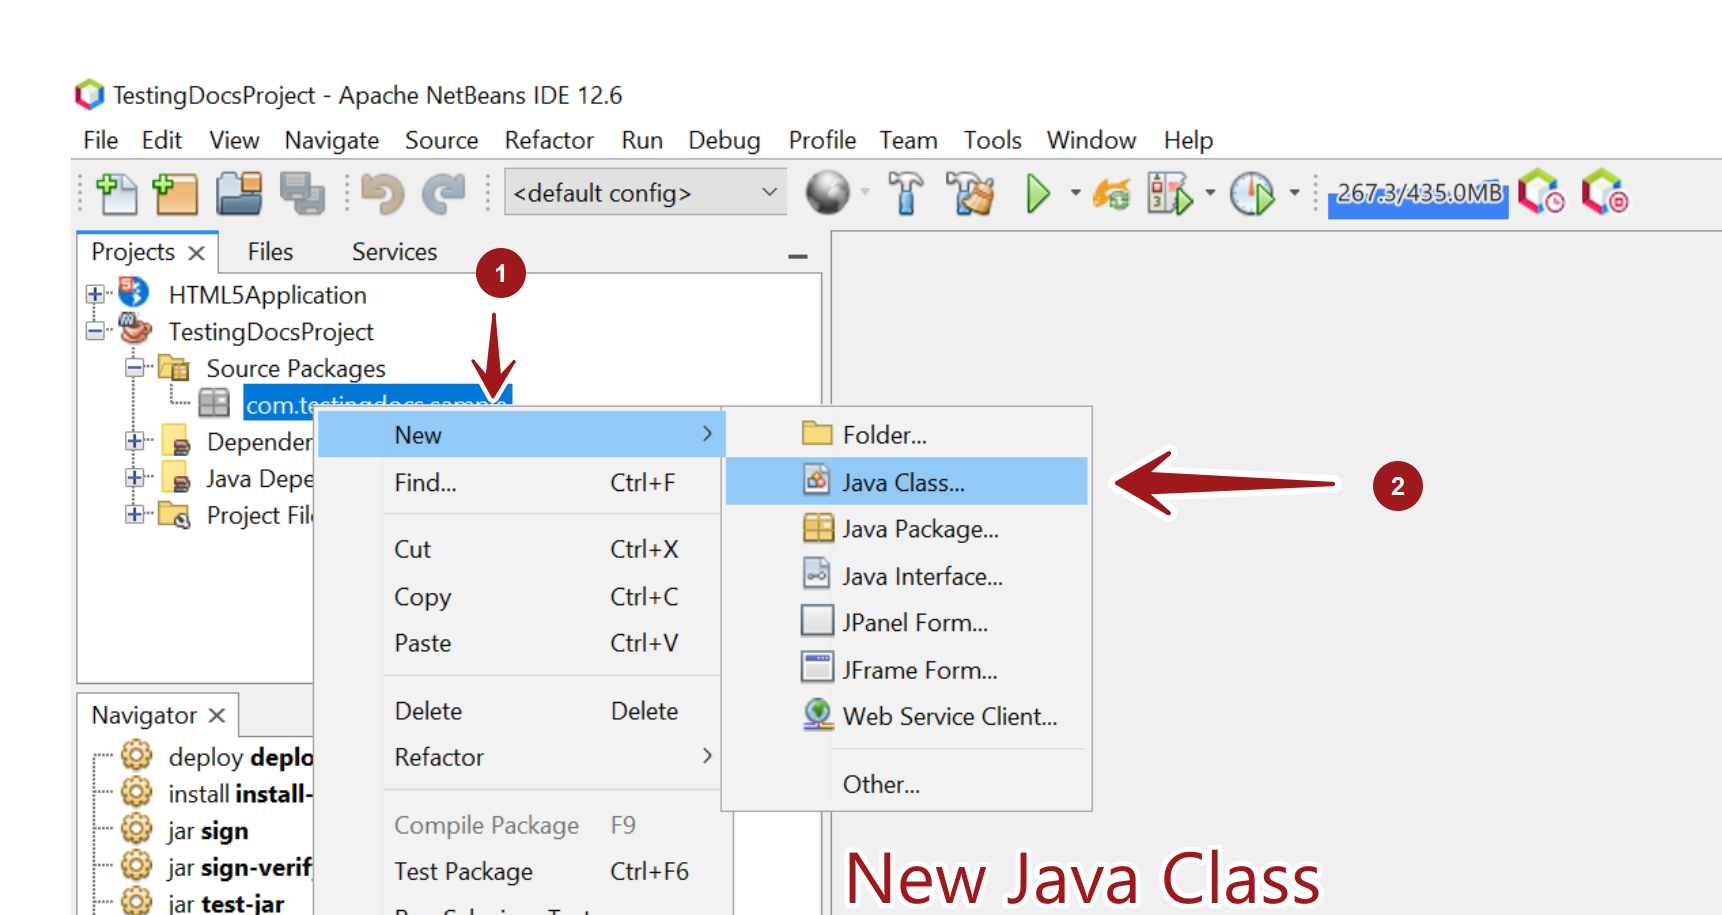

This will open the New Java Class window.
Enter the class name, package name.
We can also specify the Superclass and the implementing Interfaces. Click on the Browse… button and select the respective Superclass and Interfaces. Note that, in the Java language, a class can only have one direct Superclass. However, a class can implement multiple interfaces.
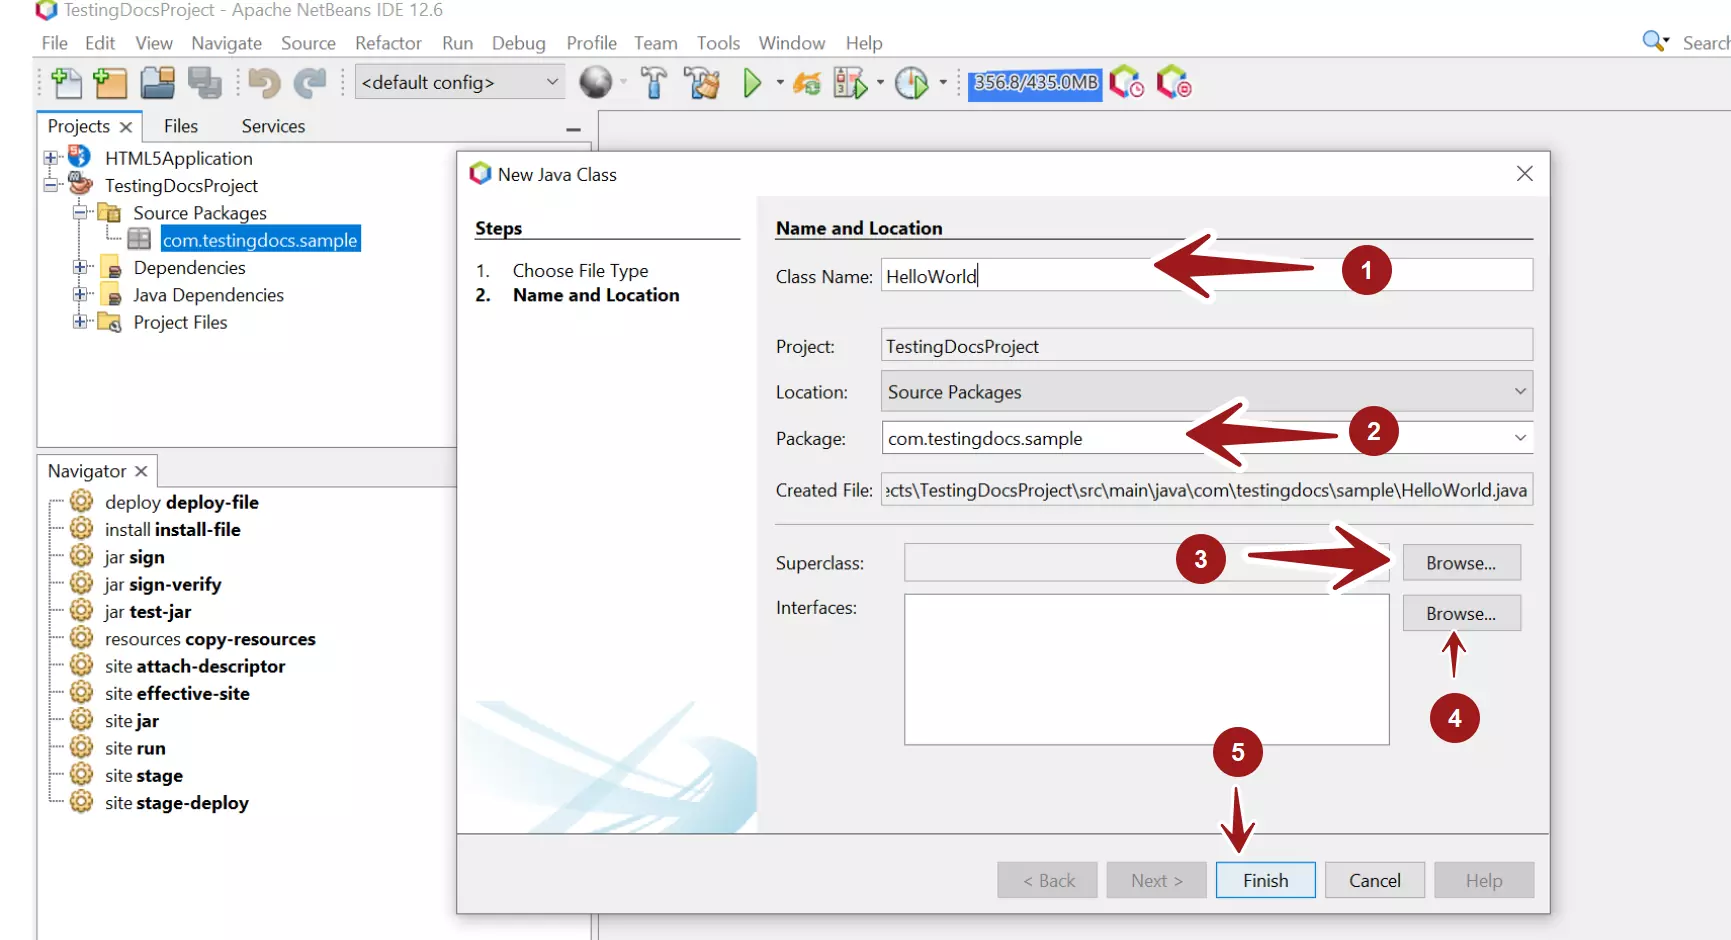

Once done, click on the Finish button to create the class.
The file <className>.java would be created under the respective package and opened in the code editor.
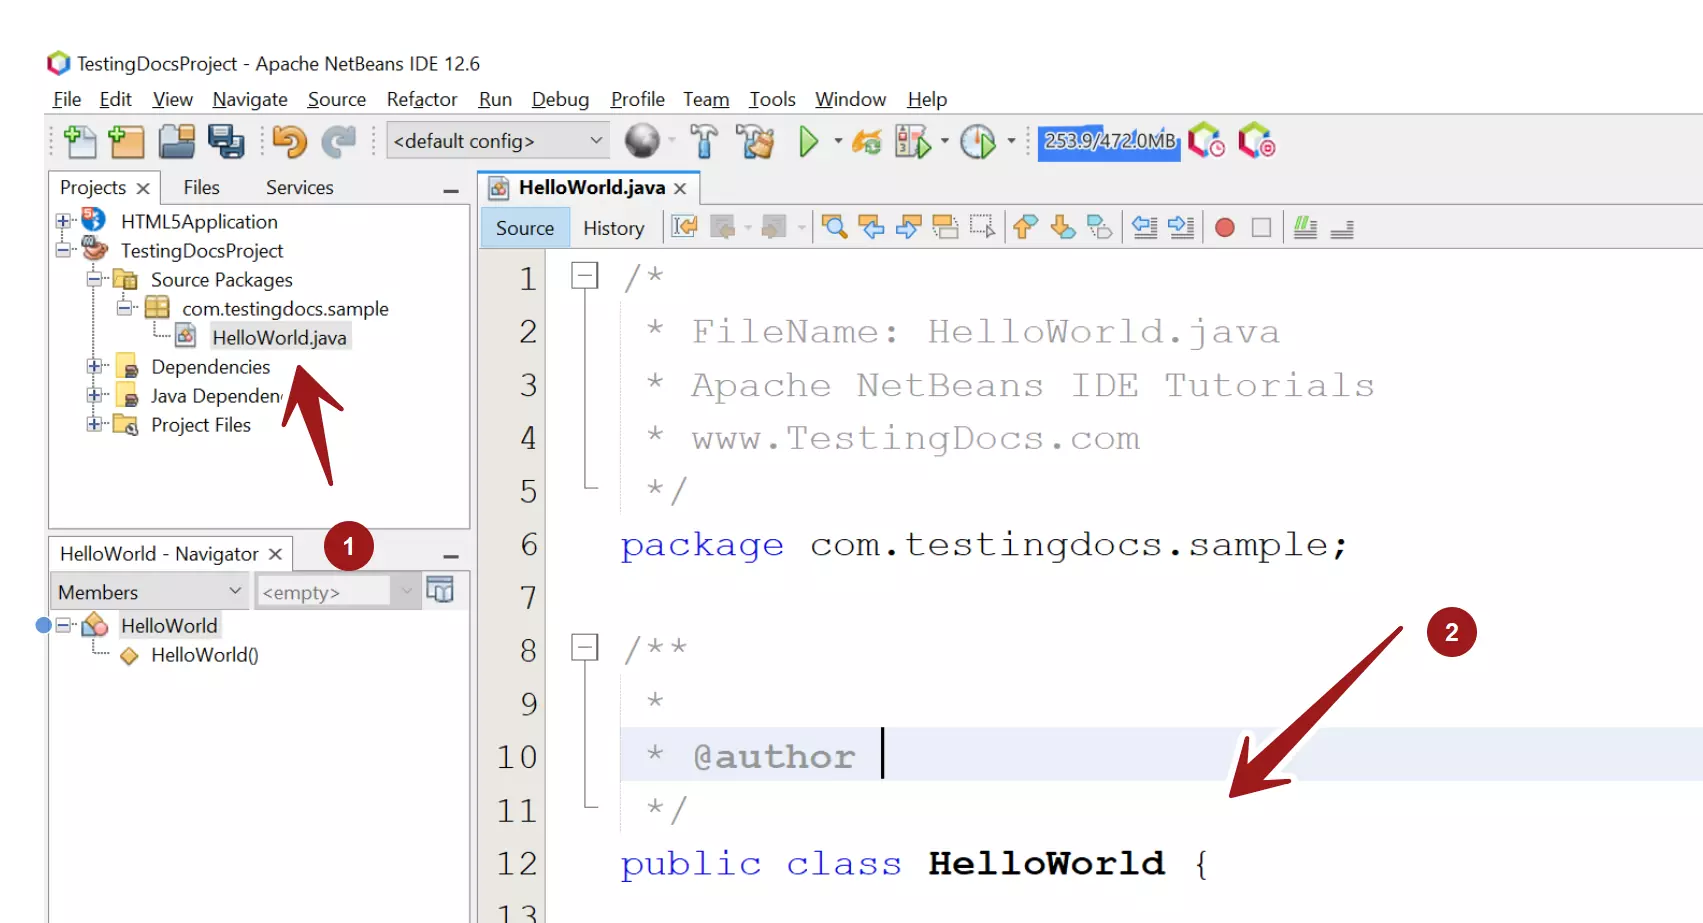

We can start adding source code to the class.
That’s it.
—
NetBeans IDE Tutorials
NetBeans tutorials on this website can be found at:
https://www.testingdocs.com/apache-netbeans-ide-tutorials/
For more Information on NetBeans IDE, please visit the official website: