

Overview
In this post, we will learn how to create new profile in Terminal on Ubuntu Linux. Steps to create profile on KDE based Konsole as well.
Profiles allow us to create multiple settings in the Terminal. We can easily switch between the settings by choosing the required profile.
Create New Profile in Terminal
Launch the Terminal window.
Open Terminal preferences window. To open the preferences window click on the three lines icon beside the search icon in the Terminal.
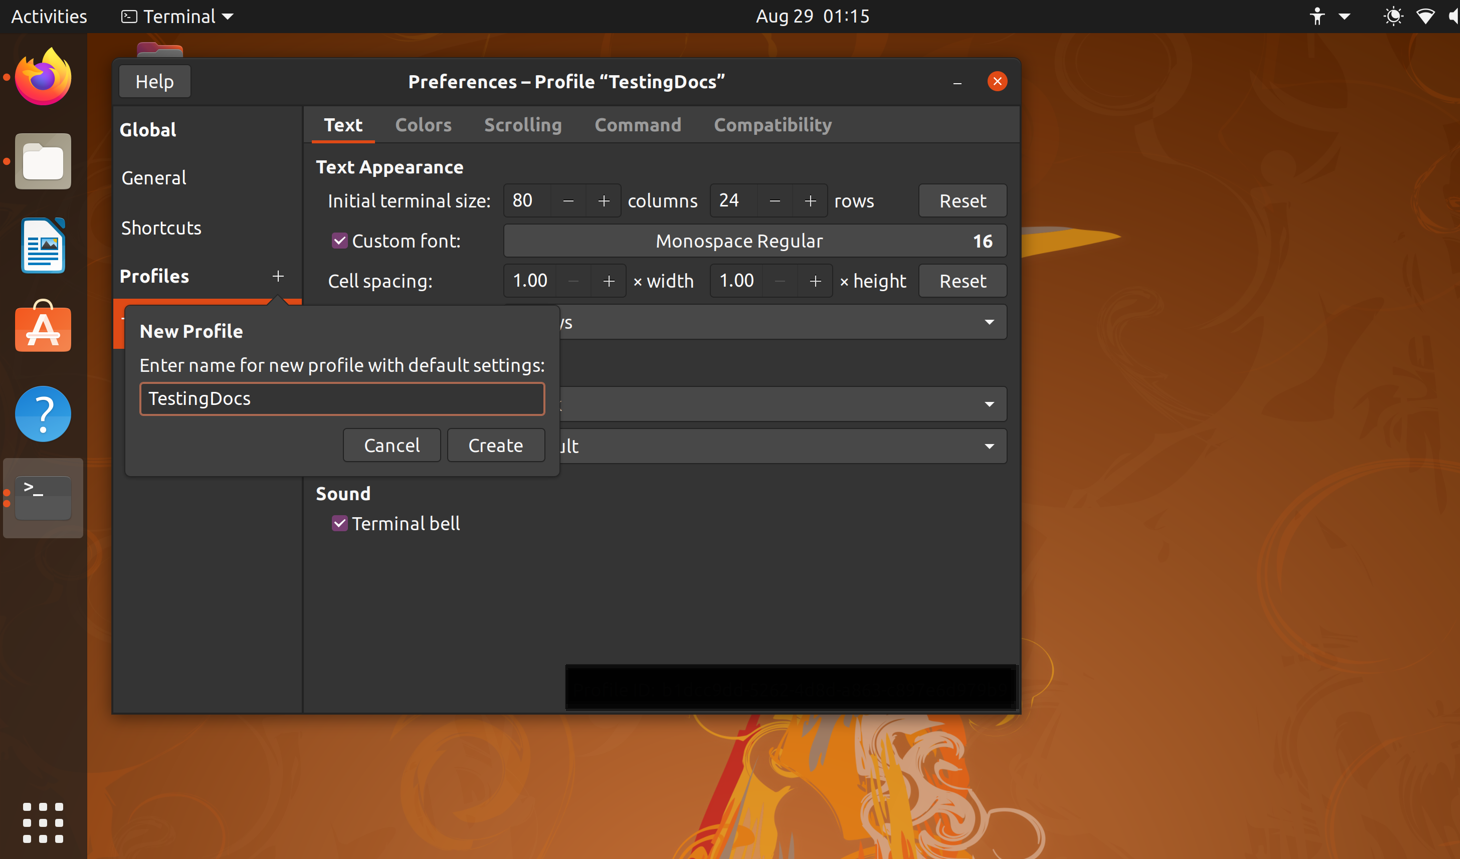
Profiles >> Click on the + button
Enter the name of the new profile and click on the Create button. Give a meaningful name so that you can relate it to the profile settings.
For example, to view server logs we want the Terminal background to be white. We may name the profile as ‘SvrLogWhiteBg’

Customize Settings
Once the profile is created, we can change the Terminal settings. Choose the profile and customize the Terminal settings.


We can change the fonts, text size, window settings, colors, scroll bar settings, mouse cursor settings, etc.
Later if you want these settings, we can simply choose the Profile and start working in the Terminal. There is no need to change the settings every time. Creating a profile will save time.
Konsole
Konsole is KDE terminal program. Steps to create profile in Konsole are as follows:
Launch Konsole.
Choose Settings >> Manage Profiles… menu option.
Click on the New Profile… button.


Give a name to the profile. Customize the Konsole settings.
Click on Apply button and then OK button to apply the settings.
Optionally, we can specify a start command in the Command textbox. Some commands like
sudo or su – , etc.
To know more about sudo command:
https://www.testingdocs.com/sudo-command-in-linux/


More information about Konsole: