

Overview
In this tutorial, we will learn the steps to Create New C++ Project in Code::Blocks IDE. Code::Blocks contains several Project templates to choose from for the projects.
A project is a container that contains all the project-related source code files, header files, configuration files, etc. Projects are created in a workspace.
Environment
- Windows 10 operating system
- Code::Blocks IDE
Steps to install Code::Blocks IDE on Windows
Create New C++ Project
Launch Code::Blocks IDE.
https://www.testingdocs.com/launch-codeblocks-ide-on-windows/
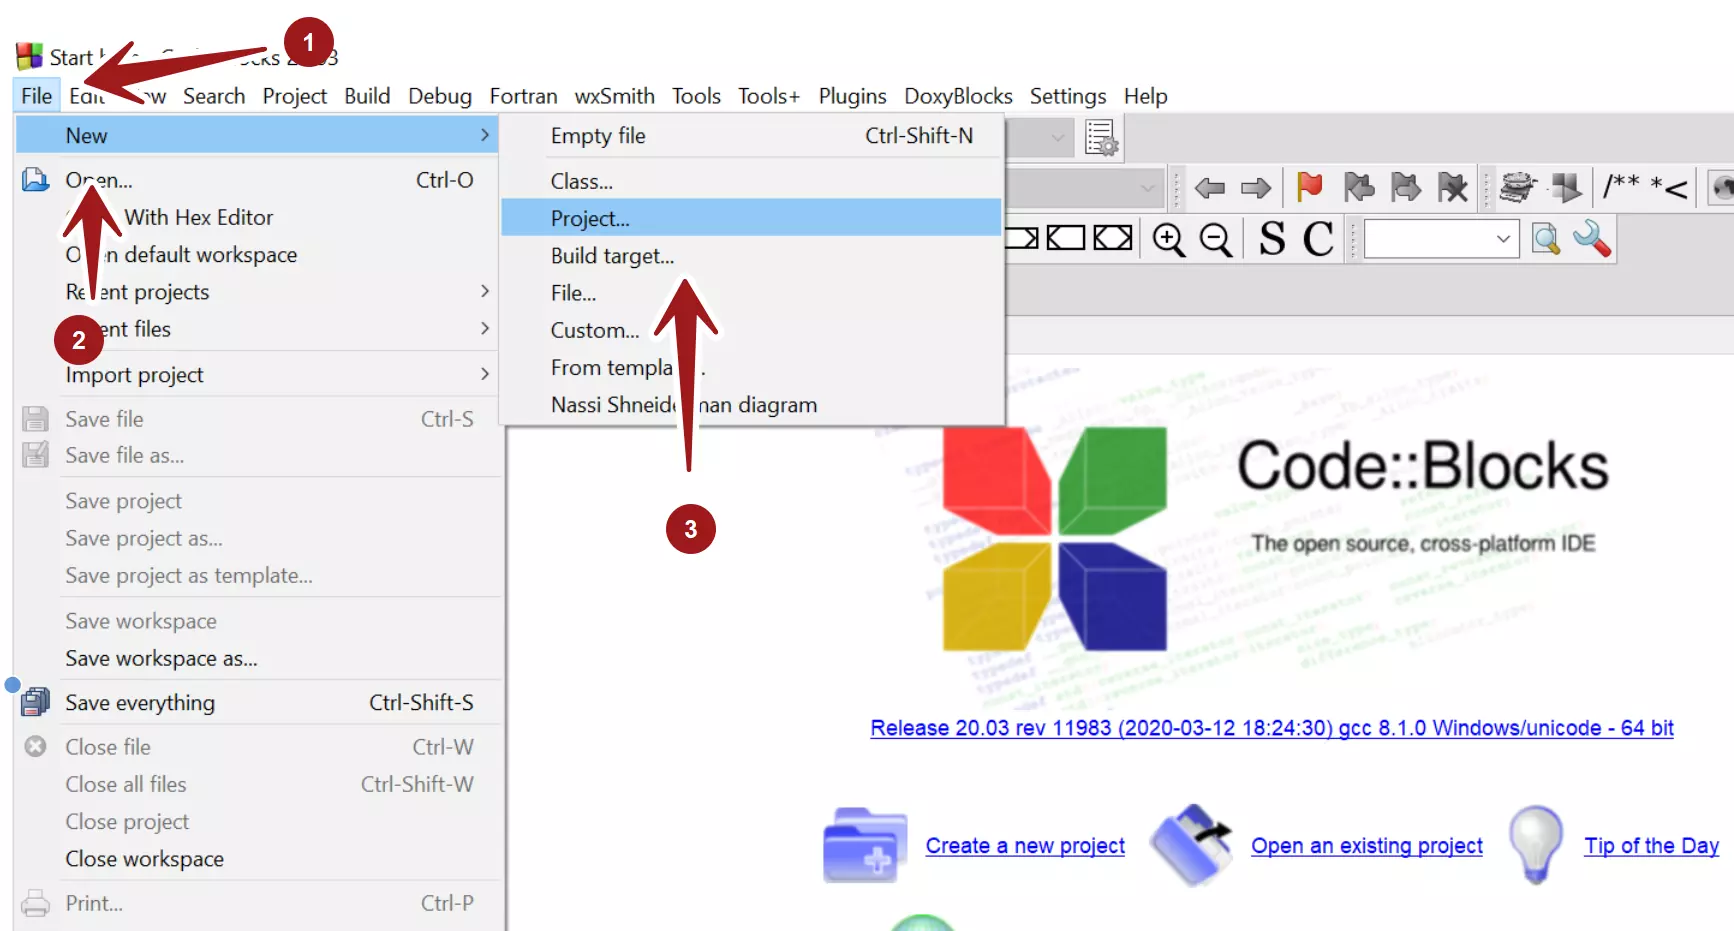
Click on the link Create New Project on the “Start here” page.


Alternatively, Choose the following menu option
File >> New >> Project…

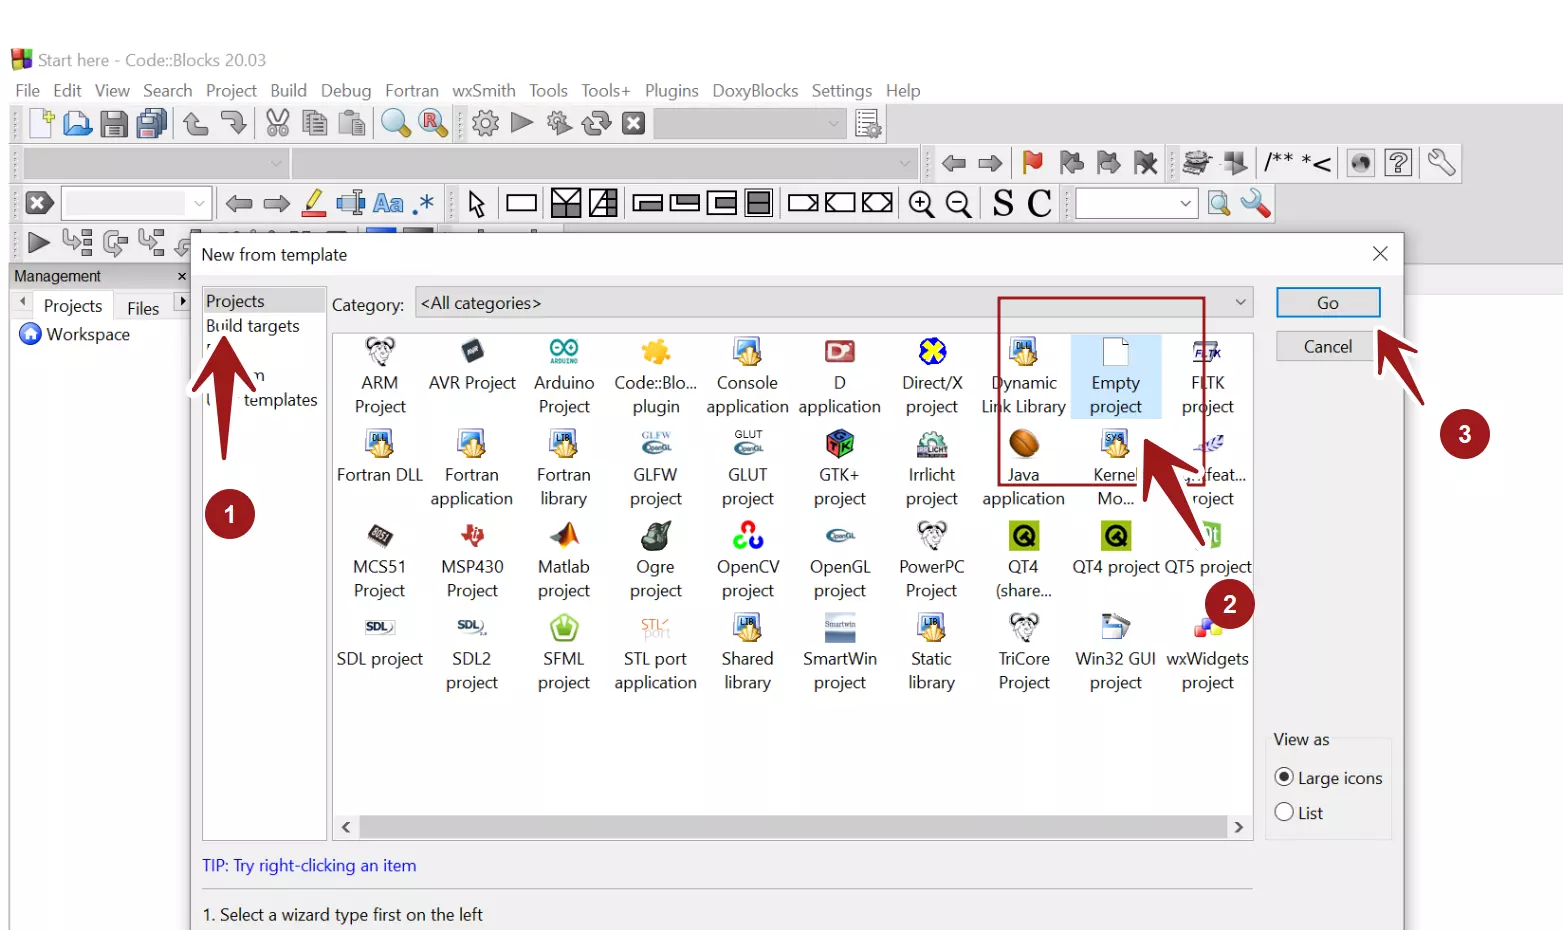
This opens the Project wizard windows. Select Projects in the left wizard types and choose the Project template.
To start from scratch, choose the Empty project template and click on the Go button. We can also double-click on the Empty project template to launch the wizard.
Click on the Next > button.

Project Details
Enter project details and choose the project location.
- Project Title
- Project Folder
Project filename and Resulting filename path would be generated by the IDE. The project filename has a .cbp file extension.
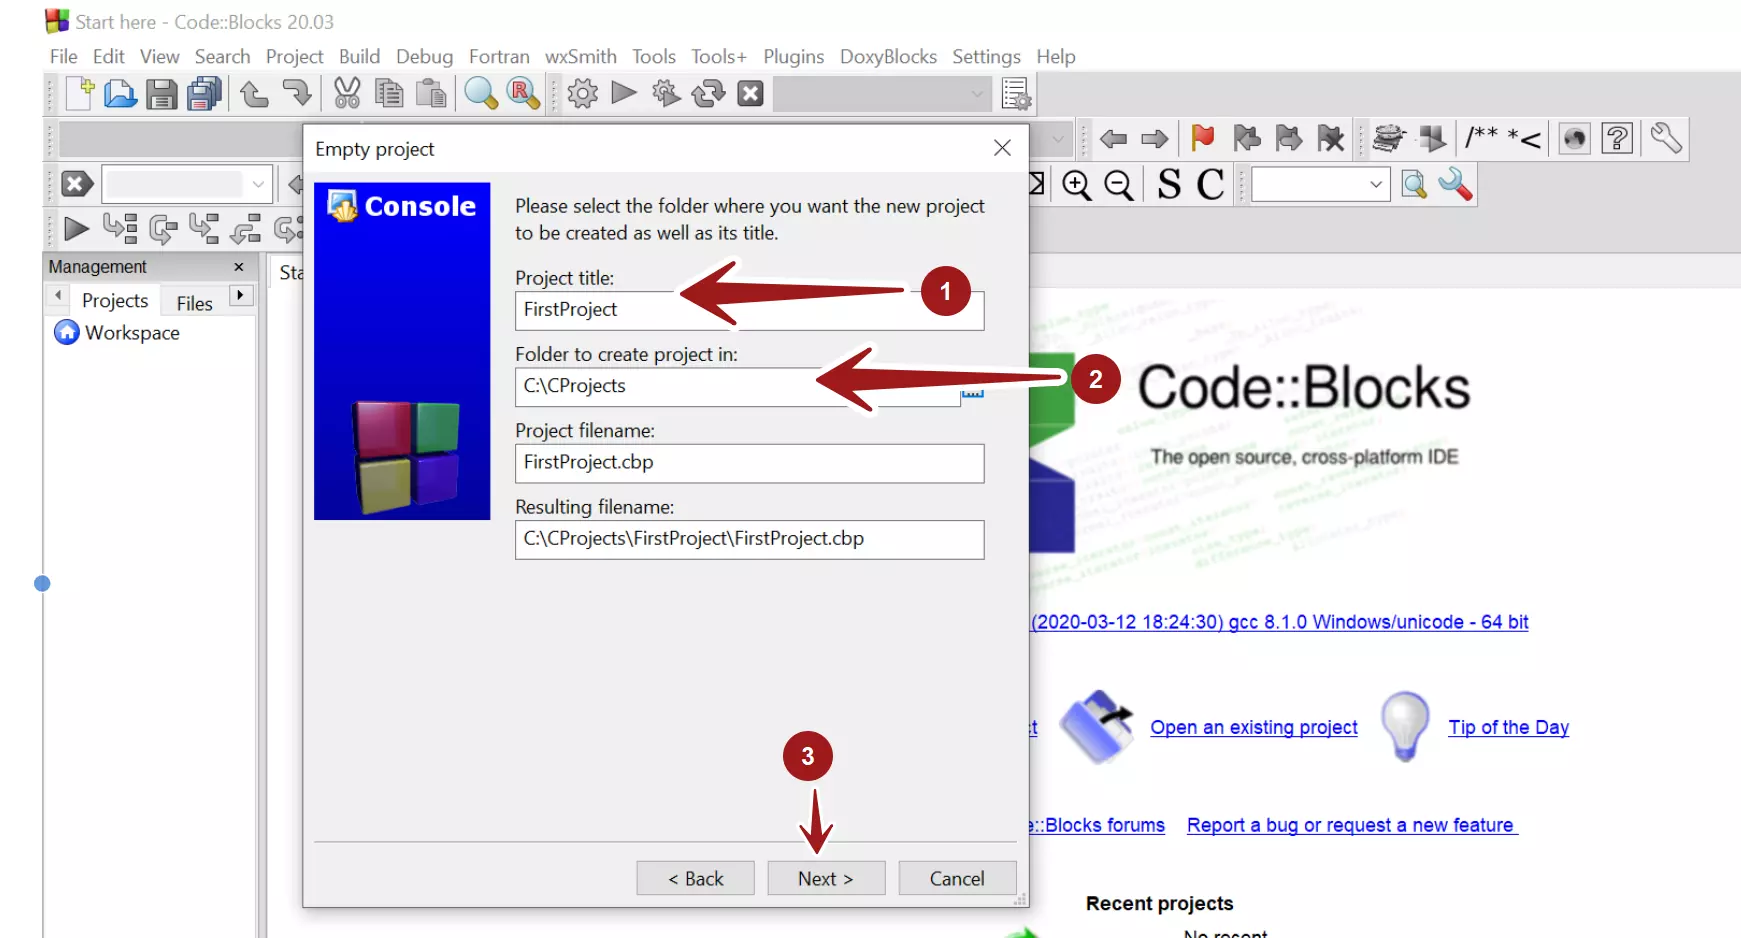

Click on the Next > button.
In the next screen, choose the C++ compiler.
Select the options to create the Project Debug and Release configurations.
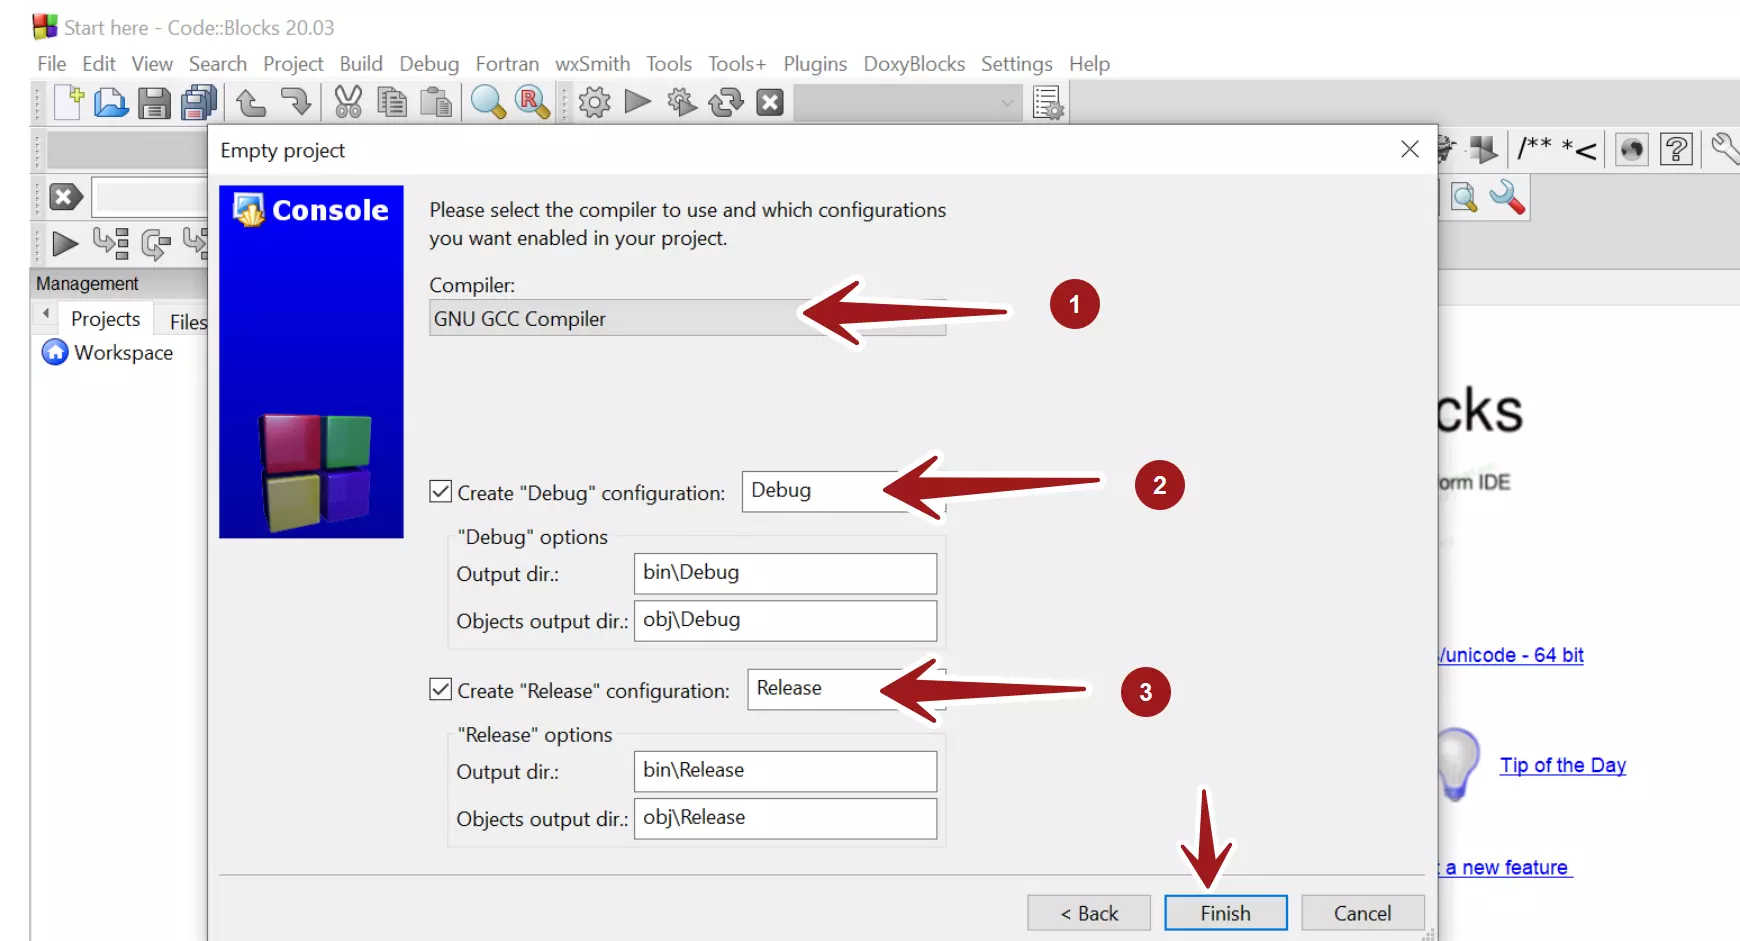

Click on the Finish button to create the project in the IDE.
That’s it. An empty new C++ project is now created. We can add source code files *.cpp to the project.
Add Source Files
https://www.testingdocs.com/add-c-source-files-in-codeblocks-ide/
—
Code::Blocks Tutorials
Code::Blocks Tutorials on this website can be found at:
https://www.testingdocs.com/code-blocks-tutorials/
For more information on Code::Blocks IDE, visit the official website: