

Introduction
In this post, we will see how to create JUnit Test Suite in Eclipse. If we have several test classes, we can combine them into a single test suite. Running a test suite executes all test classes in the suite in the specified order. A test suite may also contain other test suites.
Create Test Suite
Let us see how to create a suite using Eclipse. Right-click in the Project Explorer where you have JUnit test cases. Select New –> Other… -> JUnit -> JUnit Test Suite.
Select the test classes which should be included in the Suite in the wizard window. We can select the test classes with JUnit test methods as shown in the below picture.
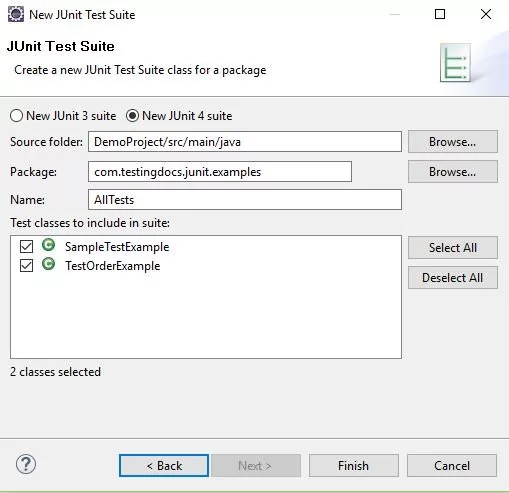

Hit on the finish button and look how the test suite is created with all the selected test classes.
Code Listing
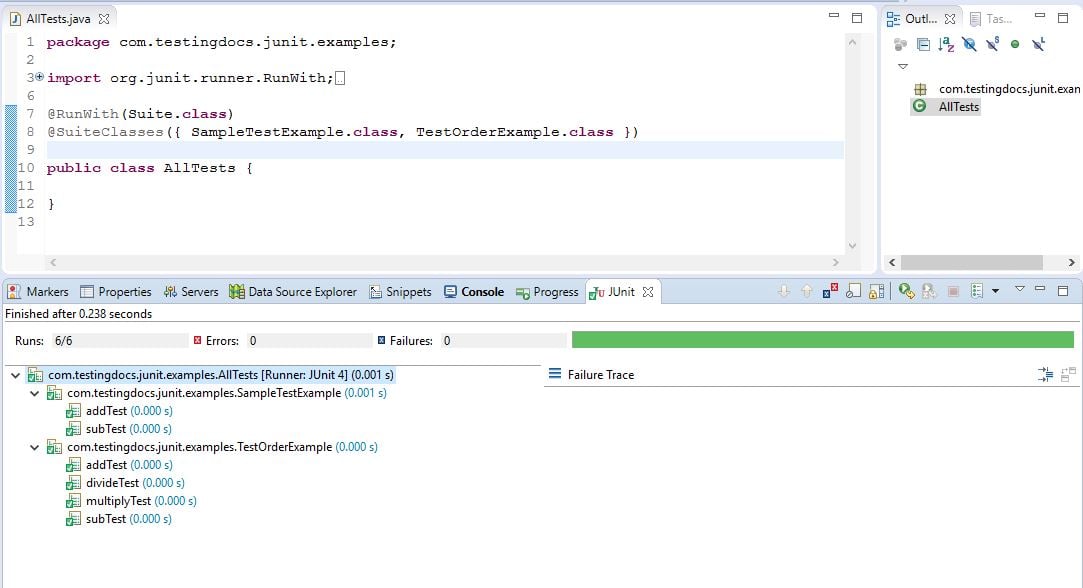
@RunWith(Suite.class)
@SuiteClasses({ SampleTestExample.class, TestOrderExample.class })

public class AllTests {

}
When a class is annotated with @RunWith or extends a class annotated with @RunWith, JUnit will invoke the class it references to run the tests in that class instead of the runner built into JUnit. The above code example shows the basic usage of a Suite.
Screenshot
We can see below, that all the test classes have run which are added to the Suite.

JUnit Tutorial on this website can be found at:
https://www.testingdocs.com/junit-tutorial/
More information on JUnit official website: