

Overview
In this tutorial, we will learn the steps involved to Export Java Project in Eclipse IDE. The export functionality allows us to share the project contents with others. Others can import the project on their IDE. We can also move the project from one machine to another.
Export functionality also allows us to archive and backup the project outside Eclipse IDE. (It’s recommended to use distributed version control tool like Git)
Export Java Project
Steps to Export a Project in Eclipse are as follows:
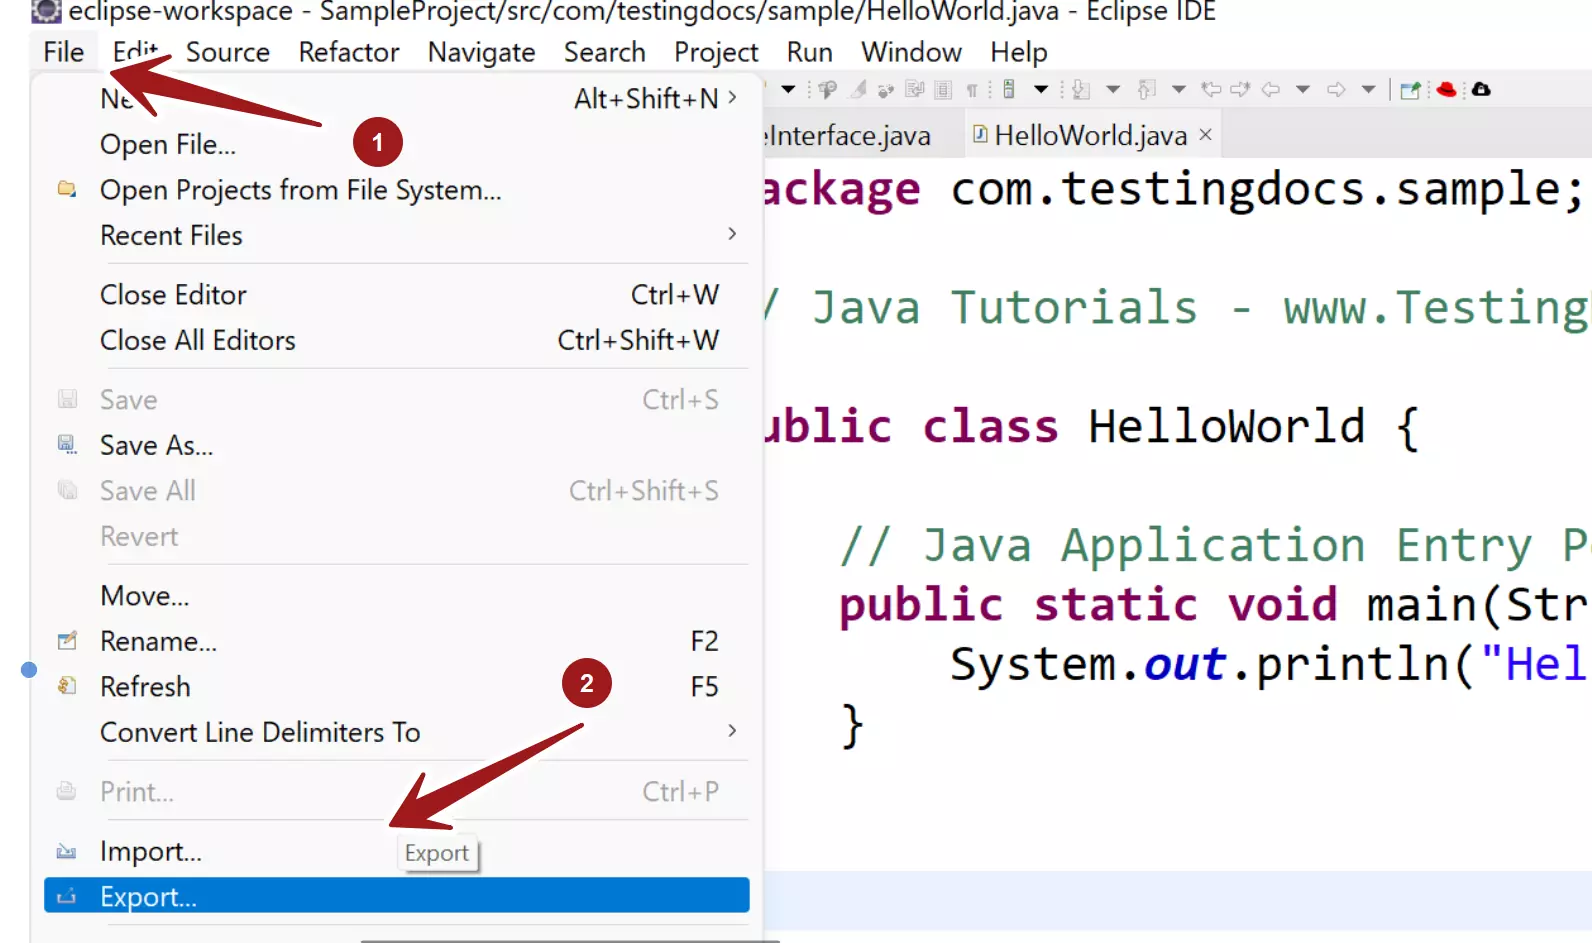
Open Eclipse IDE.
Choose File >> Export in the menu. This will open the Export wizard window.

Choose General >> Archive File in the export wizard.
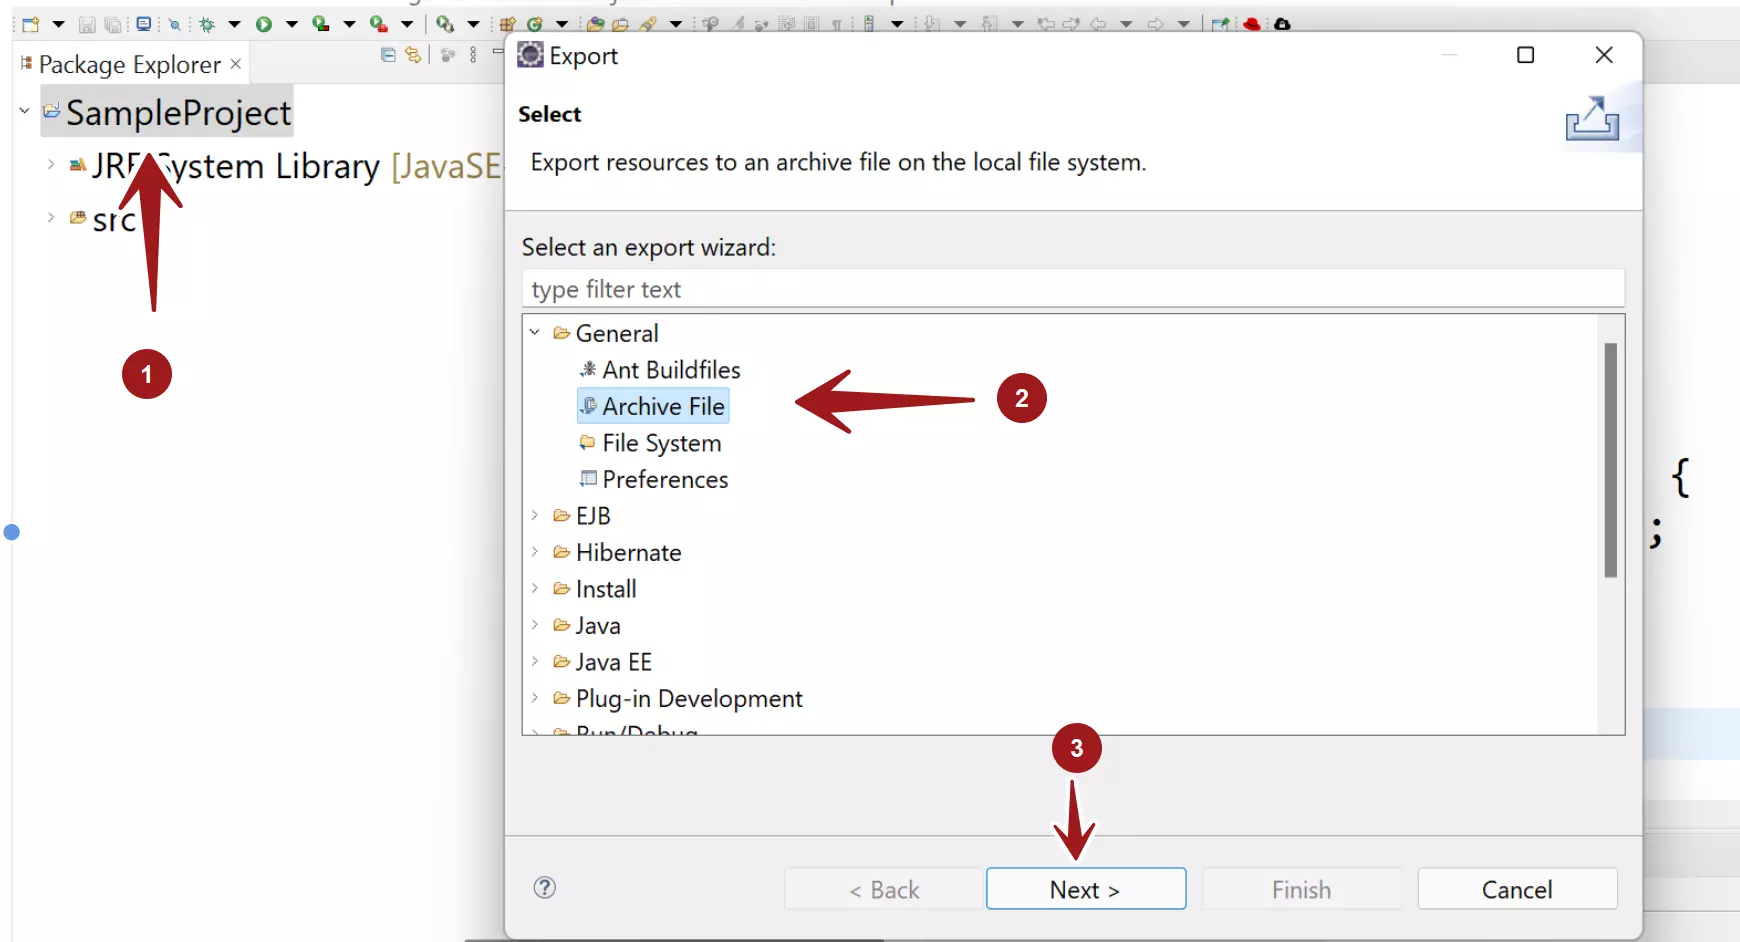

Click on the Next > button.
Select the project and the export options.
Give a name to the export file in To archive file: text box. Alternatively, click on the Browse button and create a file to point to the absolute file path of the archive file.
The file format depends on the target machine operating system. For example, to import the project on target Windows machine choose the archive file extension as a .zip file.
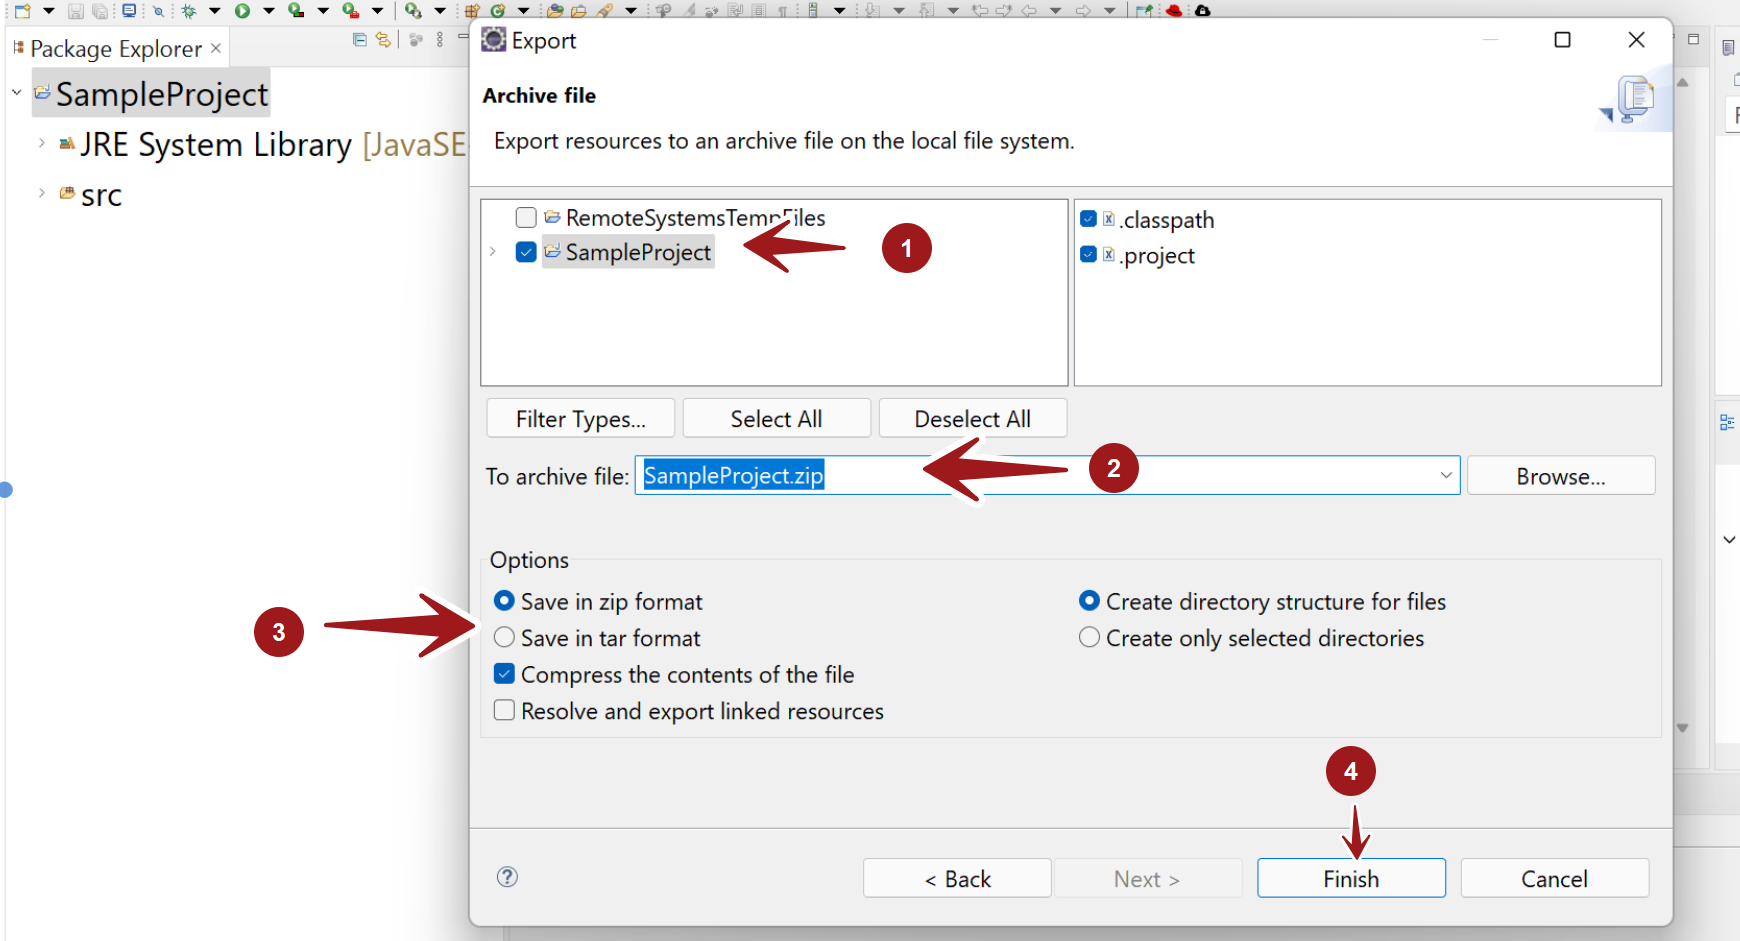

Check the compress the file option to compress the project contents.
Click on the Finish button to complete the export process. A project export .zip file would be created by default under the Eclipse install directory.
That’s it. We have successfully exported a Java project in Eclipse IDE.
—
Eclipse Tutorials
Eclipse Tutorials on this website can be found at:
https://www.testingdocs.com/eclipse-tutorials
For more details on the Eclipse IDE, visit the official website