

Introduction
Getting Started with JUnit Framework: JUnit is a simple framework to write repeatable tests. It is a unit testing framework for Java, created by Erich Gamma and Kent Beck. It is based on the xUnit architecture for unit testing frameworks. In this post, we will write a sample JUnit test and see how to run it.
Prerequisites
- JDK.
- IDE like Eclipse.
Let’s get started!
The easiest way to install JUnit is to add the JUnit library to the project build path.
or
Add the maven dependency and add it to the Maven project pom.xml file.
https://www.testingdocs.com/junit-unit-testing-framework/
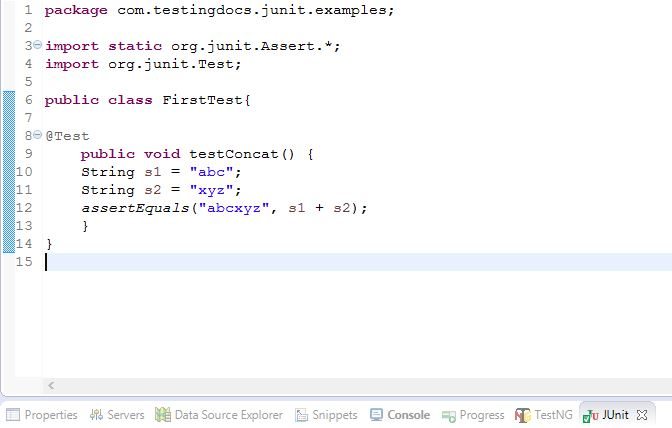
Sample test
import static org.junit.Assert.*;
import org.junit.Test;

public class FirstTest {

@Test
public void testConcat() {
String s1 = "abc";
String s2 = "xyz";
assertEquals("abcxyz", s1 + s2);
}
}

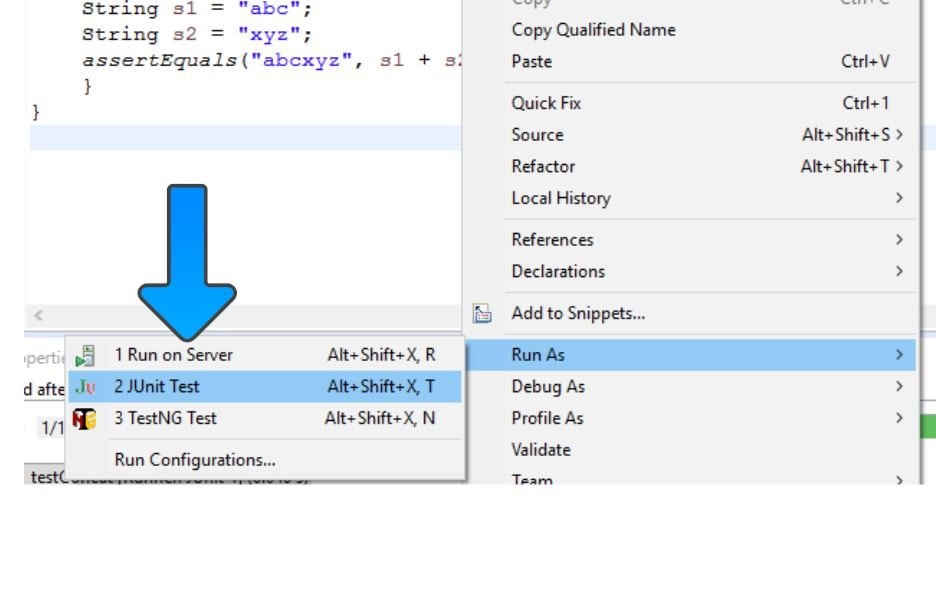
The simplest way to run the test is Right-click on the class >> Run As >> JUnit Test as shown in the below picture:

BlockJUnit4ClassRunner
It is the default test runner that runs the tests and reports the test results for us under the hood. If we do not want the default runner to be used, we can specify the runner by annotating our test class with the @RunWith annotation. We talk about this annotation later.
Learn more: JUnit Calculator Test cases