

Overview
In this tutorial, we’ll be going through the steps to Install MySQL Server server on the Ubuntu Linux machine. MySQL is one of the most popular open-source relational database.
In this series of installing LAMP ( Linux, Apache, MySQL server and PHP) stack components, the next step after installing Apache Webserver is to install MySQL.
Steps to install Apache:
https://www.testingdocs.com/install-apache-http-server-on-ubuntu-linux/
Environment: Ubuntu Linux Server LTS.
Install MySQL Server
To install MySQL on Linux follow the steps.
Open the terminal prompt window
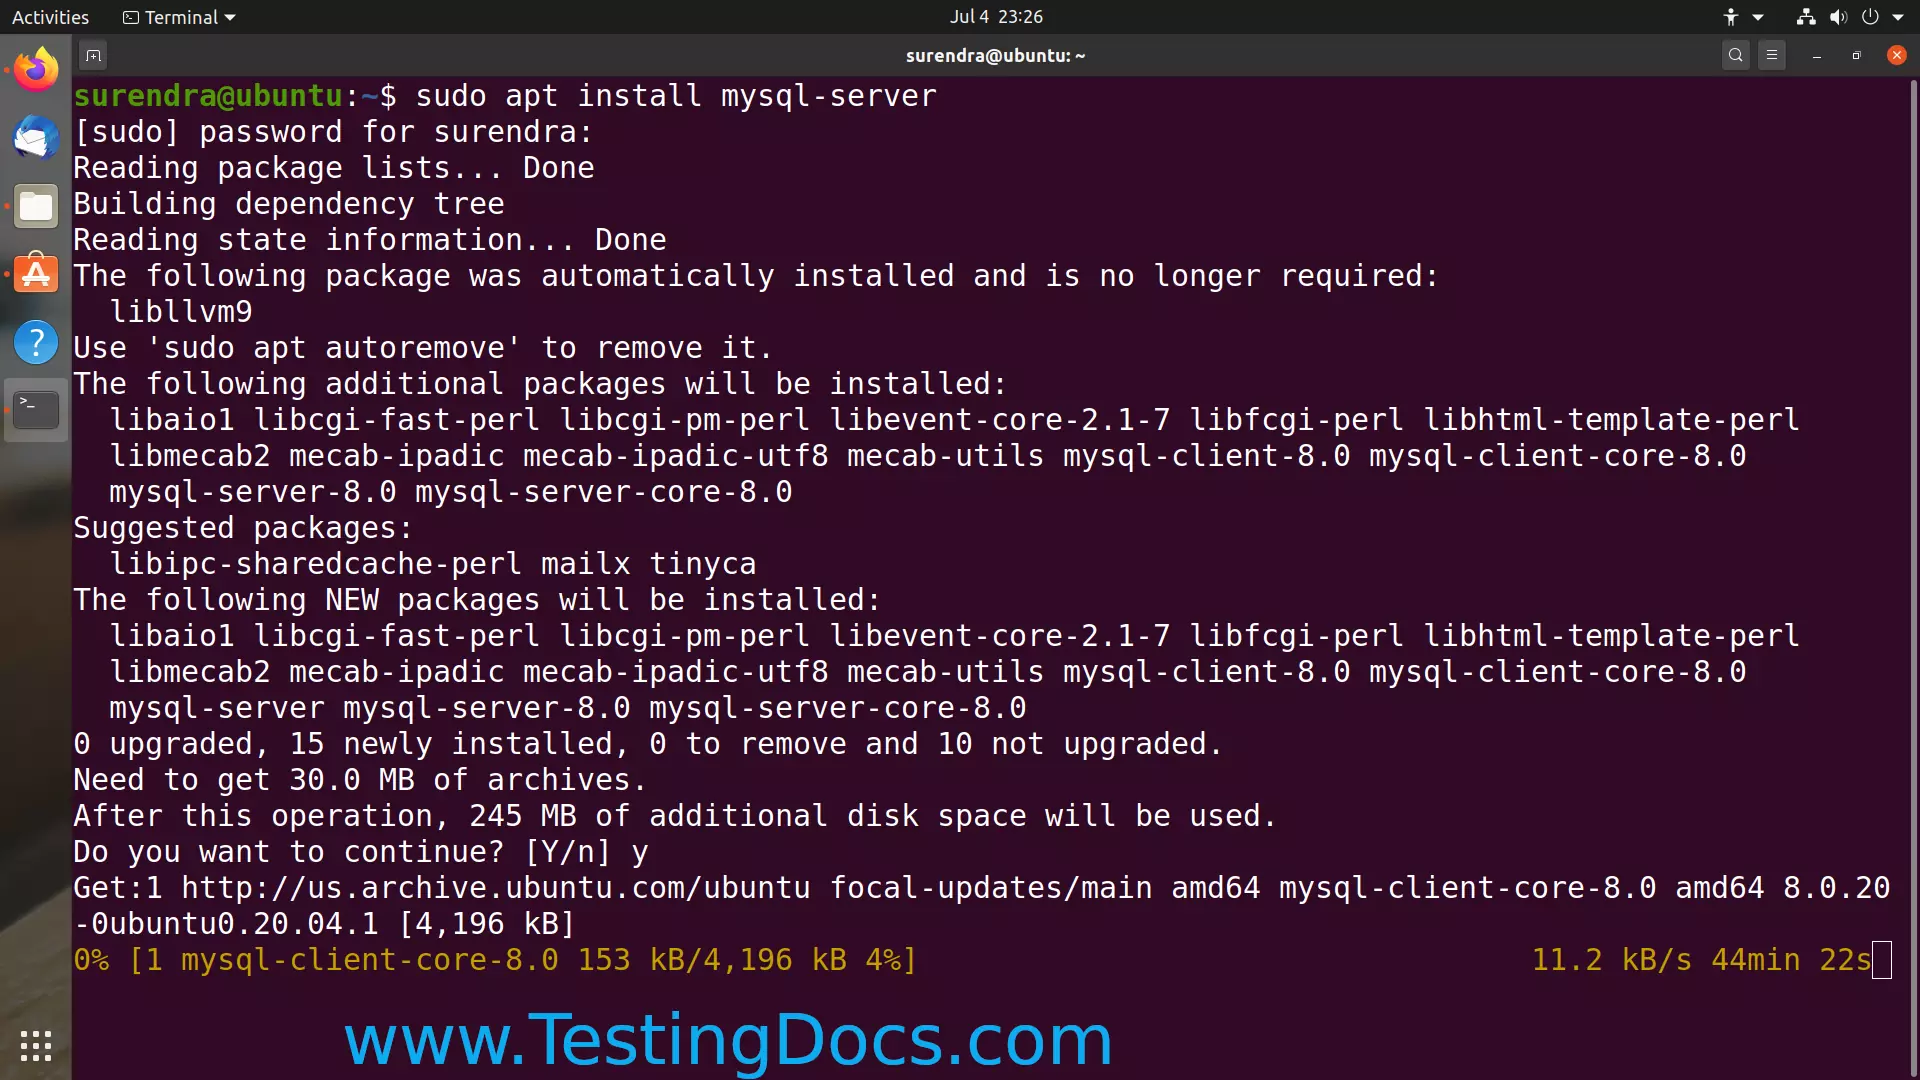
Issue the following commands to install Mysql.
$ sudo apt update
$ sudo apt install mysql-server

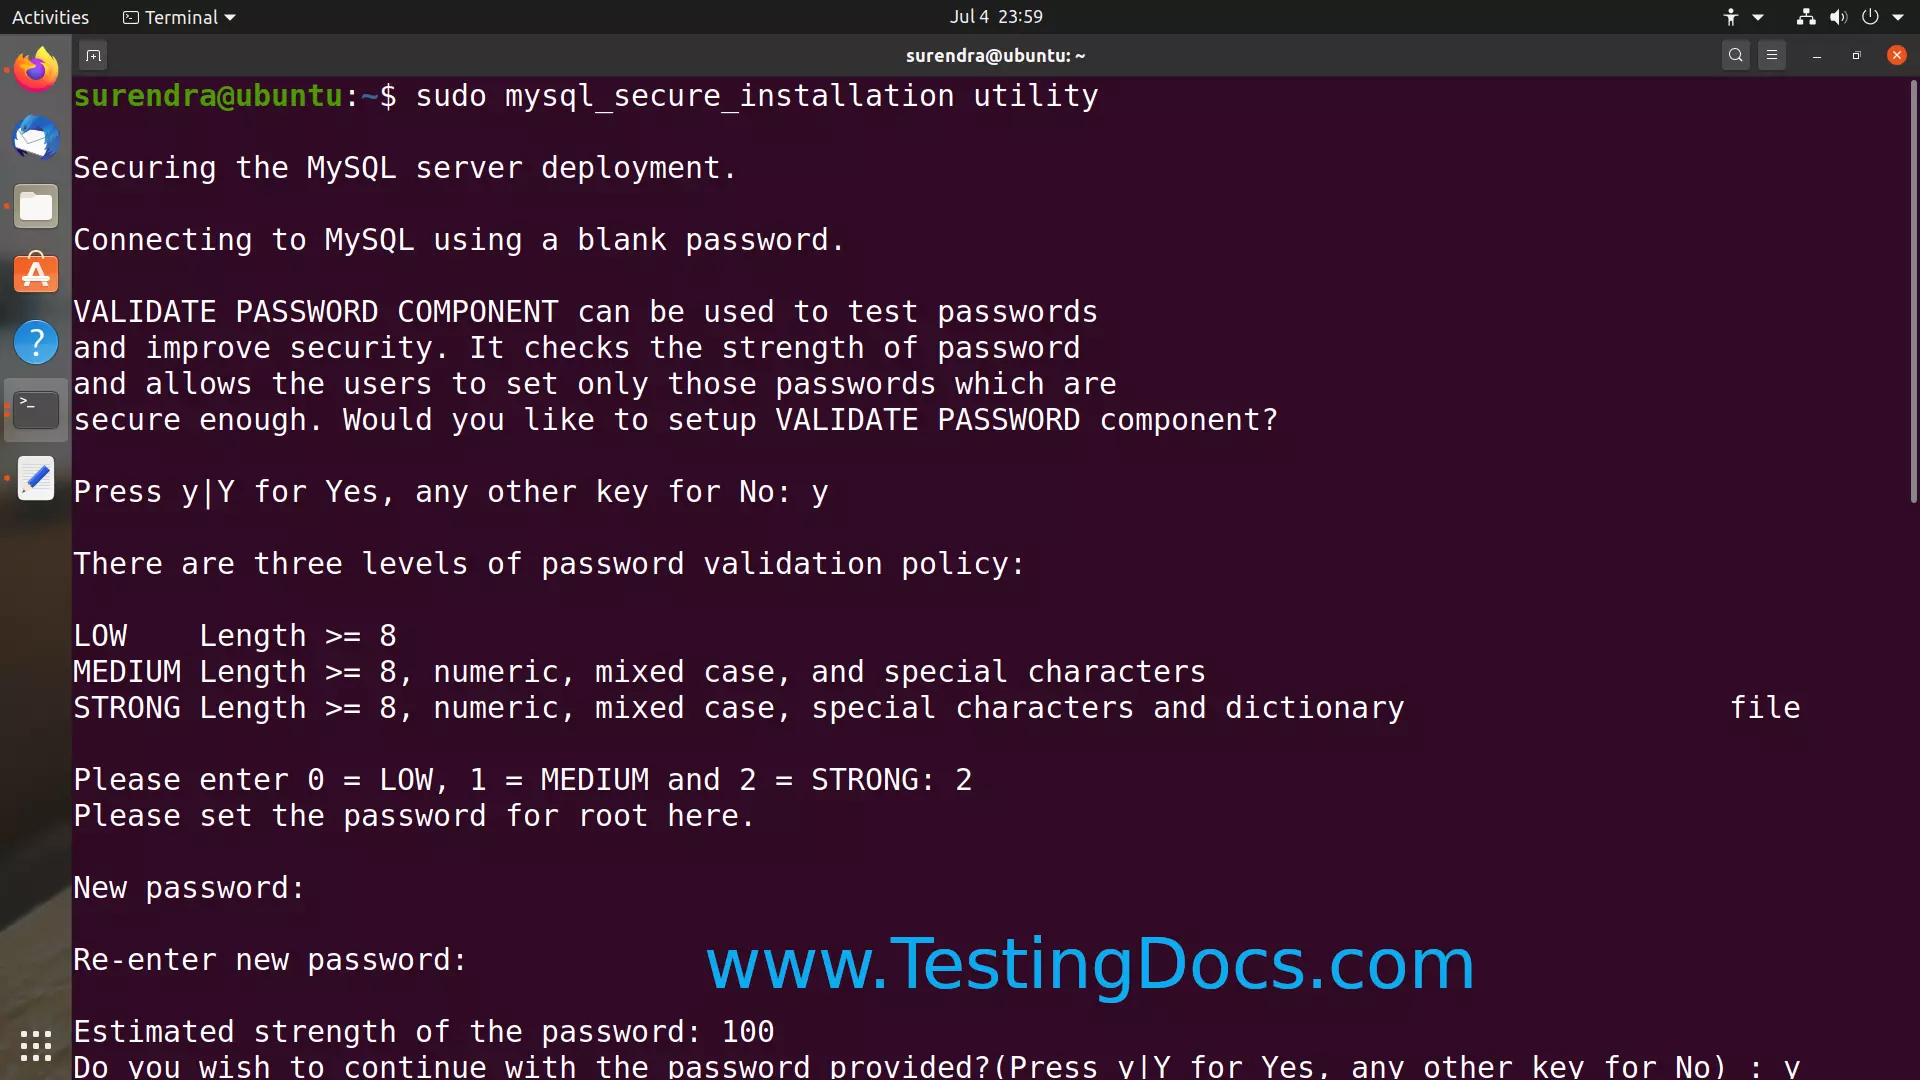
Securing the MySQL server deployment.
Run the utility to set the root password and other security parameters for the MySQL server.
$ sudo mysql_secure_installation utility
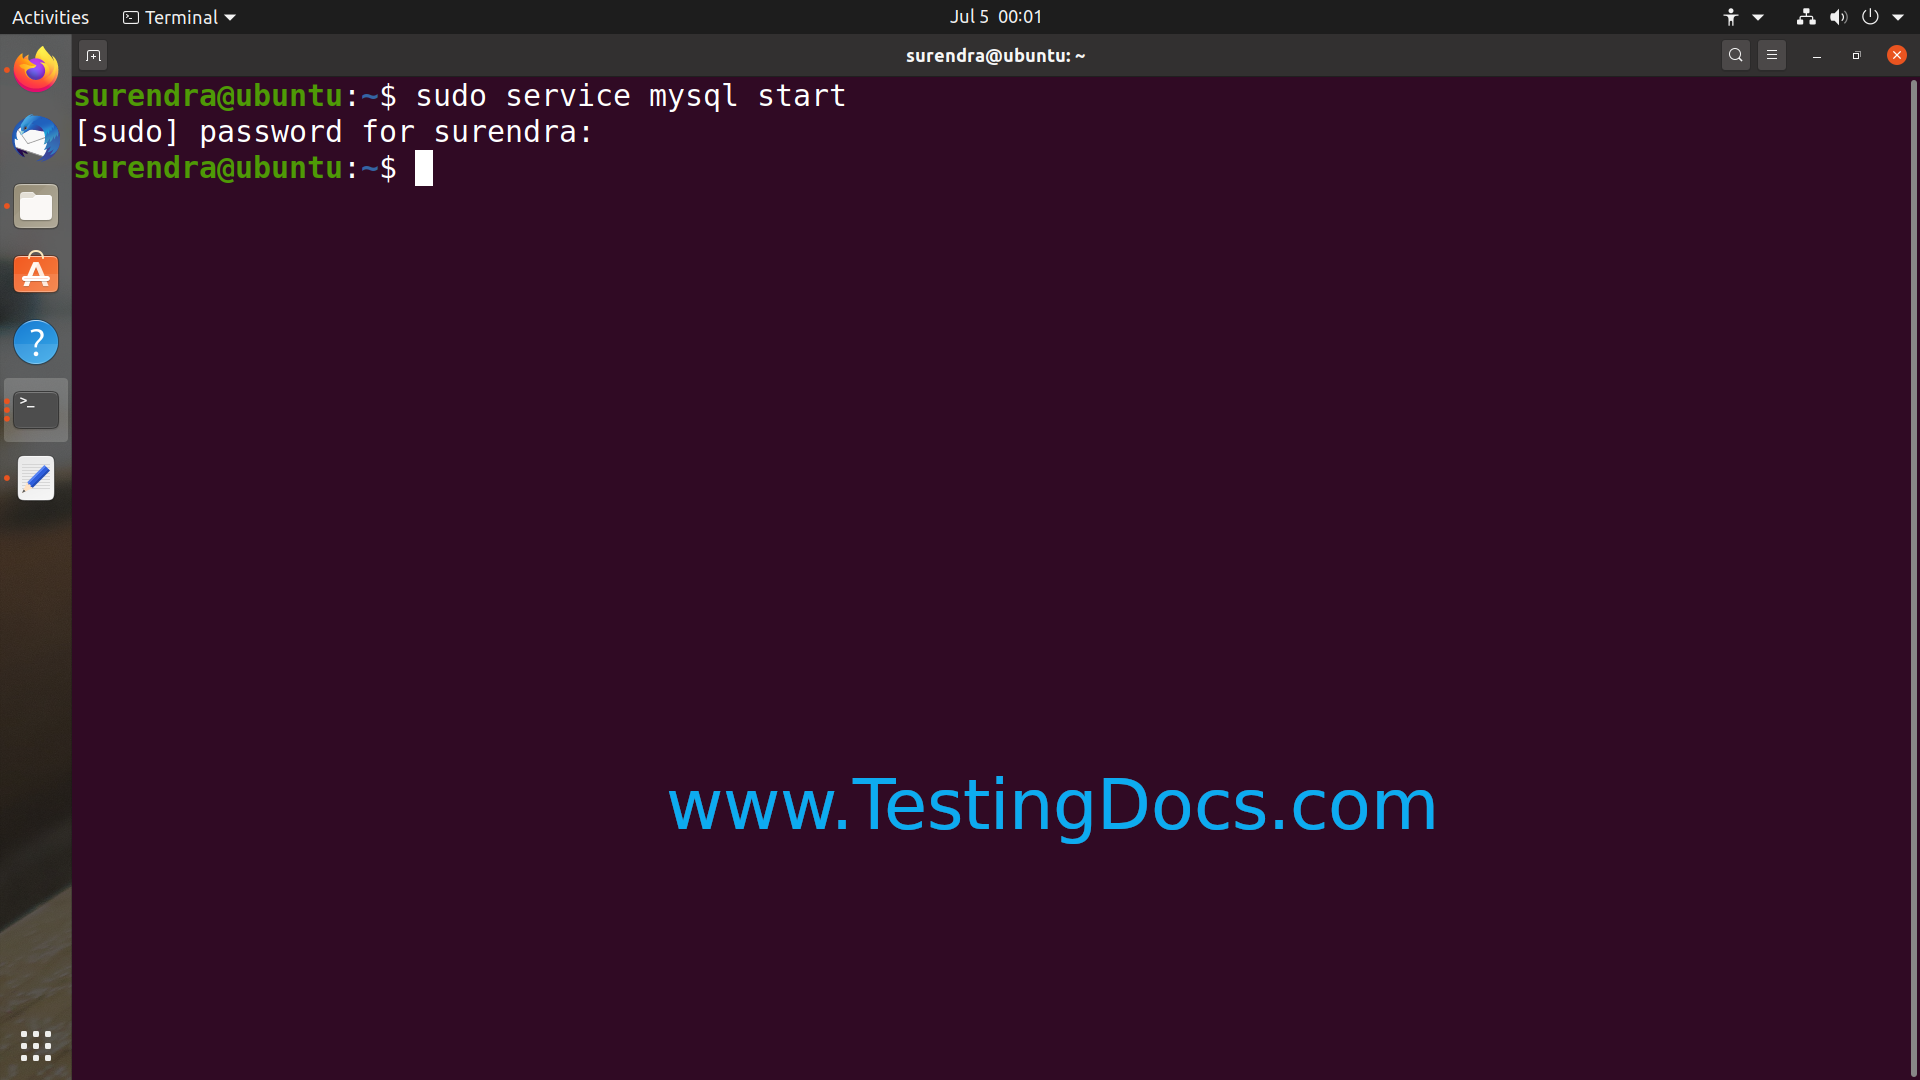
Start the service
$ sudo service mysql start
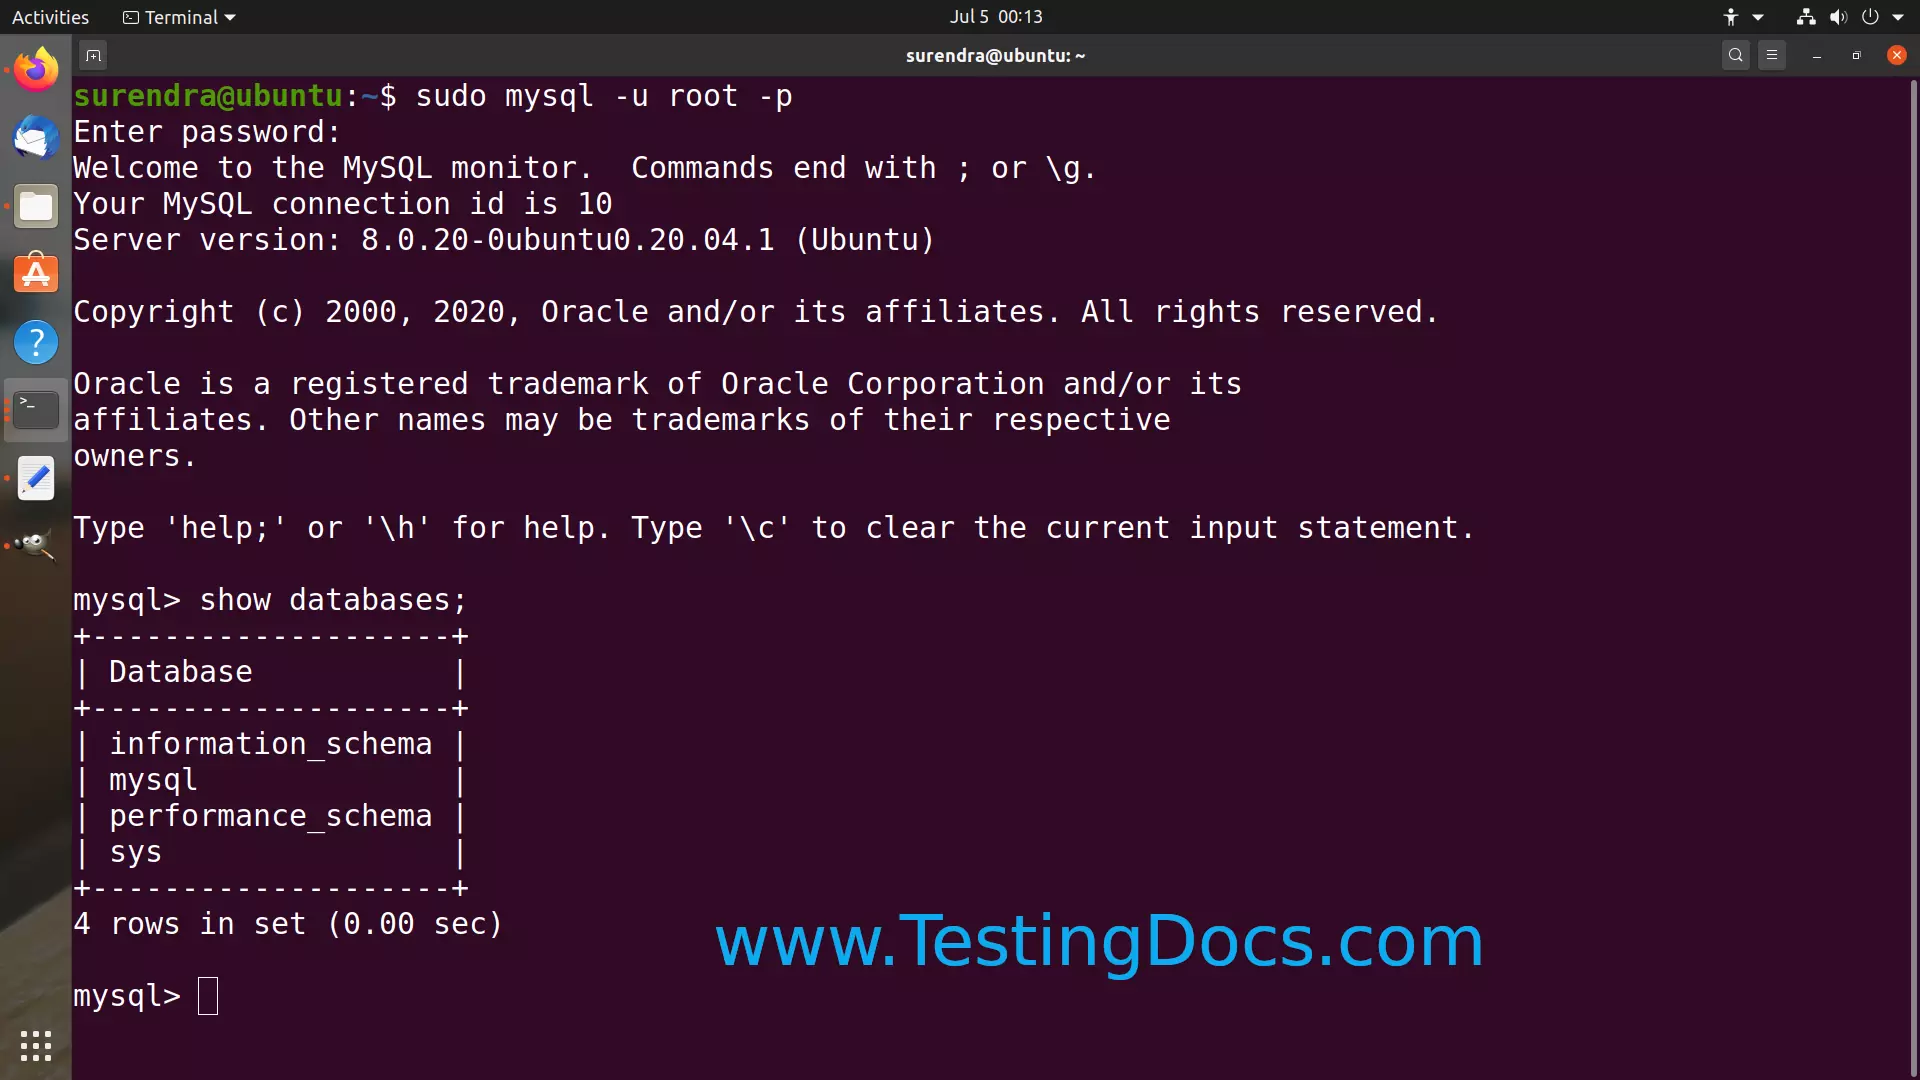
Test MySQL server instance
Type the following command to connect to MySQL instance and run a sample test command.
$ sudo mysql -u root -p
Enter password:
Welcome to the MySQL monitor. Commands end with ; or \g.
Your MySQL connection id is 10
Server version: 8.0.20-0ubuntu0.20.04.1 (Ubuntu)
Copyright (c) 2000, 2020, Oracle and/or its affiliates. All rights reserved.
Oracle is a registered trademark of Oracle Corporation and/or its
affiliates. Other names may be trademarks of their respective
owners.
Type ‘help;’ or ‘\h’ for help. Type ‘\c’ to clear the current input statement.
mysql> show databases;
+——————–+
| Database |
+——————–+
| information_schema |
| mysql |
| performance_schema |
| sys |
+——————–+
Install PHP
https://www.testingdocs.com/install-php-on-ubuntu-linux/