

Introduction
In this post, we would be installing Git on Windows 10. Step-to-step screenshots during the Git install process.
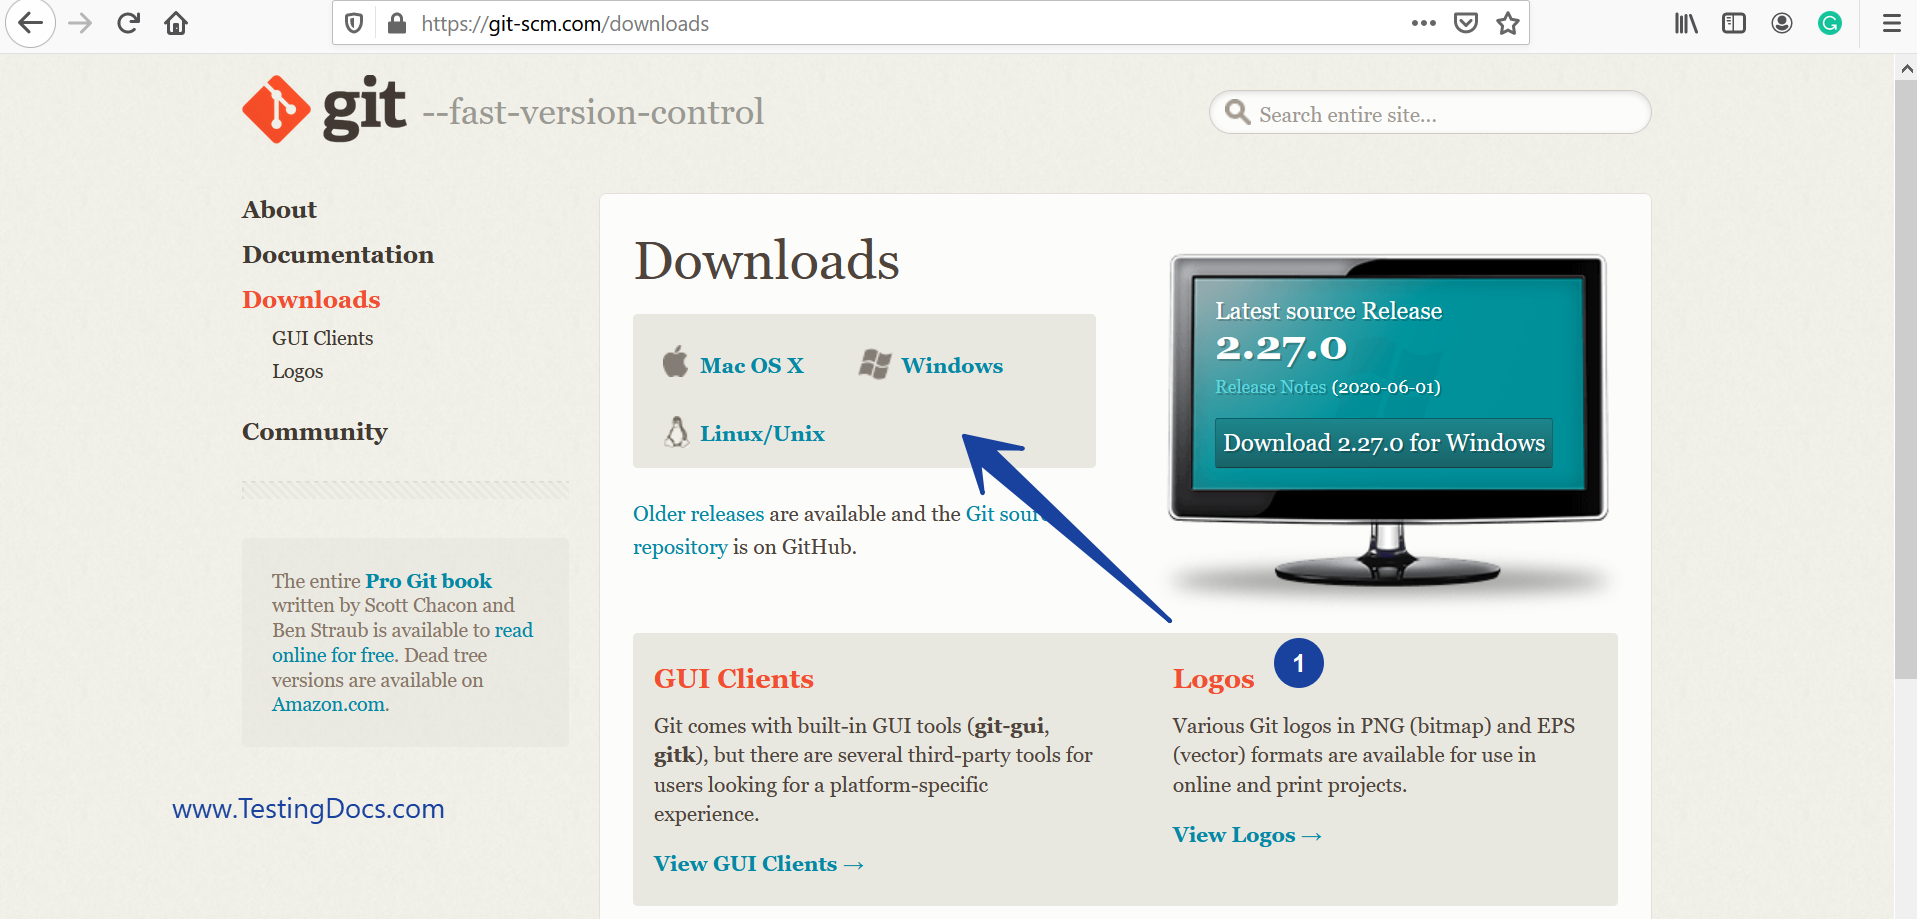
Navigate to https://git-scm.com/downloads
Click on the corresponding operating system to download Git.

Install Git
Read the license agreement and click on the Next button.


Choose where to install. Check the file location where to install on your machine. Look at the free disk space requirements if you are changing the path. In most cases, the default location is just fine and click on next.
Additionally, you can choose to have a desktop icon on the select component install screen as shown below, and leaving the default options checked.
Select Components

Select the Start menu option, leave the default, and click on next.
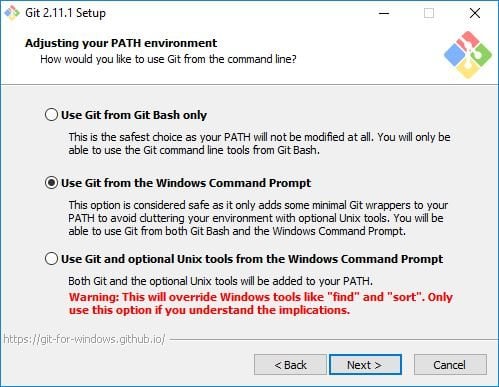
Choose the middle option. This option allows Git bash and as well as integrate Git with the Windows Command prompt. This gives you the flexibility of working from both.
In the next screen, Choose Unix-style line endings conversions, choose the middle option if you work on multiple cross-OS environments. Select the first if you only work with Windows.

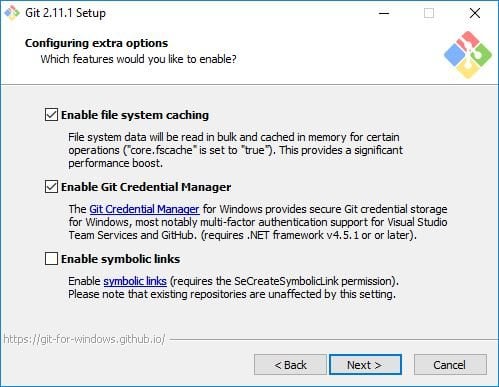
Configuring extra options for the git setup as shown in the below screen. Enable cache for performance boost and git credential manager for security and multi-factor authentication support for Visual Studio.
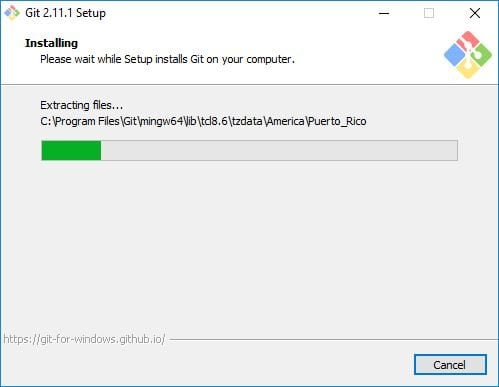
After you choose all these options git setup will install git for you.
Now that you have git installed successfully. Check the Launch Git Bash and check its working correctly. We can also check the view release notes option to check what’s new with the latest version and critical bug fixes.
Next Step
https://www.testingdocs.com/getting-started-with-git-version-control/
—
Git Tutorial on this website can be found at:
https://www.testingdocs.com/git-tutorials/
For more details on the Git, visit the official website at:
Save