

Overview
In the previous post, we have installed Jira core server on Windows operating system. Now it’s time to setup Jira core server instance.
Steps to install Jira server are outlined here:
https://www.testingdocs.com/install-jira-core-server-on-windows/
Jira Core Server Instance
Launch your favorite web browser on the machine.
Navigate to the serve instance URL. For example,
http://localhost:9090/
This tutorial assumes that the server instance on localhost and on non-default port 9090. ( note that the default express install port for Jira core server is 8080.)
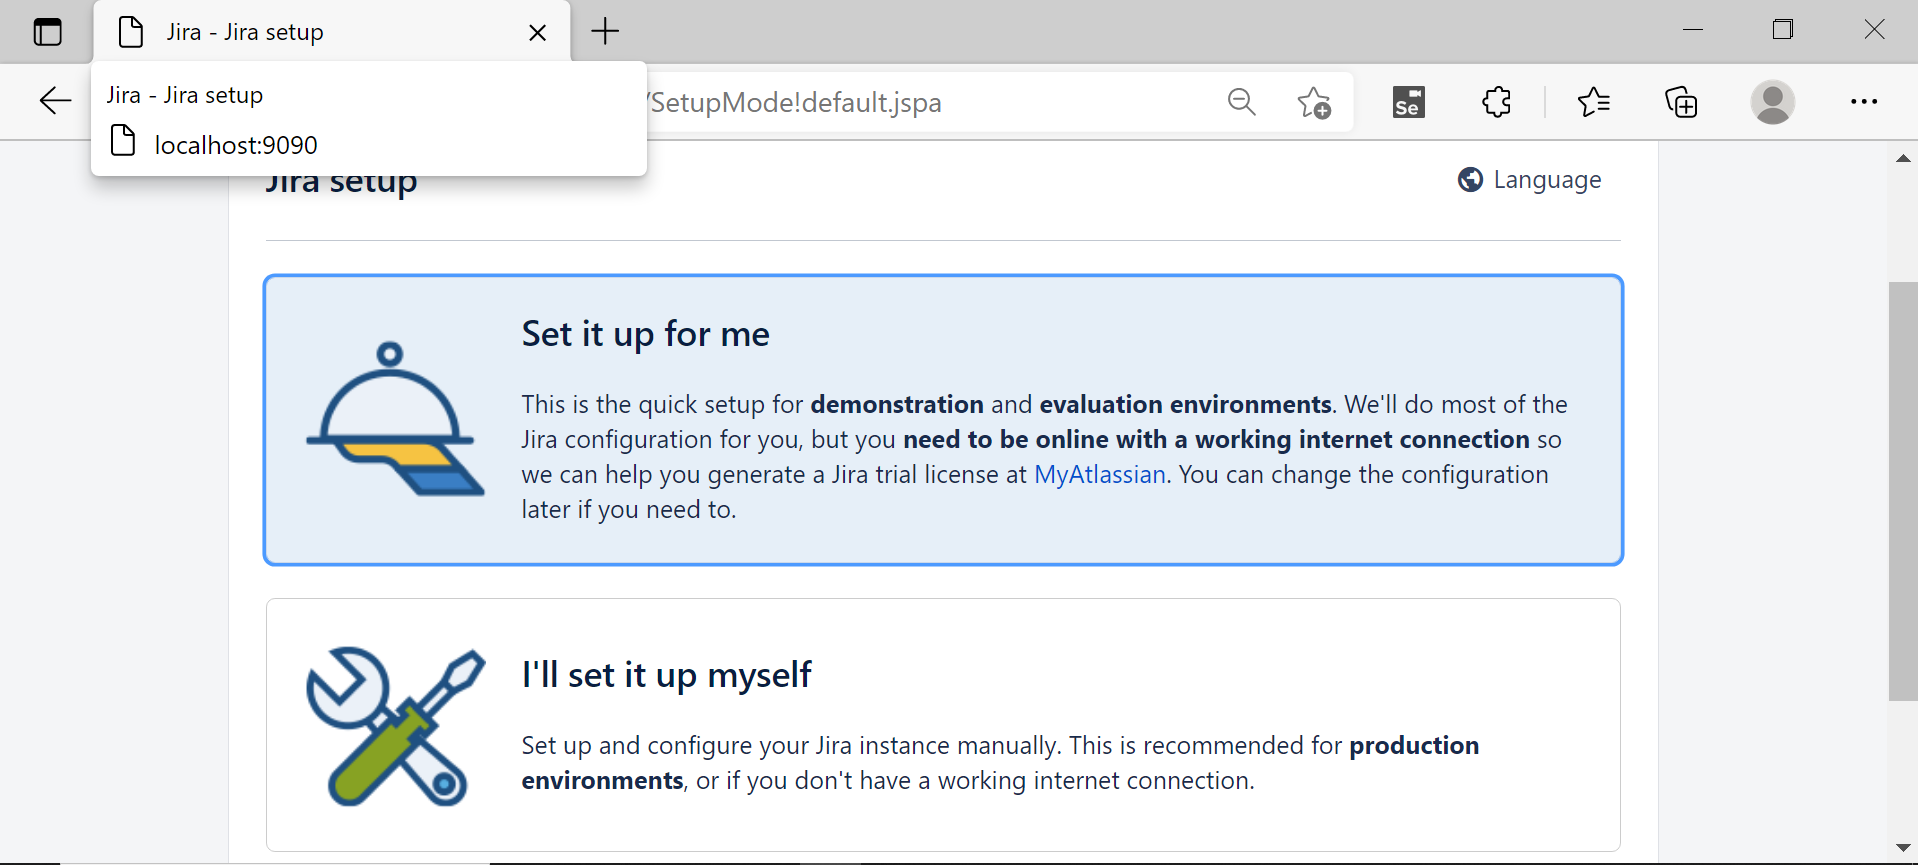
Jira Setup
On the initial screen, we will find two options:
- Set it up for me
- I’ll set it up myself

Database Setup
The first option is for evaluation and demo purpose only. On production environments, we need to create own database.
For setting up own MySQL database, follow this link:
https://www.testingdocs.com/setup-mysql-database-for-jira-server/

Make the changes outlined above and choose the second option. Connect the Jira server to the MySQL database. Fill the database details.
Choose the Database Type: MySQL 8.0
- Hostname
- Database Port
- Database
- Database username
- User password

Click the Test Connection button to test the database connection.
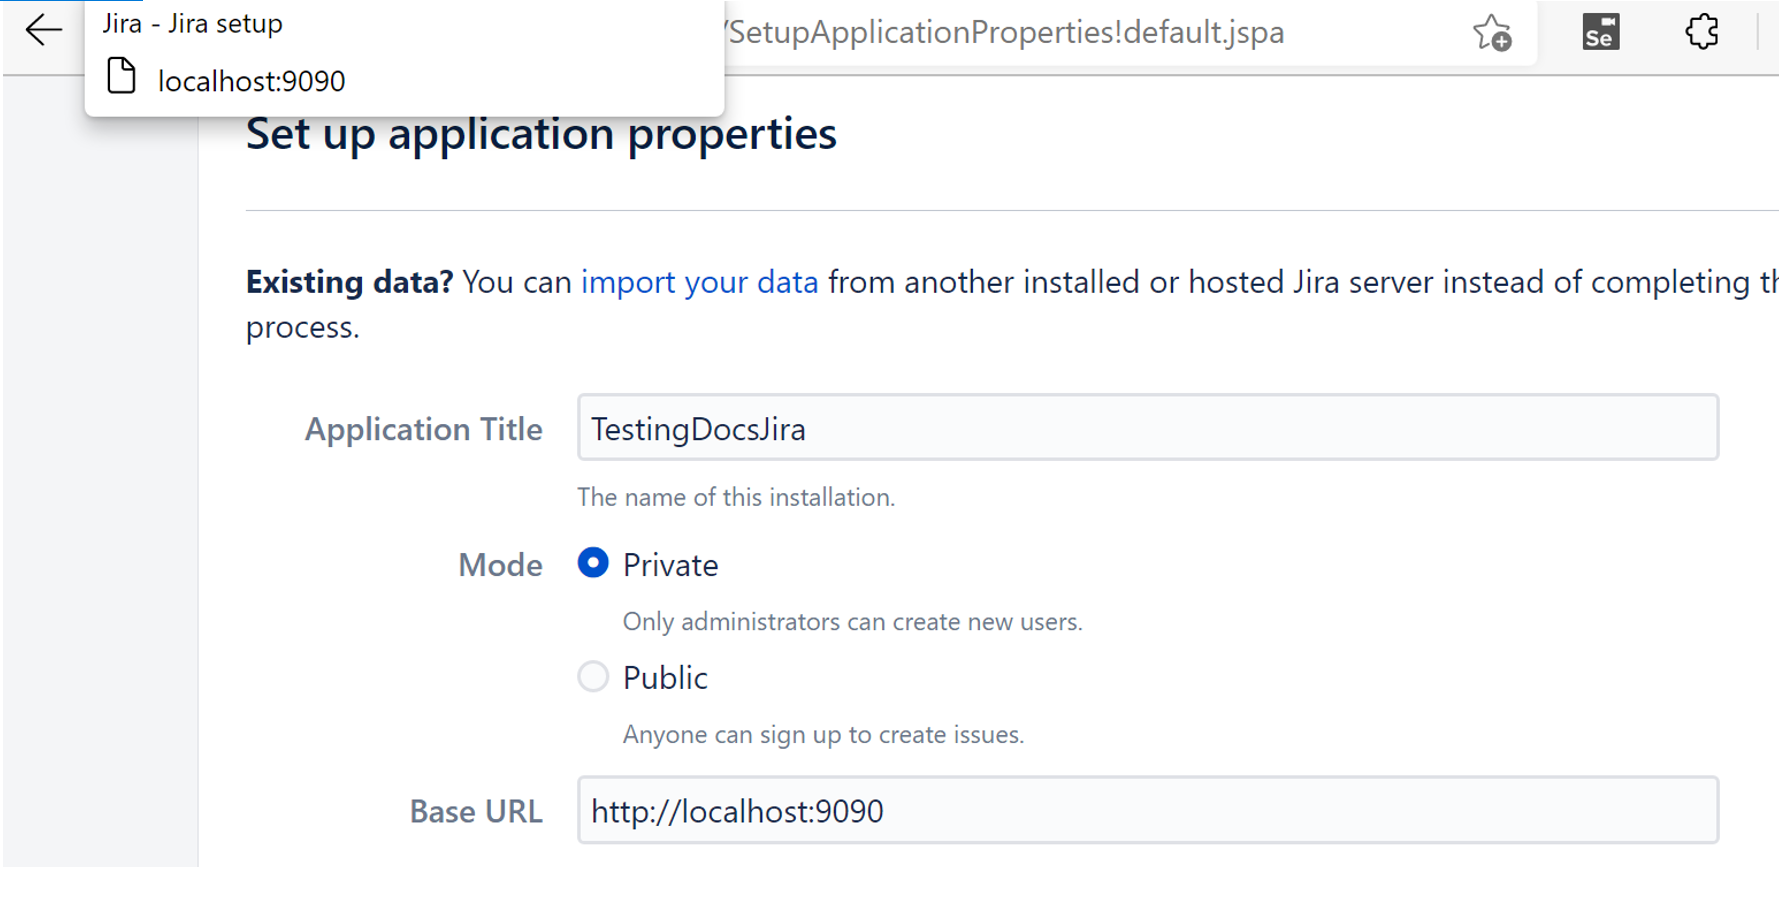
Jira Application properties
On this screen, we can configure Jira application properties like:
- Application Title:
- Instance Mode
- Base URL

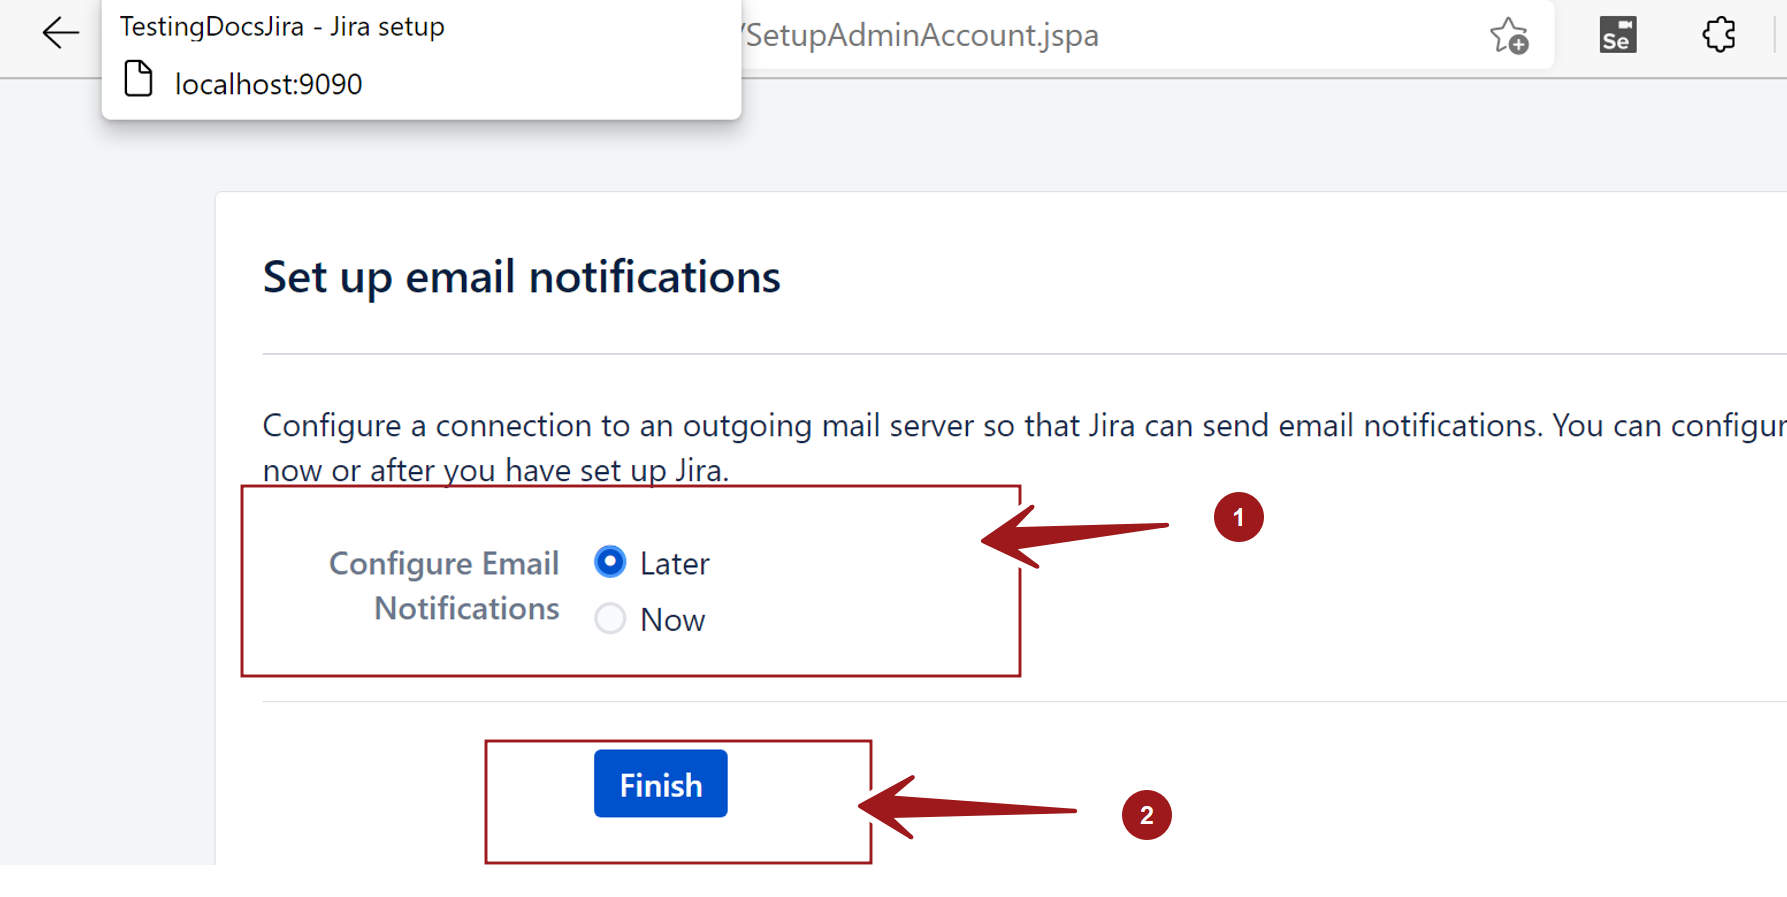
Email Notifications
We can setup SMTP server for email notifications on this screen.

Login Screen
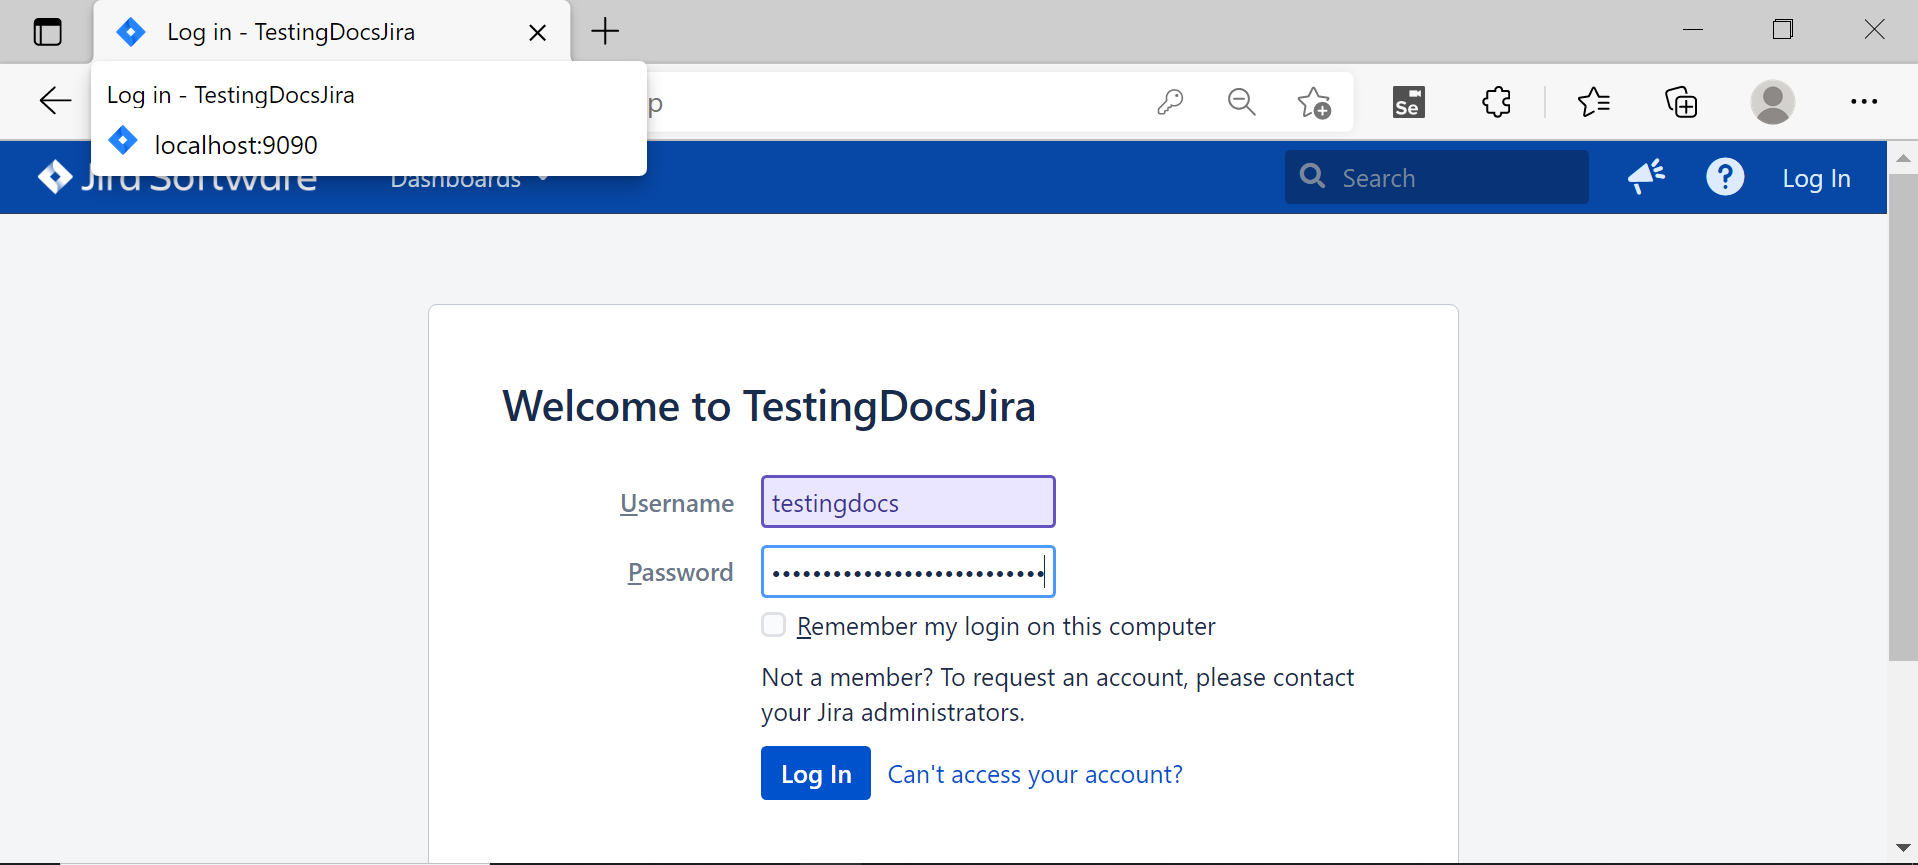
—
Jira Tutorials
Jira Software Tutorials link on this website:
https://www.testingdocs.com/jira-software-tutorial/
Jira Official Website
For more information on Jira Software: