Jira TestLink Integration
Overview
In this tutorial, we will learn Jira TestLink Integration. TestLink can be integrated with many software tools like Jira. Jira is an industry-wide popular issuer tracker and agile project management tool.
Jira TestLink Integration
Login to the TestLink tool with an administrative user or account.
Select the Test Project from the drop-down list.
Click on the Issue Tracker Management link on the dashboard.
![]()
Click on the Create button.
![]()
This opens up the Issue Tracker Management page.
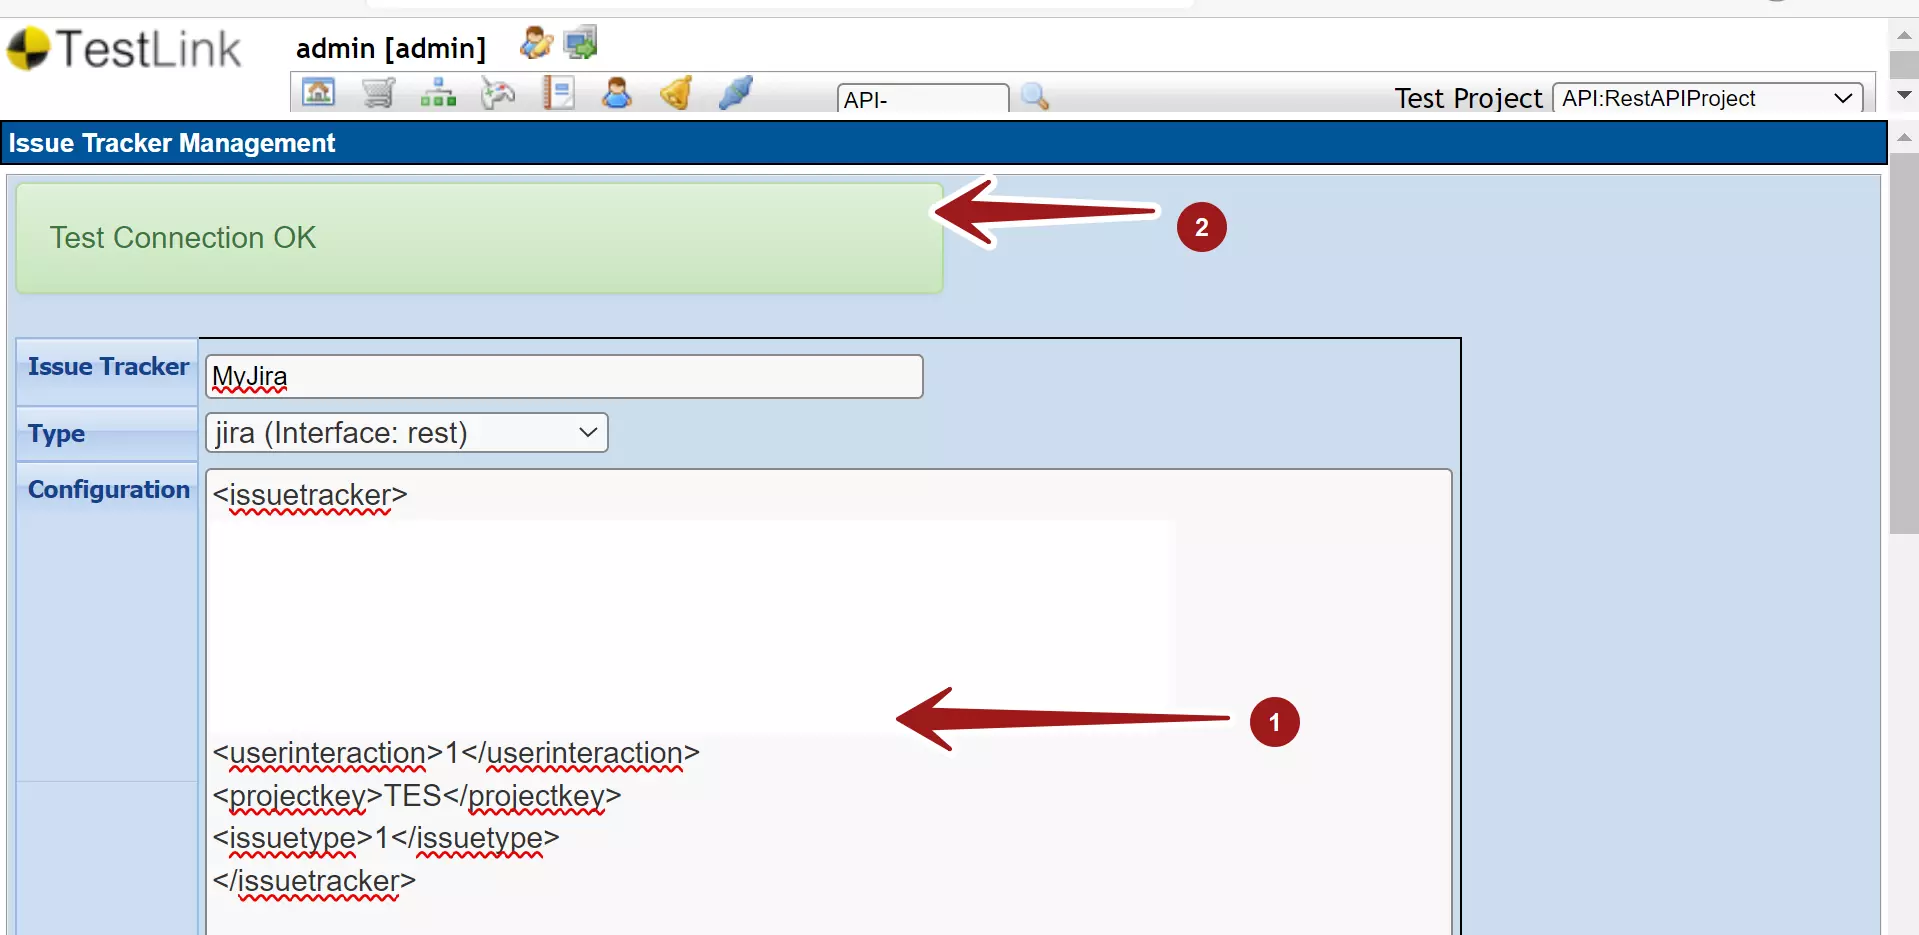
Enter the Issue Tracker name.
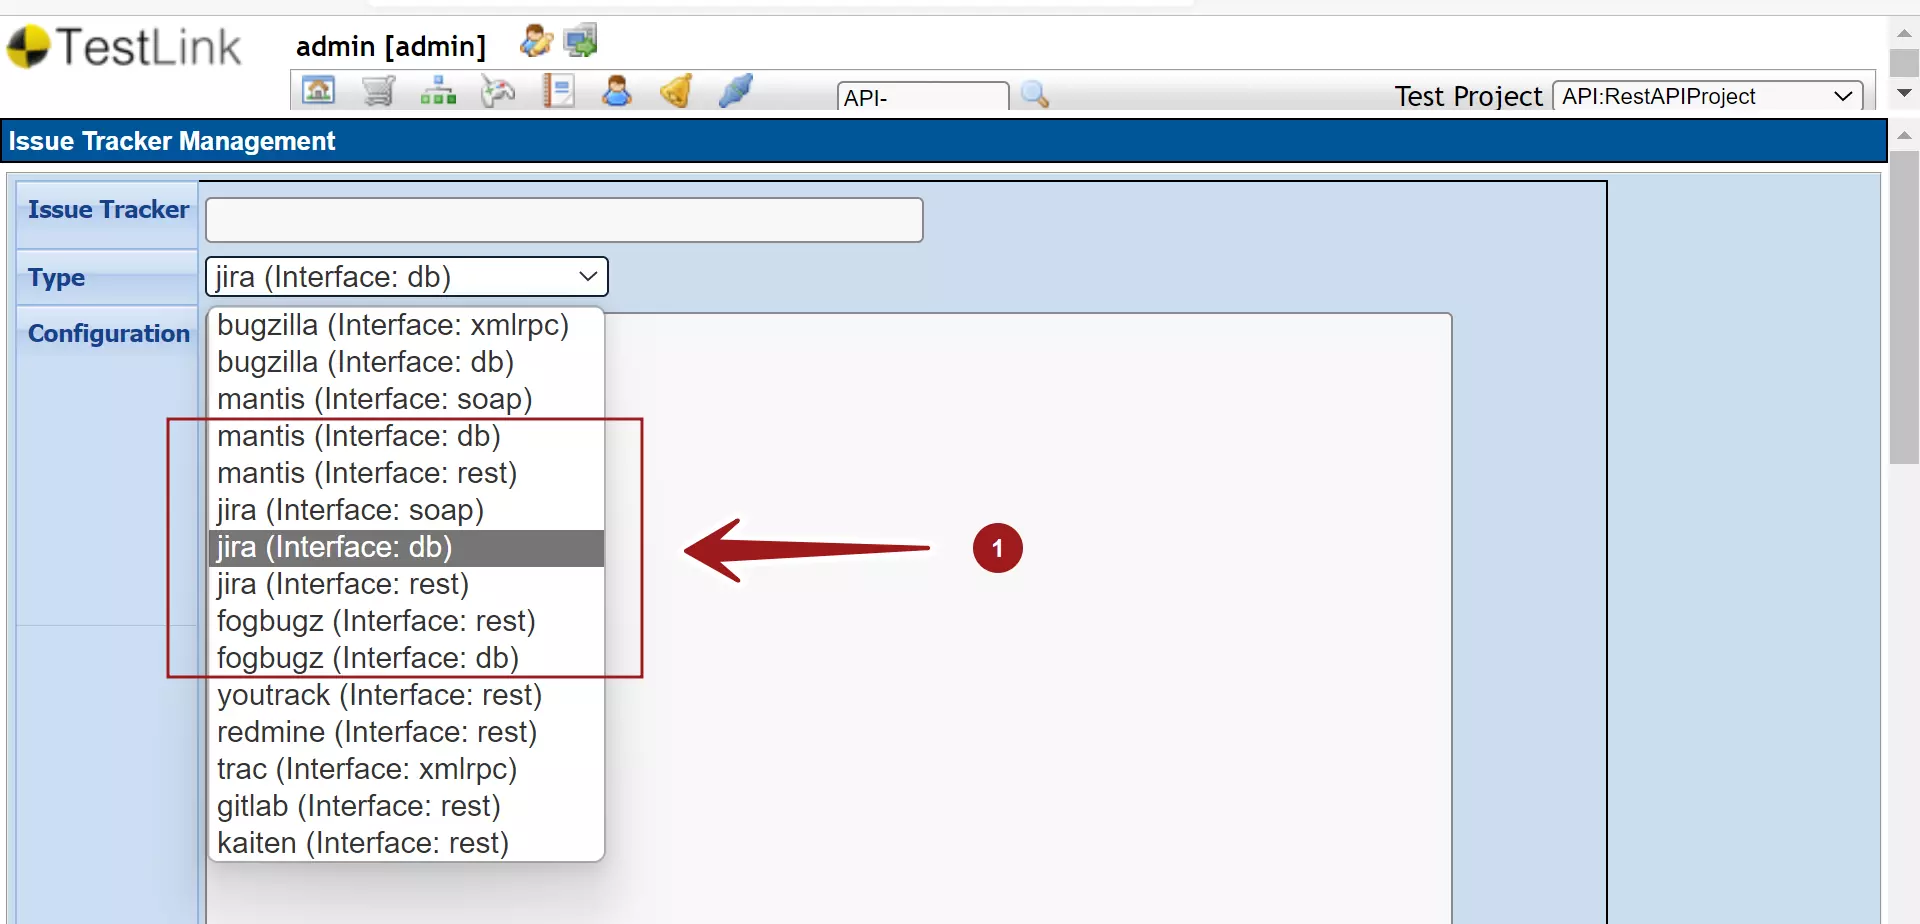
Choose the configuration type from the Type dropdown list.
TestLink provides three configuration types for Jira Integration.
Jira DB, Jira Rest , Jira SOAP.
Choose the jira(Interface: rest) drop-down list entry.

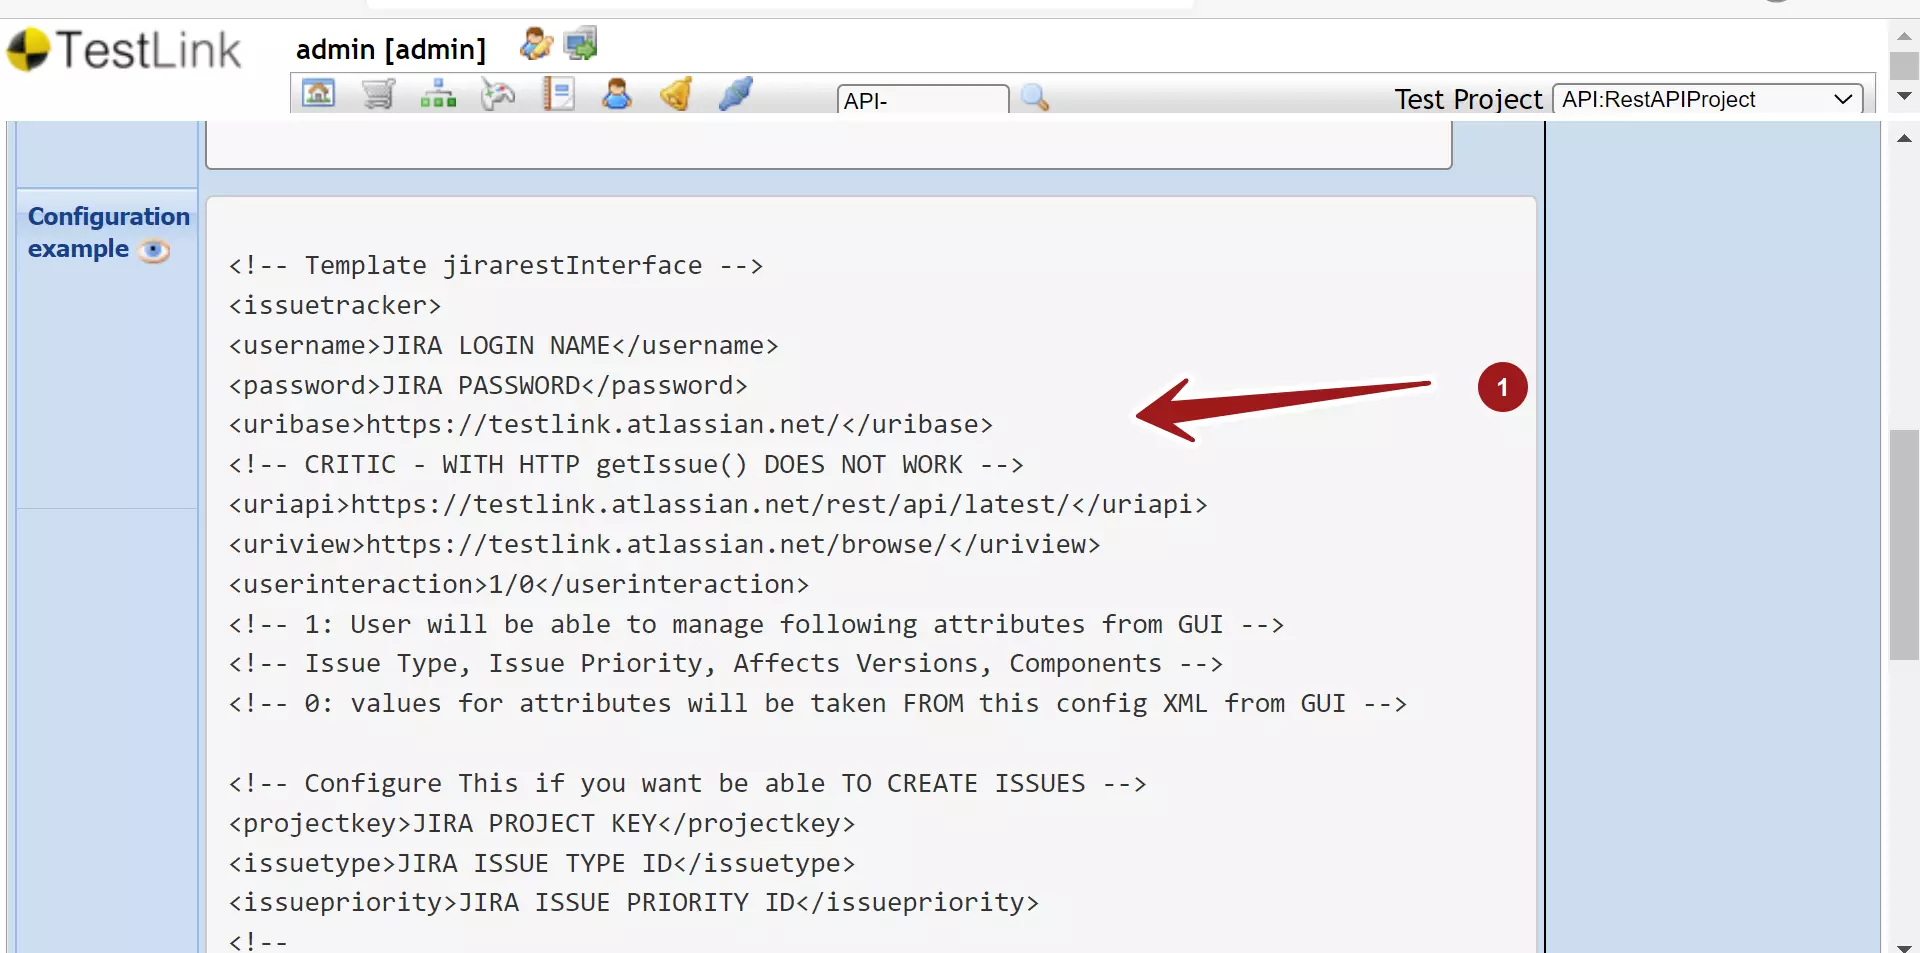
Click on the Configuration example eye icon and copy the XML configuration and paste it in the Configuration text area.

Modify the configuration settings as per the Jira instance.
Modify the username, password, and uribase settings as per the Jira instance that you try to connect.
For example, uribase :
https://<your_jira_instance>.atlassian.net/
<issuetracker>
<username>JIRA LOGIN NAME</username>
<password>JIRA PASSWORD</password>
<uribase>https://testlink.atlassian.net/</uribase>
JIRA API Token
We can also use the Jira API Token. Tokens are alternative for API authentication just like passwords. The use of API tokens adds flexibility and enhances security to API usage. You must use an API token if the Atlassian account you authenticate with has had two-step verification enabled.
Steps to create Jira API Token are outlined here:
https://www.testingdocs.com/create-jira-api-token/
Give the Jira project key:
<projectkey>JIRA_PROJECT_KEY</projectkey>
Click on the Save button to save the Jira configuration.
Click on the Check connection button to check if the connection is OK. Successful connection would display a message: Test Connection OK

In case the connection fails, we need to debug the issue. Check the TestLink events log for the debug information.
Add Issue Tracker to Project
Once done with the Jira configuration, enable the Jira Integration on the Test Project.
Click on the Test Project Management link on the dashboard.
Choose the Test Project.
Choose the Jira Issue Tracker from the drop-down list.
Check the Active checkbox.
Click on the Save button to complete the Issue Tracker Integration.
![]()
That’s it. We have successfully integrated Jira with TestLink.
—
TestLink Tutorials
TestLink Tutorial on this website can be found at:
https://www.testingdocs.com/testlink-tutorials/


