

Overview
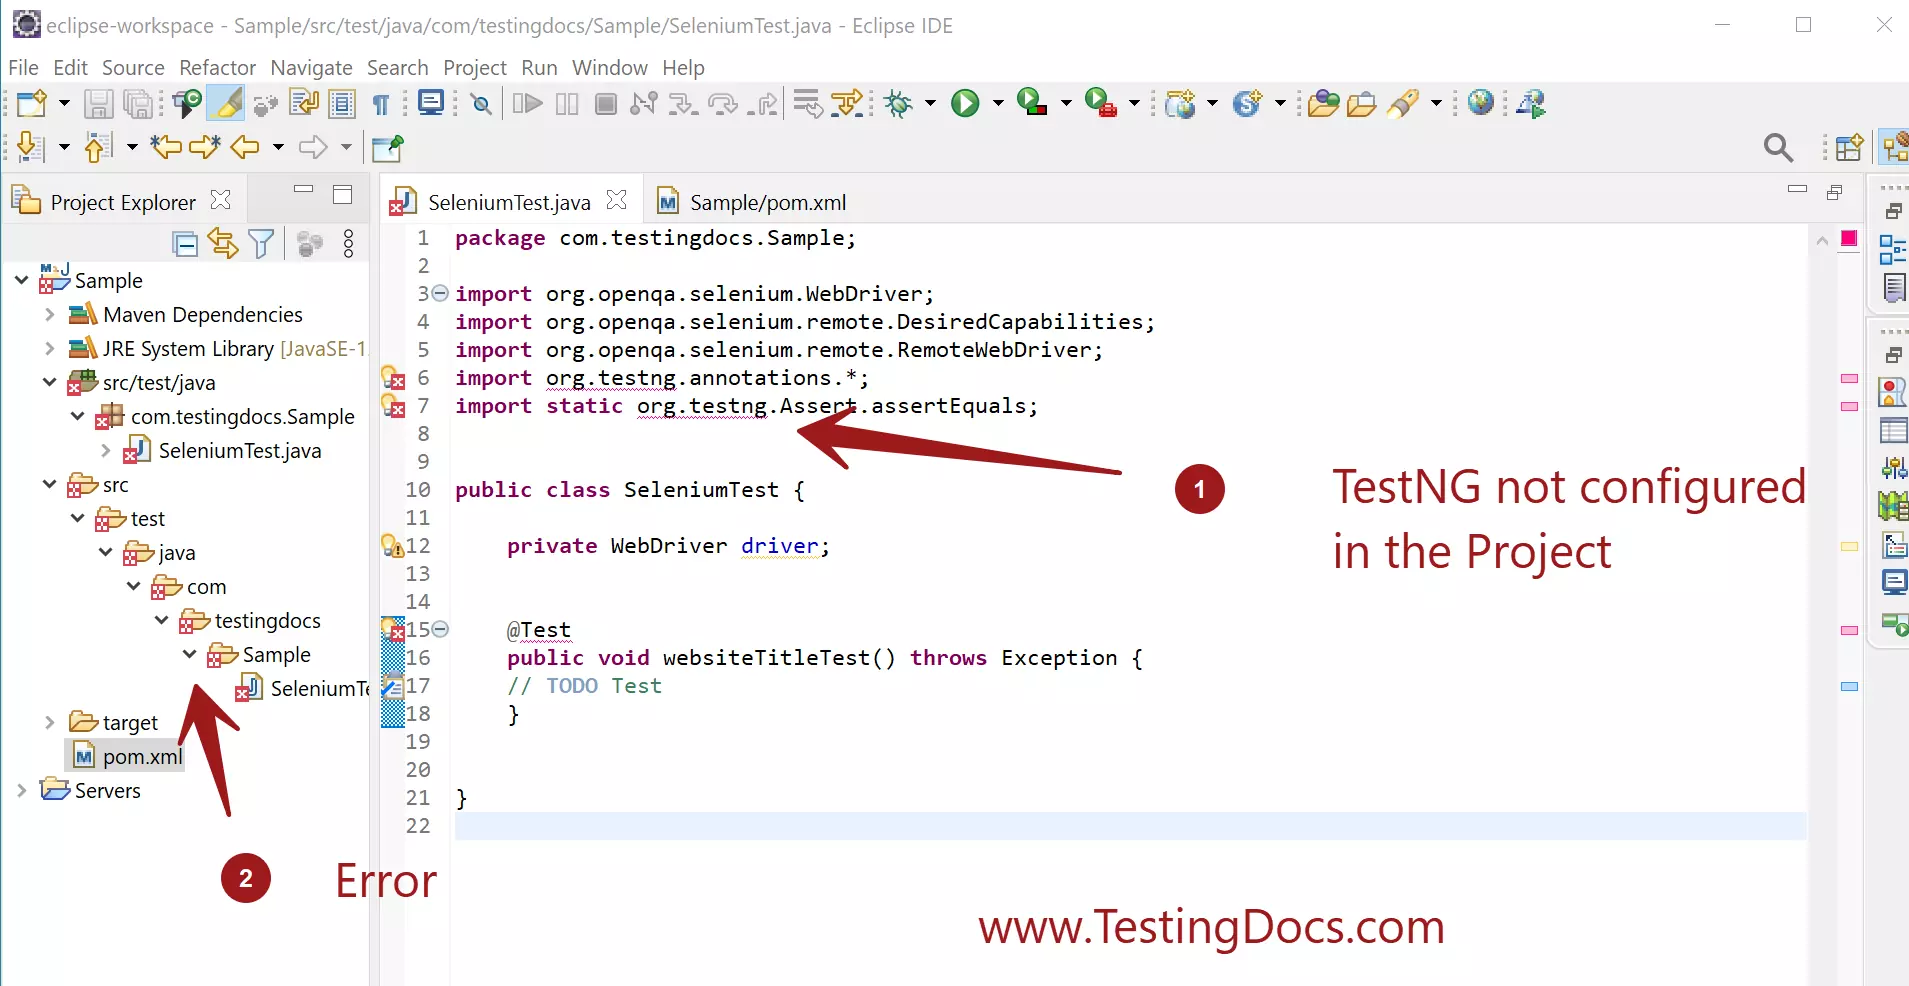
In this tutorial, we will configure TestNG in Selenium Java Project. If TestNG is not configured in the project, we get errors in the Test classes. Import statements that use @Test annotations, Assert would result in Errors.
Steps for the TestNG configuration to the Selenium project depends on how the project is built. This article covers the steps if the Selenium project is built with Maven build tool.
Errors in the Project.

TestNG Configuration
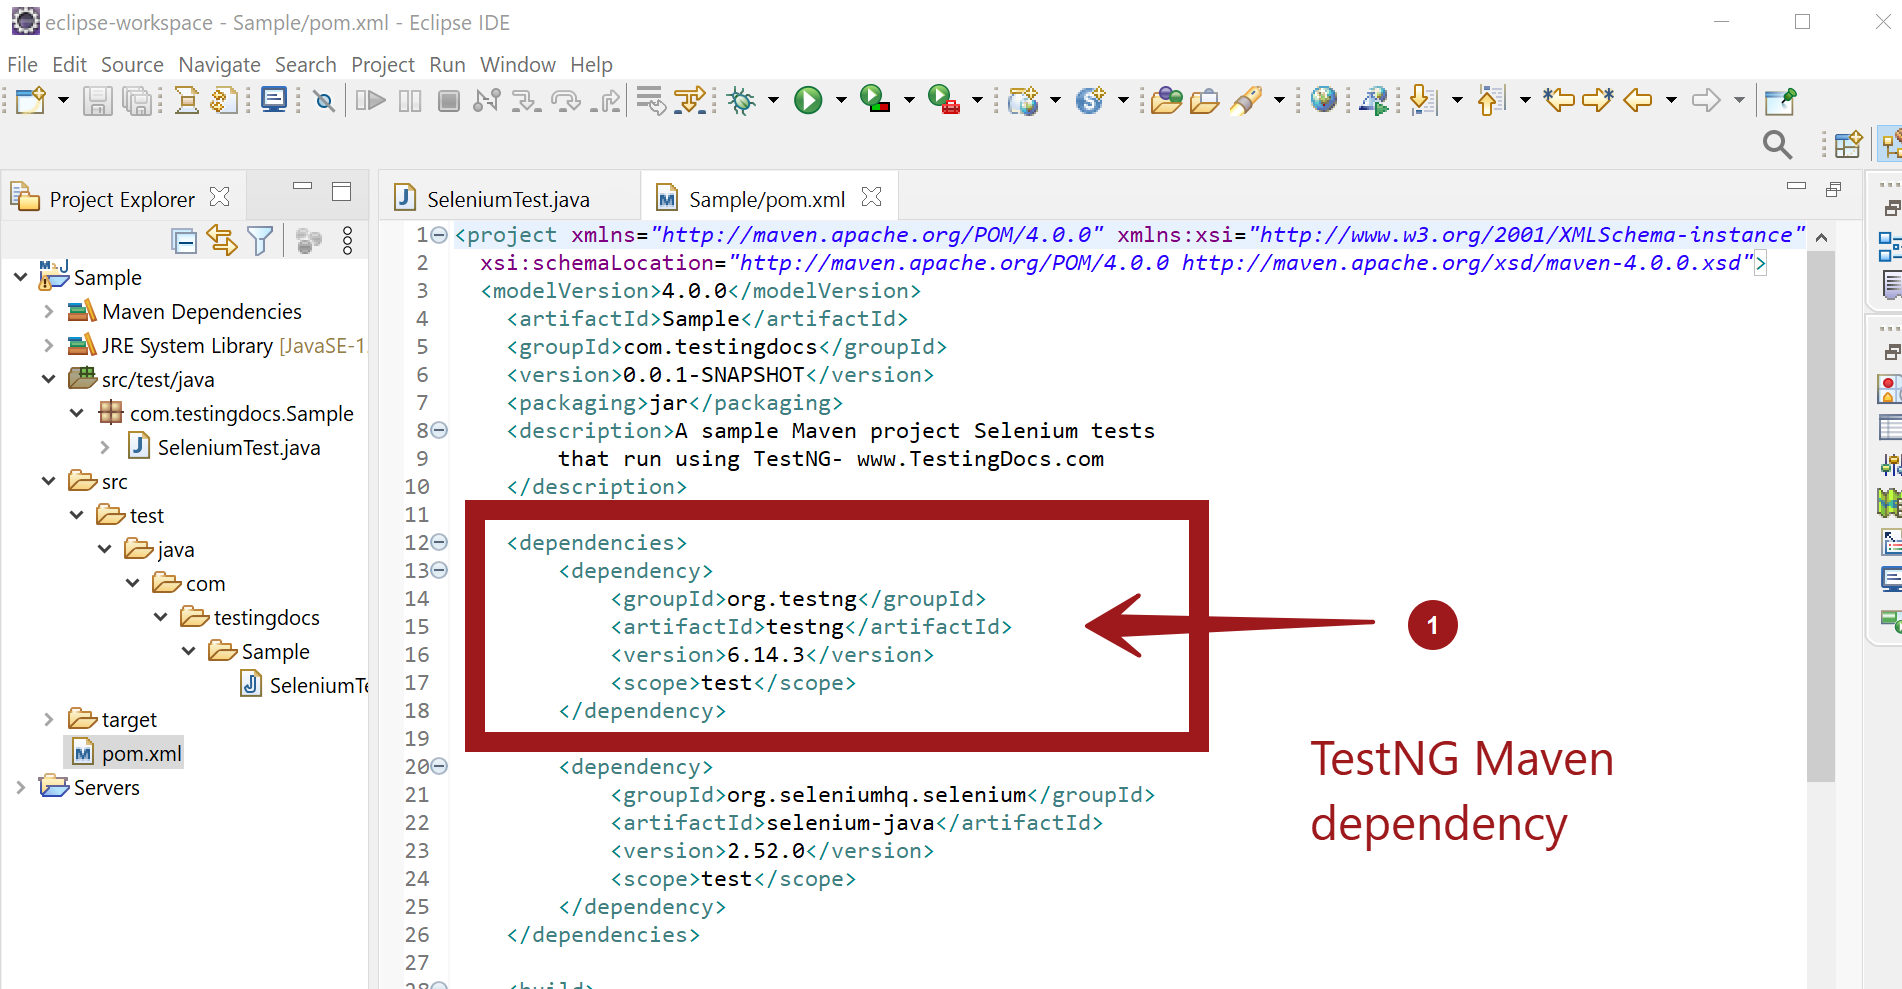
Add the TestNG dependency to the project pom.xml file.
<dependency>
    <groupId>org.testng</groupId>
    <artifactId>testng</artifactId>
    <version>6.14.3</version>
    <scope>test</scope>
</dependency>
Note that always add the latest version of the TestNG.
- Launch the IDE and open the project.
- Open the pom.xml file.
- Add the TestNG dependency with the latest version.

Sample Test
package com.testingdocs.Sample;

import java.util.concurrent.TimeUnit;
import org.openqa.selenium.WebDriver;
import org.openqa.selenium.opera.OperaDriver;
import org.testng.Assert;
import org.testng.annotations.AfterClass;
import org.testng.annotations.BeforeClass;
import org.testng.annotations.Test;

public class SeleniumTest {

    private WebDriver driver;

    @Test
    public void sampleTest() {
        driver.get("https://www.google.com");
        driver.manage().timeouts().implicitlyWait(30, TimeUnit.SECONDS);
        Assert.assertEquals(driver.getTitle(), "Google", "Verify title test");
    }

    @BeforeClass
    public void beforeClass() {
        System.setProperty("webdriver.opera.driver", "operadriver.exe");
        driver = new OperaDriver();
    }

    @AfterClass
    public void afterClass() {
        if(driver != null)
        {
            driver.quit();
        }
    }
}
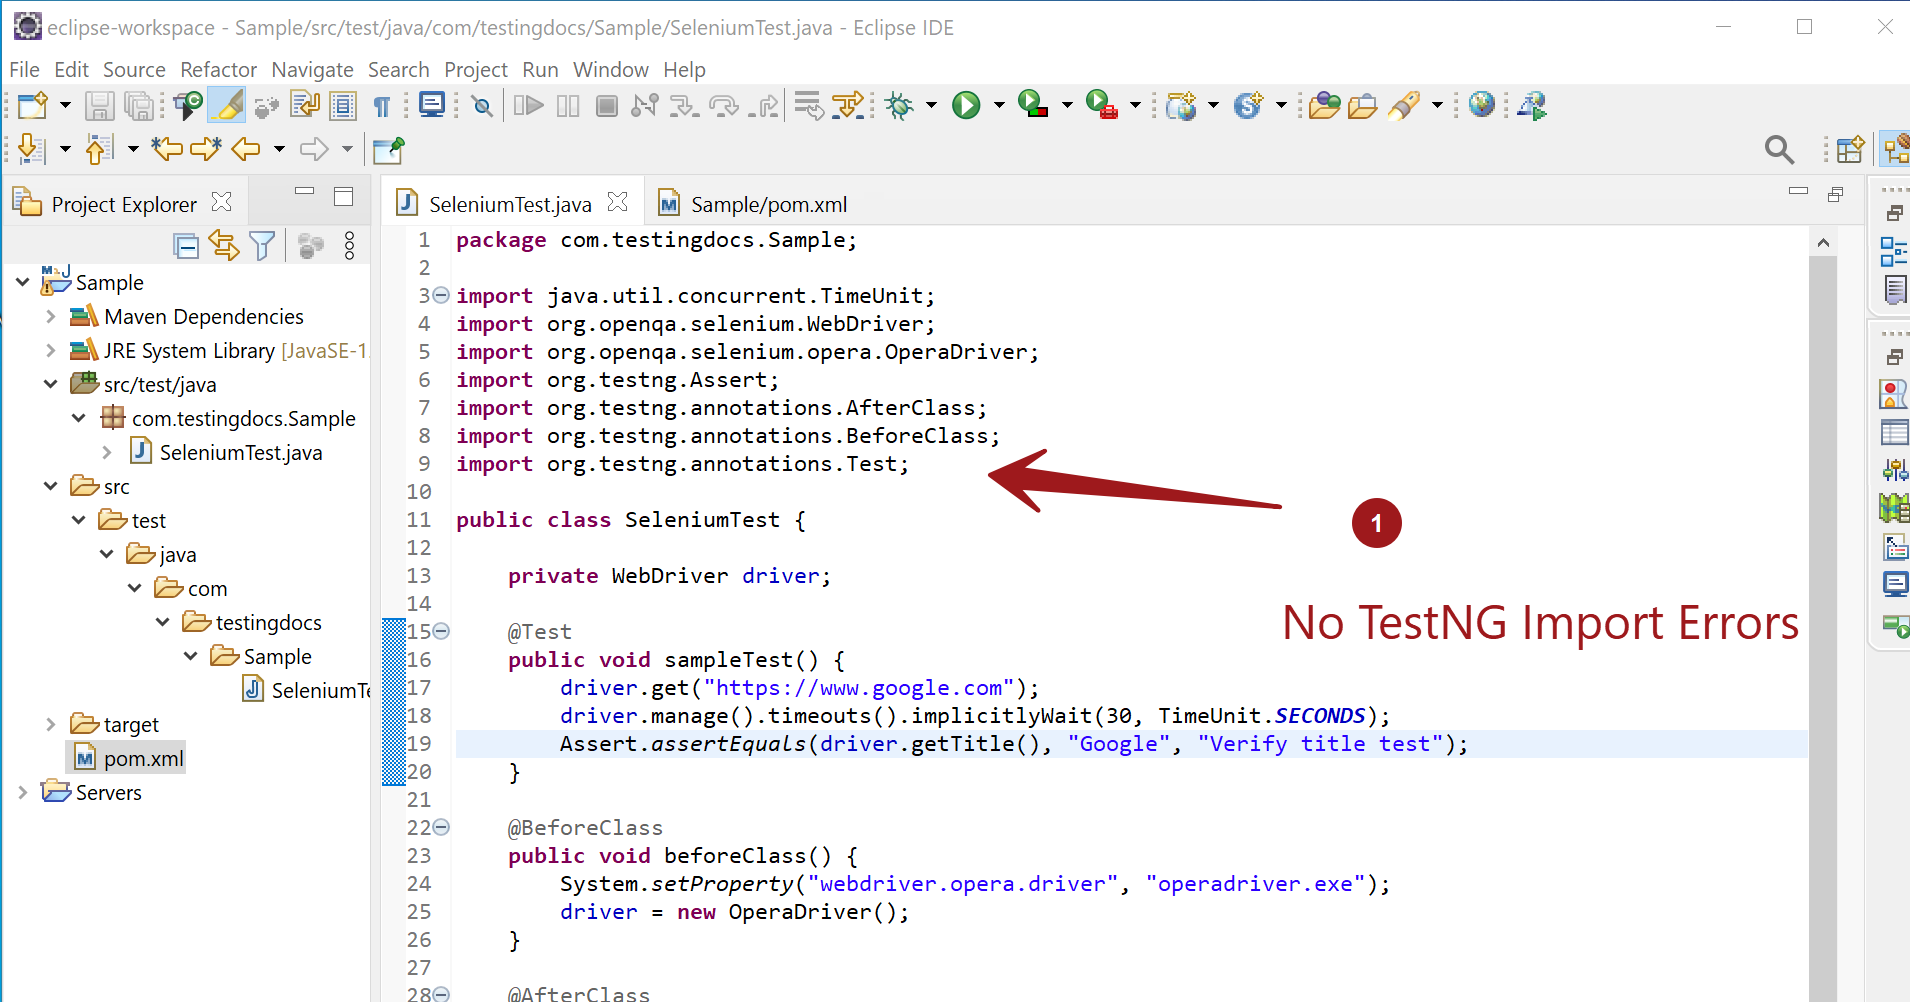

Notice that after configuring the TestNG in the project pom file, project errors related to TestNG are gone.