

Overview
Restore point is a system protection feature that enables the computer to revert to its previous state to avoid or undo unwanted system changes.
A restore point is a stored state or snapshot of computer files taken at a particular point in time. This feature is similar to taking a Snapshot of a Virtual machine.
Environment
Windows 11 OS
Create a Restore Point
The steps to create a restore point on a Windows 11 machine are as follows:
Click on the Search icon in the Taskbar. This will launch the search window.
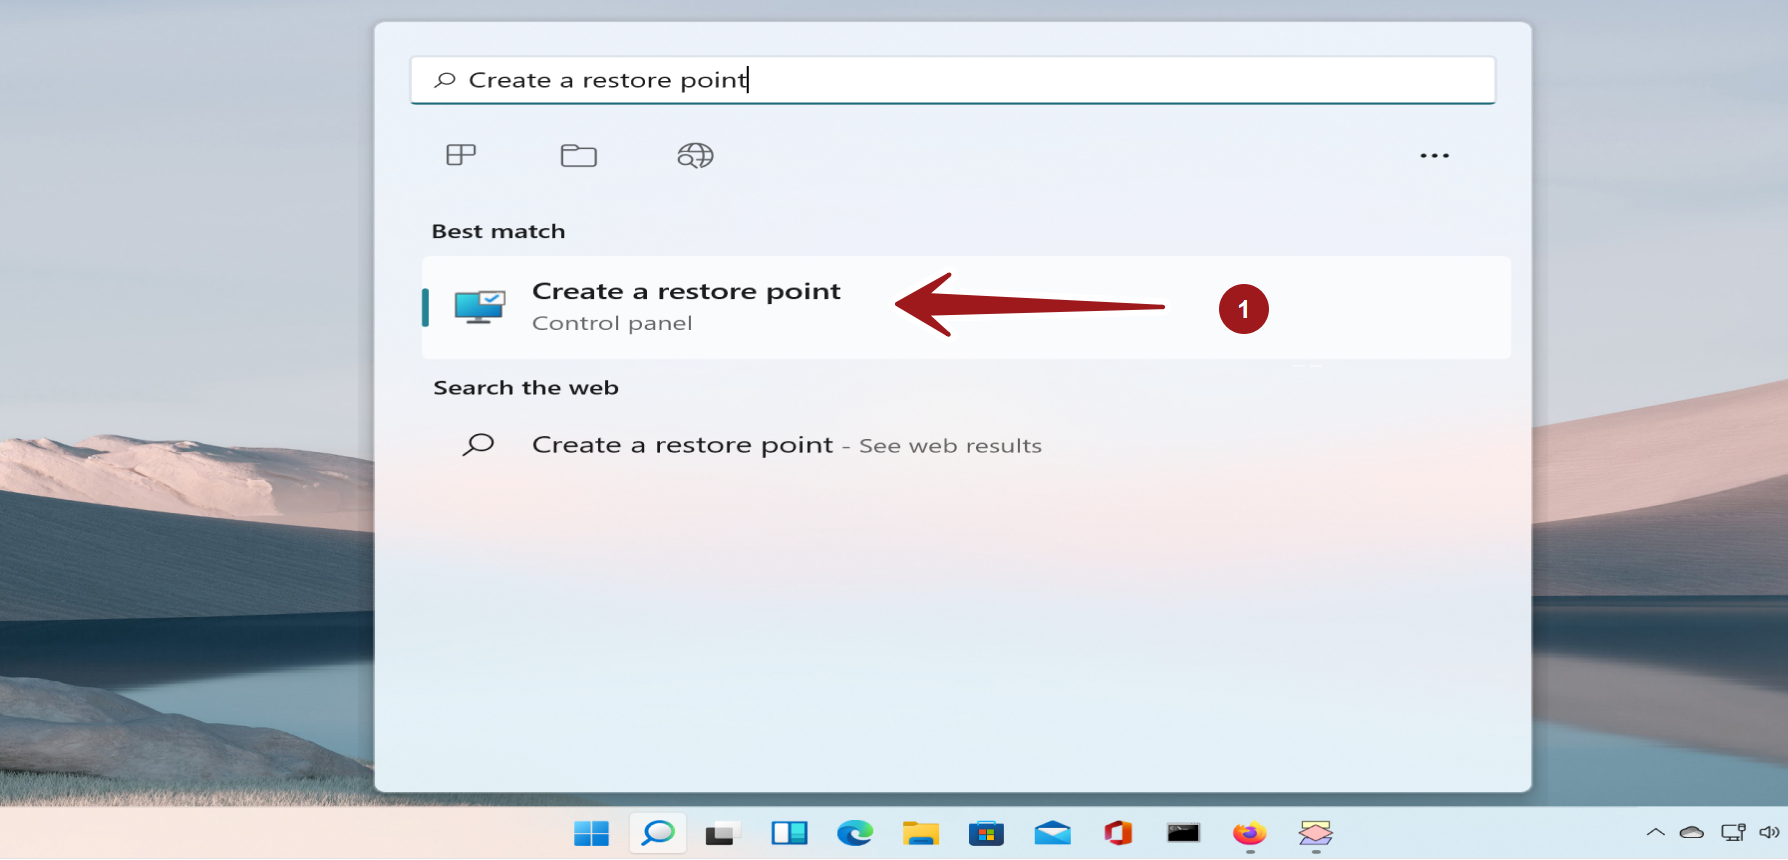

Type Create a restore point in the search bar and select the Control panel search result.
Choose the System Protection tab in the System Properties window.
We need to turn on the System protection for the disk to create a restore point. To configure the restore settings for the disk partition, Click on the Configure… button.
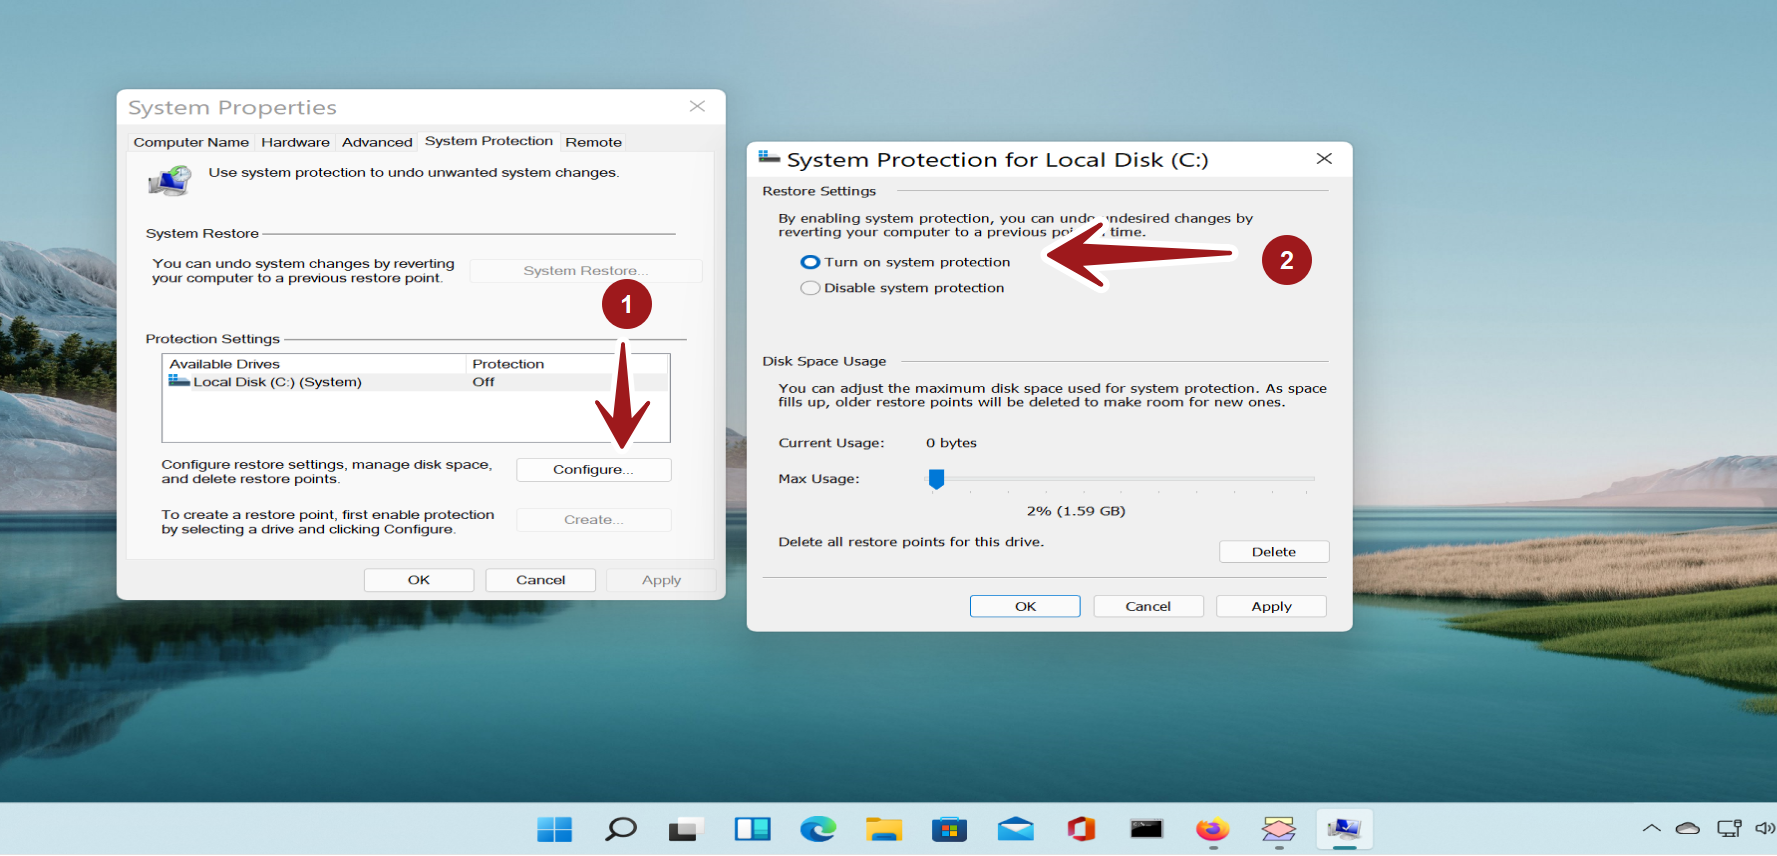

Choose the Turn on system protection radio option. Click on the Apply button to apply the settings.
Click on the OK button and return to the System Properties window.
Click on the Create… button.
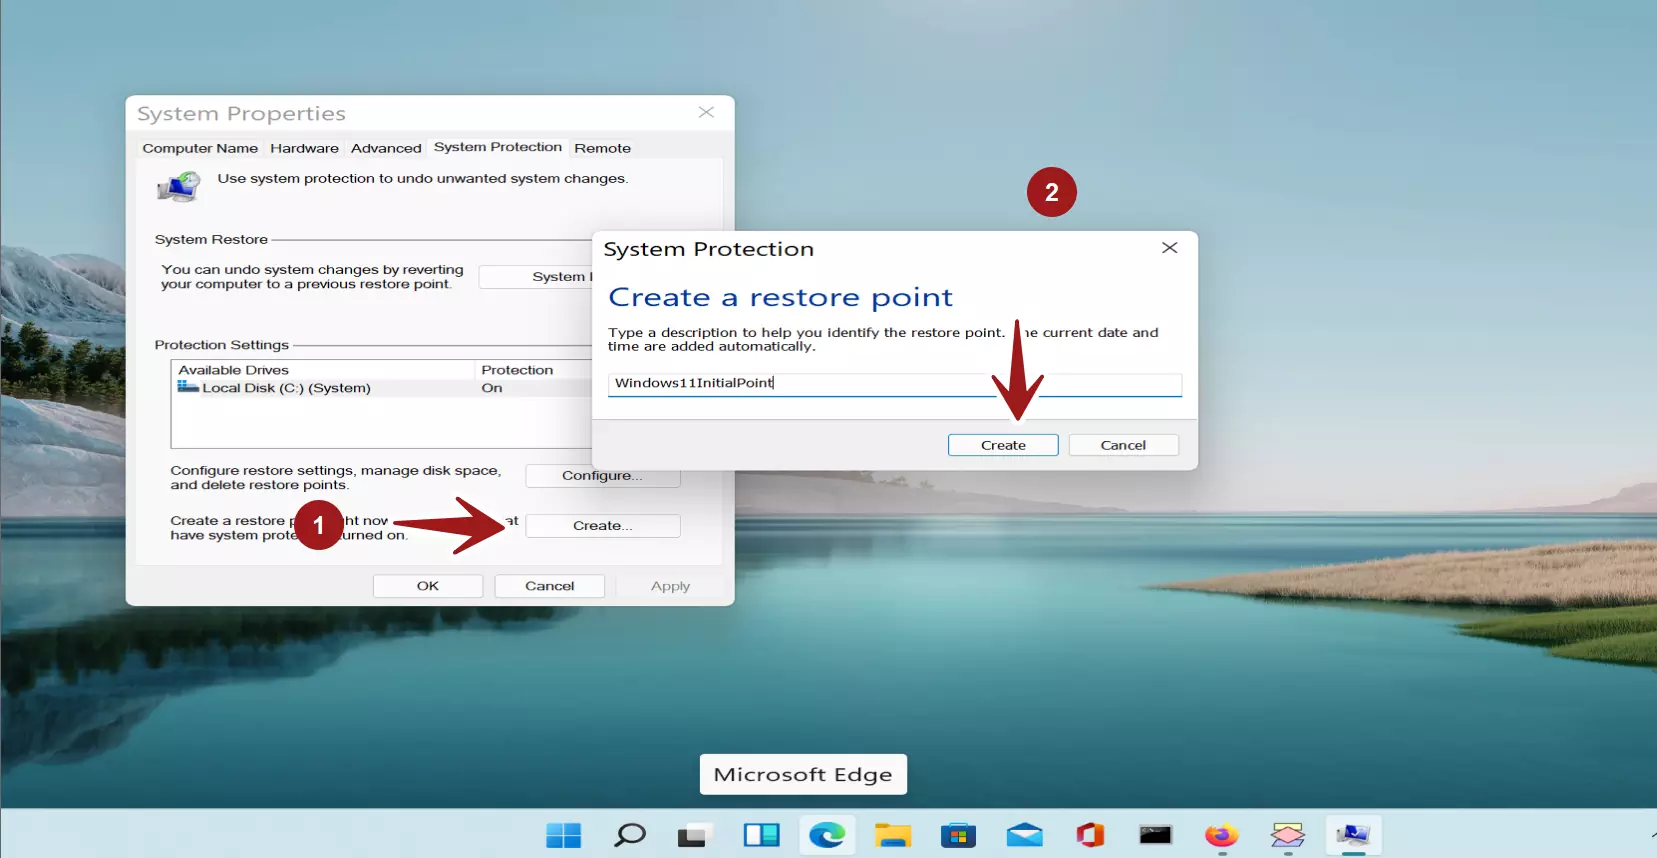

Type a description to identify the restore point. Click on the Create button. The system might take a while to create the restore point.
That’s it. We are done with creating a restore point for the Windows 11 machine. We can use the restore point to revert the computer to an earlier state. This feature is especially useful while performing destructive or negative testing on the computer that can result in unexpected results.
—
Windows 11 Tutorials
https://www.testingdocs.com/windows-11-tutorials/
More Information on Windows 11
https://www.microsoft.com/en-us/windows