

Introduction
In this post, we will learn how to run Calculator JUnit tests using Jenkins CI. Lets build a Maven project with Calculator tests and configure the project in Jenkins CI.
Calculator Tests
Sample Calculator Junit tests can be found here:
https://www.testingdocs.com/junit-calculator-test-case-example/
Jenkins
To get started with Jenkins CI :
https://www.testingdocs.com/getting-started-with-jenkins/
Create Maven Project
Create Maven project using quickstart archetype:
https://www.testingdocs.com/create-quickstart-maven-project-in-eclipse-ide/
Configure Maven Project in Jenkins
Launch Jenkins.
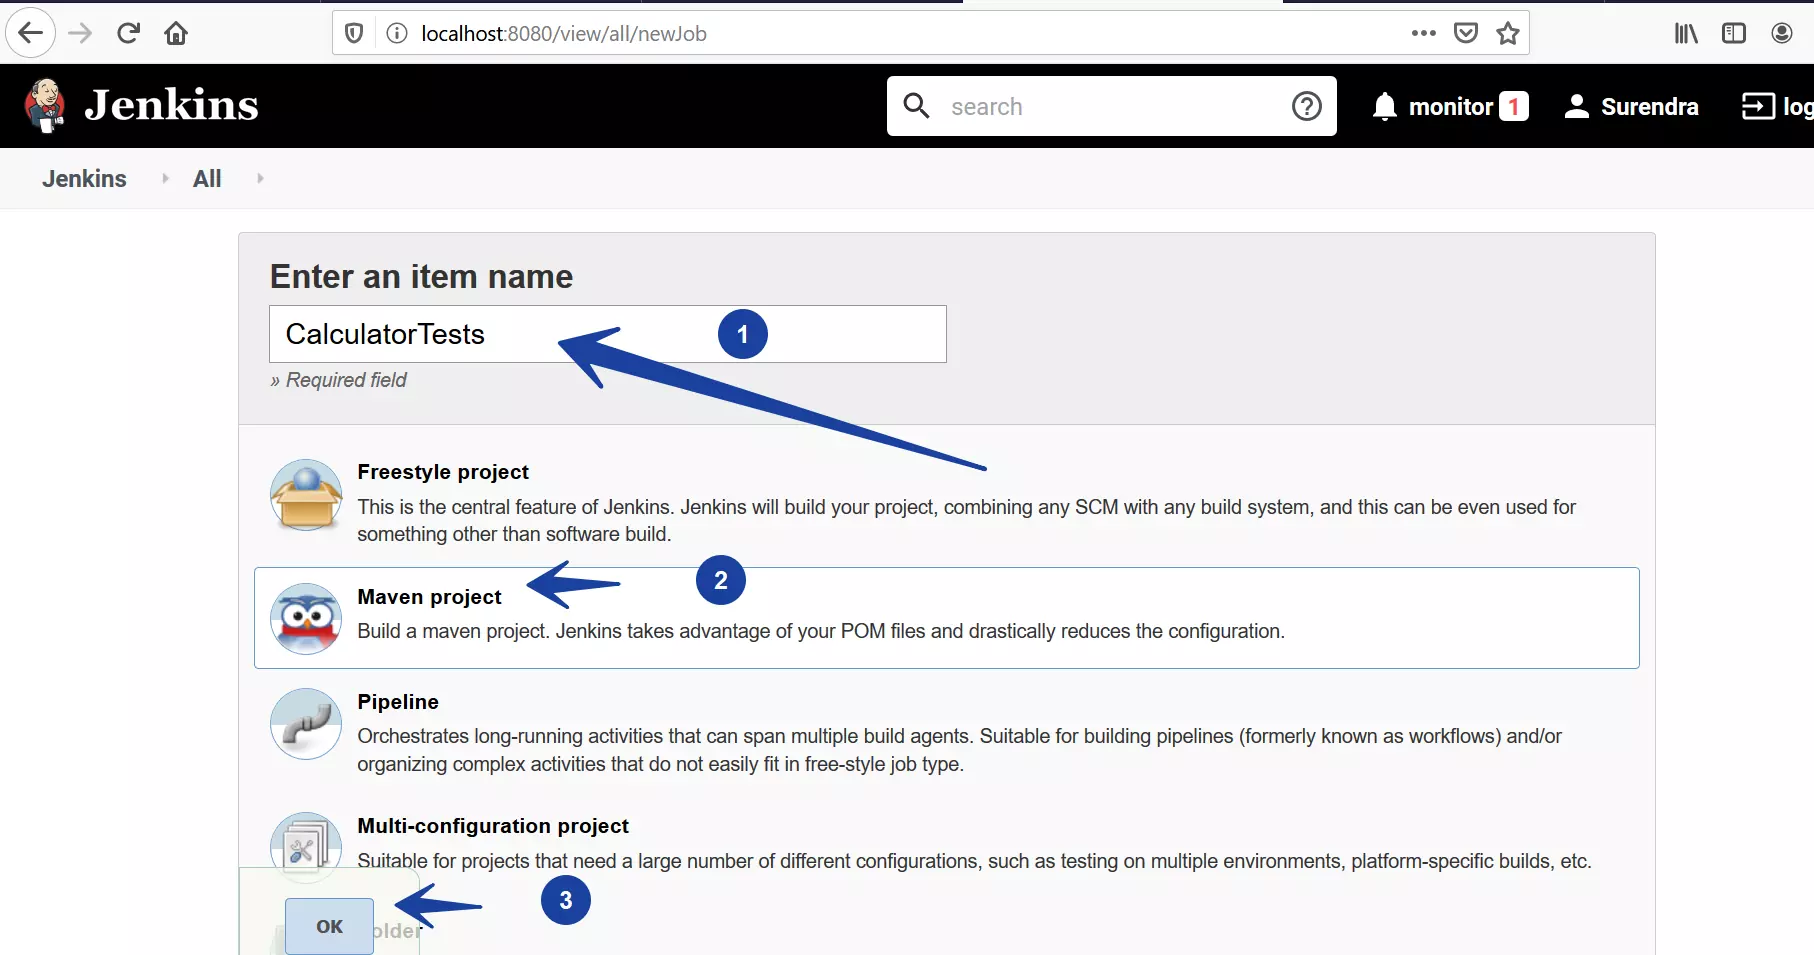
Create New Project >> Click on New Item

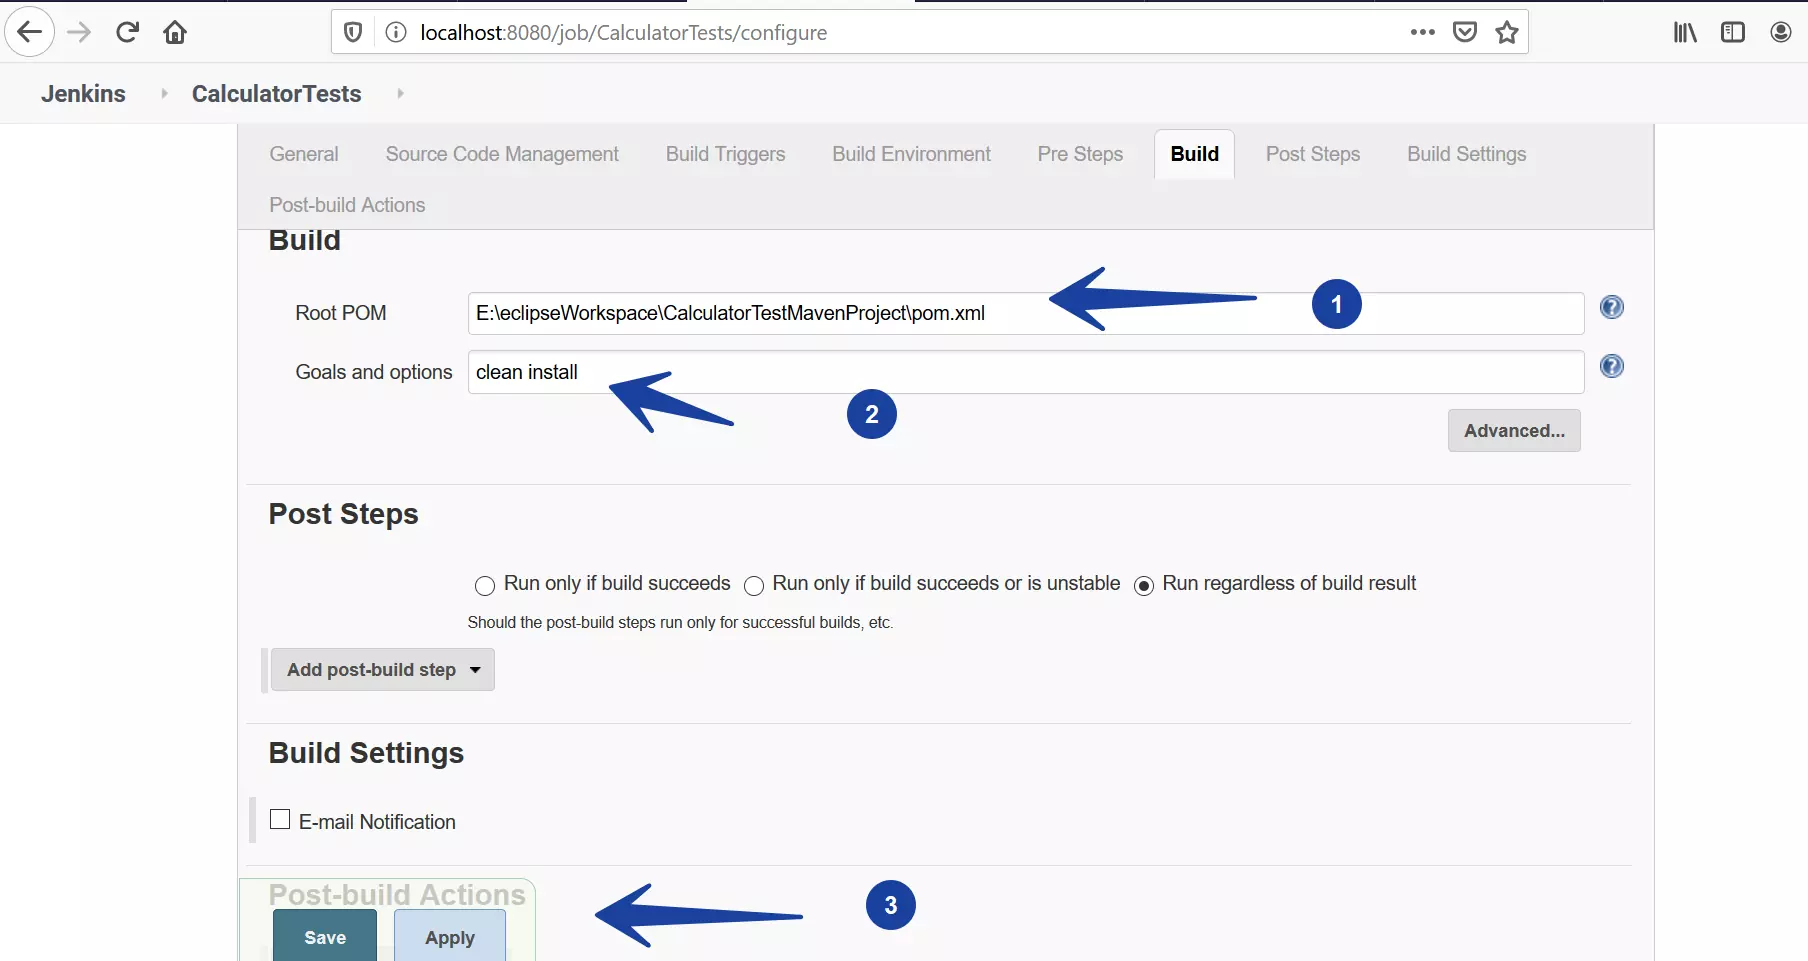
POM.xml
Configure the project details.
Specify pom.xml in the project. Specify the Maven goals for the build like clean install
Click on the Save button.

Build the Project
Once your are done with the configuration, click on the Build now link to build the project. Alternatively, you can schedule the build project.


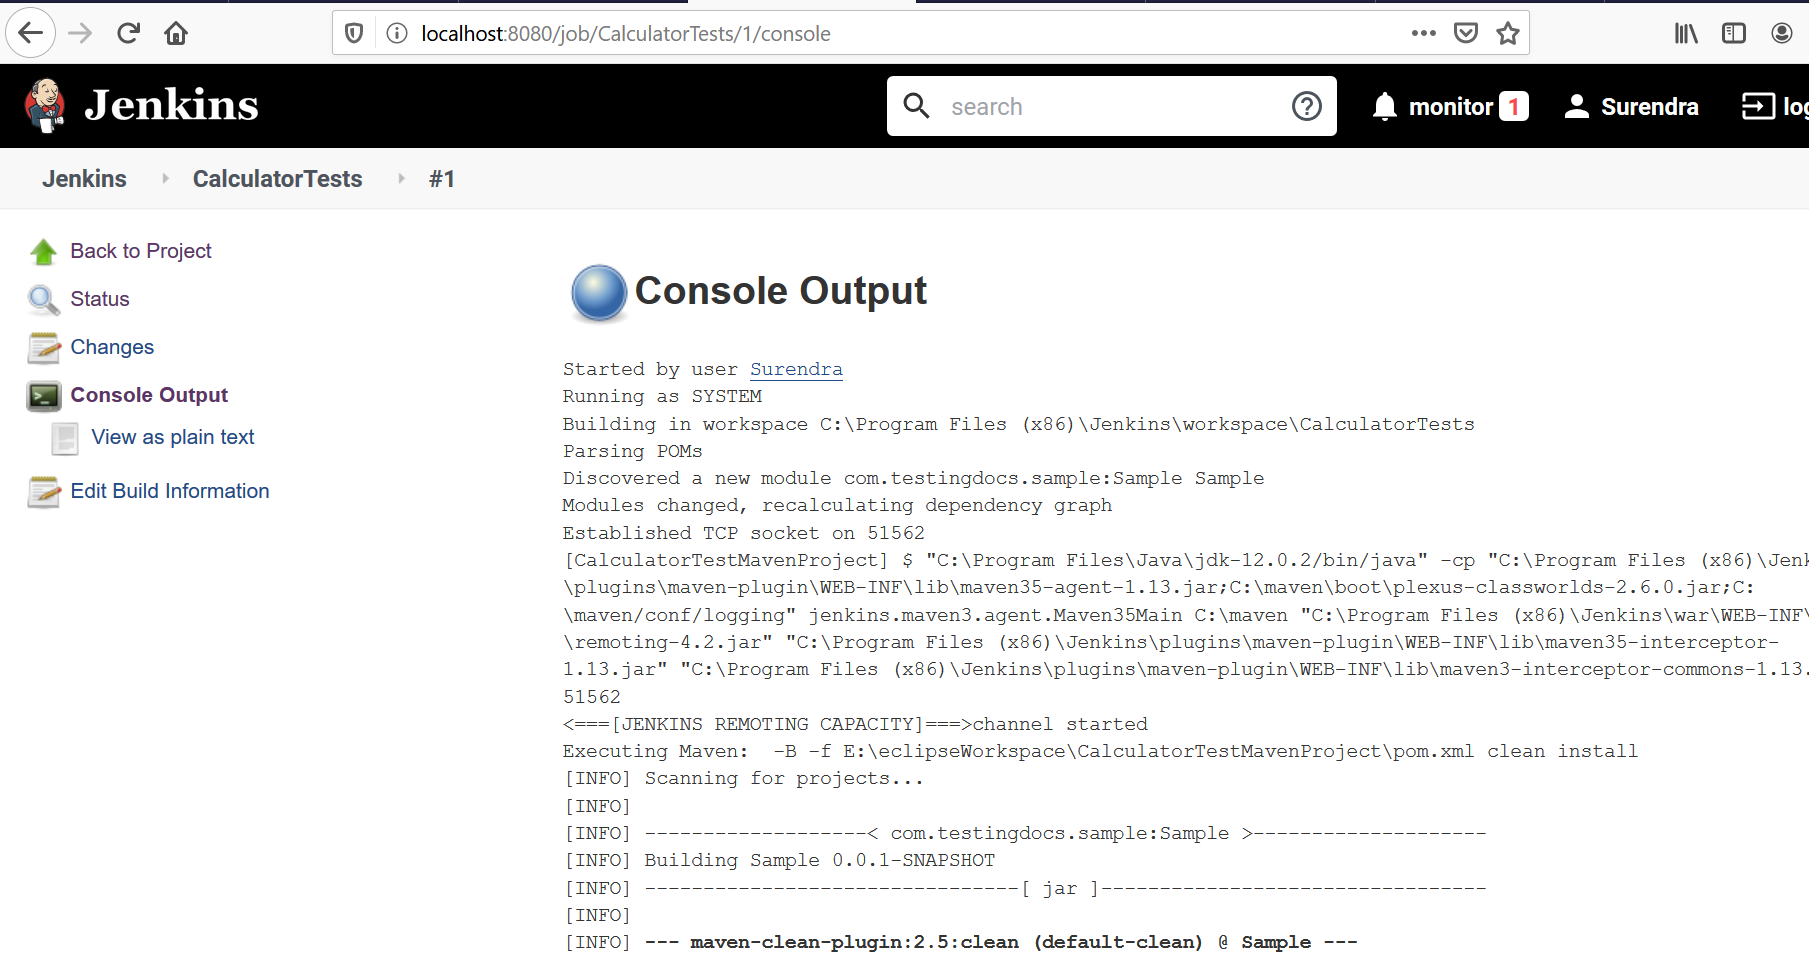
Console Output
The console output windows displays the build information of the project.

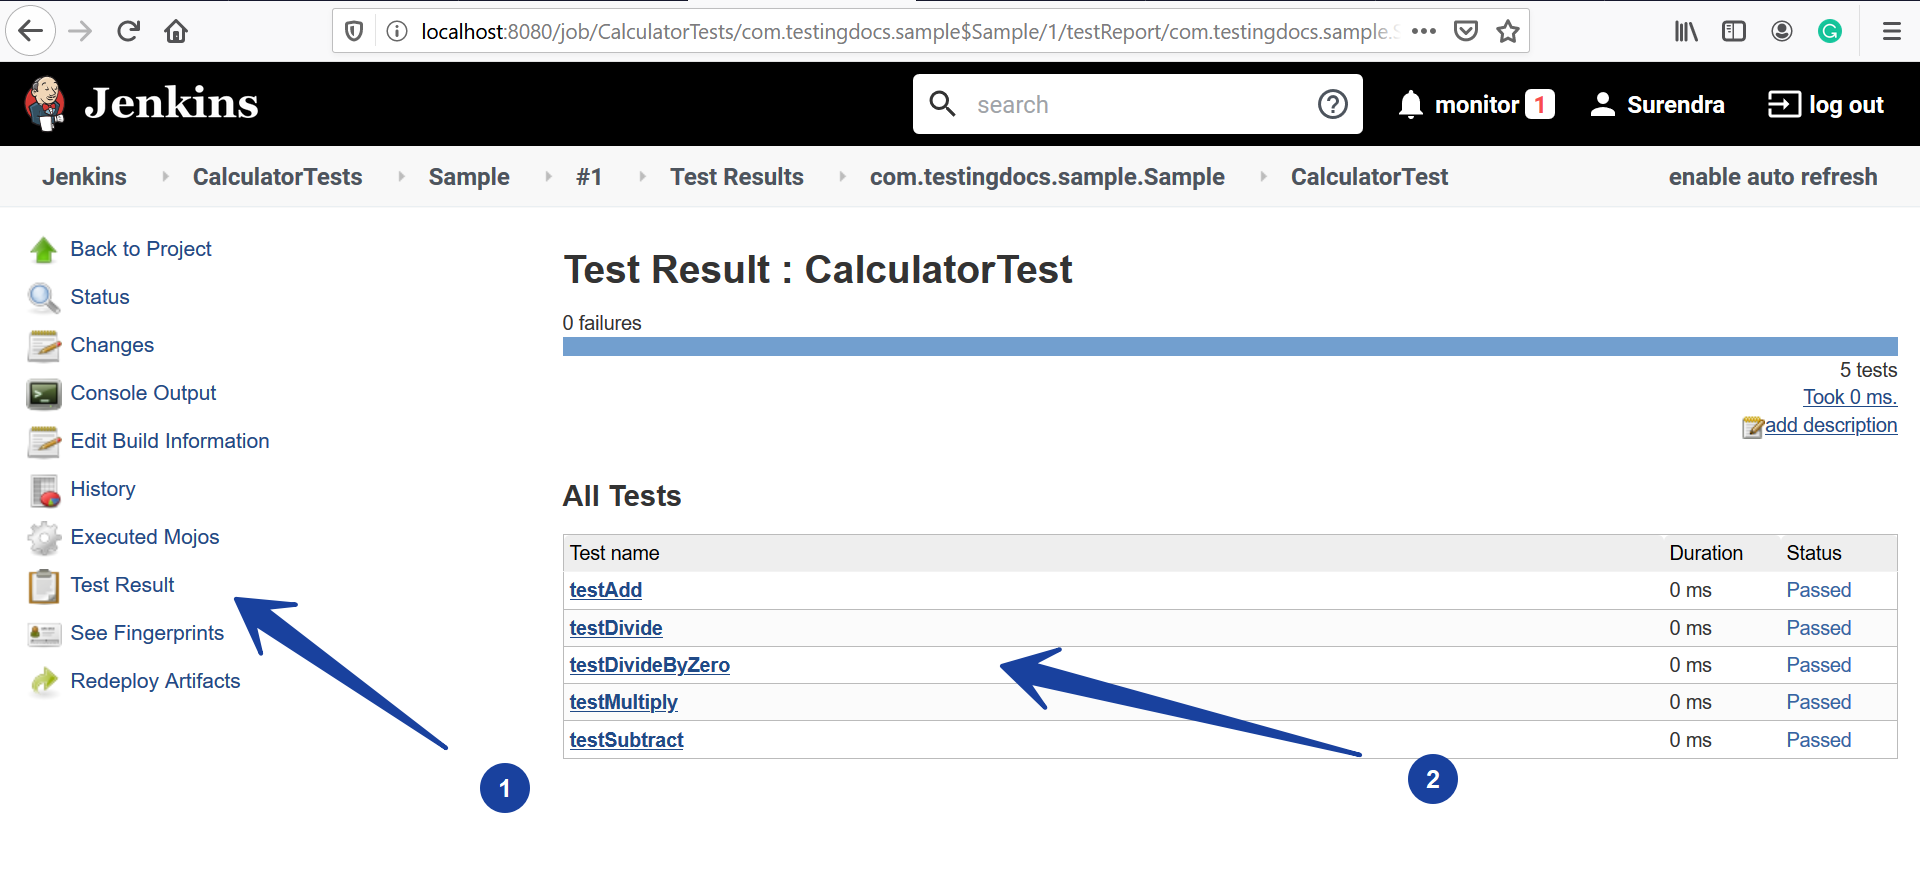
Test Result
Click on the Test Result link to view the JUnit test results of the build.

Jenkins Tutorials on this website can be found at:
https://www.testingdocs.com/jenkins-tutorial
For more details on the Jenkins CI, visit the official website at: