

Overview
In this tutorial, we will learn the steps to uninstall Apache NetBeans IDE on Windows operating system.
Proper uninstall would remove the installation files and other settings gracefully.
Environment
- Apache NetBeans IDE
- Windows 11 Operating System
Steps to Uninstall
A running instance of Apache NetBeans IDE acquires a lock and may prevent the uninstall process. So, close NetBeans IDE prior to the un-installation process.
Steps to uninstall the Apache NetBeans IDE are as follows:
- Click on the Search icon in the Toolbar
- Search for Control Panel
- Click on the Control Panel App.
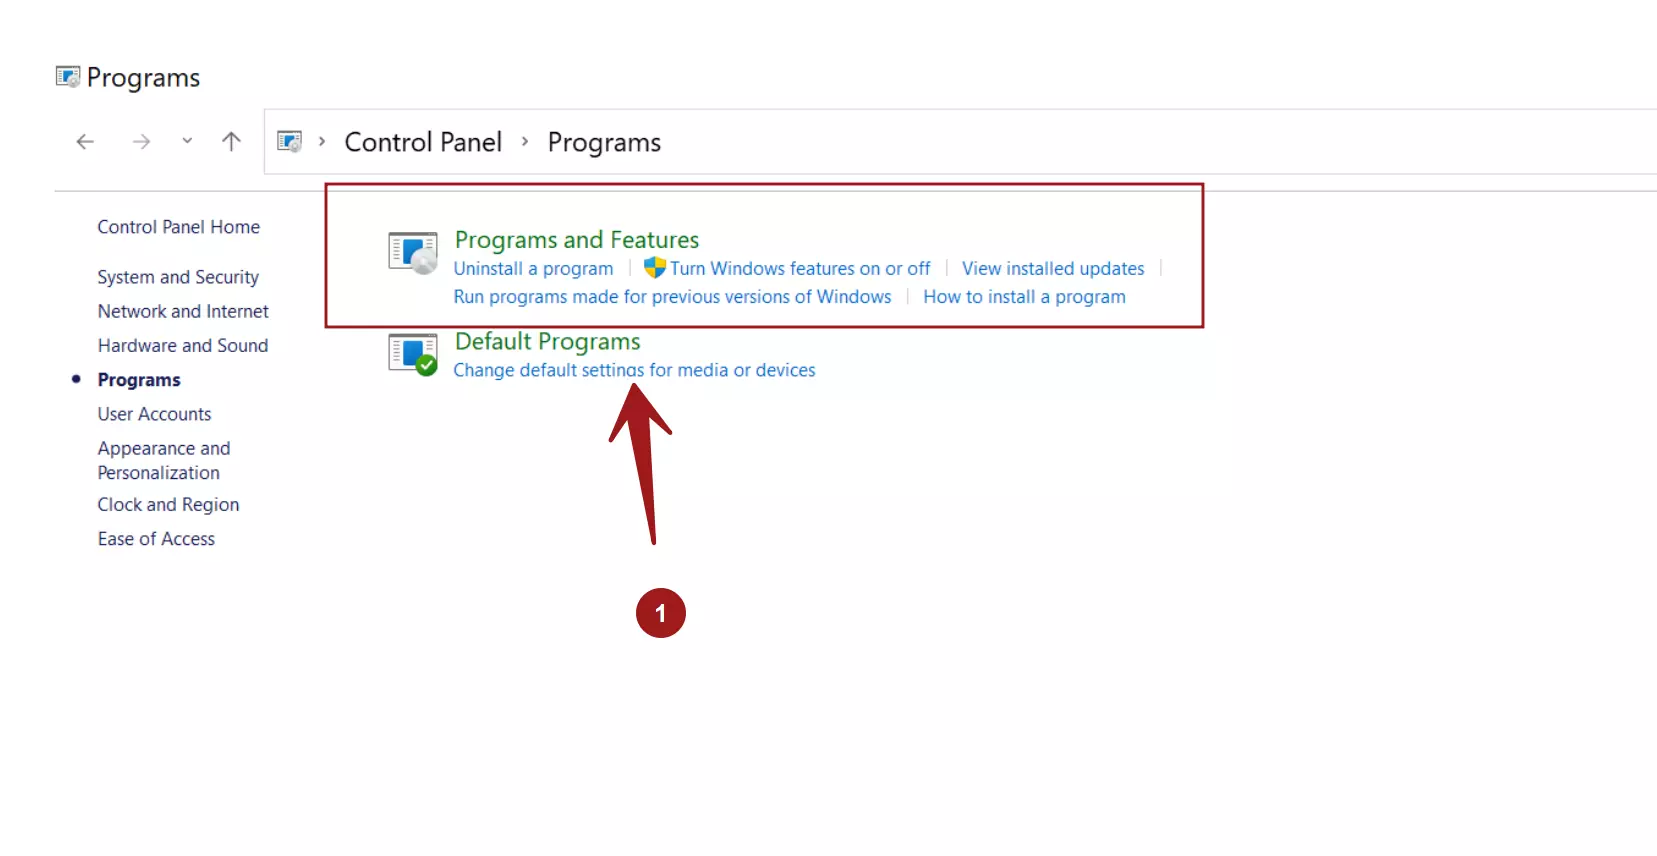
- Click on the Programs link.
- Click on the Programs and Features icon.

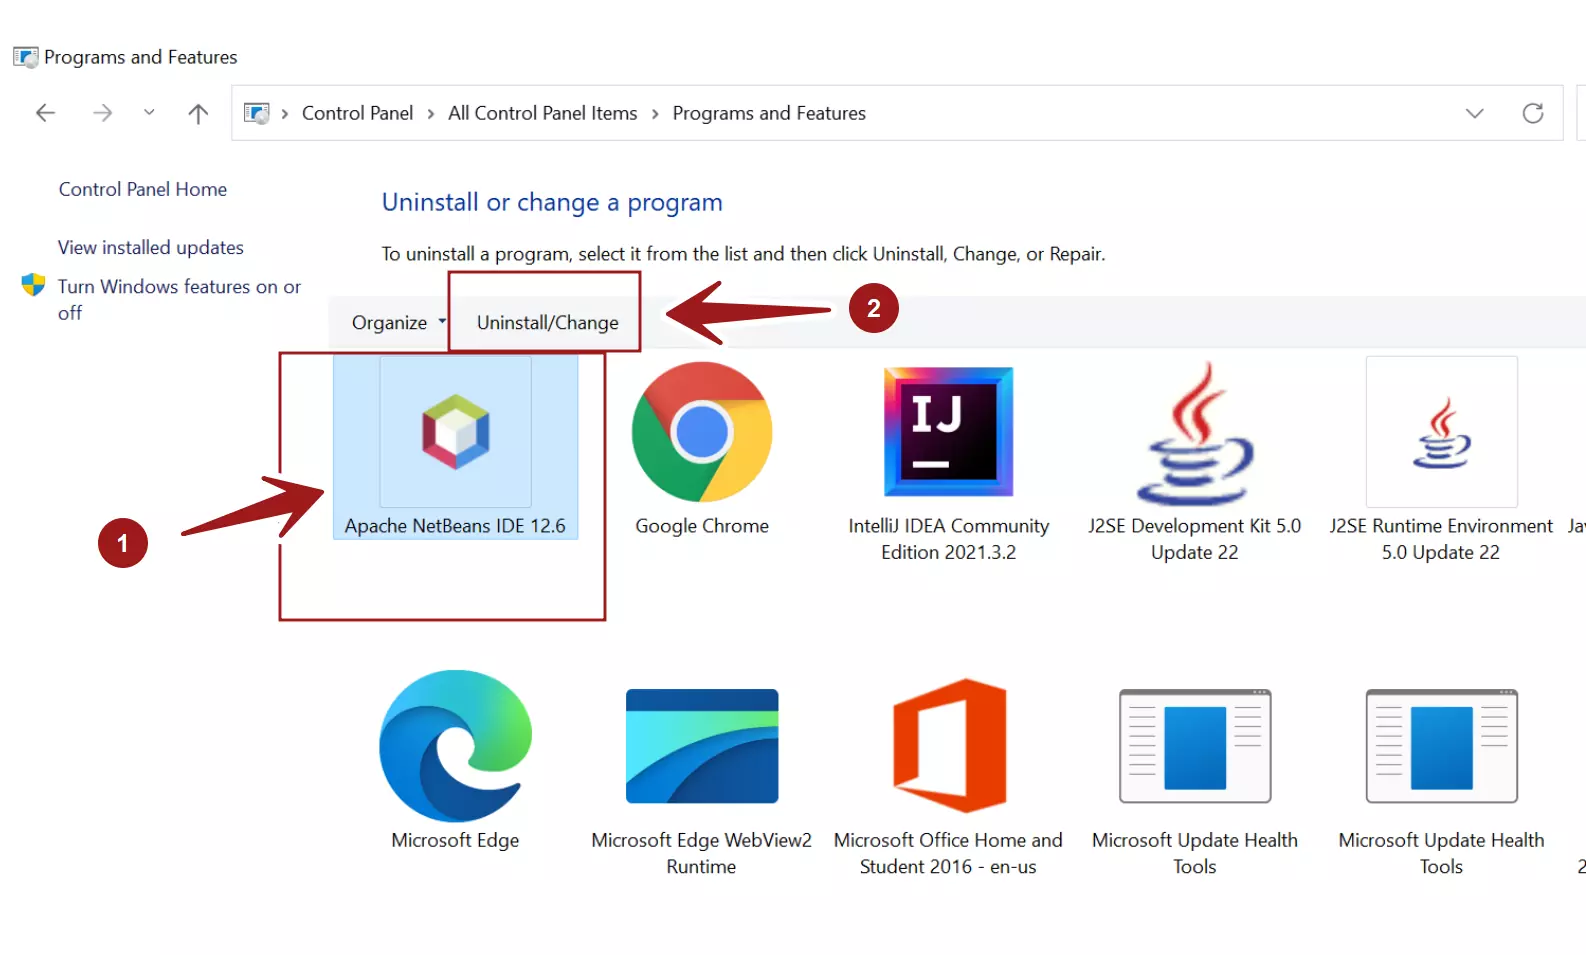
Select the Apache NetBeans IDE application and click on the Uninstall/Change link. This will launch the uninstall process.
We can change the display icons view by clicking on the drop-down beside the help icon.
For example to Small, Medium, Large icons, List, Tiles or Detail content, etc.

We can change the display icons view by clicking on the drop-down beside the help icon. For example to Small, Medium, Large icons, List, Tiles or Detail content, etc.
This will prompt UAC elevation dialog. Click Yes on the prompt window.
Click on the Uninstall button. This will uninstall the application and delete all the install files and settings.
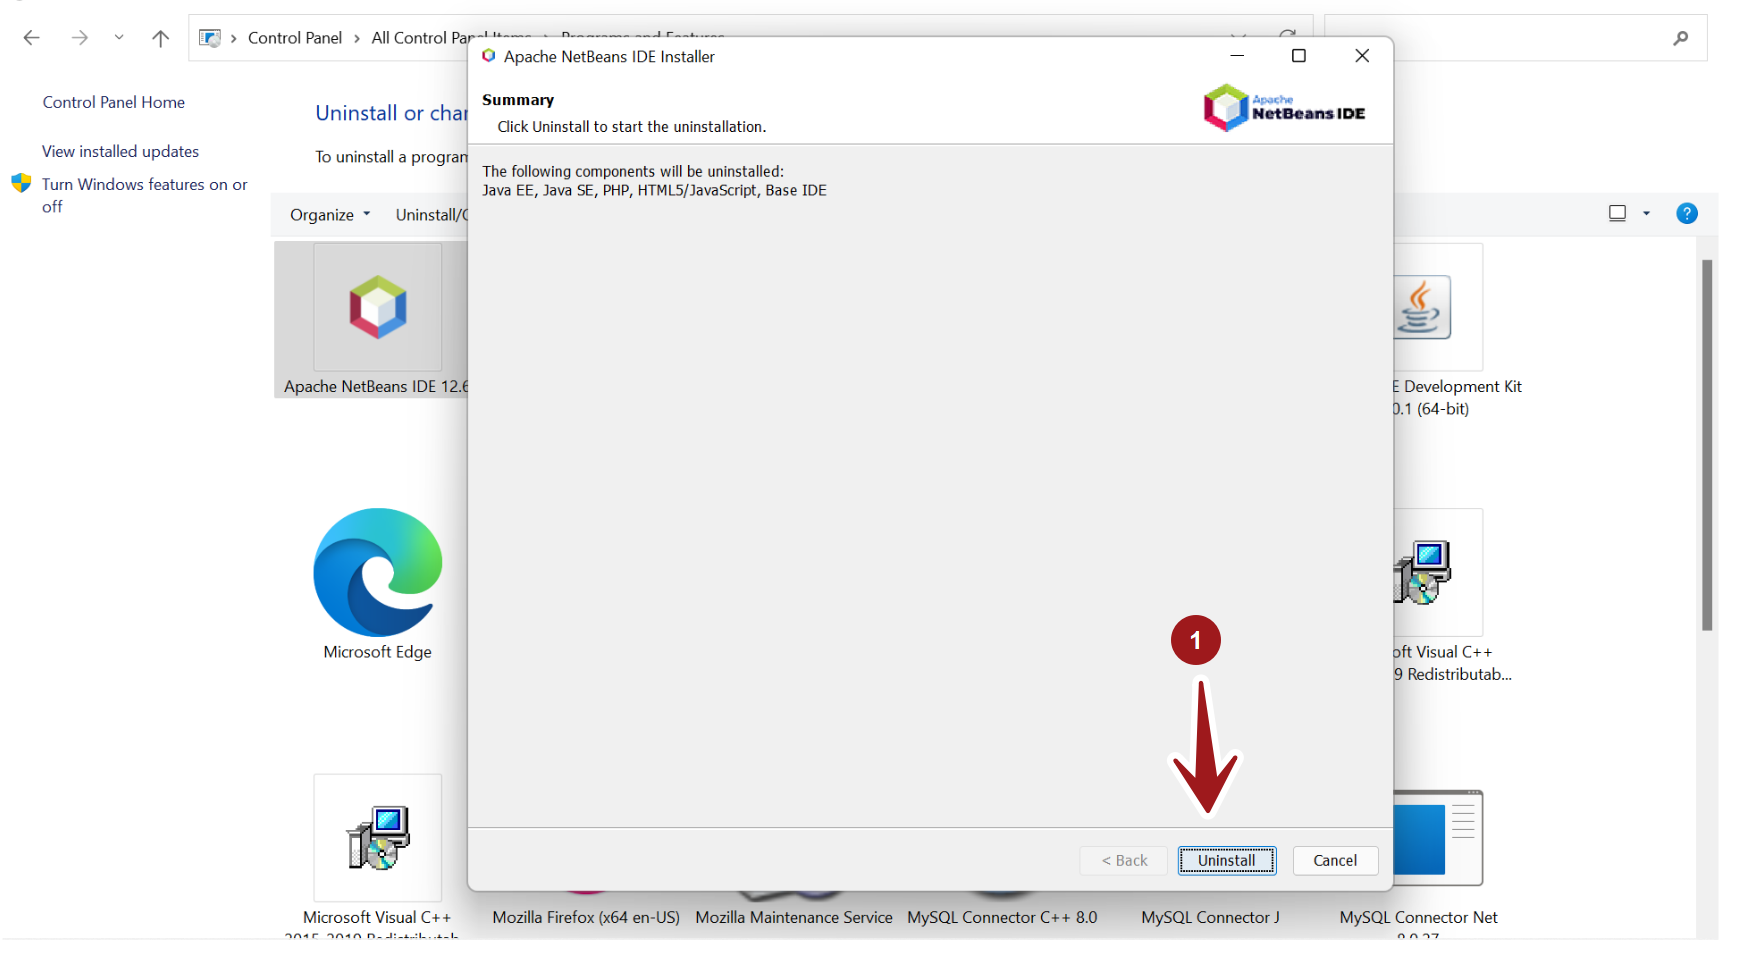

The progress bar displays the status and the percentage indicator of the uninstall process.
Click on the Finish button to complete the Uninstall process. Save your work and restart the machine.
Uninstall.exe
Locate the uninstall.exe to uninstall the IDE tool. For example, the default path to the uninstaller :
C:\Program Files\NetBeans-<version>\uninstall.exe
This will launch the uninstall wizard screen.
That’s it. We have successfully uninstalled Apache NetBeans IDE on the Windows system.
—
NetBeans IDE Tutorials
NetBeans tutorials on this website can be found at:
https://www.testingdocs.com/apache-netbeans-ide-tutorials/
More Information on NetBeans IDE, please visit the official website: