

Overview
In this tutorial, we will learn the steps to uninstall IntelliJ IDEA IDE on Windows 11 operating system. Proper uninstall will remove the installation files and other settings gracefully.
Steps
Steps to uninstall the IntelliJ software are as follows:
- Click on the Search icon in the Toolbar
- Search for Control Panel
- Click on the Control Panel App.
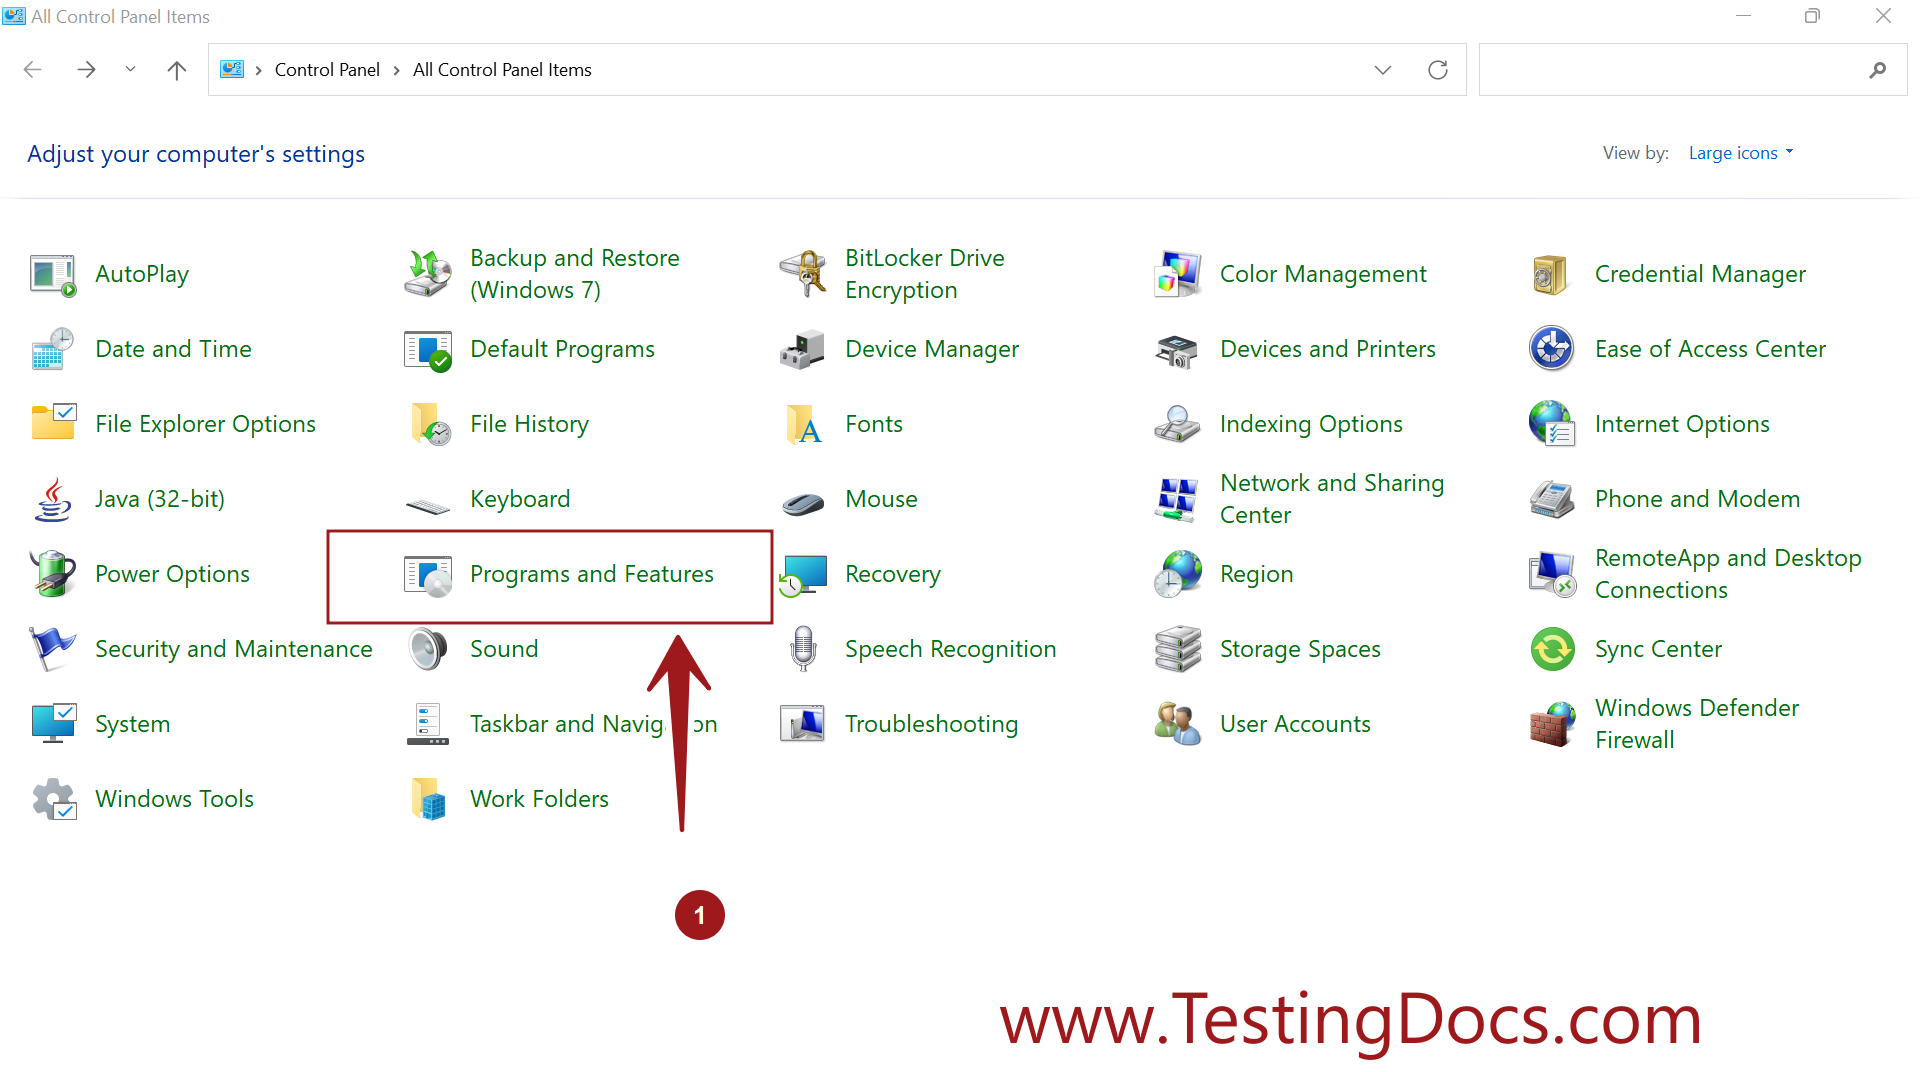
- Click on the Programs link.
- Click on the Programs and Features icon.

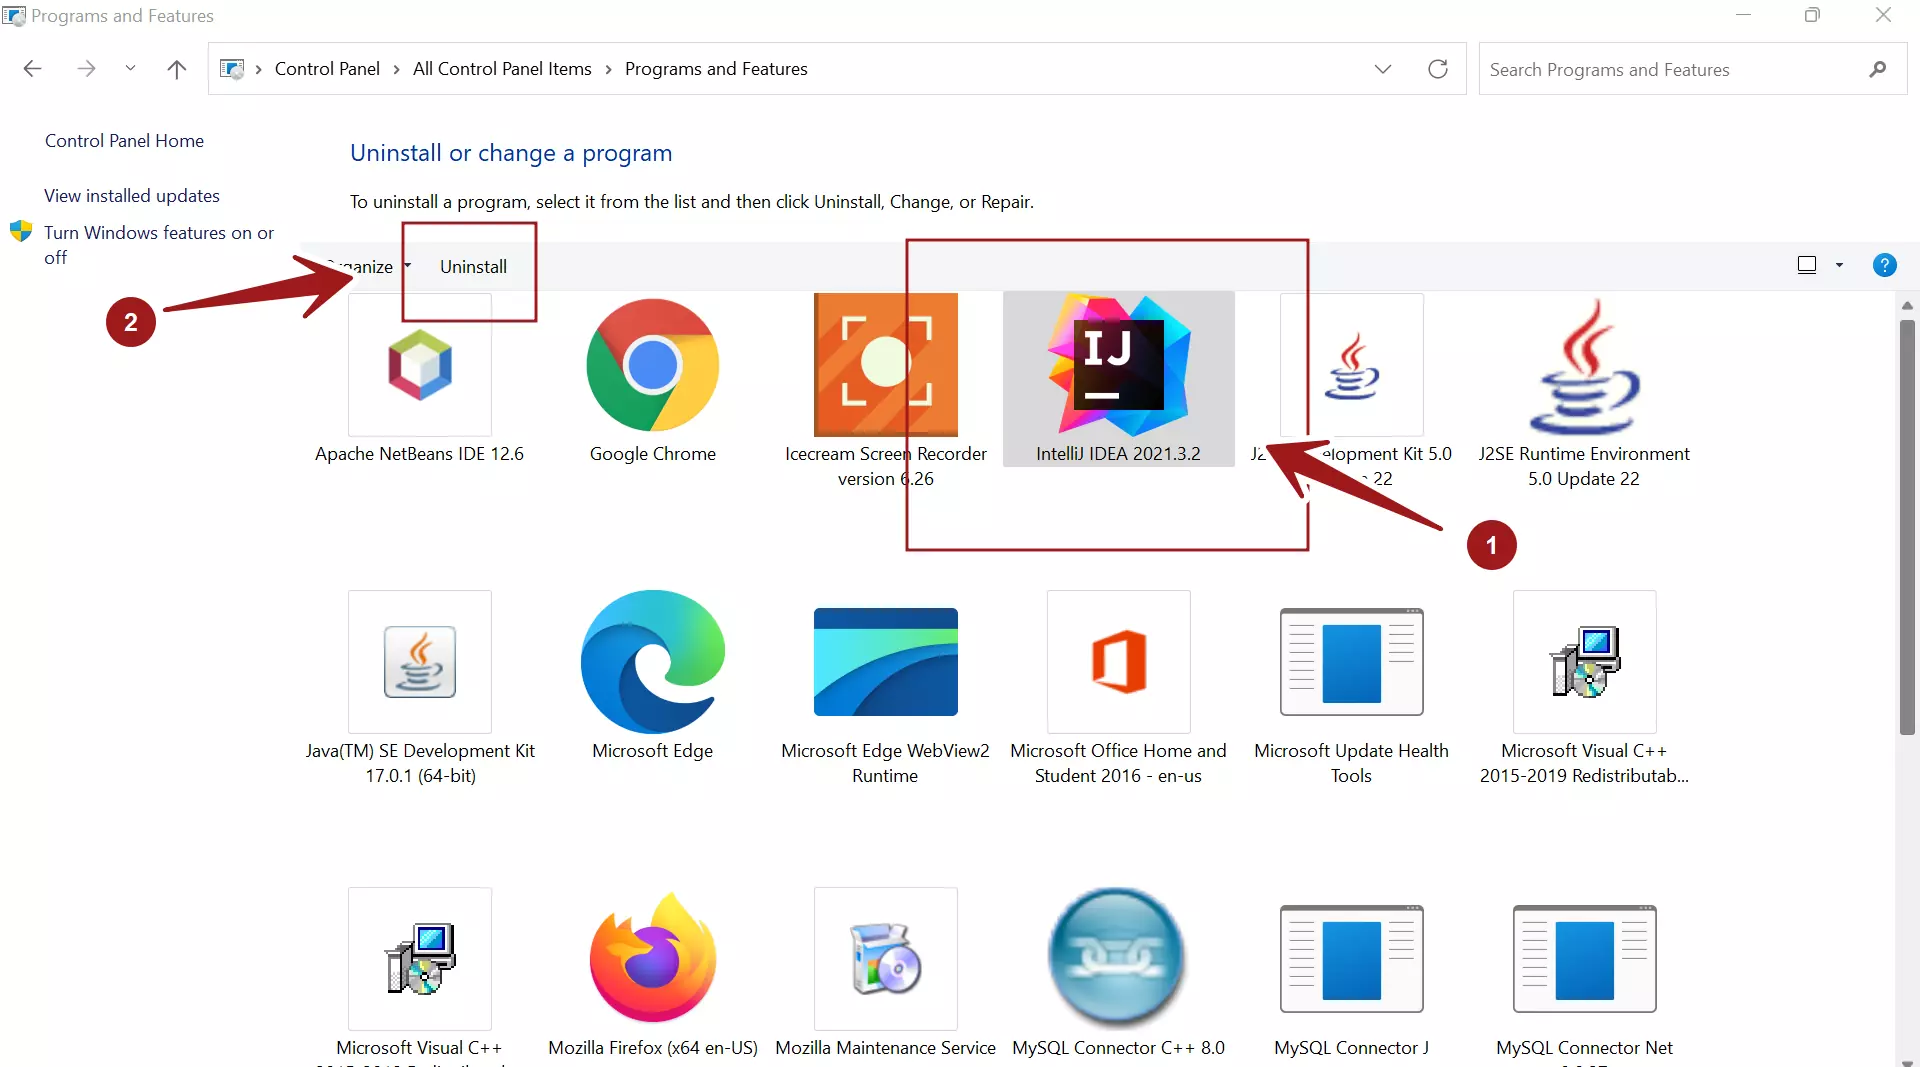
Select the IntelliJ IDEA application and click on the Uninstall link.
We can change the display icons view by clicking on the drop-down beside the help icon.
For example to Small, Medium, Large icons, List, Tiles or Detail content, etc.

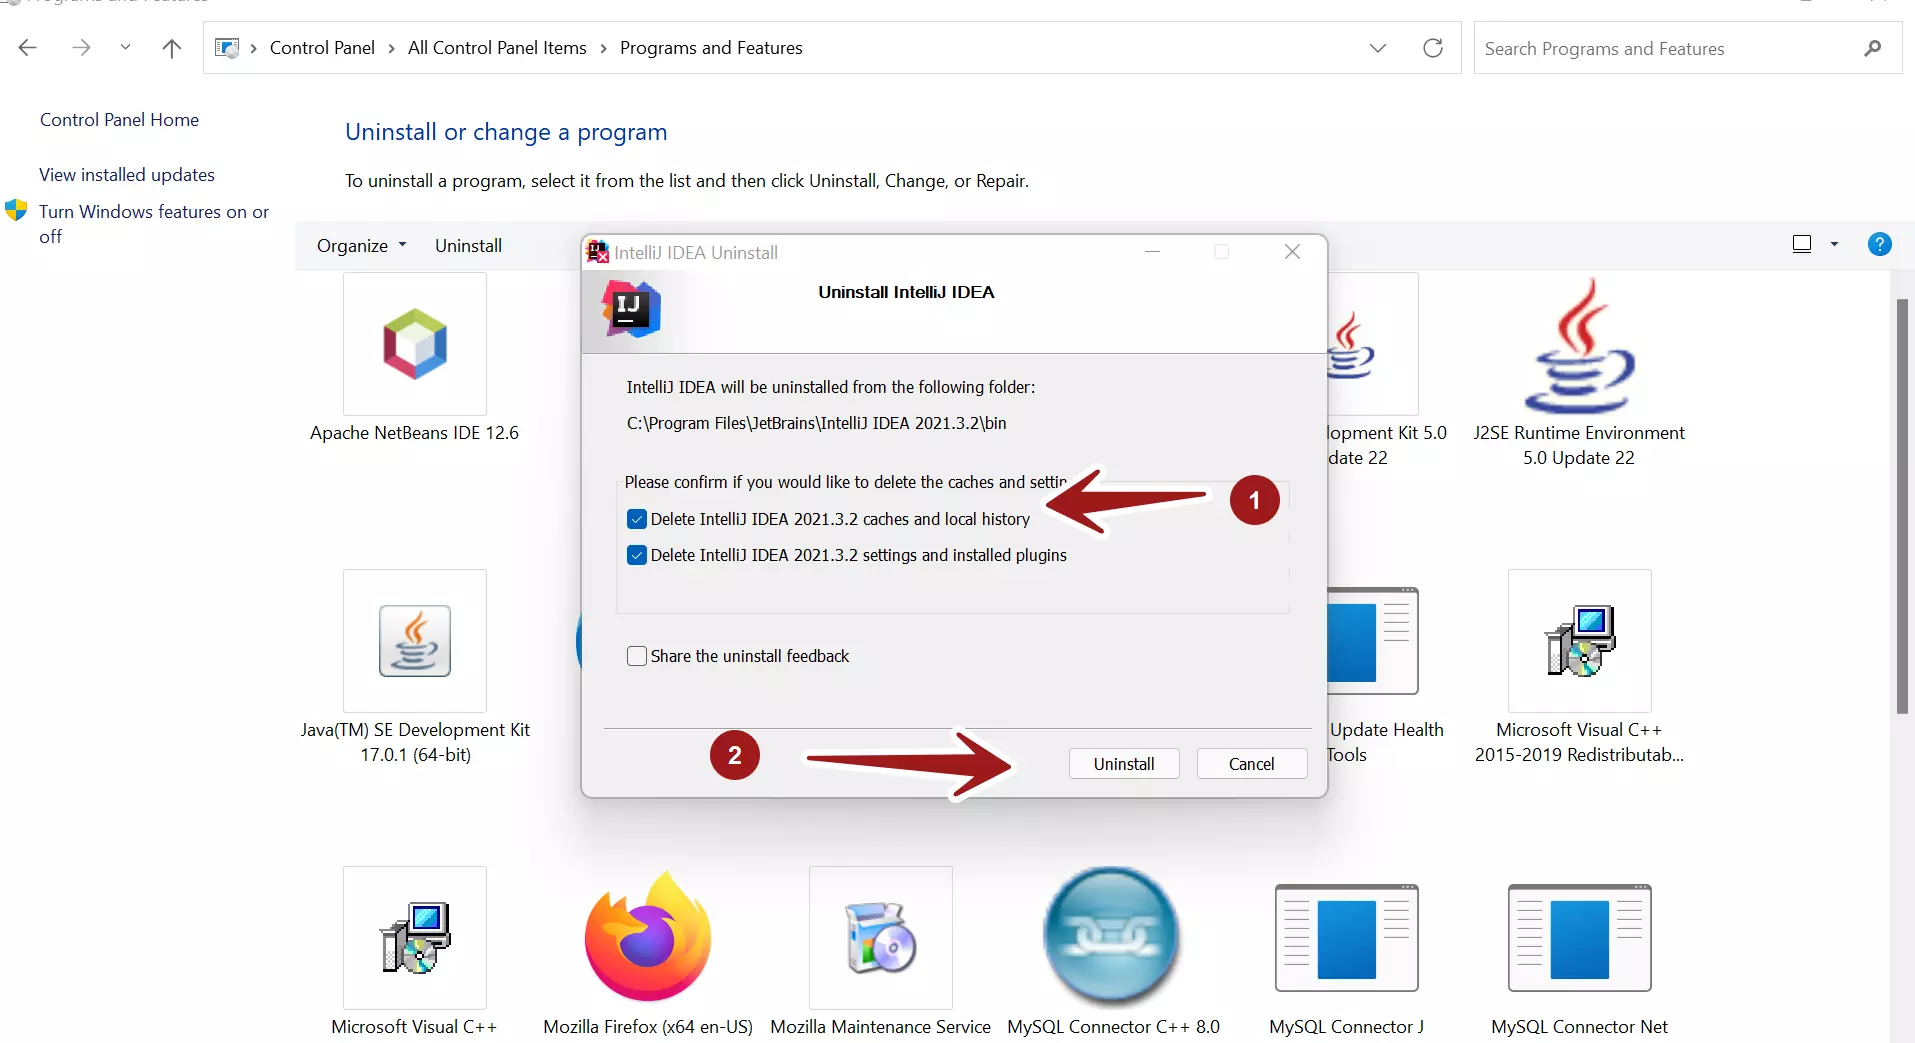
For clean uninstall select the checkboxes options to delete caches and local history, settings, and installed plugins.
- Delete IntelliJ IDEA caches and local history
- Delete IntelliJ IDEA settings and installed plugins
In case, you are planning to reinstall again, you can leave these options unchecked.
Optionally, you can share the uninstall feedback with the organization.
Click on the Uninstall button. This will uninstall the application and delete all the install files and settings.

Click on the Close button to complete the Uninstall process. Save your work and restart the machine.
That’s it. We have successfully uninstalled IntelliJ IDEA IDE on the Windows 11 machine.
We can reinstall the tool and follow the install process.
—
IntelliJ IDEA Tutorials
IntelliJ IDE tutorials on this website can be found at:
https://www.testingdocs.com/intellij-ide-tutorials
For more information on IntelliJ IDE visit the official website:
https://www.jetbrains.com/idea