

Overview
In this tutorial, we will learn the steps involved to uninstall Java on Windows 11 operating system. The uninstall steps depend on the install method.
- Installed through Java/JDK installer
- Installed through JDK compressed archive Package
Side note: We can just change the JAVA_HOME to point the another Java install on the machine. There is no need to uninstall Java on the machine if your are switching JDKs.
Below are the steps to uninstall Java from the machine.
Uninstall Java
These steps are applicable for Java/JDK installed using installer.
Open Control Panel
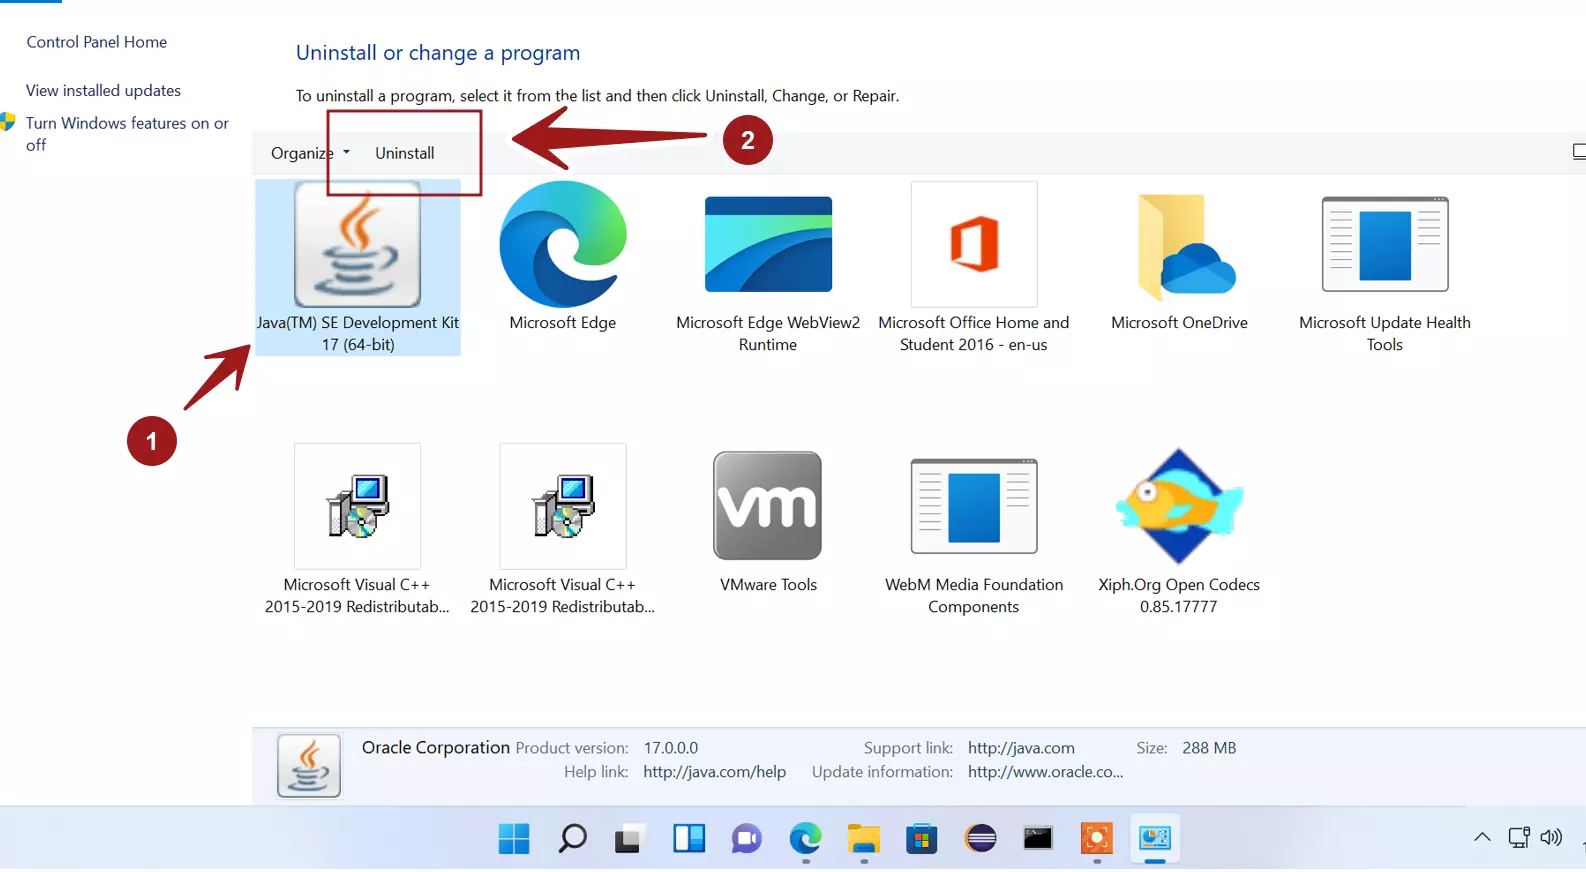
Control Panel >> Programs >> Programs and Features screen
Check for Java JDK program entry in this screen.
Select the Java SE Development Kit <version> and click on the Uninstall link.

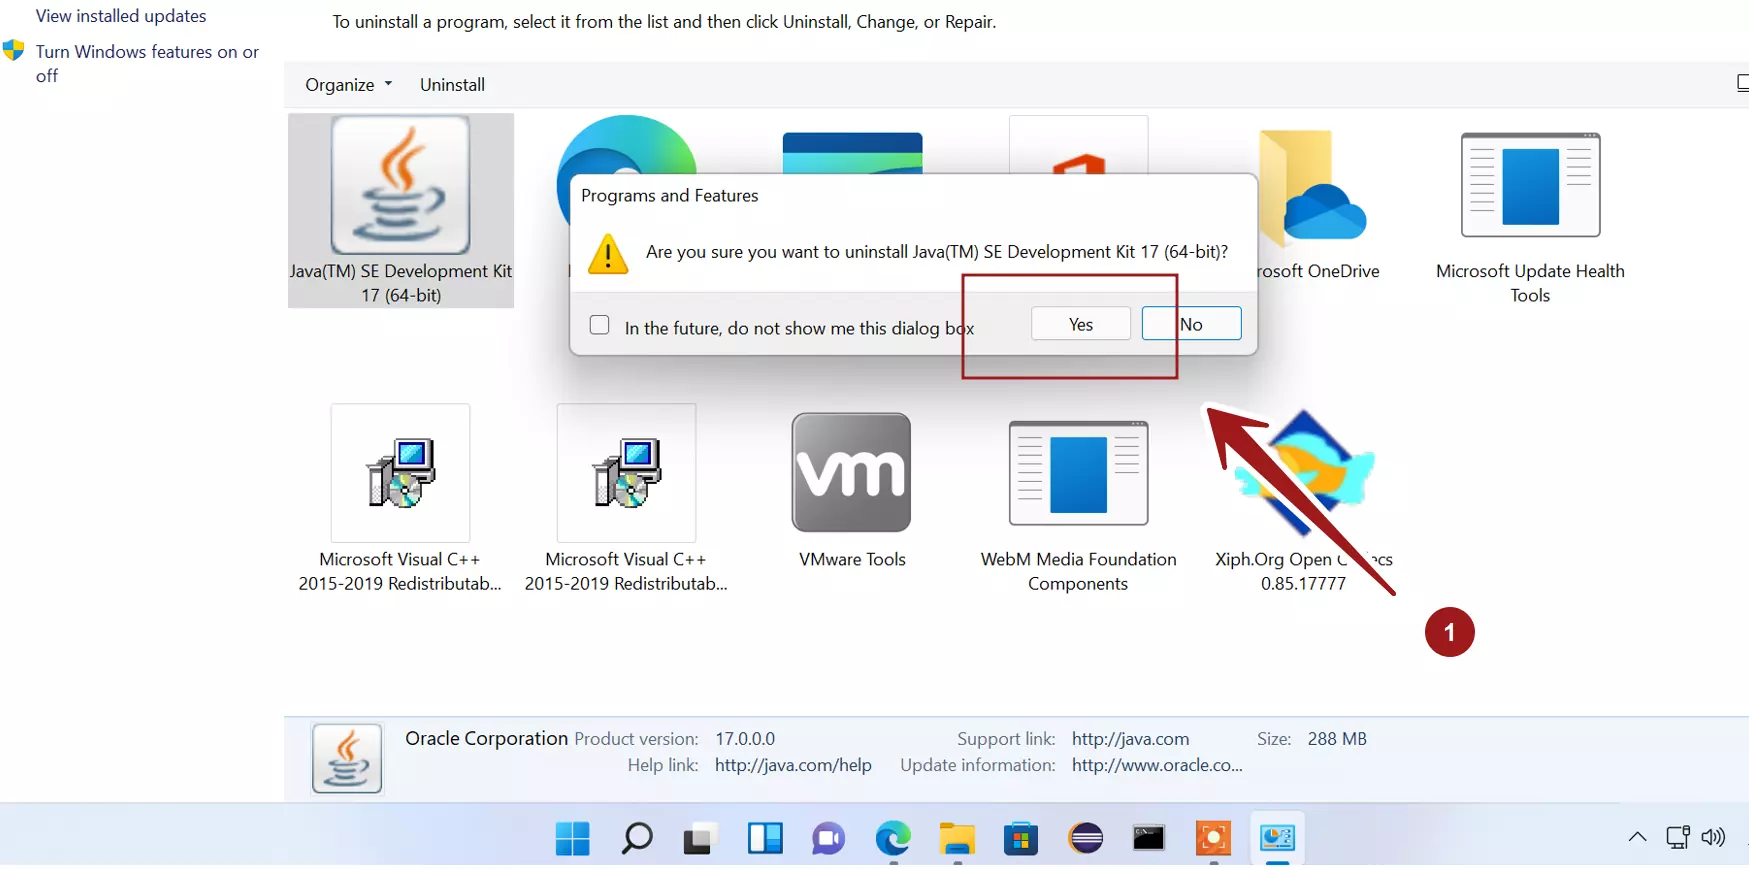
This will launch the uninstaller. Click on Yes button to uninstall the JDK.

Remove environment variables set during Java install process. See below for the instructions to remove system variables.
That’ it. Java or JDK would be uninstalled from the Windows 11 machine.
Uninstall Package
The below steps are applicable if Java / JDK was installed using the compressed archive package on the machine.
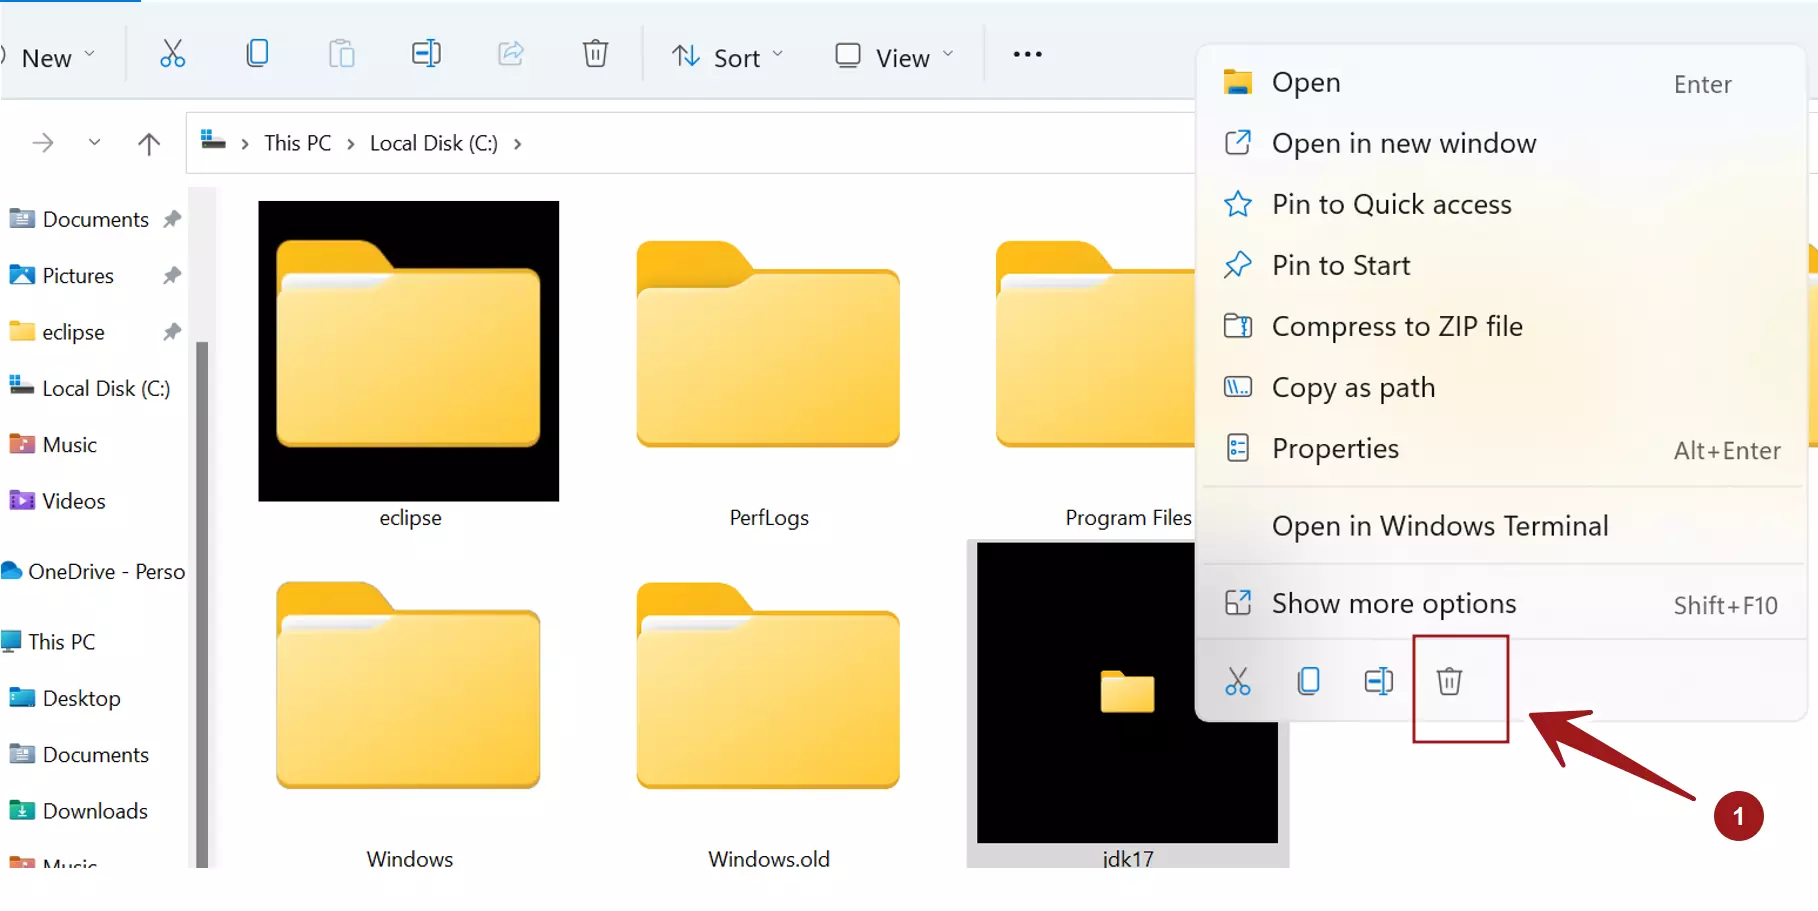
Remove JDK directory
Locate the Java JDK home directory and right click on the folder. Delete the Java home directory.
Click on the delete Trash can icon in the context-sensitive menu.

Remove System Variables
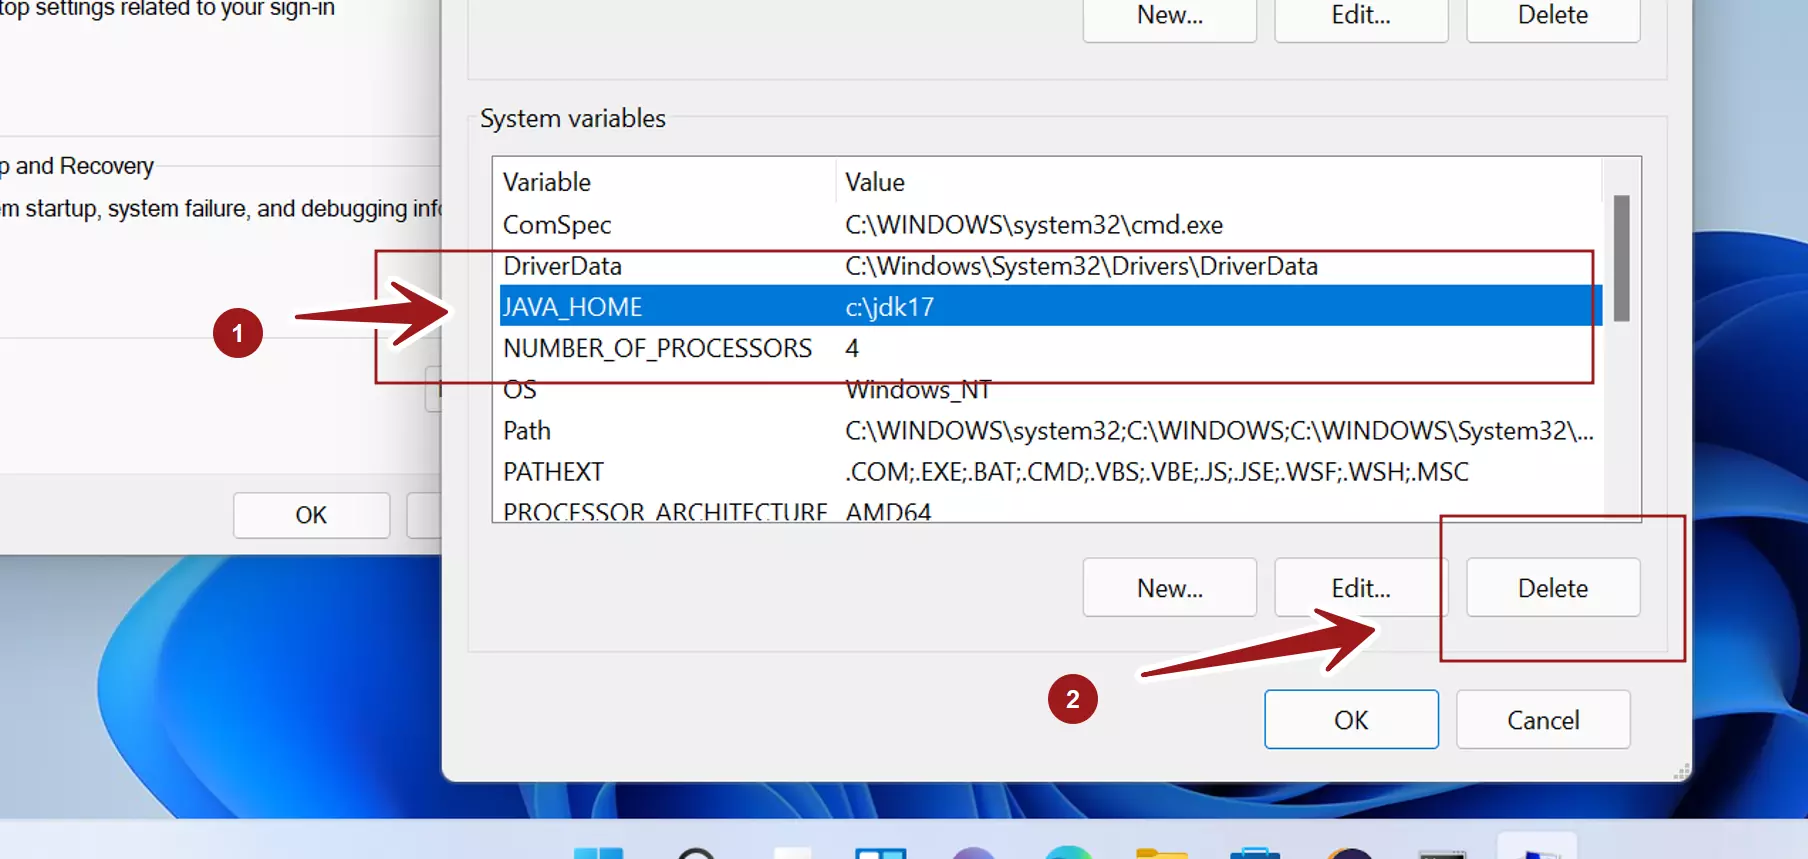
Remove the JAVA_HOME environment system variable
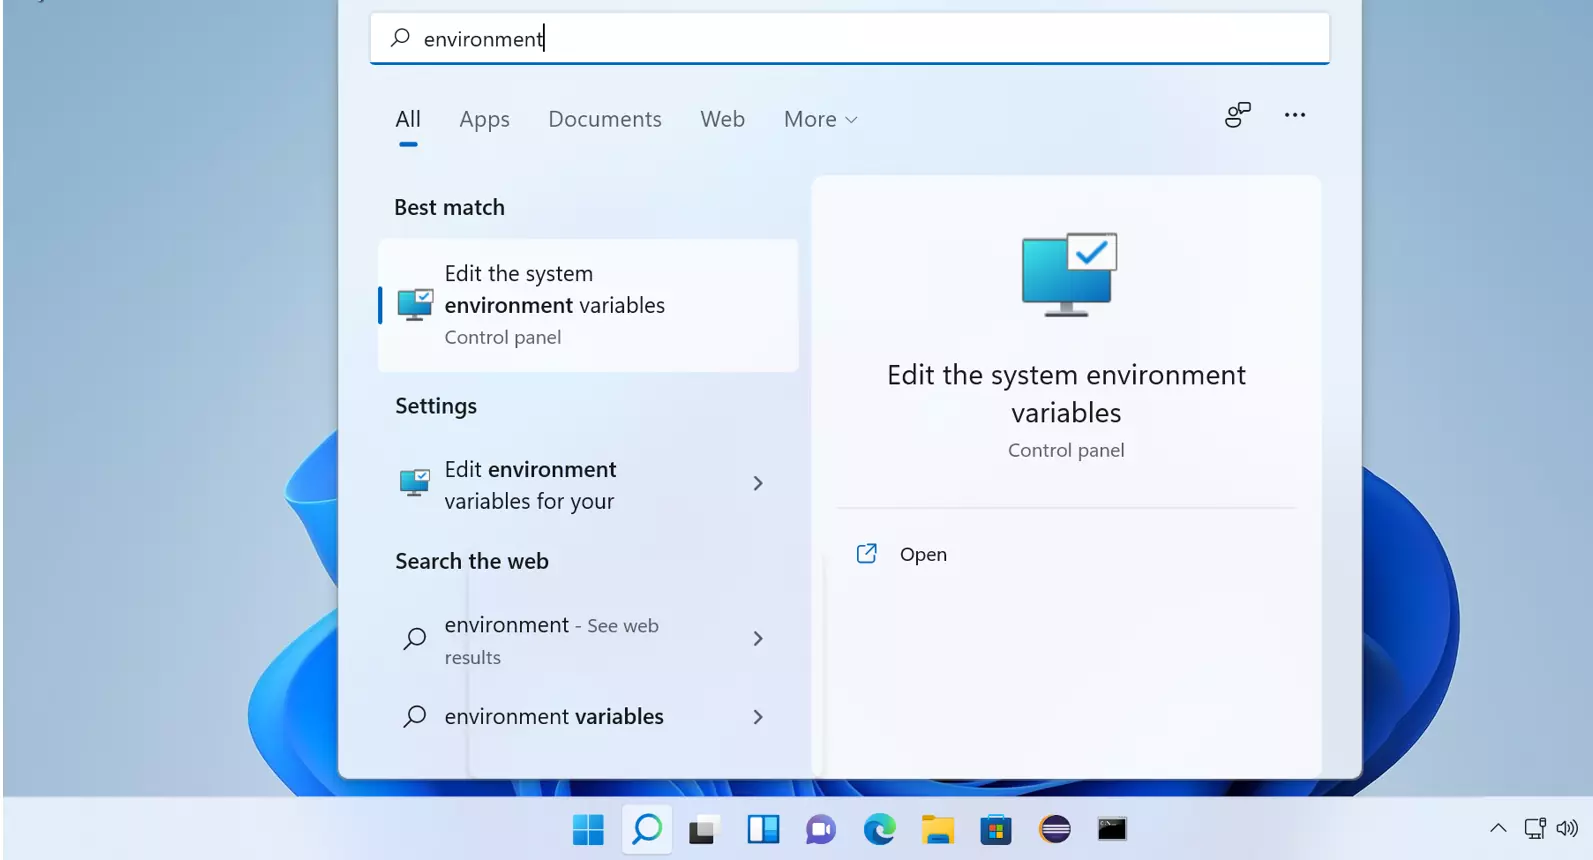
- Click on the Search icon in the Taskbar.
- Search for environment variables in the Search bar. Click the Edit the system environment variables link.

- Open System properties. Click on the Environment Variables… button
- In the system variables remove the JAVA_HOME variable. Select JAVA_HOME entry and click on the Delete button.

Remove Java PATH entry
Remove the Java entry from the PATH environment system variable.
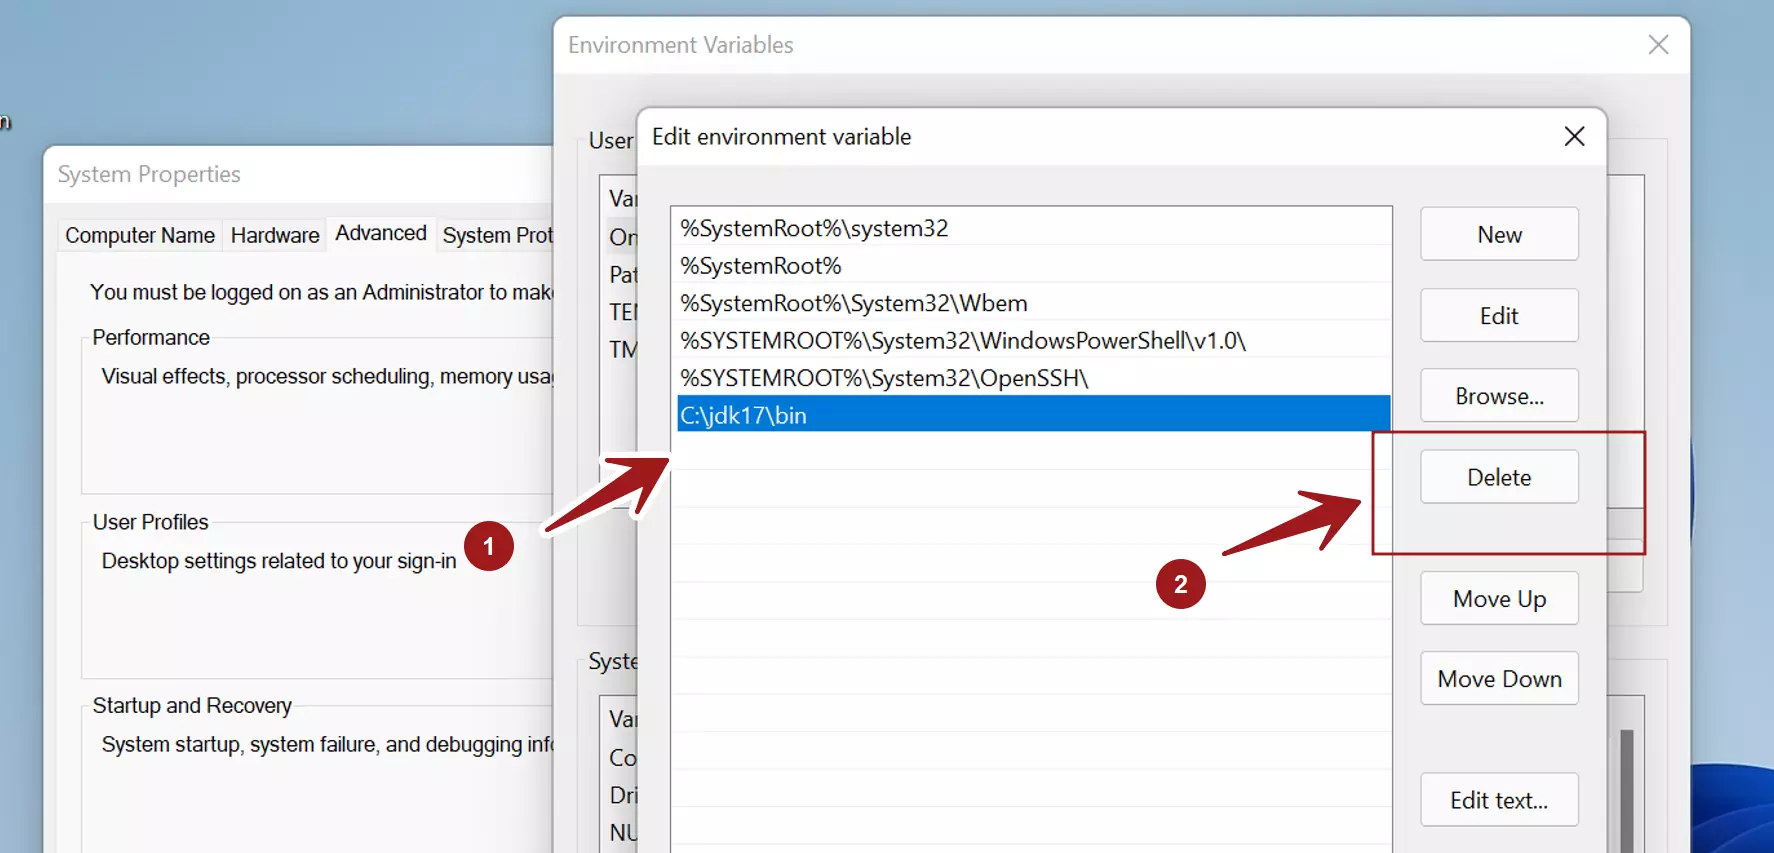
Choose the PATH system environment and click on the Edit… button.
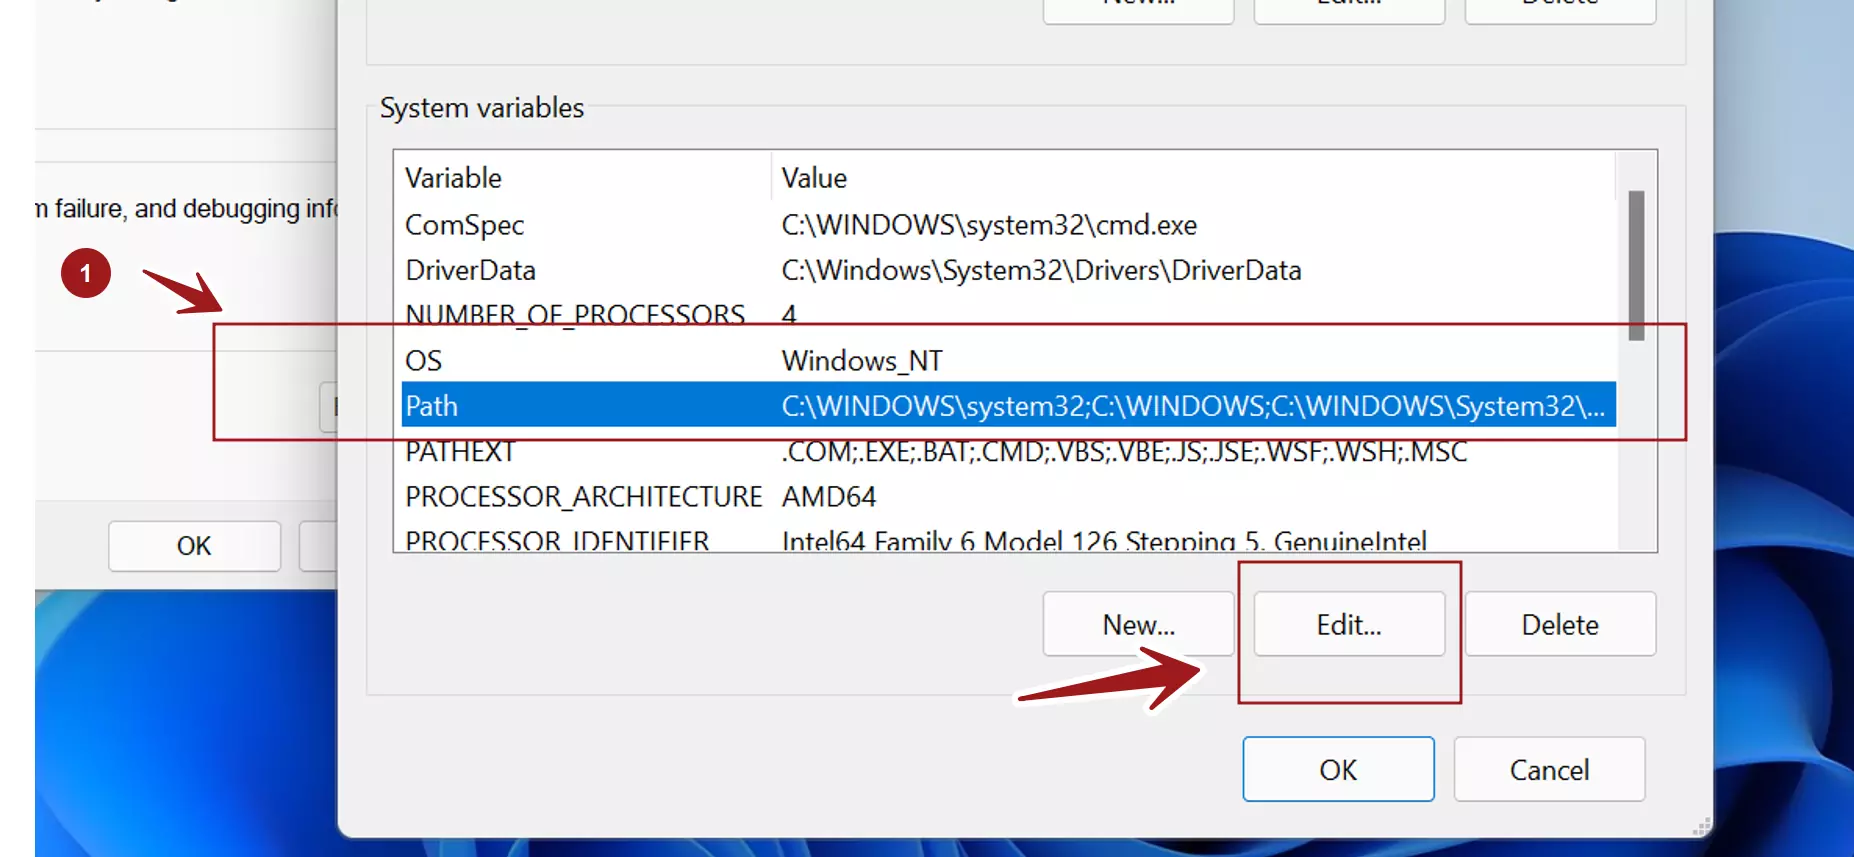

Choose the Java path entry can click on the Delete button.

That’s it. Java uninstall is complete.
—
Windows 11 Tutorials
https://www.testingdocs.com/windows-11-tutorials/
More Information on Windows 11
https://www.microsoft.com/en-us/windows