

Overview
In this tutorial, we will Download IntelliJ IDE for the Windows 11 operating system and install and set up the IDE tool. Windows 11 is Microsoft’s latest operating system. In this example, we will install IntelliJ Community Edition. The Ultimate Edition of the tool is for enterprise application development and has premium features.
Environment
- Windows 11
- IntelliJ IDEA Community Edition
- Web browser
Download IntelliJ
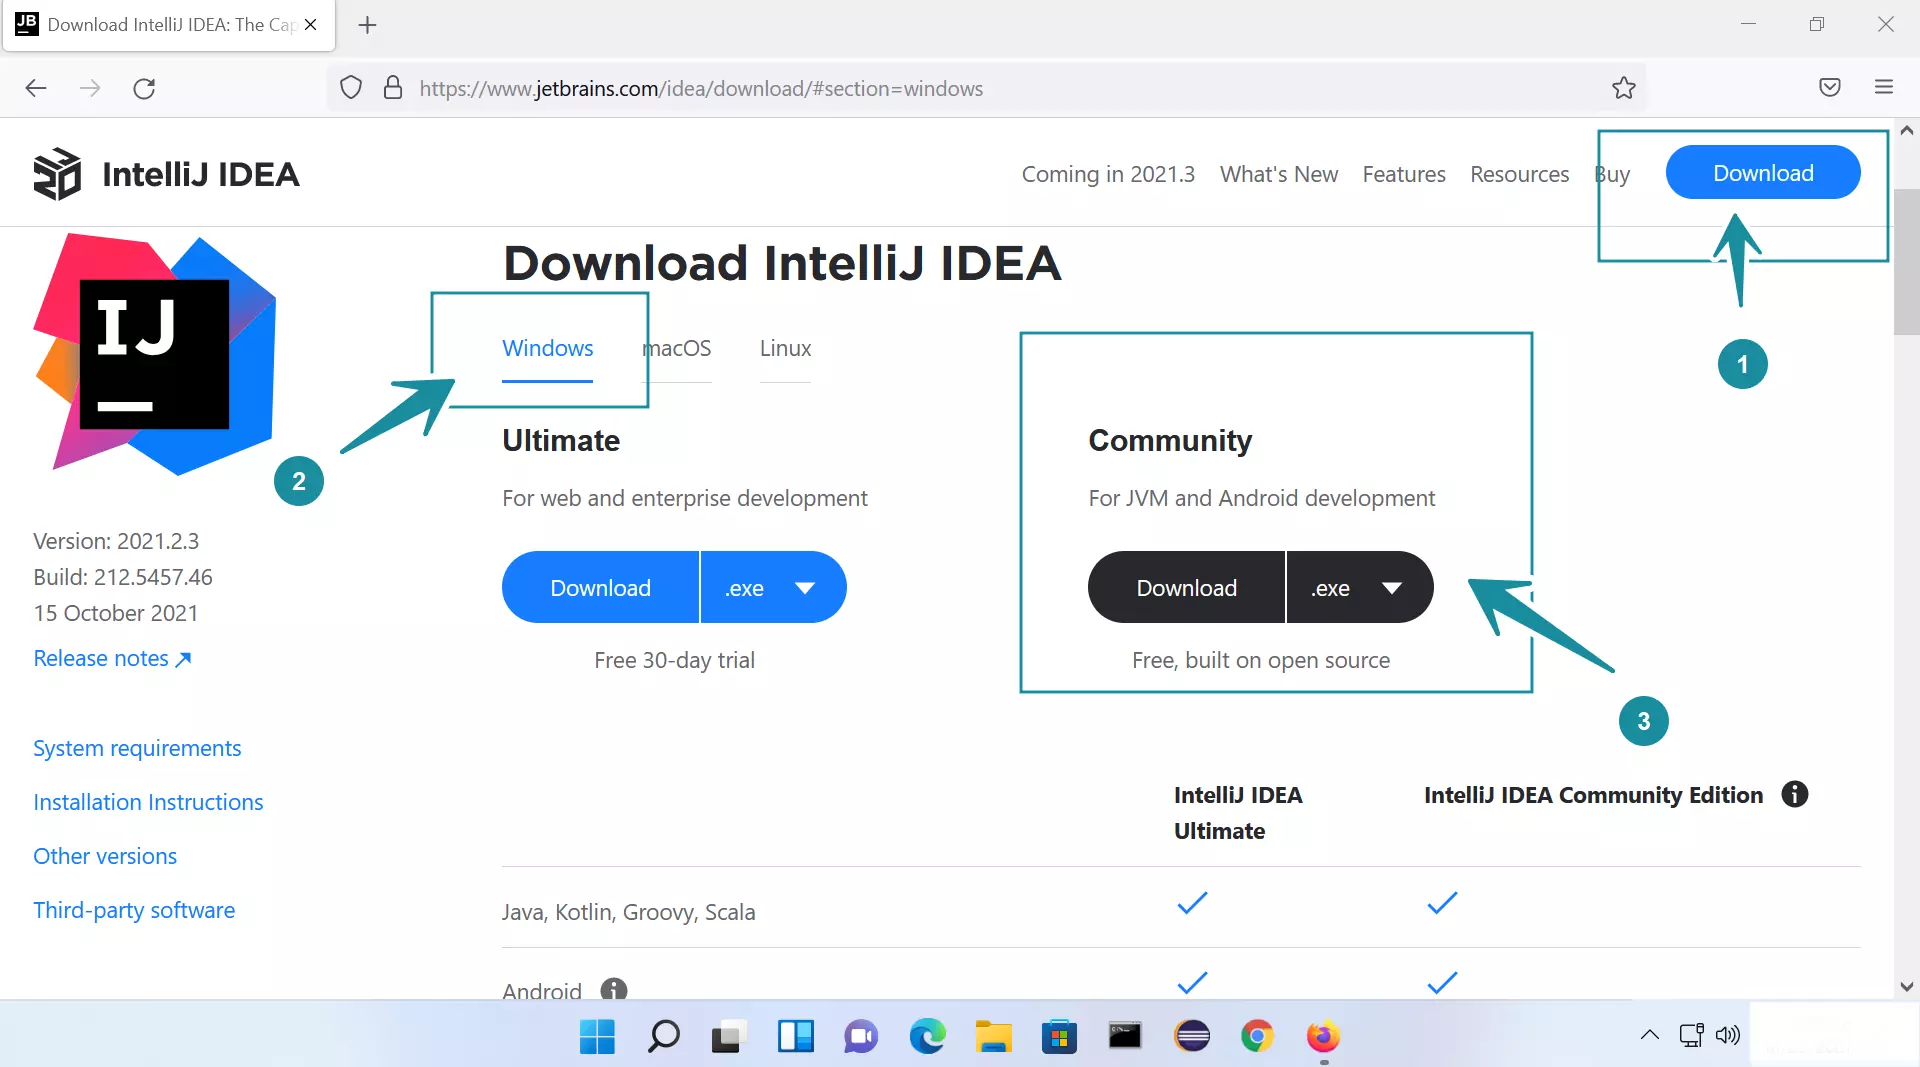
Open the Web browser and navigate to IntelliJ IDE’s official website.
https://www.jetbrains.com/idea/download
Click on the Windows tab and Download the IDE. There are two download options for the tool:
- .exe installer
- .zip bundle package
In this example, we will use the .exe installer to install IntelliJ IDE.

The Installer file format would be something like:
ideaIC-<version>.exe
Install IntelliJ
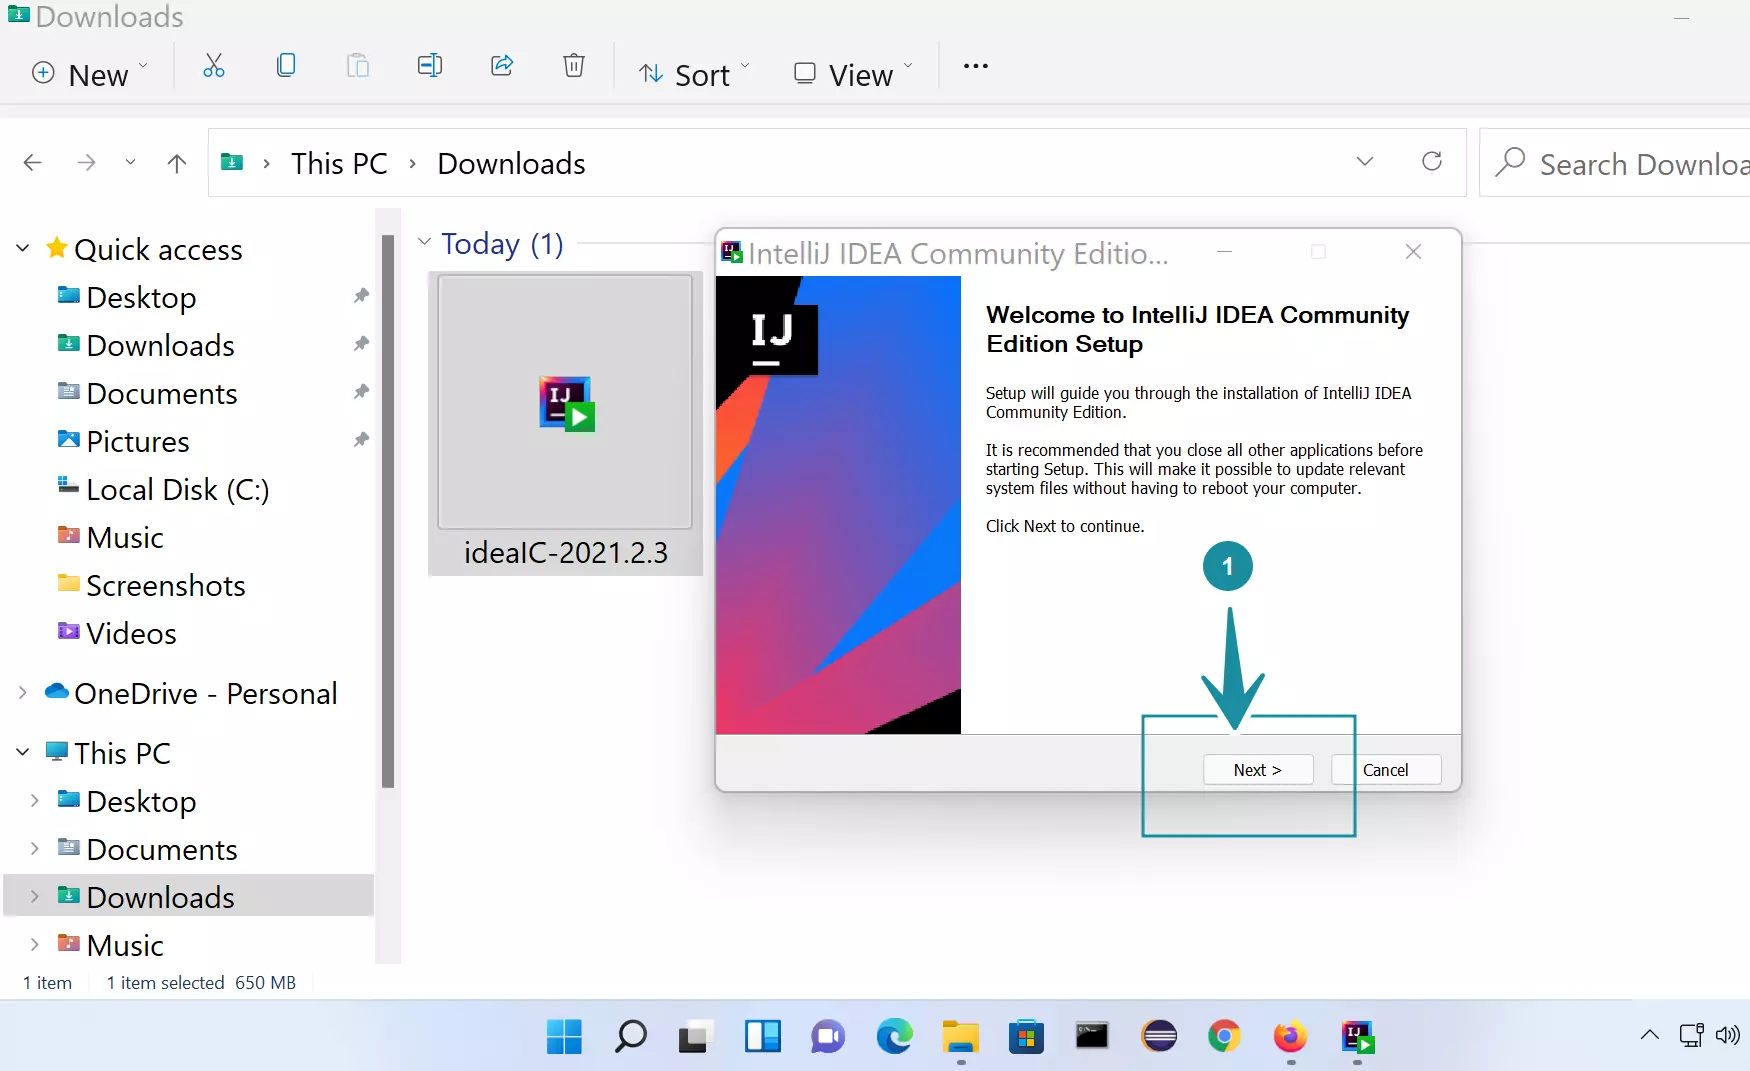
Open File Explorer and locate the Installer file. In most cases, it would be the Downloads folder.
Double-click on the Installer to run it. This will launch the IDE install setup wizard.
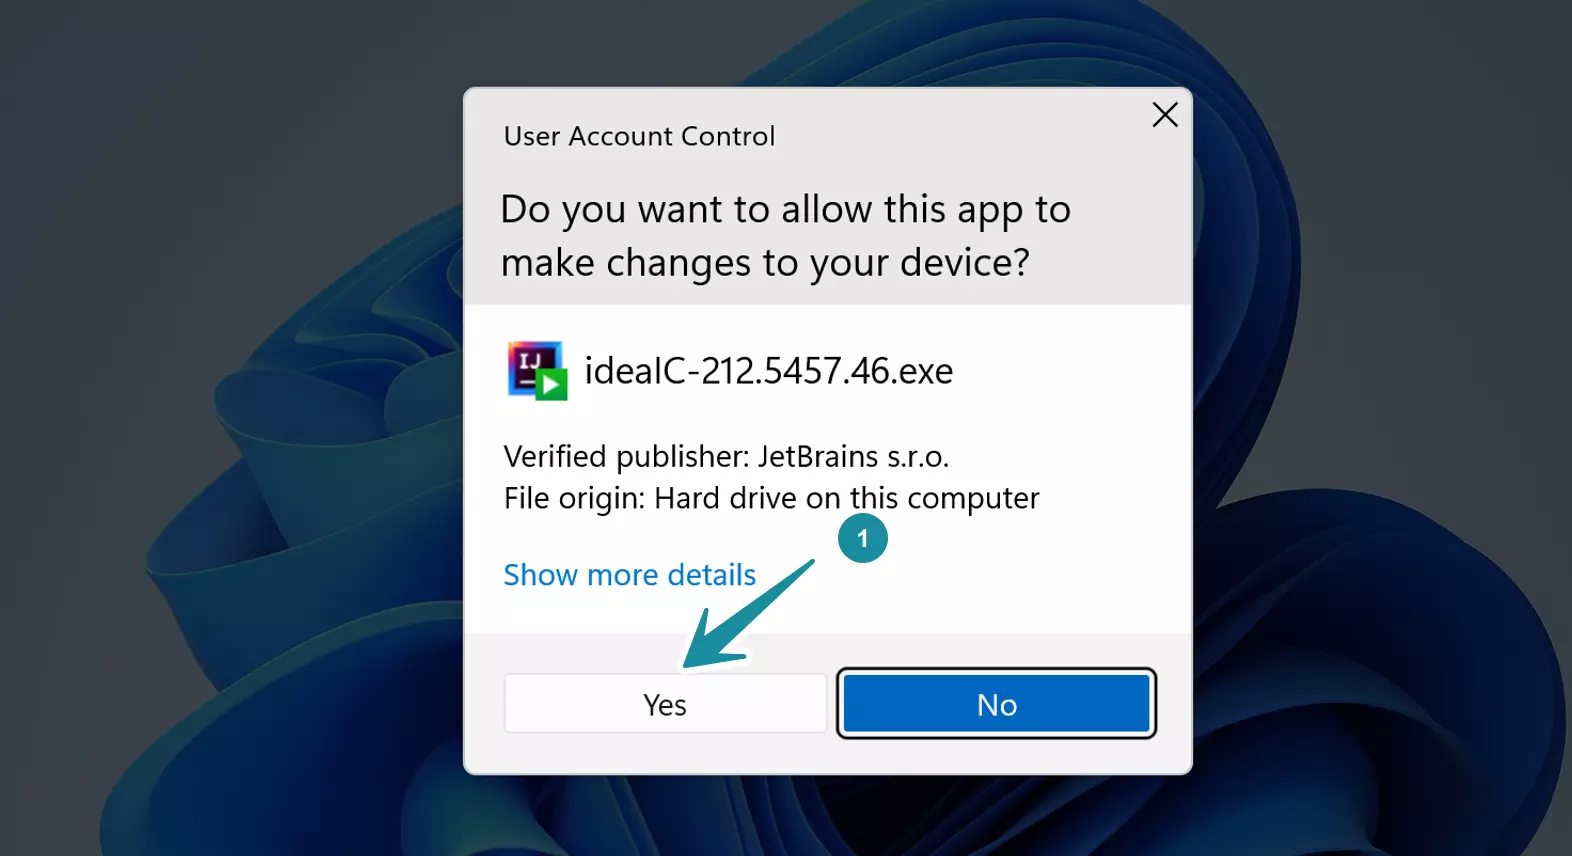

Click Yes on the UAC prompt dialog. We need administrative privileges to install the tool on the machine. UAC is a security feature that elevates and notifies the Windows user when a program tries to perform an administrative task. Notice that the installer is signed and the publisher name is displayed on the dialog prompt.
Click on the Next > button in the install wizard Welcome screen.

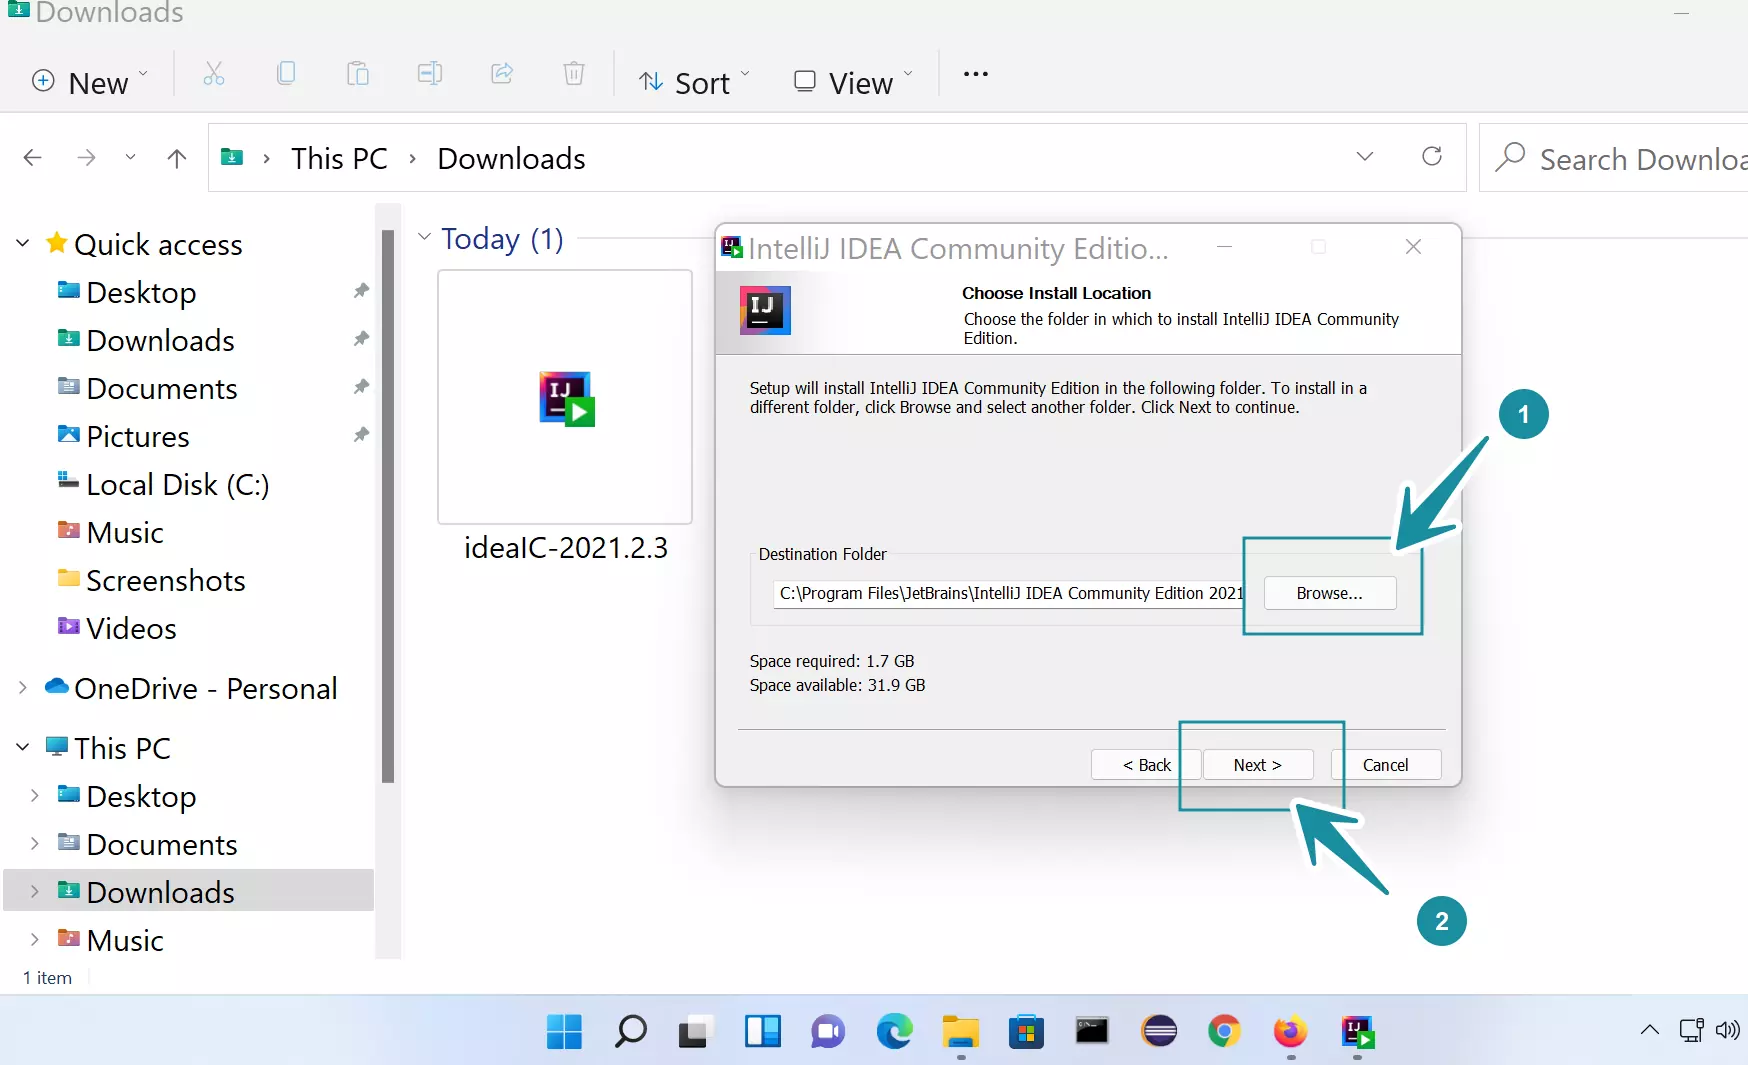
Choose Install Location for the IDE. By default, it’s under the Program Files folder.
C:\Program Files\JetBrains\IntelliJ IDEA Community Edition <version>
However, we can change the Destination folder. Click on the Browse… button and choose the destination folder for the tool.
Once done, click on the Next > button.

Installation Options
On this screen, we can set IntelliJ installation options.
Create Desktop Shortcut
Add the bin directory to the PATH environment variable.
Create File Associations for .java, .groovy, and other file extensions. When set the .java files will open with IntelliJ IDE by default.
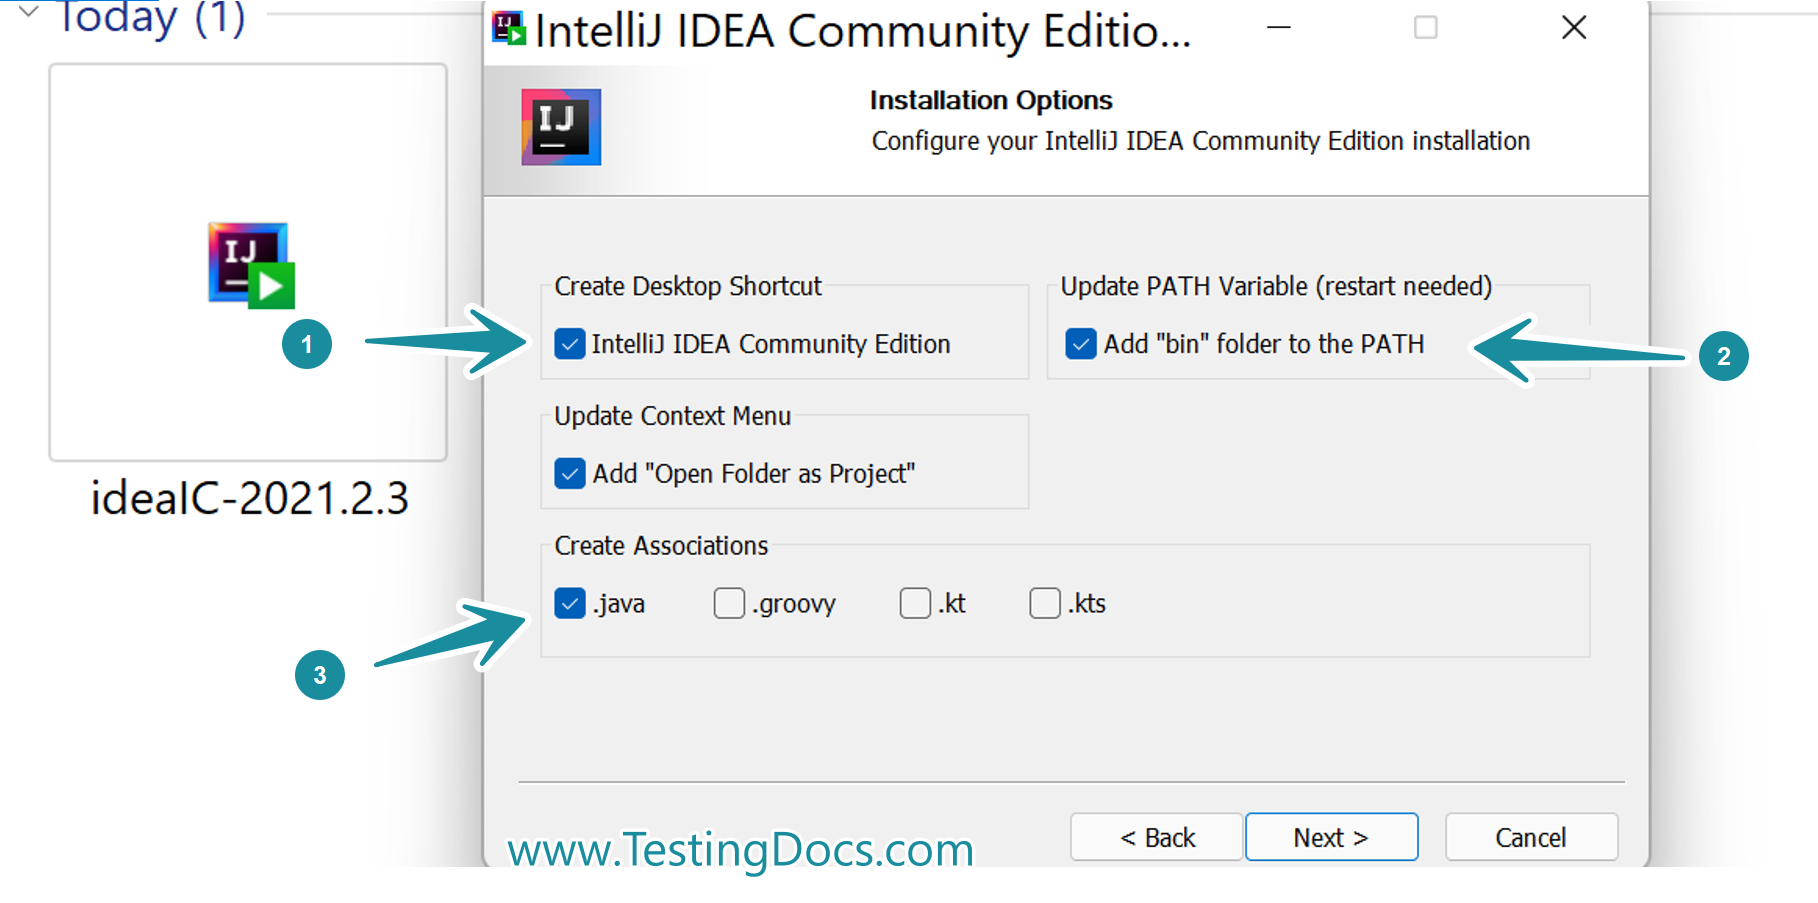

Check the install options and click on the Next > button. Choose the Start Menu folder and click on the Install button. The IDE would be installed successfully.
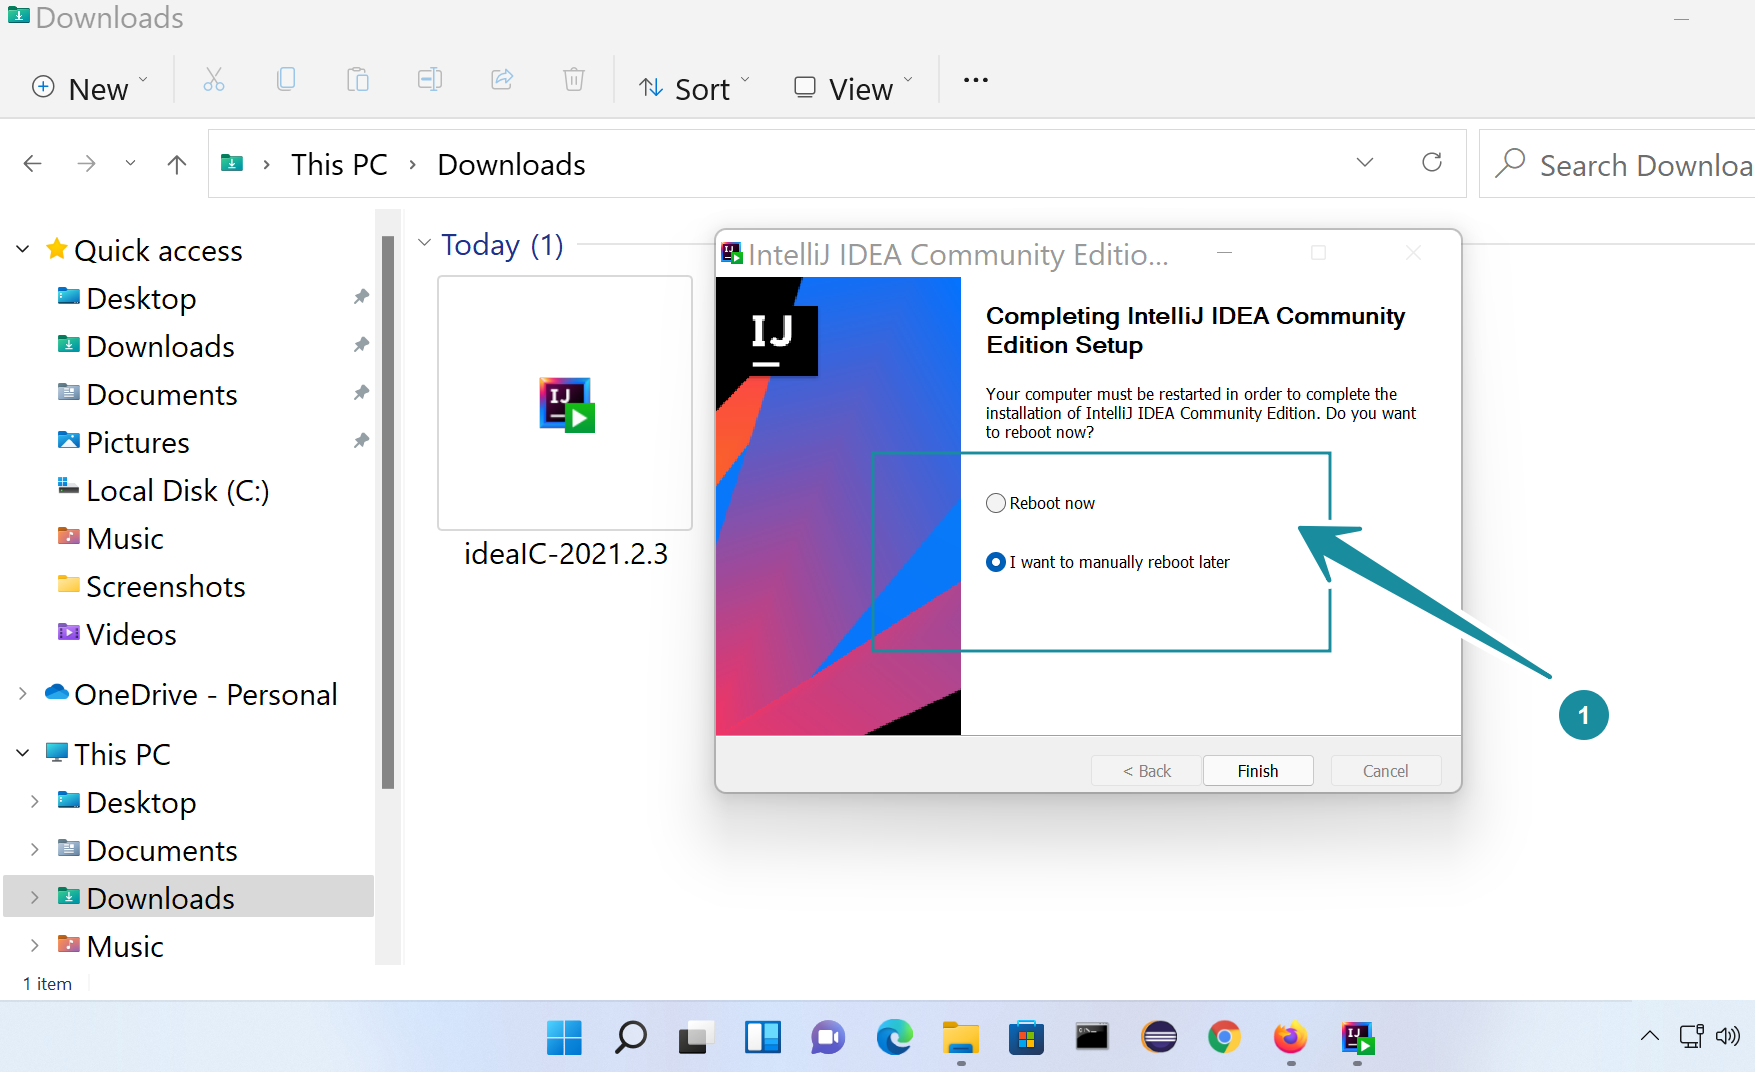
The Windows 11 computer must be restarted to complete the IntelliJ installation. Save all the work and files.
Choose Reboot Now to reboot the machine and Click on the Finish button to restart the machine.

That’s it. We have successfully downloaded and installed IntelliJ IDE on Windows 11 operating system.
—
Windows 11 Tutorials
https://www.testingdocs.com/windows-11-tutorials/
More Information on Windows 11
https://www.microsoft.com/en-us/windows