Install Eclipse IDE on Windows 11
Install Eclipse IDE on Windows 11
This tutorial outlines installing Eclipse IDE on the Windows 11 operating system. Windows 11 is Microsoft Corporation’s latest operating system version.
💻 Environment
- 🌐 Web browser (Ex. Firefox, Chrome, Edge browser)
- 🪟 Windows 11 operating system
- ♨️ Java JDK
**Although the latest Eclipse includes and bundles JRE( Java Runtime Environment), it’s always recommended that Java JDK( Java Development Kit) be installed before Eclipse IDE.
Follow the steps to install Java on Windows 11.
📥Download Eclipse Installer
Launch a web browser on the Windows 11 machine.
Navigate to the Eclipse official website download page URL.
- https://www.eclipse.org/downloads/
Click on the Download button to download the installer. In this post, we will install Eclipse using the installer.
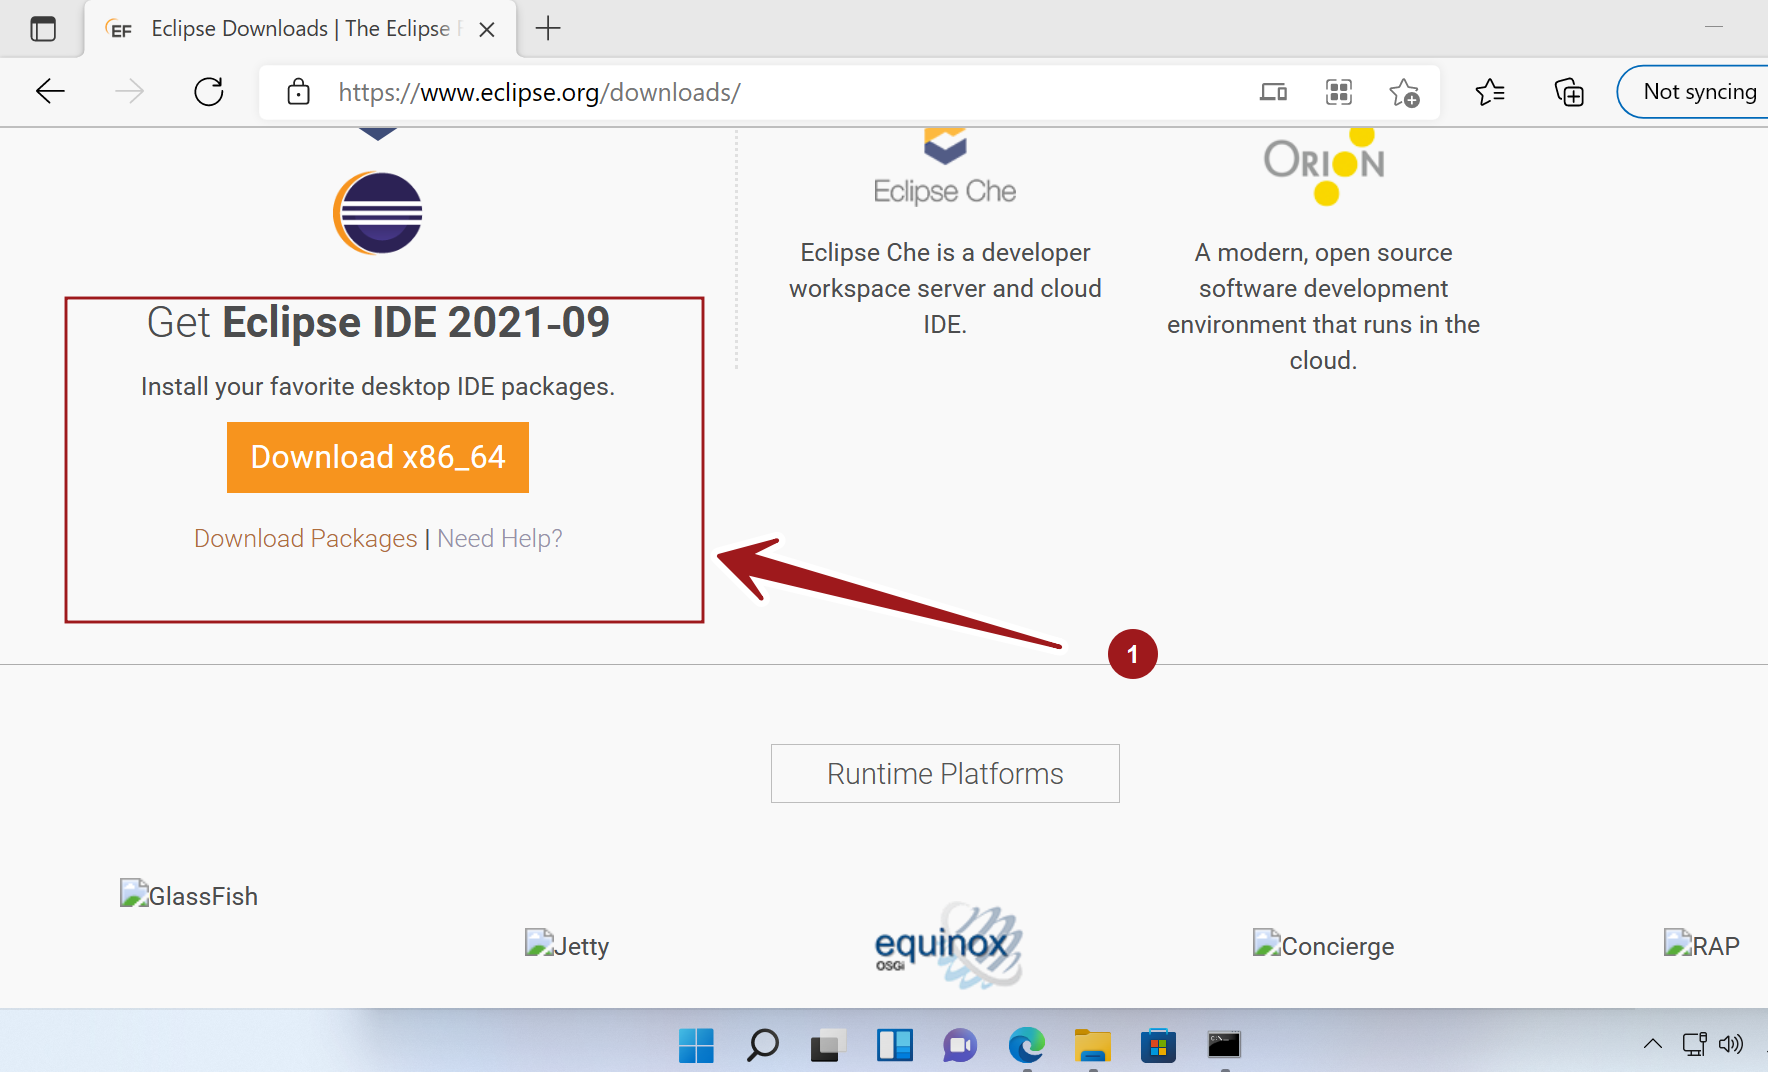
On the next screen, click on the Download button. We can also pick a mirror location that is geographically near to you to download the installer.
The download file format would be something like:
eclipse-inst-jre-win64.exe

🔎Verify the Eclipse Download
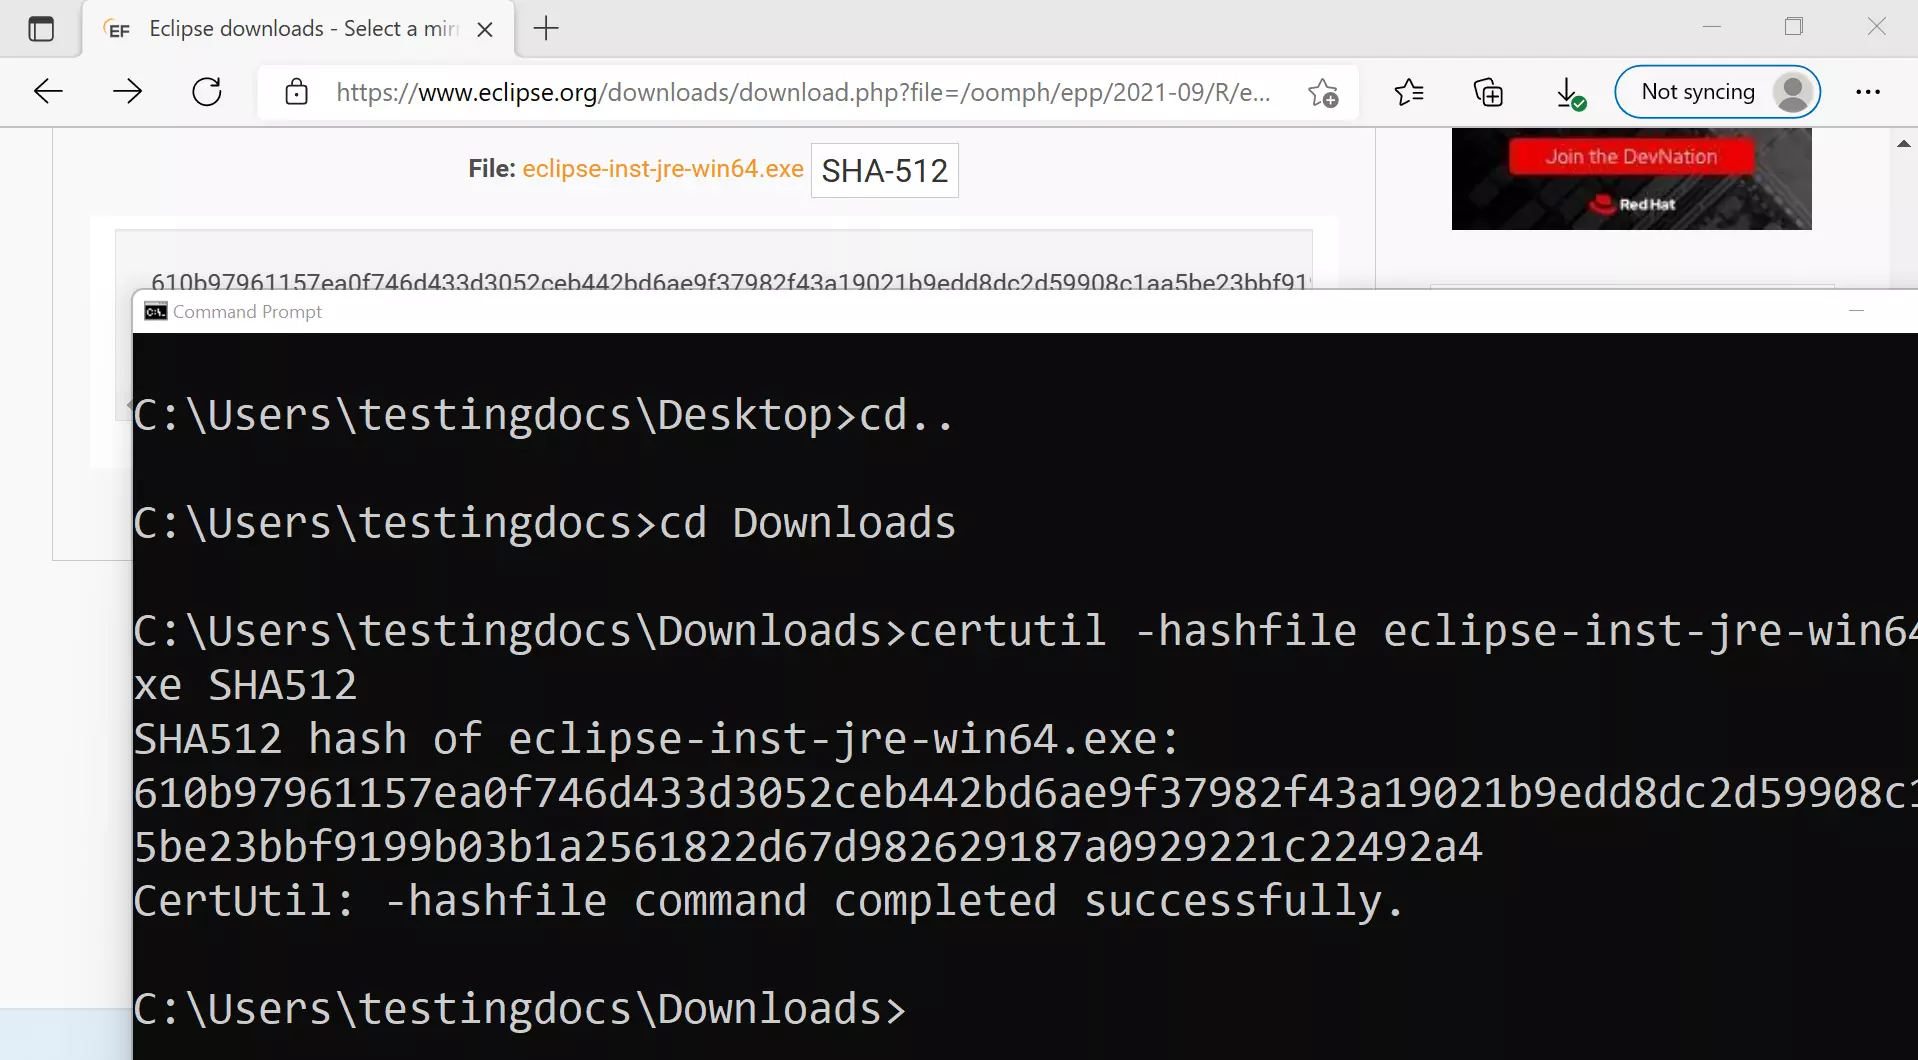
Click on the SHA-512 button on the download page. Make a note of the hashcode.

Follow the below steps to verify the Eclipse installer.
Open the command prompt and change the directory to the download path. Usually to the Downloads folder.
Run the following command:
C:\Users\testingdocs\Downloads>certutil -hashfile eclipse-inst-jre-win64.exe SHA512
Take note of the command output. Match both the hashcode. They should match. Proceed to the next step.
If the checksums don’t match, discard the installer. Delete the installer file and run an antivirus scan on the machine. Choose another mirror location and Download the Eclipse installer file again. Repeat the installer file verification.
🚀Run Eclipse Installer
Open File Explorer and browse the installer file location.
Double-click on the Eclipse installer file to run it.

Click and choose the IDE flavor.
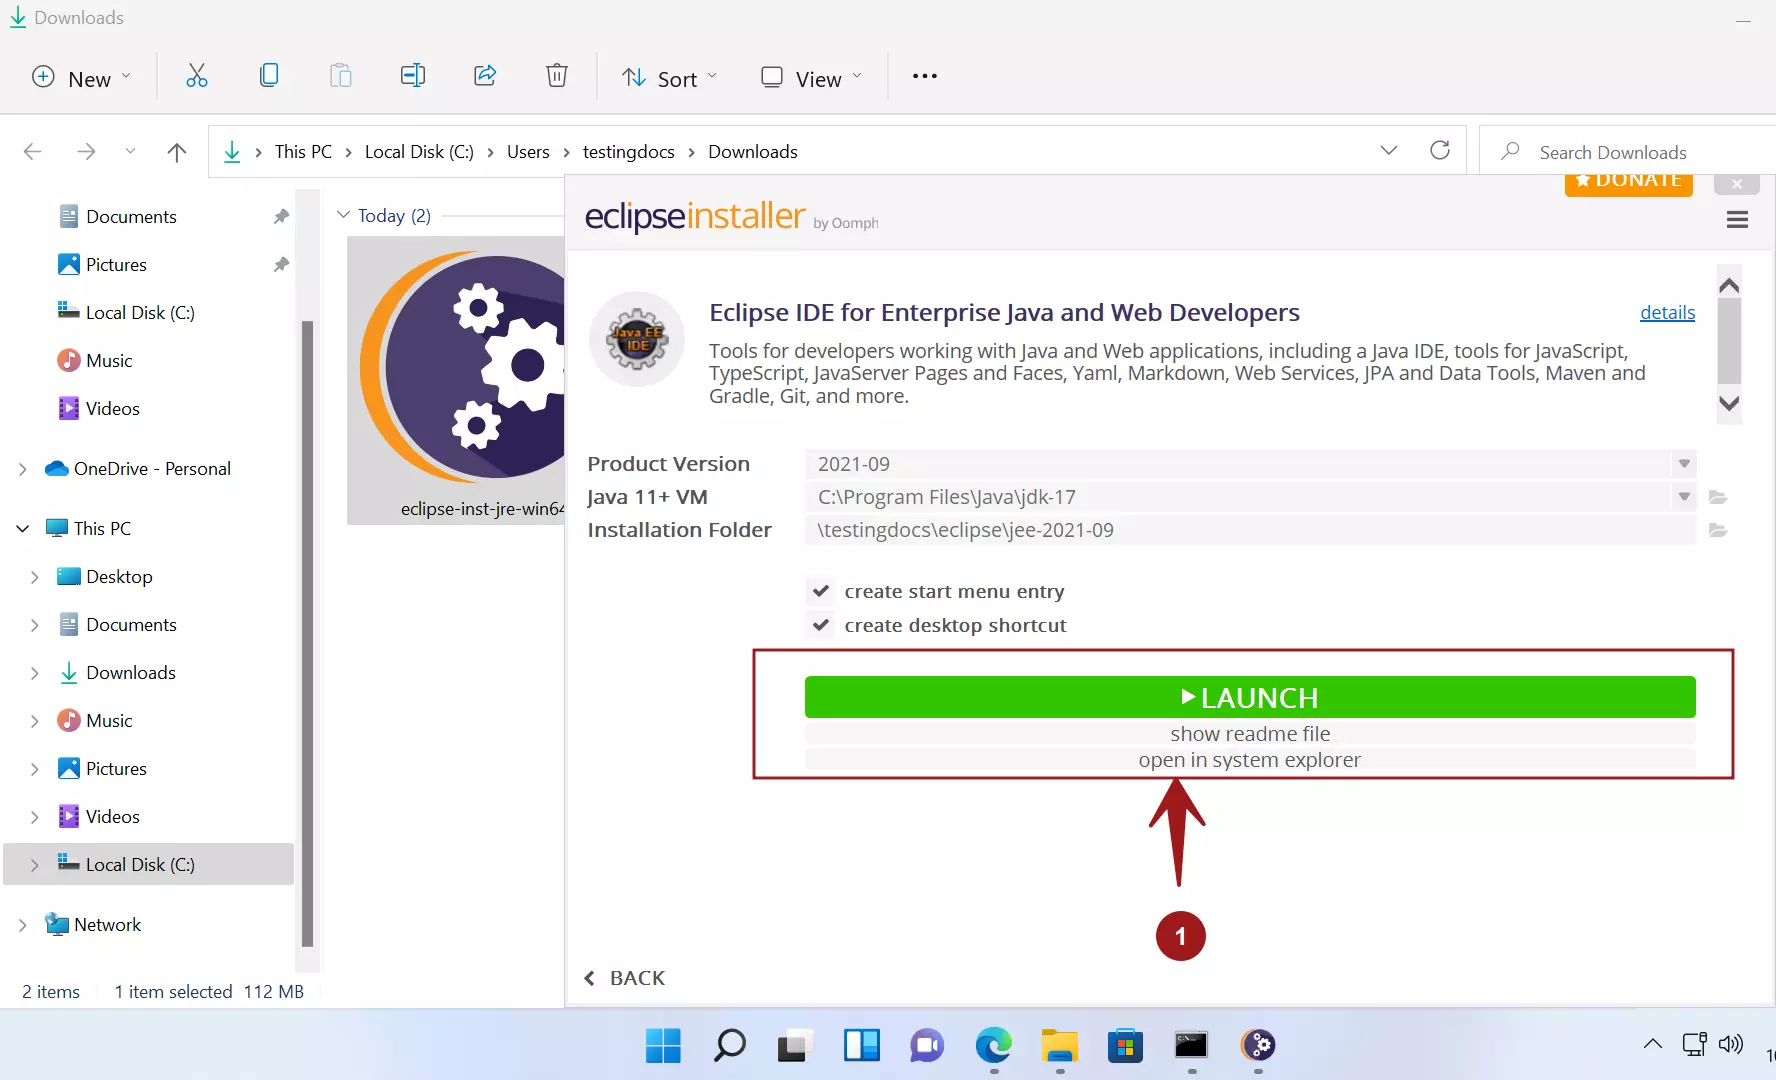
On the next screen, we can customize the Eclipse installation. Customize the Installation Folder. We can choose a custom location. Click on the open folder icon and browser the install folder.
Click on the three-line icon at the top right that displays a warning! symbol. Click on the Update menu button and accept the Eclipse license.
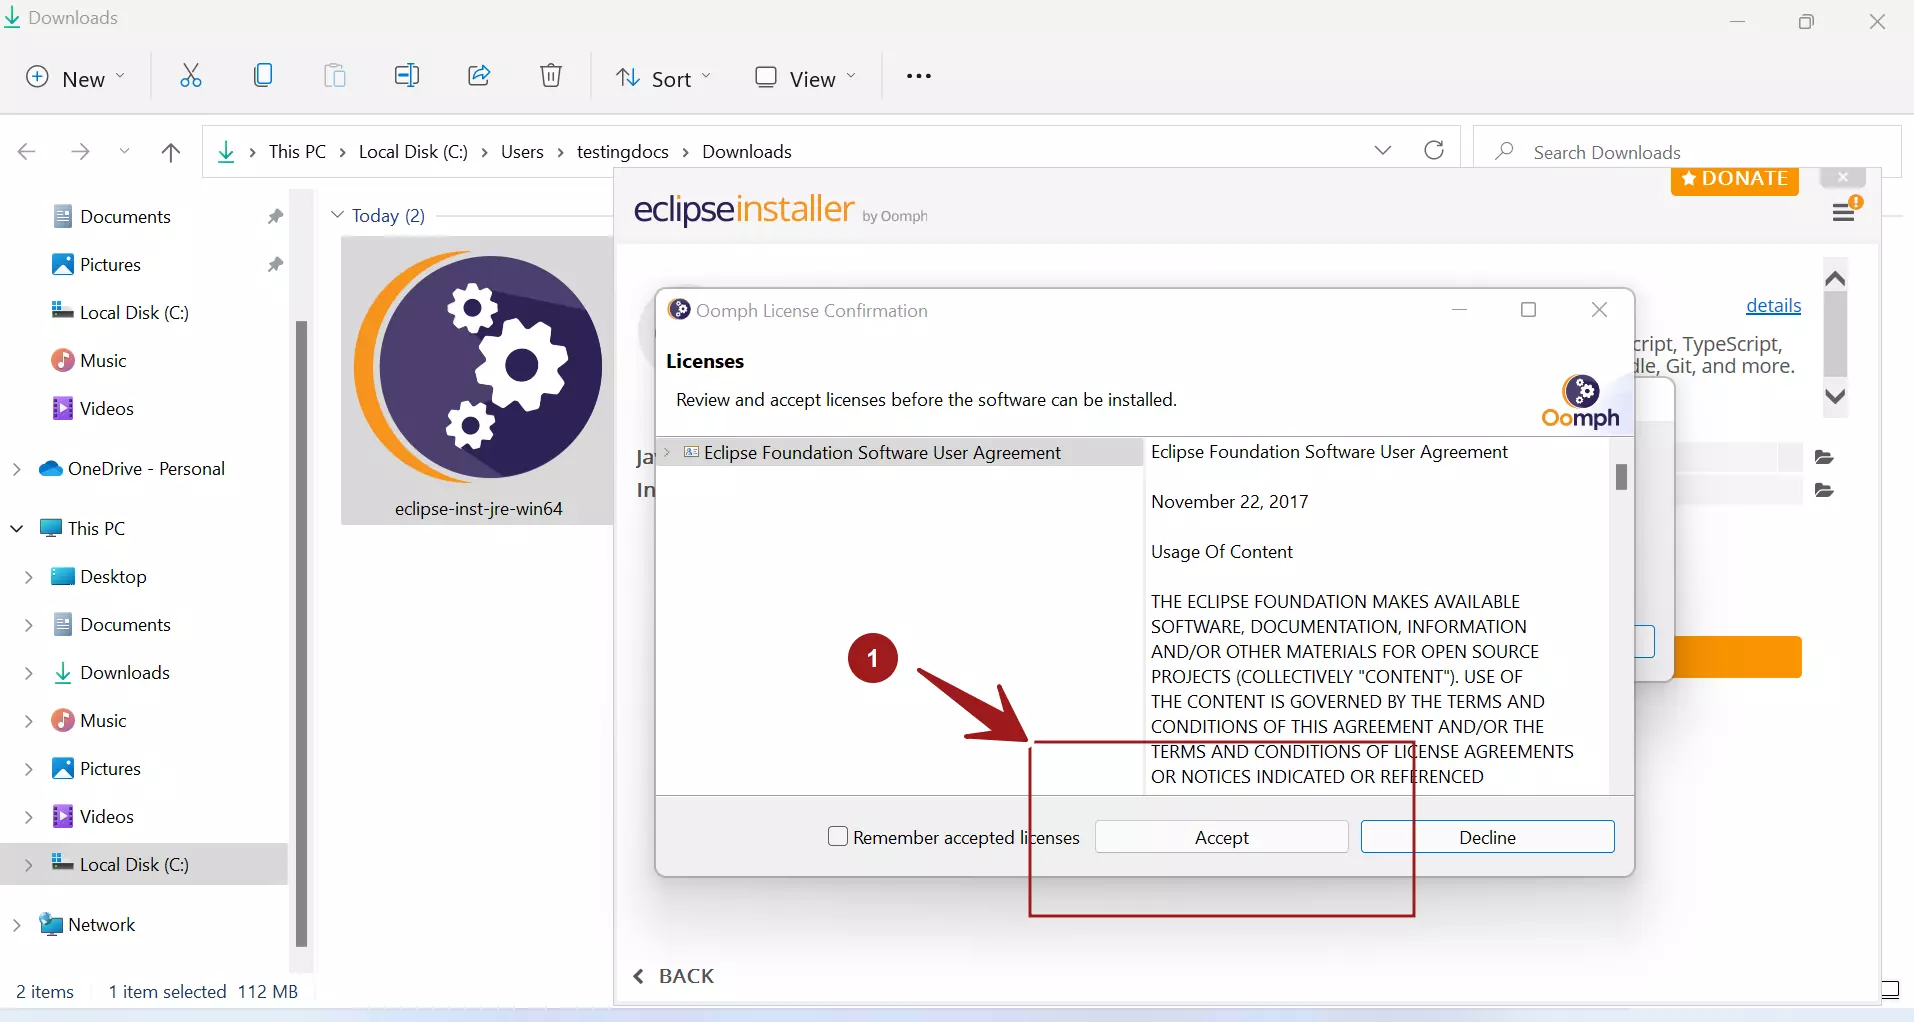
Once the installer updates, Click on the INSTALL button. To accept the License, click on the Accept button.
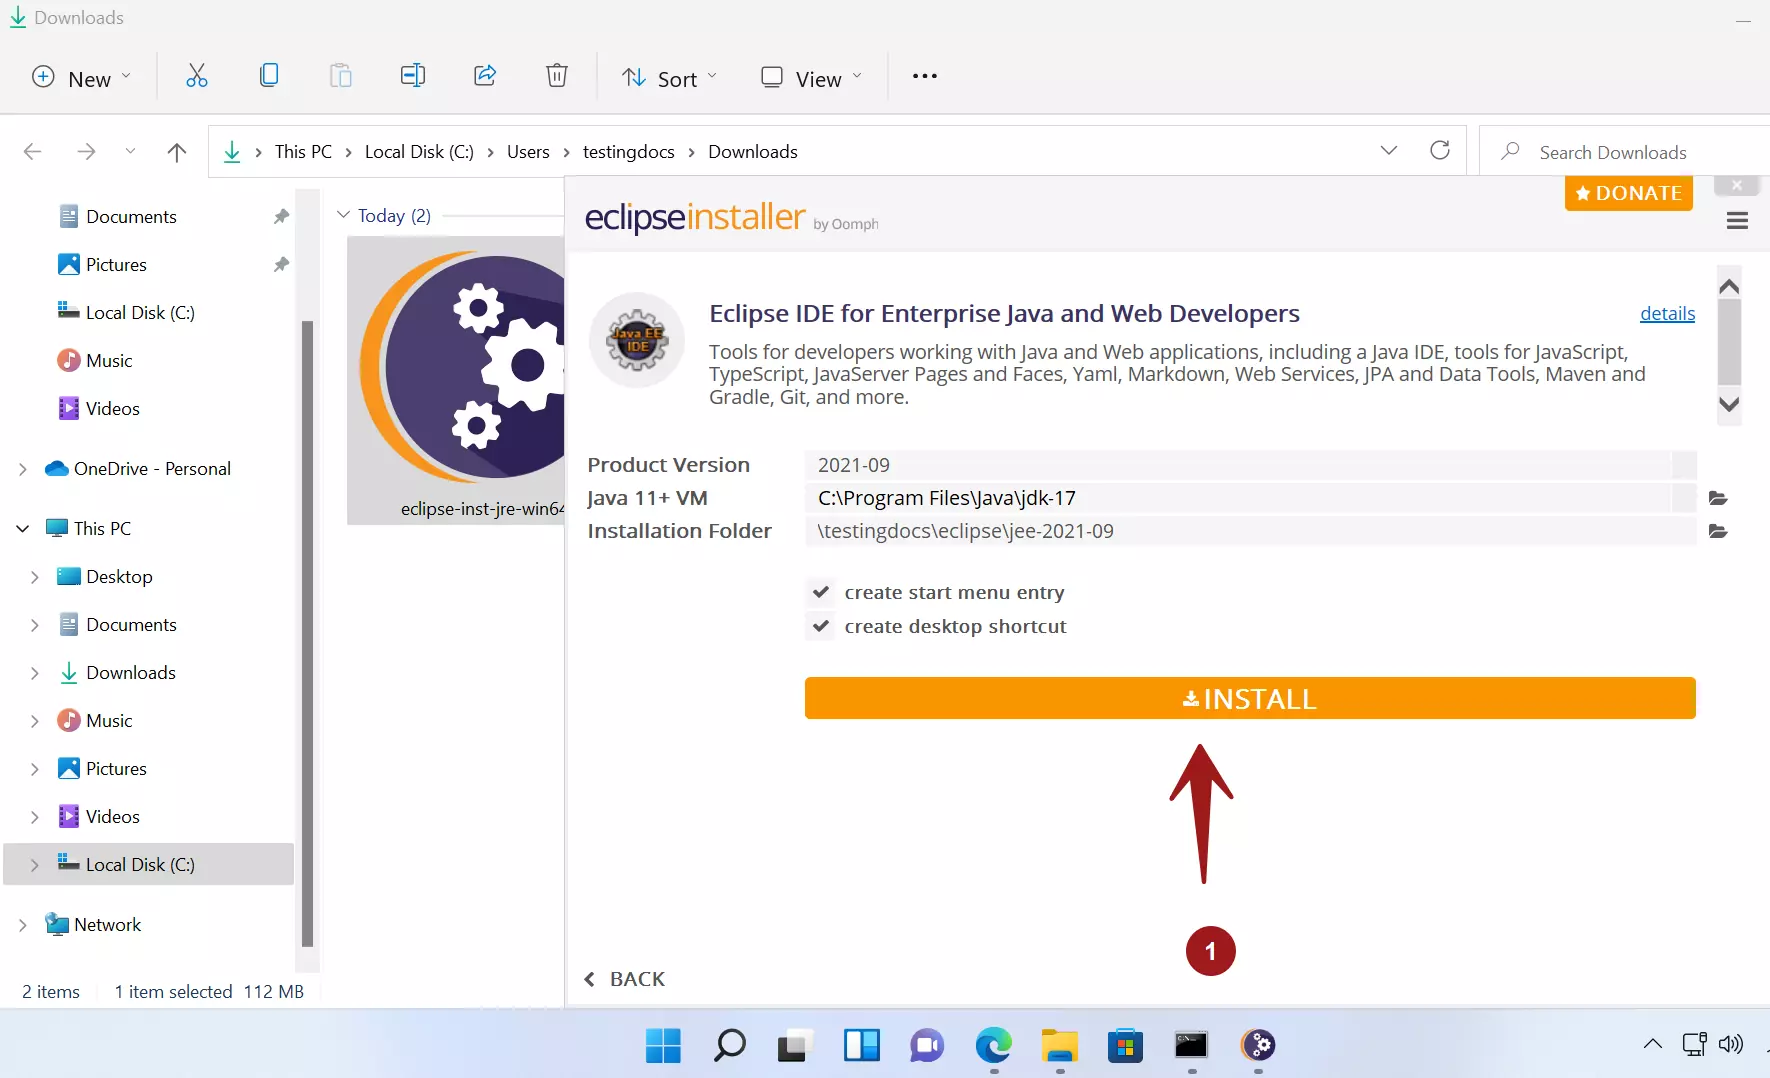
Eclipse would be installed on the Windows 11 machine. Click on the Launch button to launch Eclipse.
That’s it. 👏 Eclipse was successfully installed on a Windows 11 machine.
Video Tutorial:


