Install Maven on Ubuntu Linux
Install Maven on Ubuntu Linux
In this tutorial, we will walk through installing Maven on a Ubuntu Linux machine and explore two options.
- Manual Install from Linux archive native package.
- Install from Ubuntu Package Manager (APT).
Install Maven using the Linux native package
This option lets the user choose the version and customize the install to the chosen directory. This approach to installing Maven for environment setup, like for Software Automation, needs to set up Maven home environment variables and add the Maven bin directory to the PATH environment variable.
Navigate to Maven’s official website.
- https://maven.apache.org/download.cgi
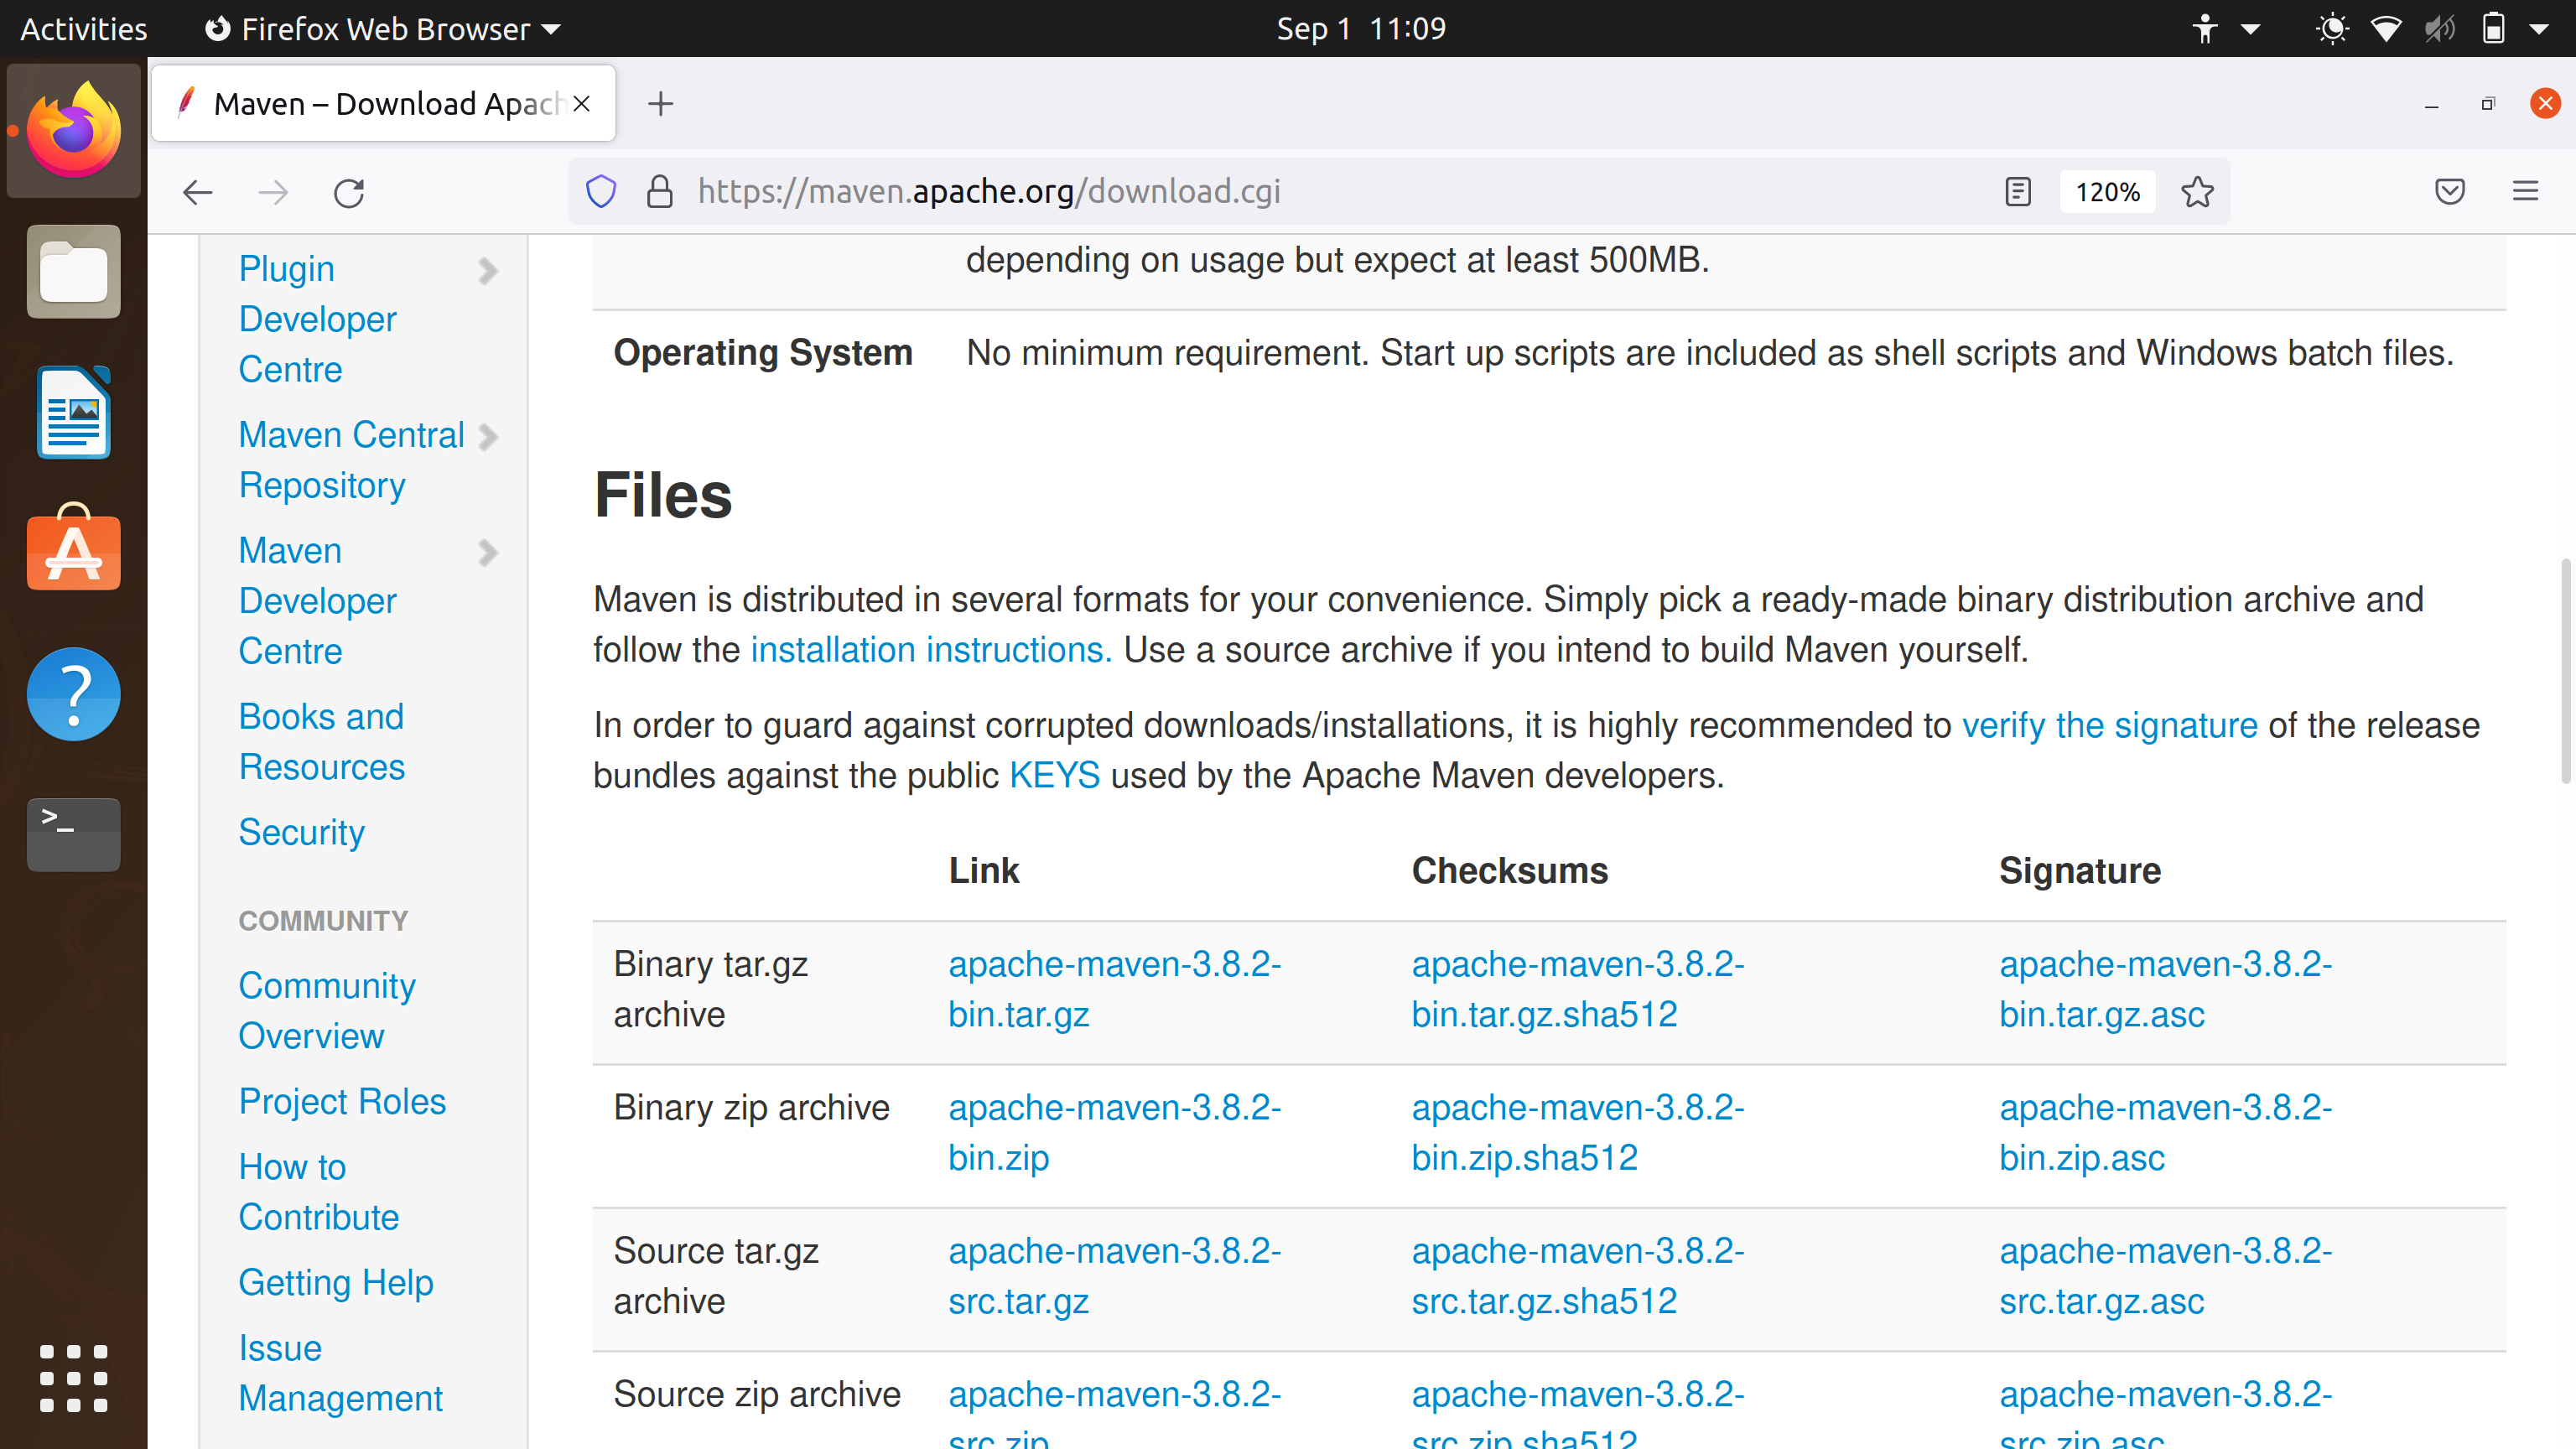
Click on the Download button.
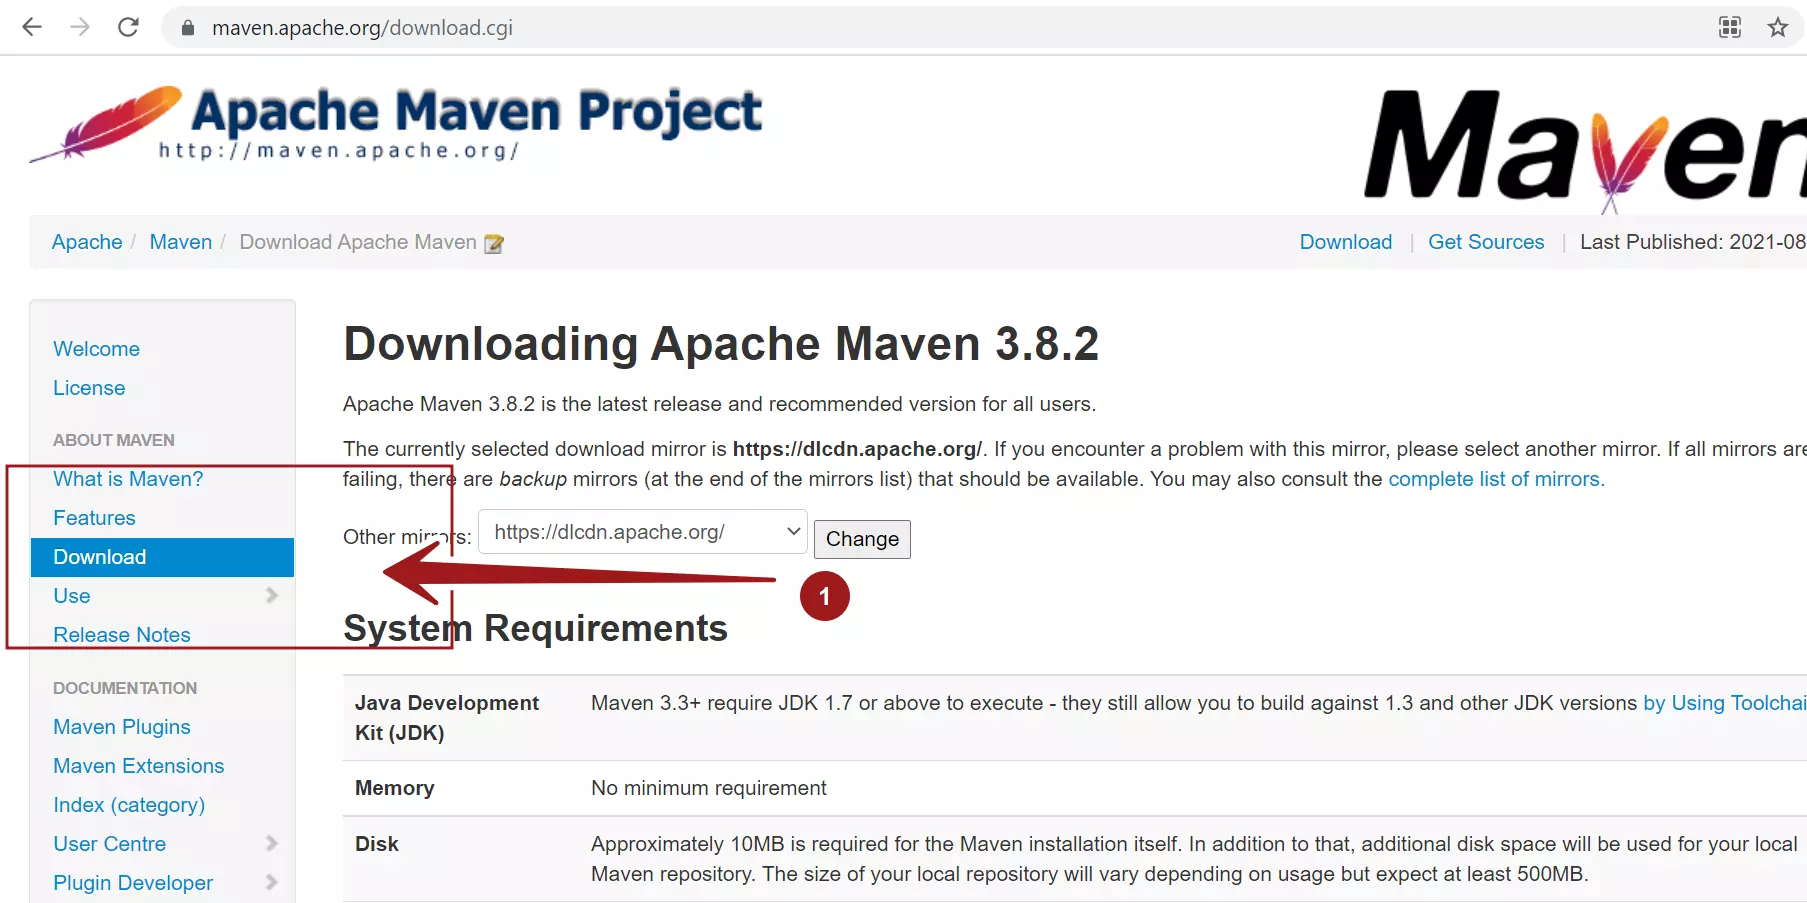
Choose Linux archive file and Download and Save the tar file onto the computer.
apache-maven-<version>.tar.gz
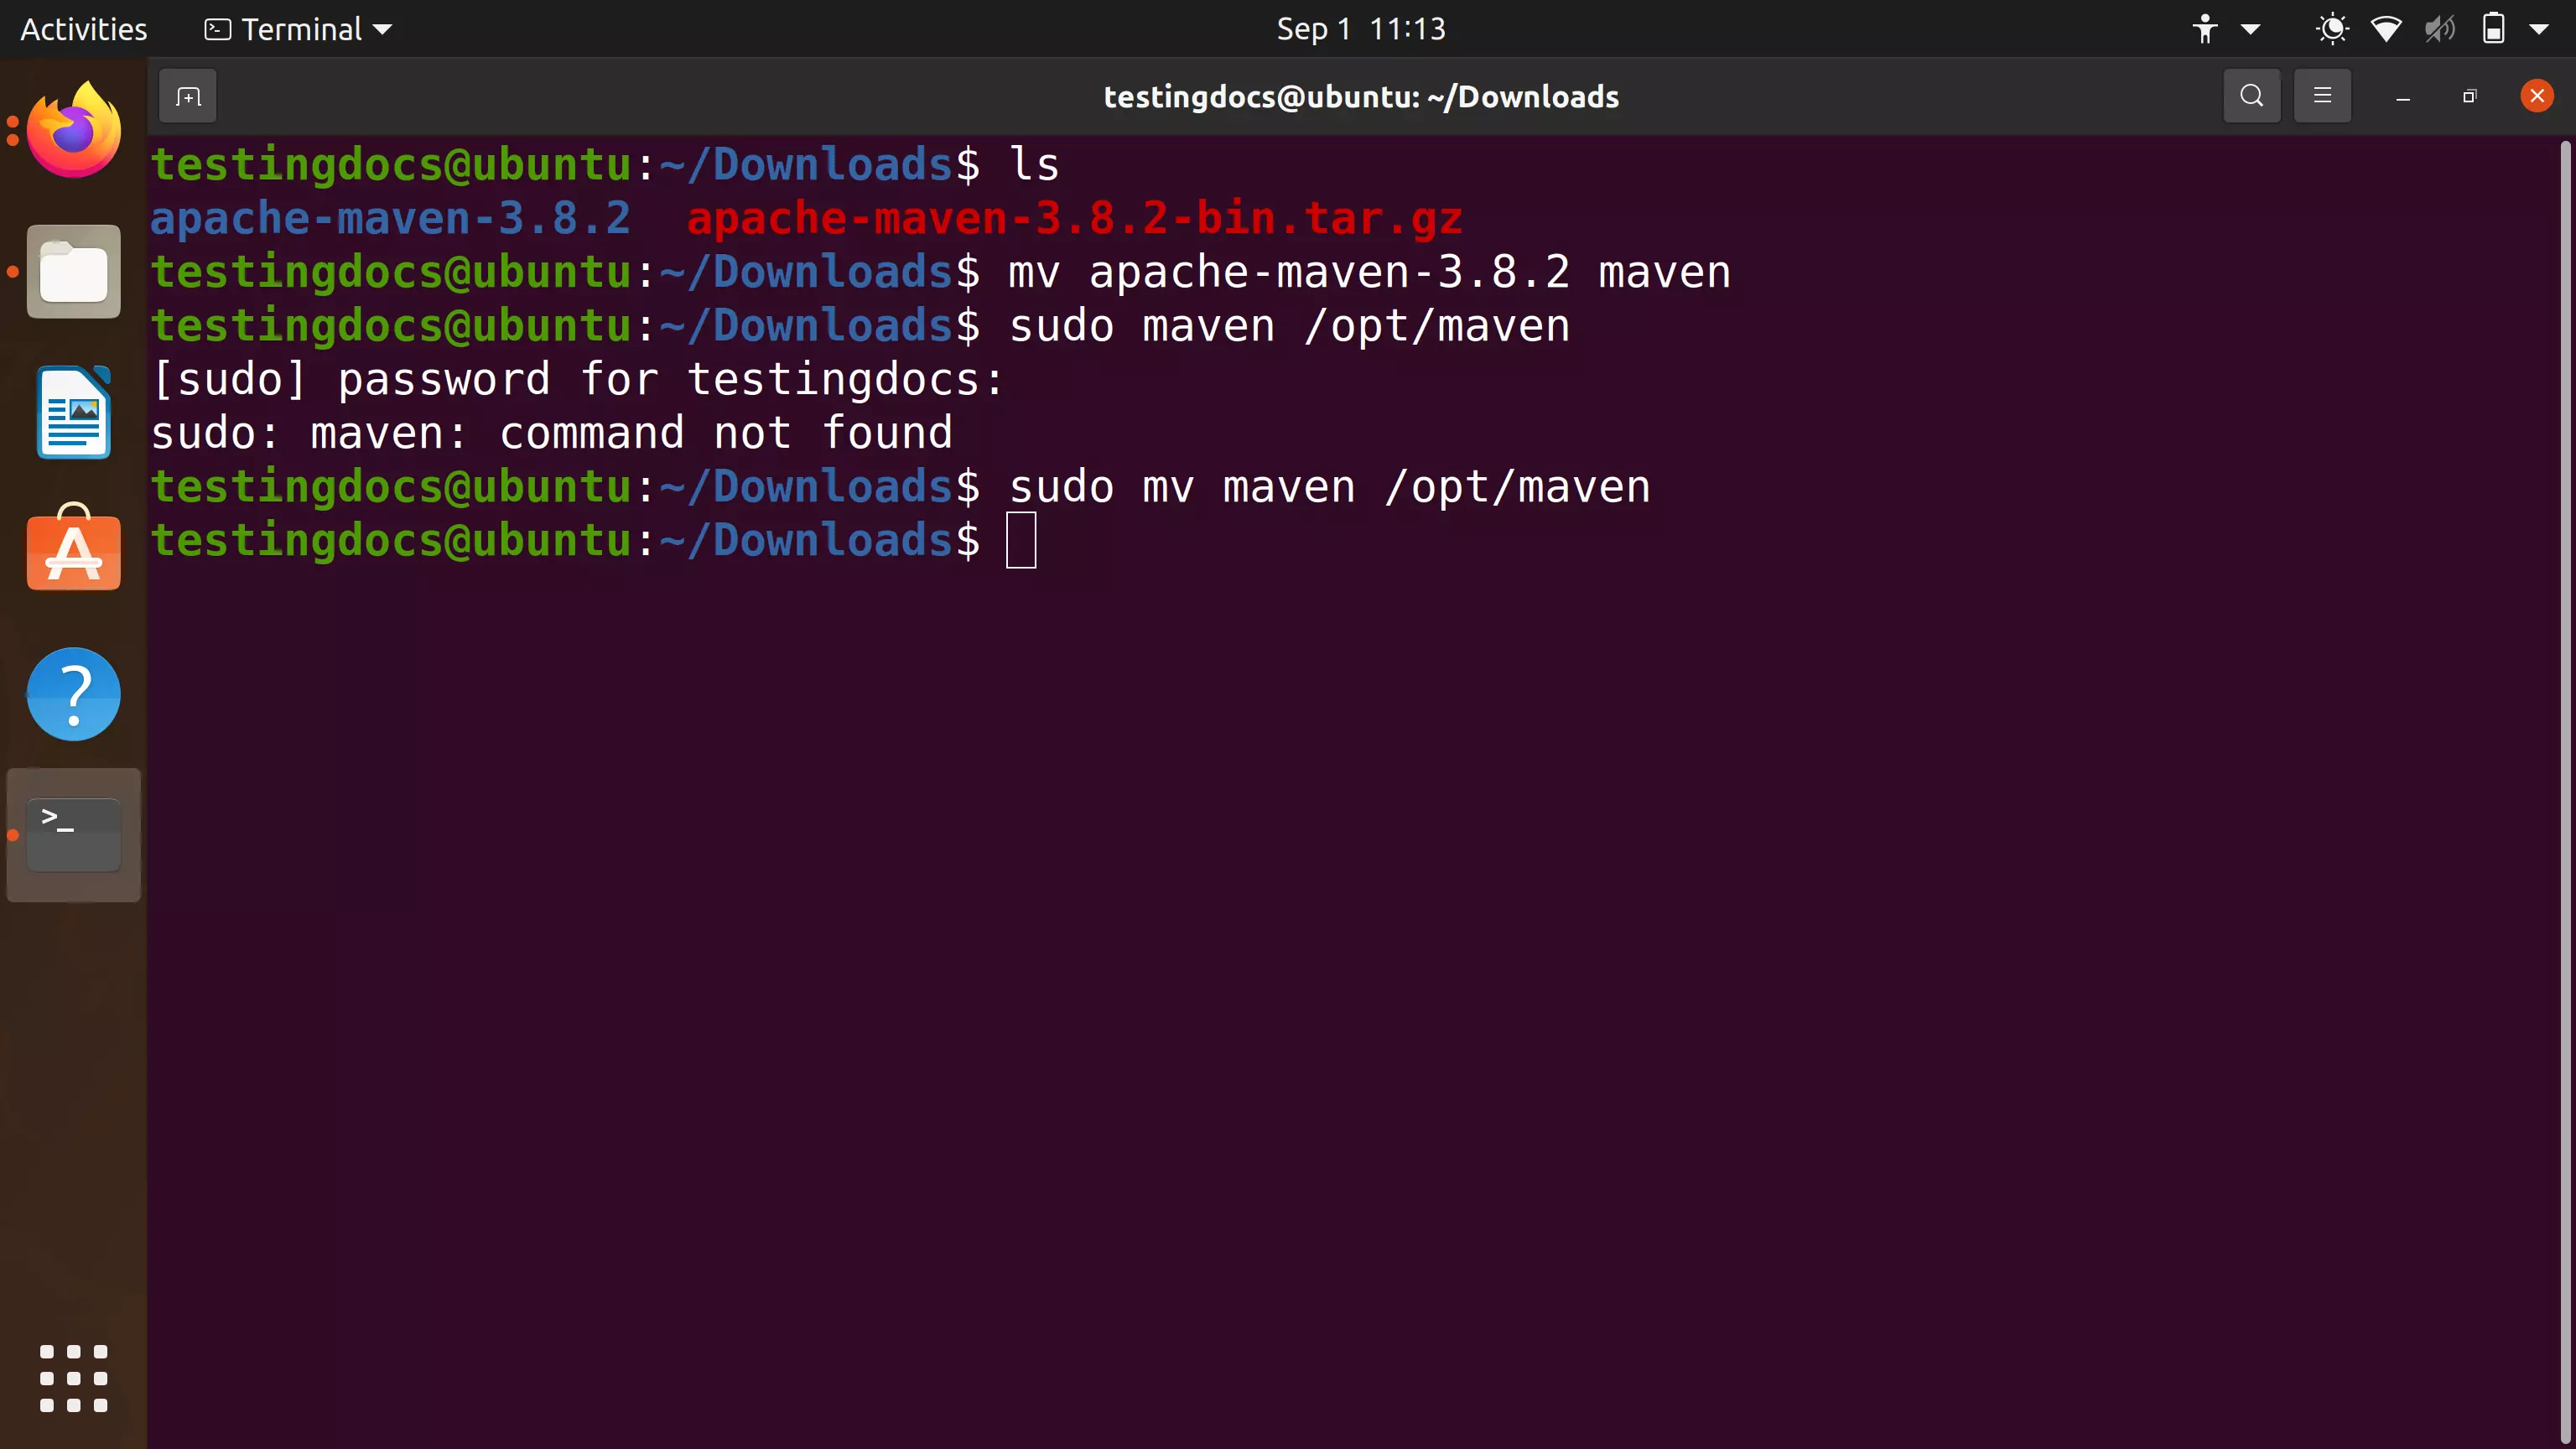
Extract the contents of the tar file.
$ tar -xvf <maven tar file location>
Move the contents to a suitable location, For example, to /opt/maven
Set M2_HOME
Set the M2_HOME environment variable. Edit /etc/profile file and the variable.
M2_HOME=/opt/maven
PATH= $PATH:$M2_HOME/bin
export M2_HOME
export PATH

Verify the Install
Launch the Terminal.
$ echo $M2_HOME
$ mvn -version
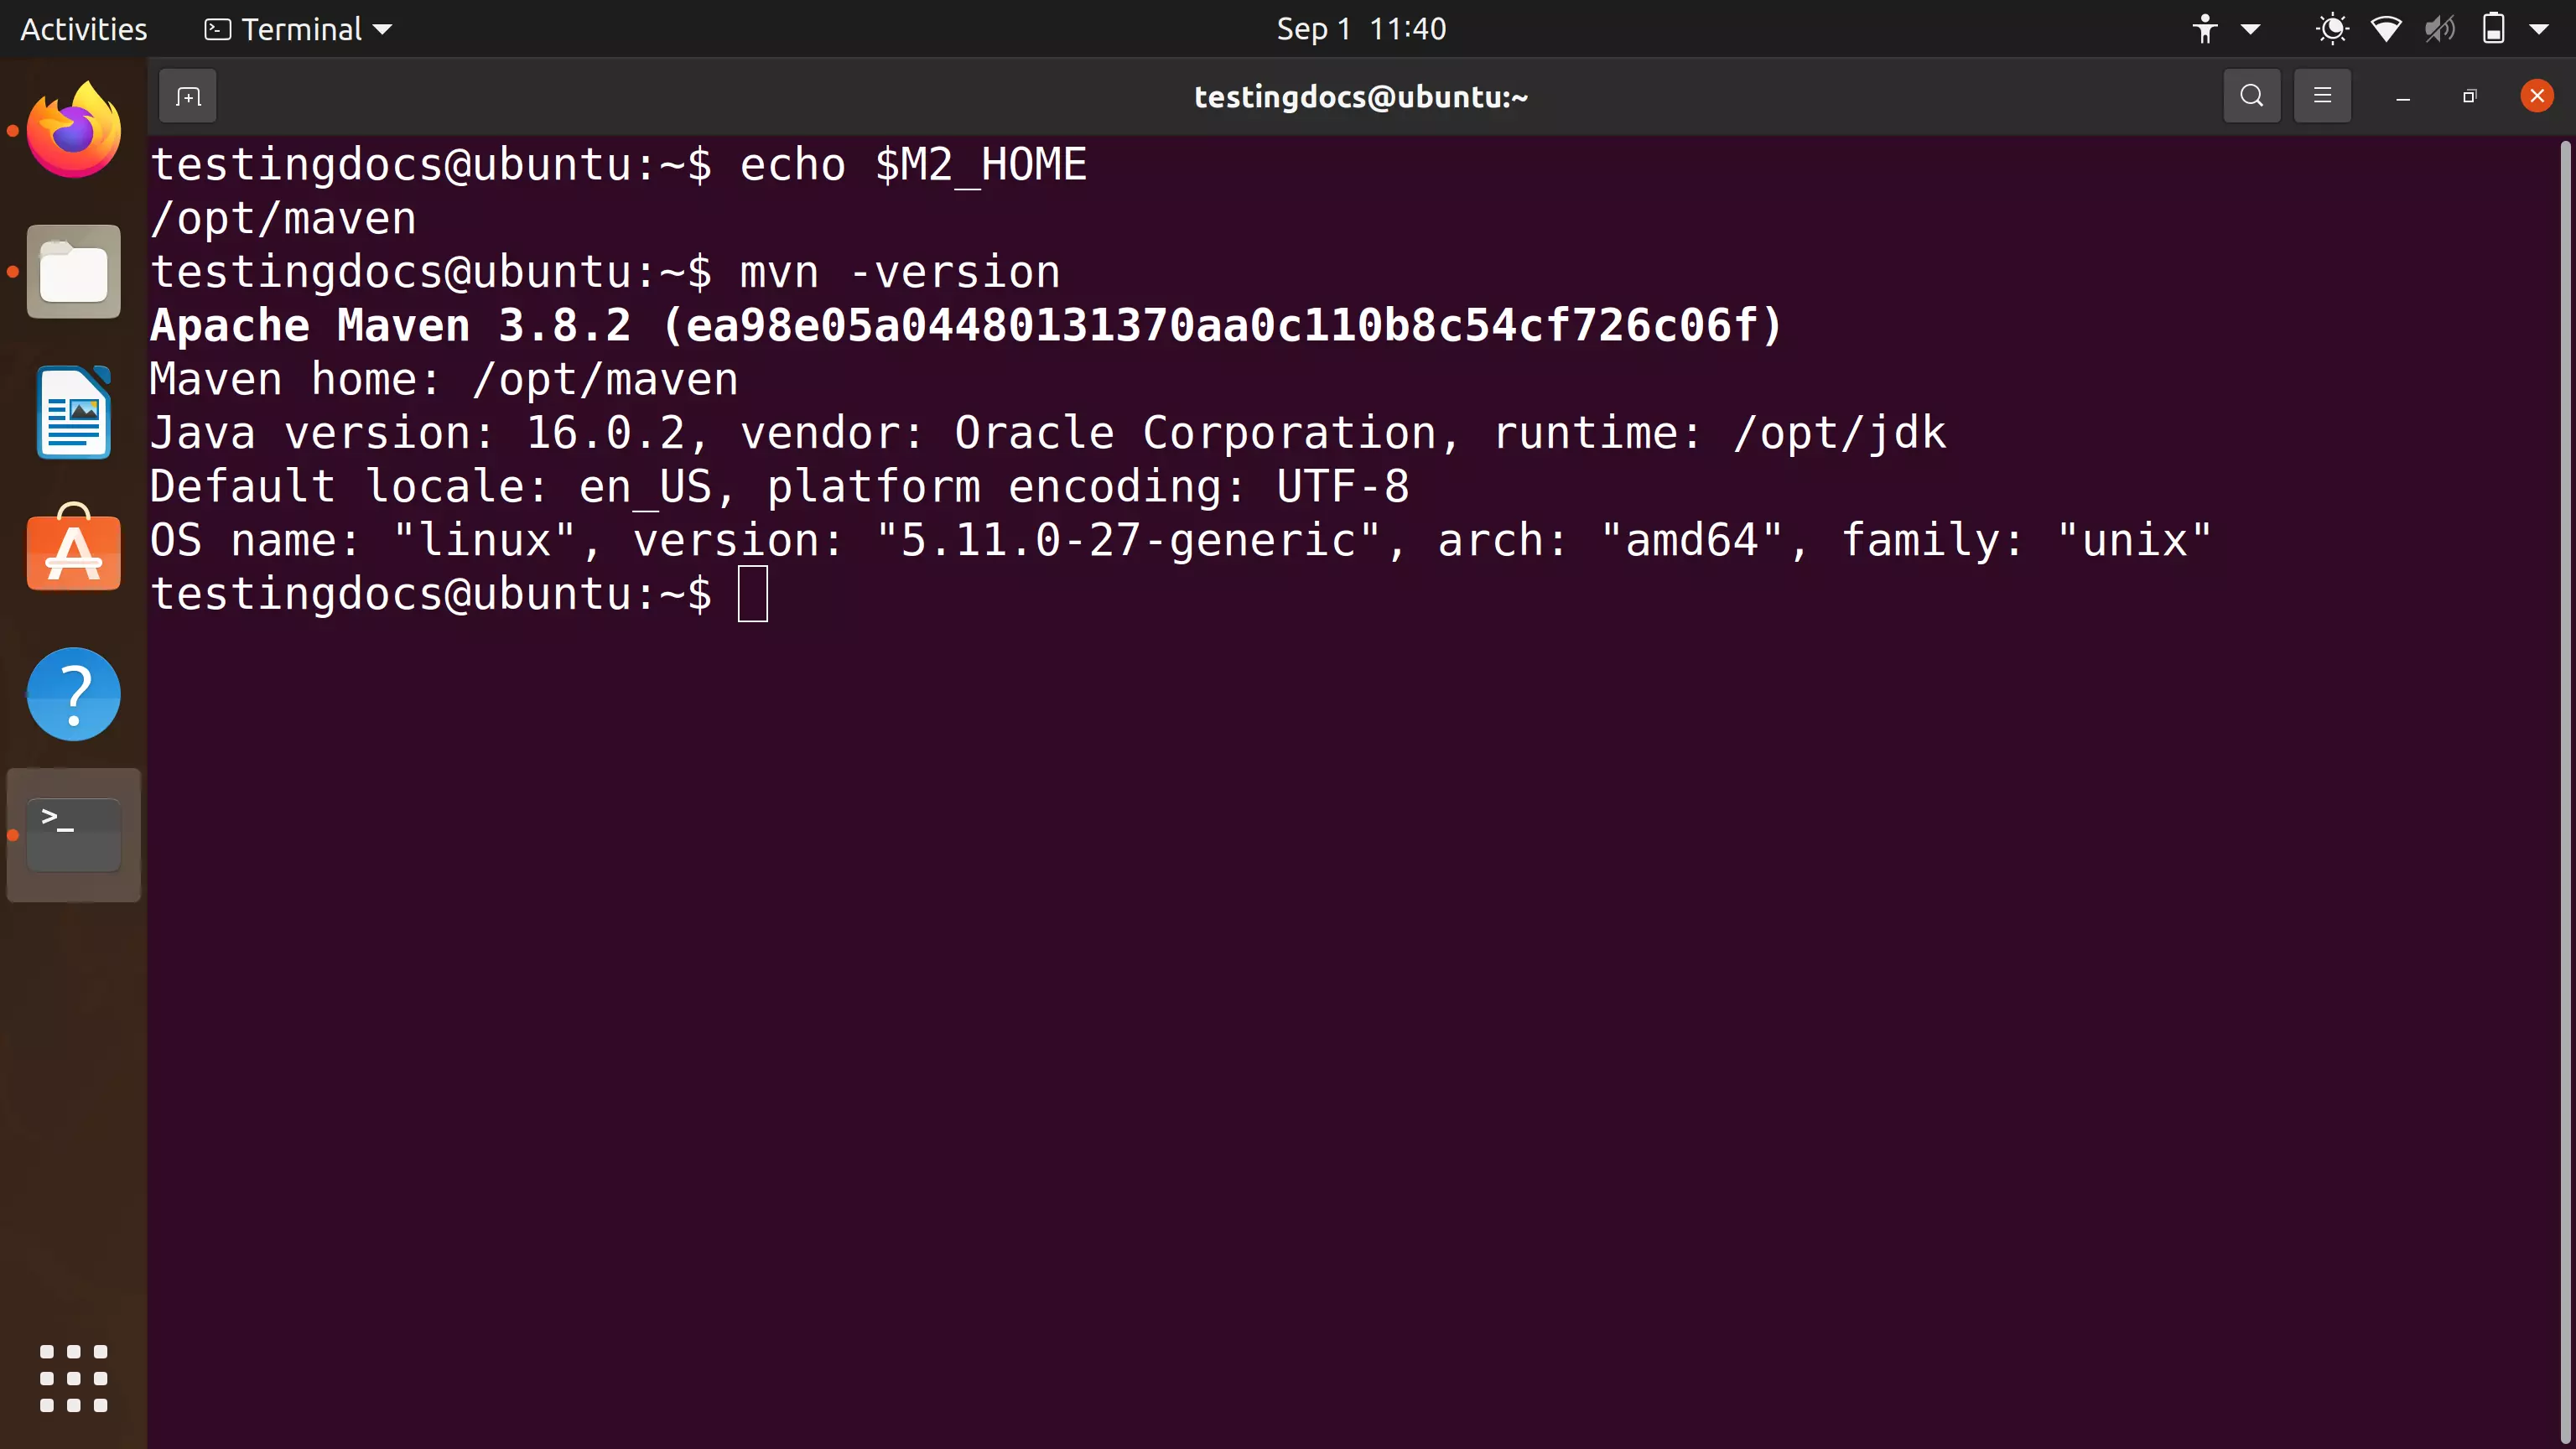
The version information should be displayed on successful Maven install.
Install Maven using Package Manager
This option is less technical savvy. The installation process is much simpler than the first option.
Launch terminal window
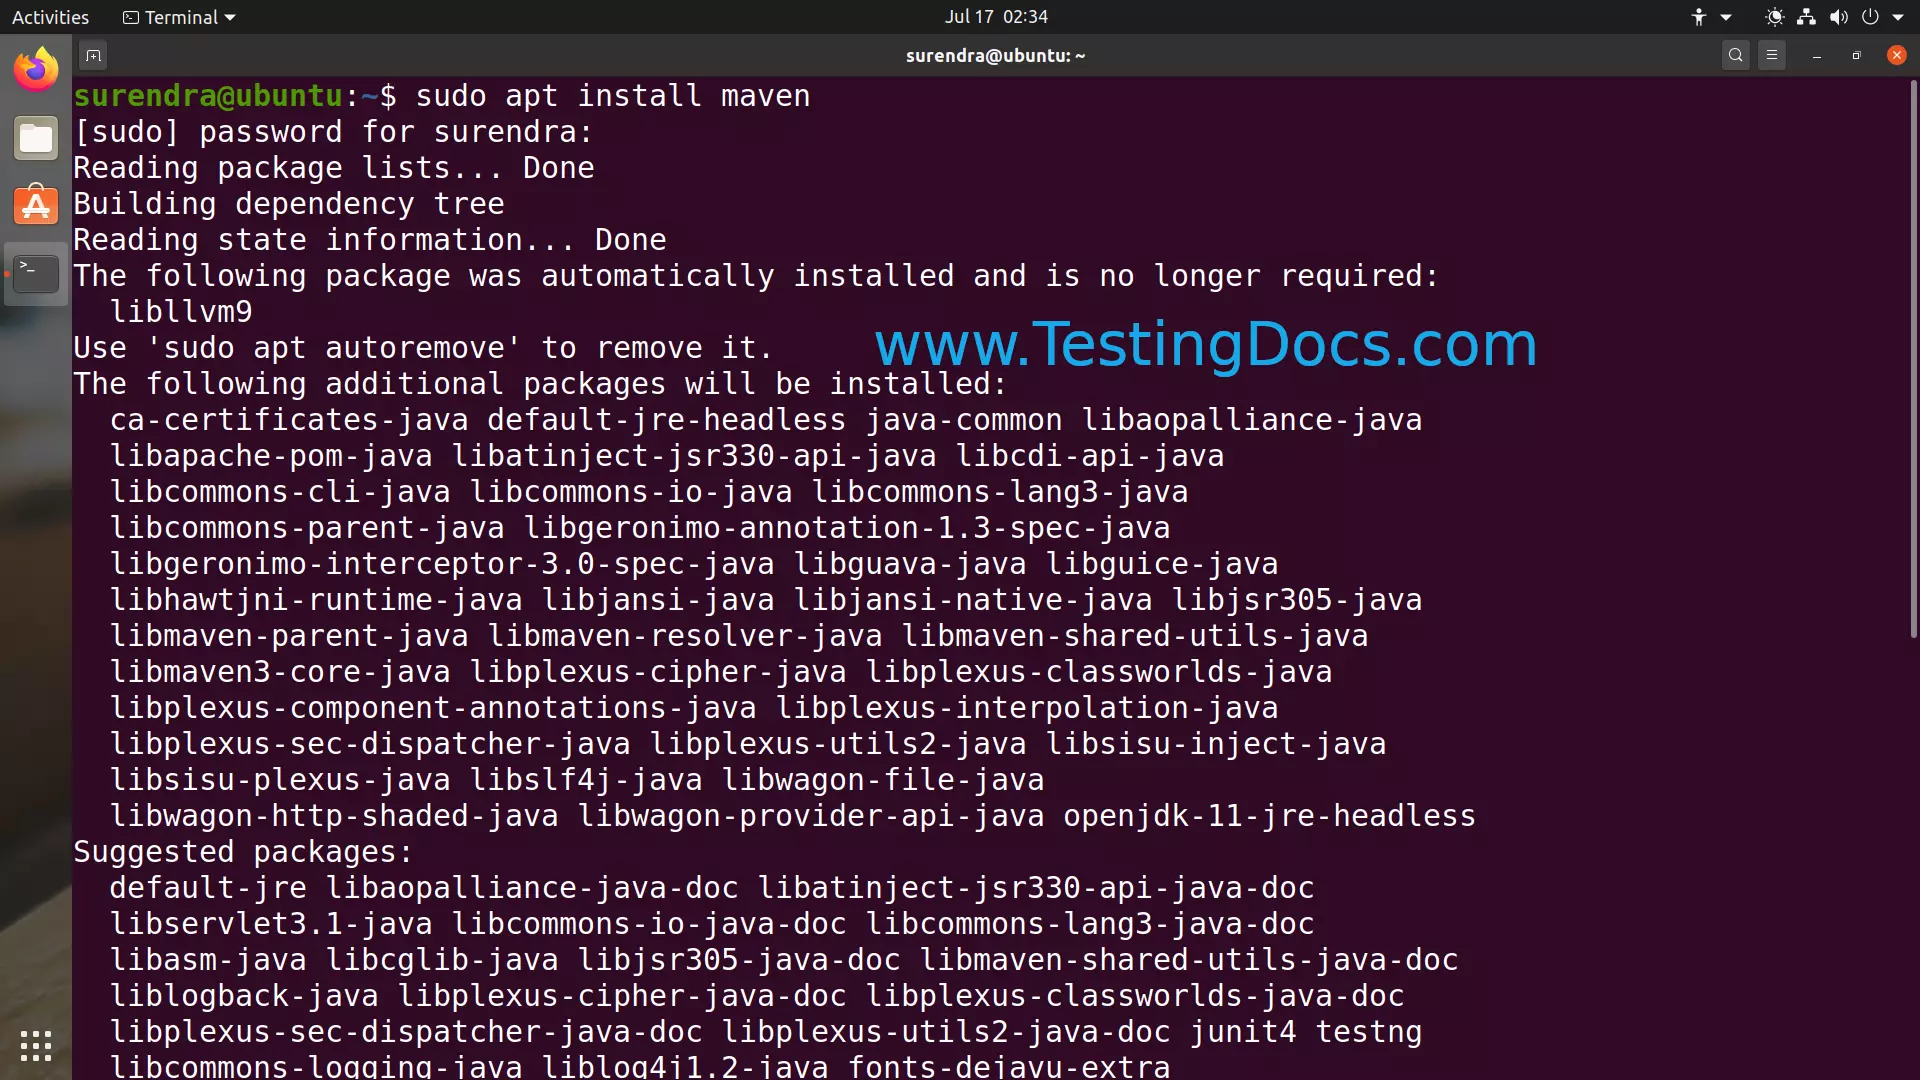
Execute the following command to install the tool.
$ sudo apt install maven
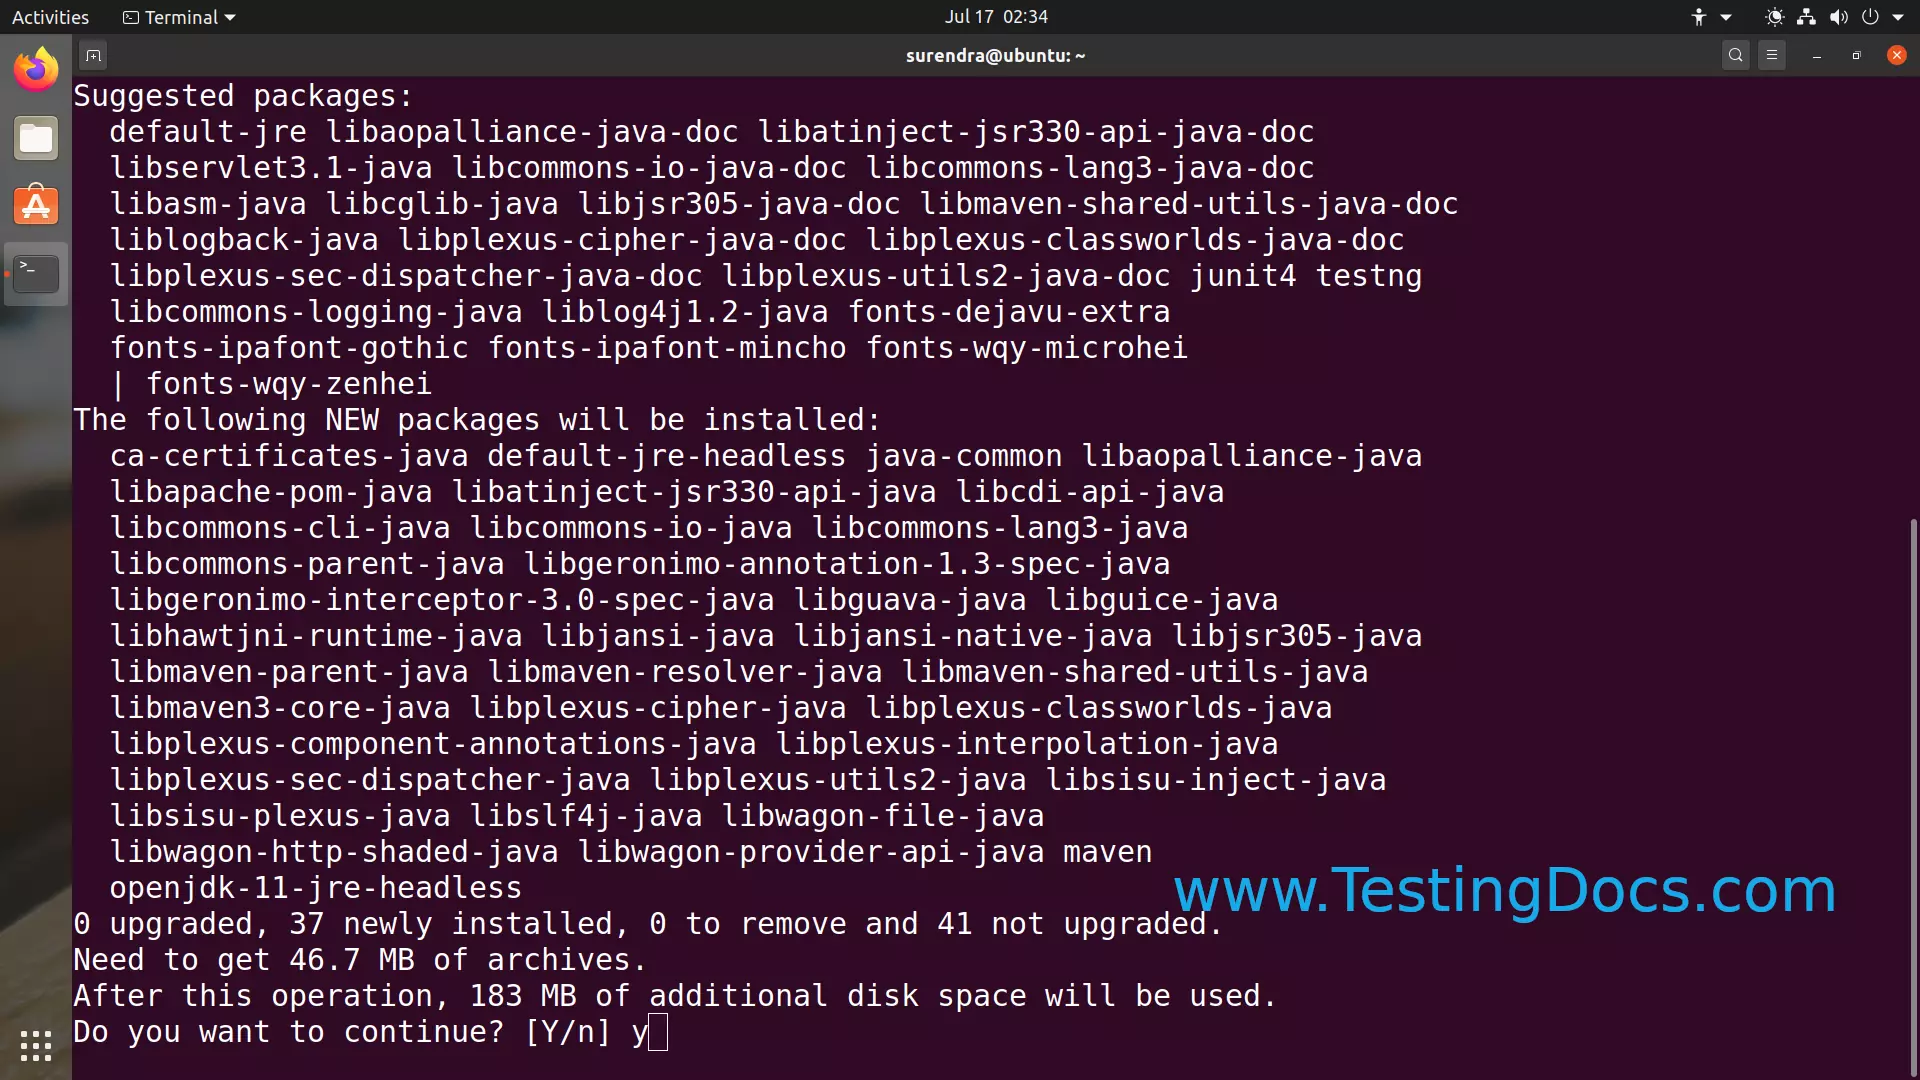
Type Y or y when prompted to install the tool.
Do you want to continue?
The installer would download all the required packages for the Maven tool.
Verification
Launch terminal window
Execute the following command to verify the Maven install.
$ mvn -version
That’s it. We are done with the Maven install on the Ubuntu machine.
Install Maven on Windows
Maven Tutorials on this website can be found at:
