Install Apache Maven on Windows 10
Install Apache Maven on Windows
Let’s see how to install Apache Maven on your Windows 10 machine. This post describes setting up the Apache Maven tool on your Windows machine.
System Requirements
Maven 3.x requires JDK 1.7 or above. You need minimum disk space to download the archive and your local Maven repository.
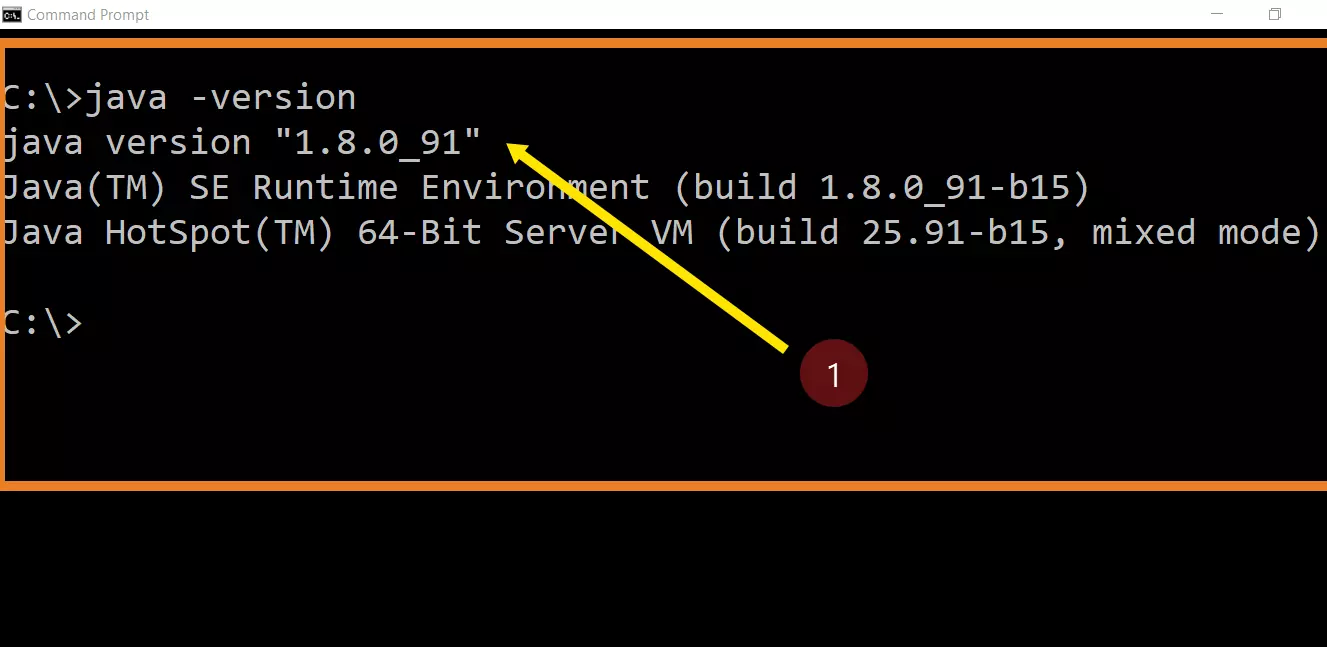
You can verify Java installation and check the Java version on your machine with the Java command.
Open the command prompt and execute the below command.
/> java -version
Download Maven
Download the Maven 3.x archive from the download url as shown in the picture. Maven is distributed in several formats. Pick the .zip archive format and download it onto your Windows machine.
- https://maven.apache.org/download.cgi

Install Maven
The installation of Apache Maven is simple. Extract the downloaded .zip archive and copy the folder to your favorite location on your hard drive. Alternatively, you can rename the folder to strip the version details, etc. ( e.g., maven )
Ensure the JAVA_HOME environment variable is set and points to your JDK installation. To check the environment variable value, use the following command
/> echo %JAVA_HOME%
You should see the JDK installation path in the output.
Add the maven bin folder to your PATH environment variable in the next step.
Just ask Cortana “environment variables”
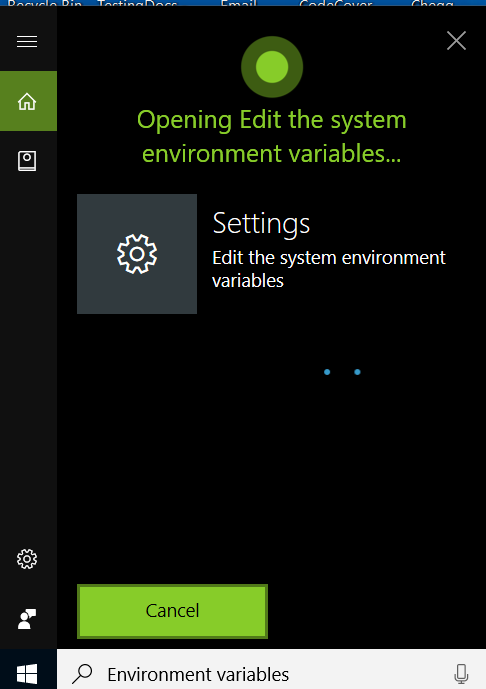
Cortana opens the System Properties window for you. Click Environment variables in the System properties windows.
Under System variables, select Path variable and click the Edit… button.
Click the New button to add the Maven bin directory to the PATH.
Verify Maven Install
You can verify the installation to make sure everything was set up correctly with the mvn command. Open the command prompt and issue the following command.
/> mvn -version
Verify the command’s output. You should see the Maven version in the output. That’s it. You are done with the Maven install process.
Next Steps
Setting up MAVEN_HOME
See Also
Installing on Ubuntu Linux
Maven Tutorials
Maven Tutorials on this website can be found at:
