Create Web Application with Maven
Create Web Application with Maven
This post will create a simple web application with Maven and IntelliJ IDEA. You can create a Java web application using maven-archetype-webapp plugin. We can create using IDE tools as well as command-line console.
Steps to create
Click Create New Project on the Welcome screen
or
Select File >> New >> Project.
You can select Maven tool and check the box create from the archetype
Select maven-archetype-webapp
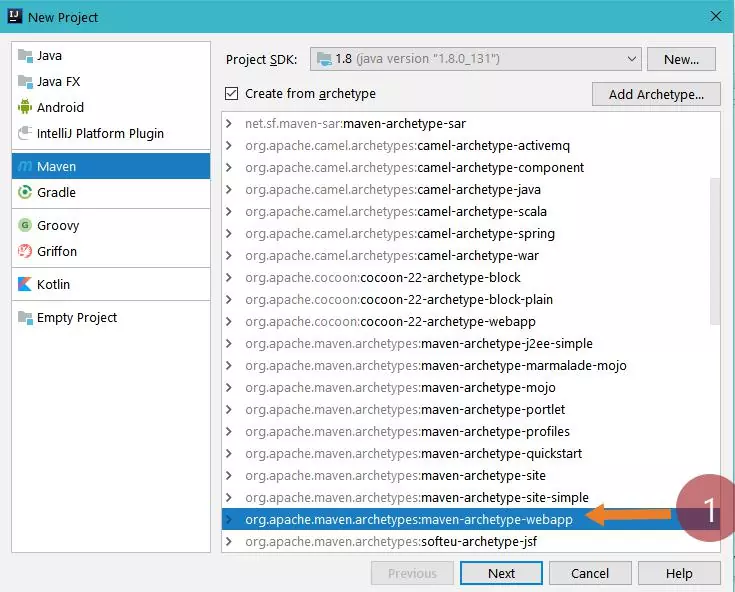
Click on the Next button.
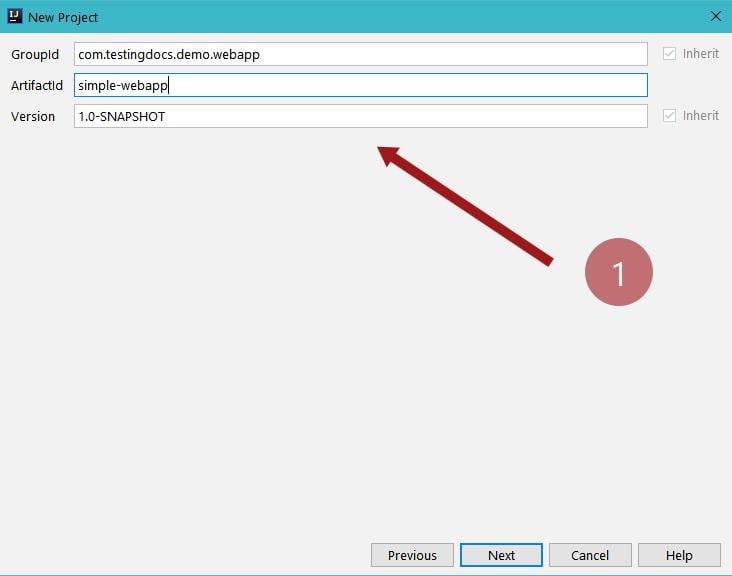
Project details
Enter groupid, artifactid and version details for the project and click on the Next button.
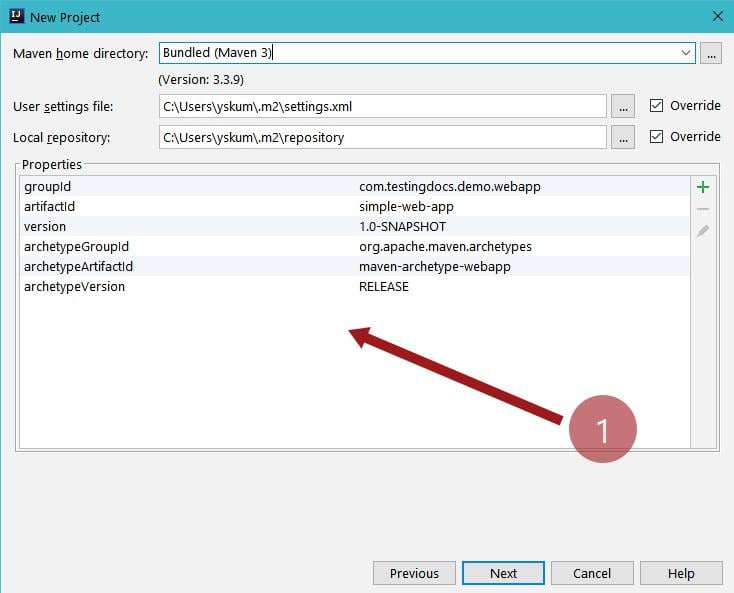
Optionally, you can also override the maven local and settings file configuration with custom ones.
In the next step, enter Project details like project name and location.
Click on the Finish button.
Once you hit on the finish button, the IDE would automatically create and build the project for you and download the dependencies. You can start adding functionality and web-pages on top of it.

POM.xml
<project xmlns="http://maven.apache.org/POM/4.0.0" xmlns:xsi="http://www.w3.org/2001/XMLSchema-instance"
  xsi:schemaLocation="http://maven.apache.org/POM/4.0.0 http://maven.apache.org/maven-v4_0_0.xsd">
  <modelVersion>4.0.0</modelVersion>
  <groupId>com.testingdocs.demo.webapp</groupId>
  <artifactId>simple-webapp</artifactId>
  <packaging>war</packaging>
  <version>1.0-SNAPSHOT</version>
  <name>simple-webapp Maven Webapp</name>
  <url>http://maven.apache.org</url>
  <dependencies>
    <dependency>
      <groupId>junit</groupId>
      <artifactId>junit</artifactId>
      <version>4.12</version>
      <scope>test</scope>
    </dependency>
  </dependencies>
  <build>
    <finalName>simple-webapp</finalName>
  </build>
</project>
Build, Deploy and Run
Once you are done with the step, execute maven goals under life cycle
View >> Tool Windows >> Maven Projects
Execute clean, compile, verify, and package goals.
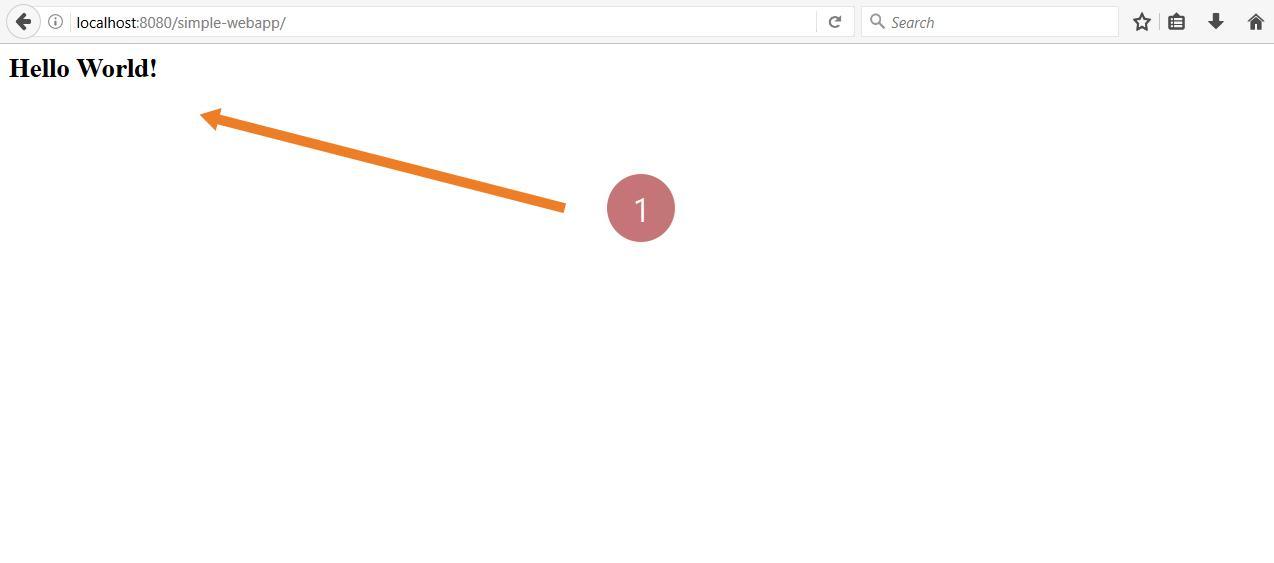
Copy the war file created under the target folder and deploy it on the server.
Visit the URL: http://<<server>>:<<port>>/simple-webapp/
Maven Tutorials
Maven Tutorials on this website can be found at:
