Take Screenshot on Windows 11 PC
Take Screenshot on Windows 11 PC
Let’s learn how to take a screenshot on Windows 11 PC. Screenshots add value to Bug/Defect reports. This post is a two part series, in the later part we will learn how to attach the Screenshot in a Bug Reporting tool such as MantisBT.
Screenshots help Developers to understand the problem and they give visual clues about the underlying problem. There are many ways to take a screenshot on a Windows 11 PC.
Use Snipping Tool
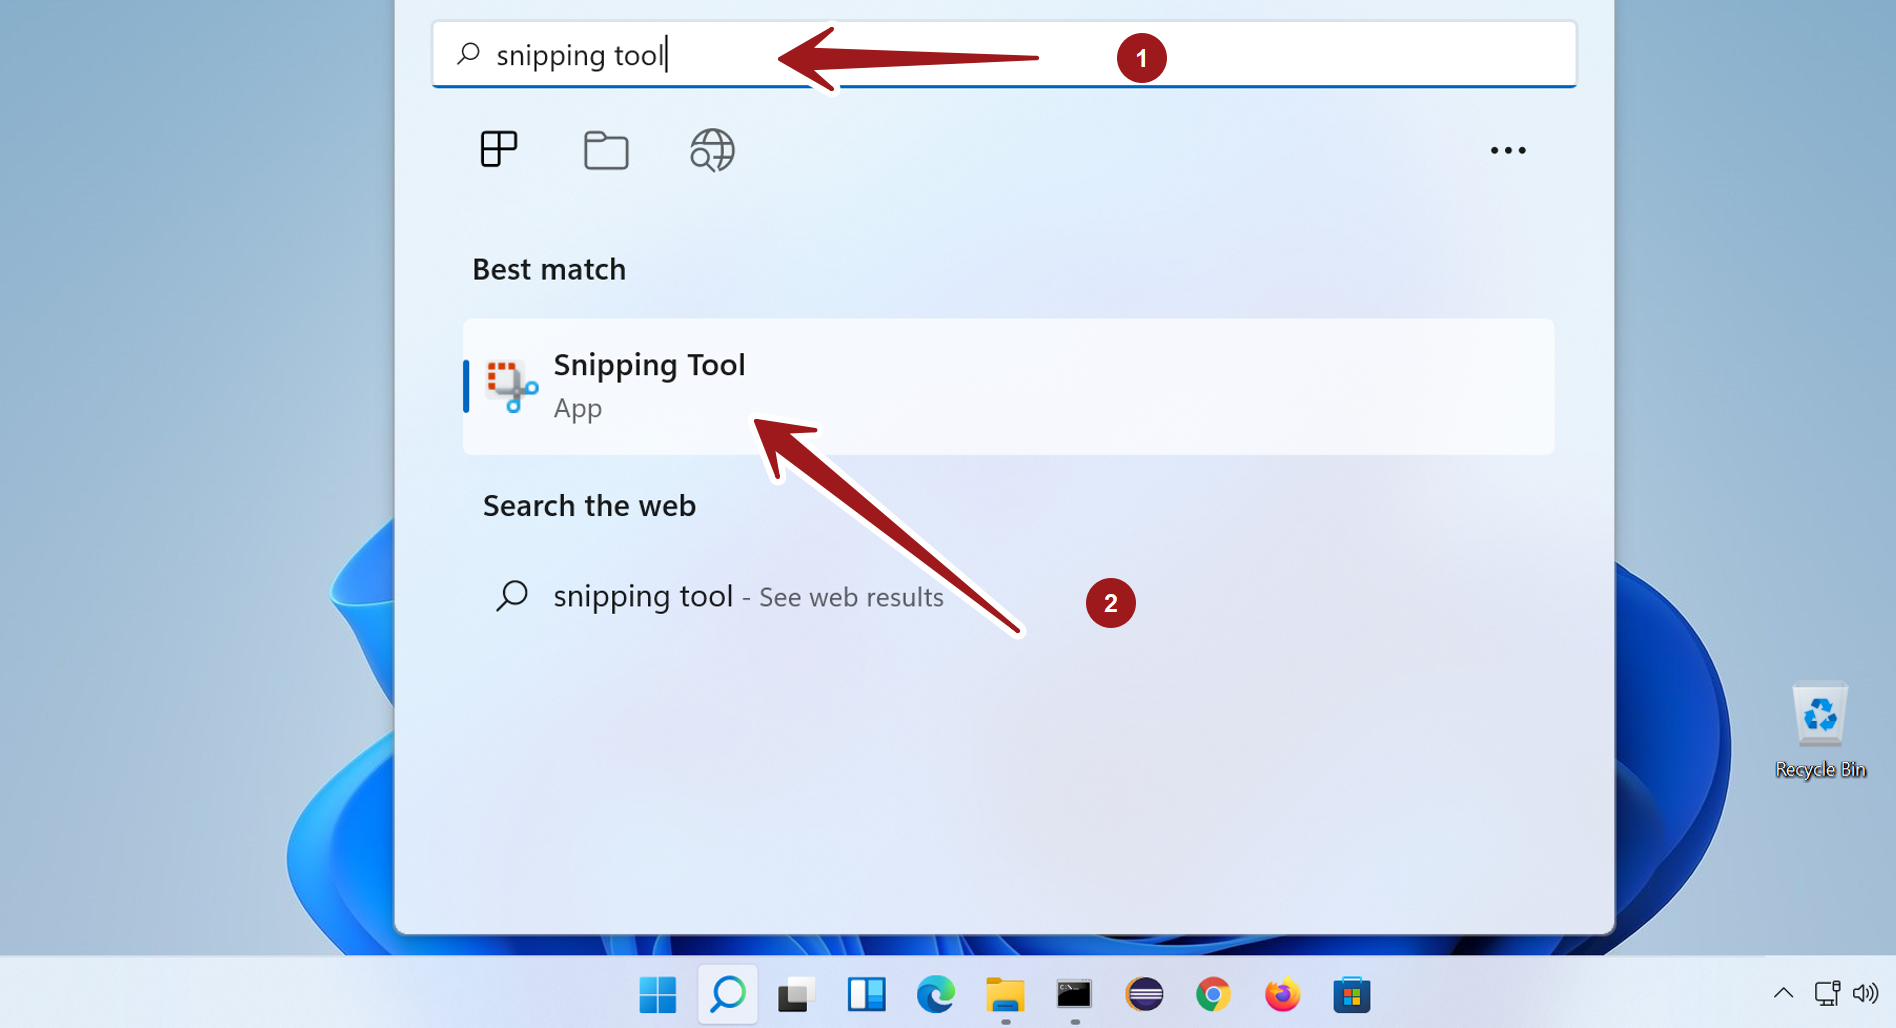
Click the Search lens icon in the Taskbar.
Search the Snipping tool. Click the Snipping tool App search entry to launch the tool.
Click New. This will allow us to select a portion of the screen.
Keyboard Shortcut
Press the Window Key + Shift + s, this will allow us to drag and select a portion of the computer screen to capture.
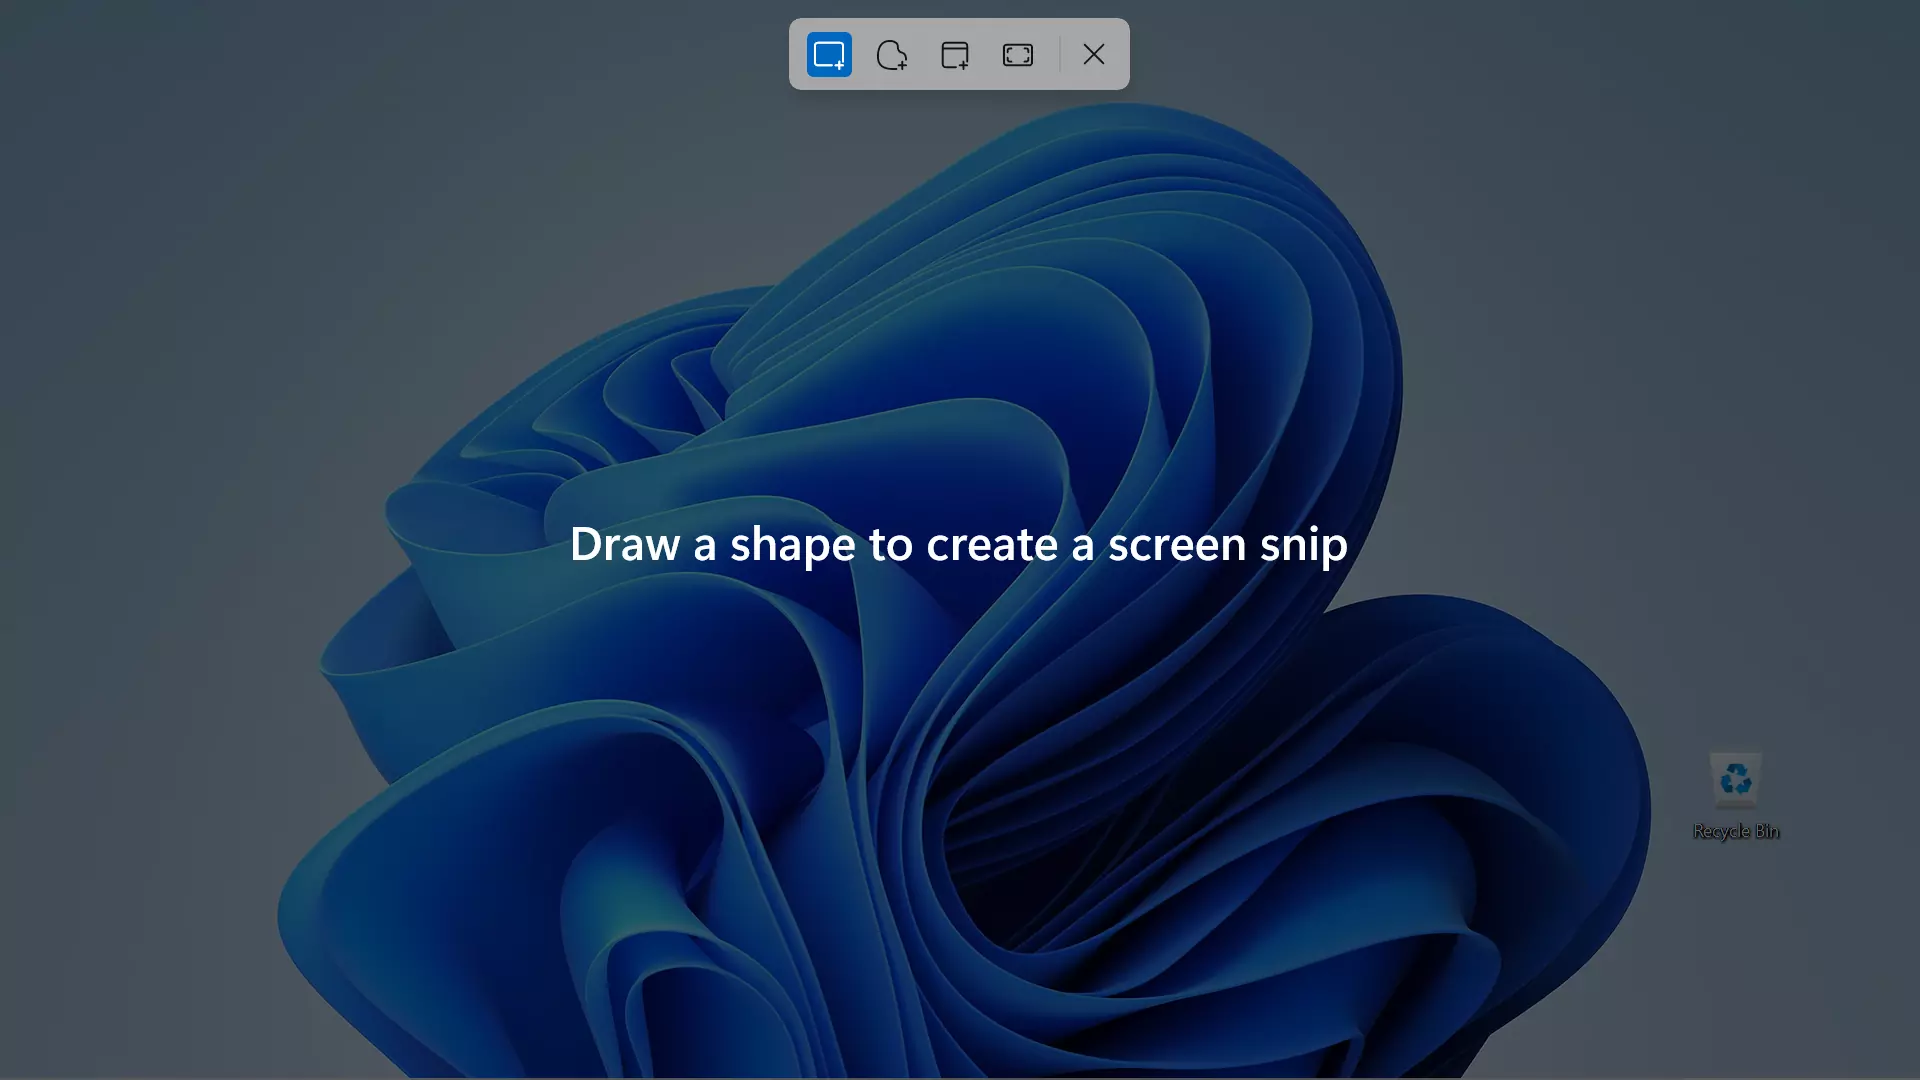
We can save it by clicking the Save floppy icon or using Ctrl + S command. We can can select the shape of your screenshot from the Mode menu.
- Rectangle mode
- Window mode
- Full-screen mode
- Free-form mode

Use Print Screen( PrtSc ) button
Press the PrtSc button from the keyboard. When we press the Print Screen button the whole screen is copied to the Clipboard. Later, we can paste it on another program such as MS Paint, MS Word document, etc.
Note that : The use of PrtSc may vary on different PCs. On some computers, you may need to press the PrtSc button along with the Function key(Fn)
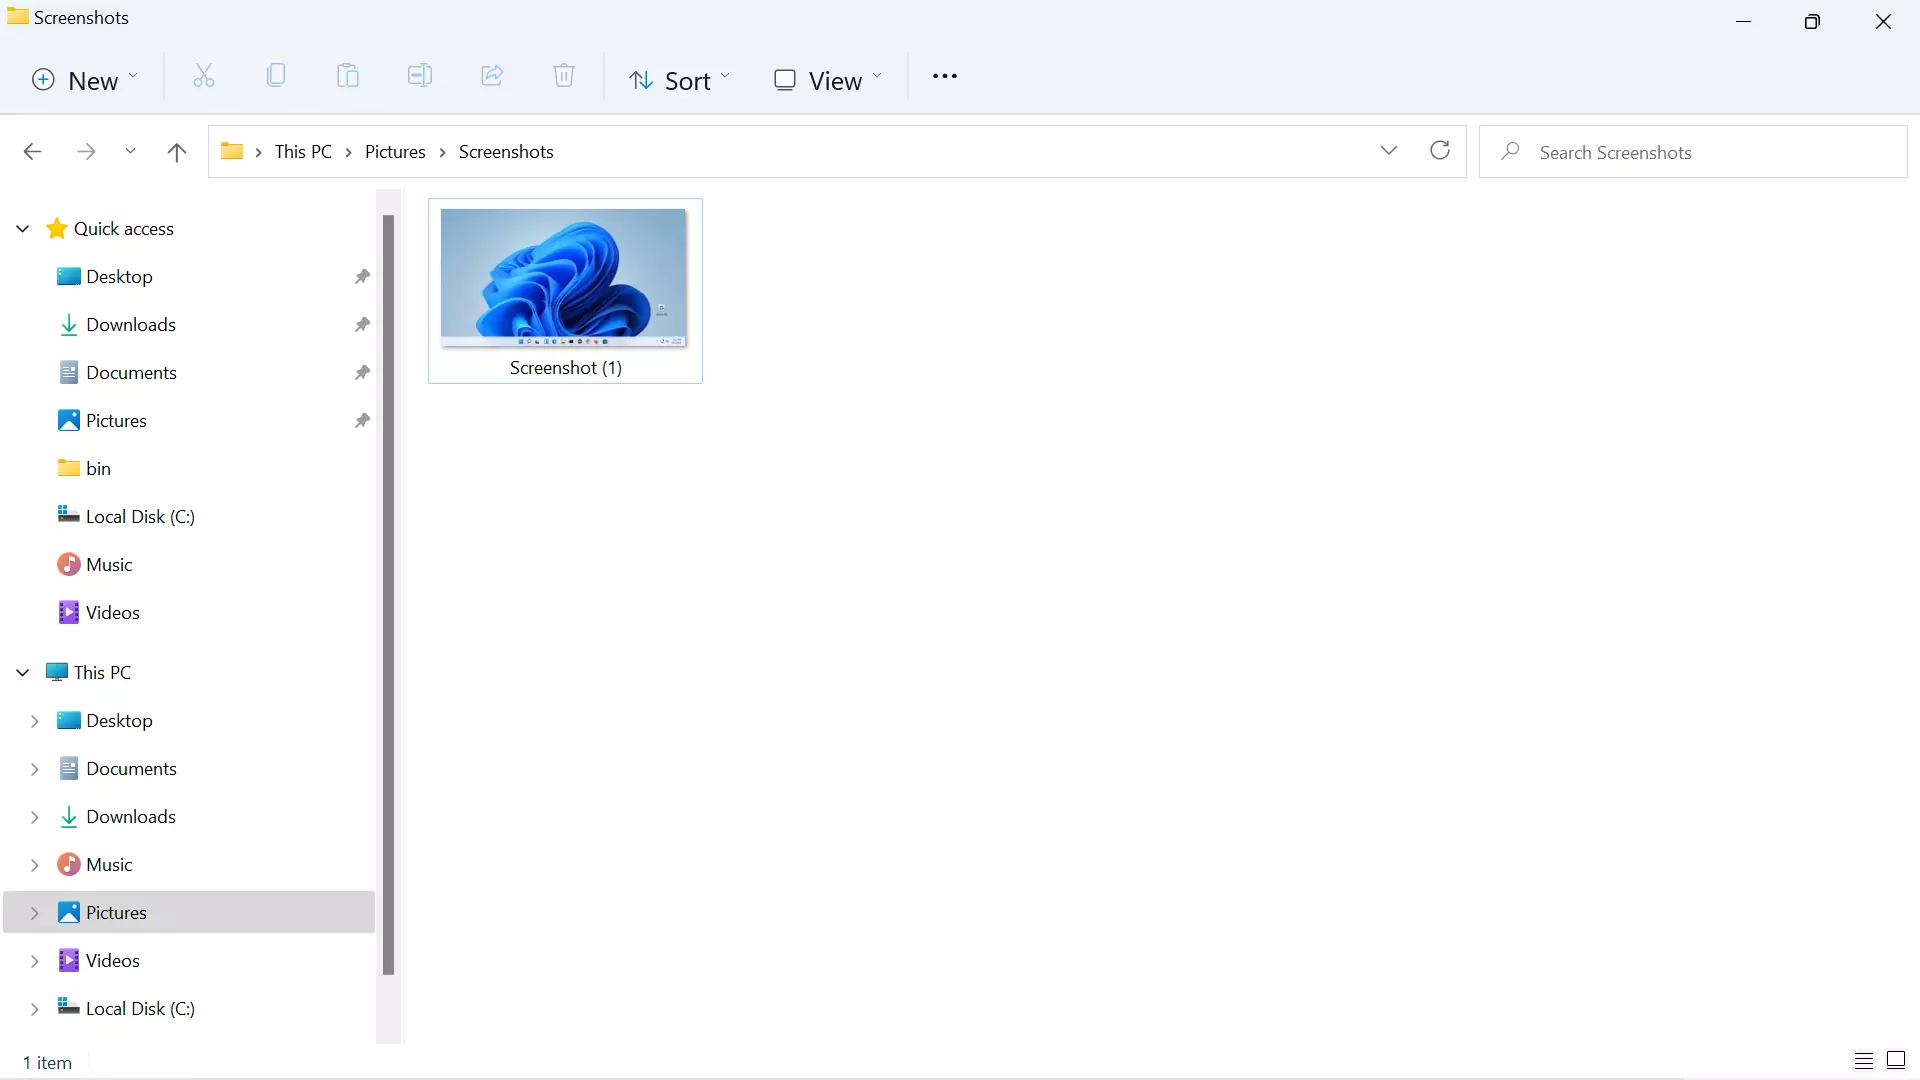
Press Windows Key + PrtSc. It will save the screen as an image file. We can browse in the File Explorer to Pictures -> Screenshots.