Download .NET Core Runtime on Windows 11
Download .NET Core Runtime
In this tutorial, we will download the .NET Core Runtime for the Windows 11 operating system. The .NET Core runtime is required for running .NET Core and ASP.NET Core applications.
The .NET platform is a free, open-source, cross-platform developer platform for building many types of applications.
There are different flavors of the .NET Core
- .NET Core runtime ( To run Windows console applications )
- .NET Core Desktop runtime( To run Windows desktop applications )
- .NET Hosting bundle ( To run web/server applications )
Download .NET Core
The steps to download the .NET core are as follows:
Open a web browser and navigate to the.NET Core download URL:
- https://dotnet.microsoft.com/en-us/download/dotnet/3.1/runtime?cid=getdotnetcore
Pick the LTS(Long-Term Support) release version. The LTS release builds have long-term extended support for up to 3 years.
However, to try new features early and on experimental machines, we can install the Preview release builds. These are under development and not recommended for production machines.
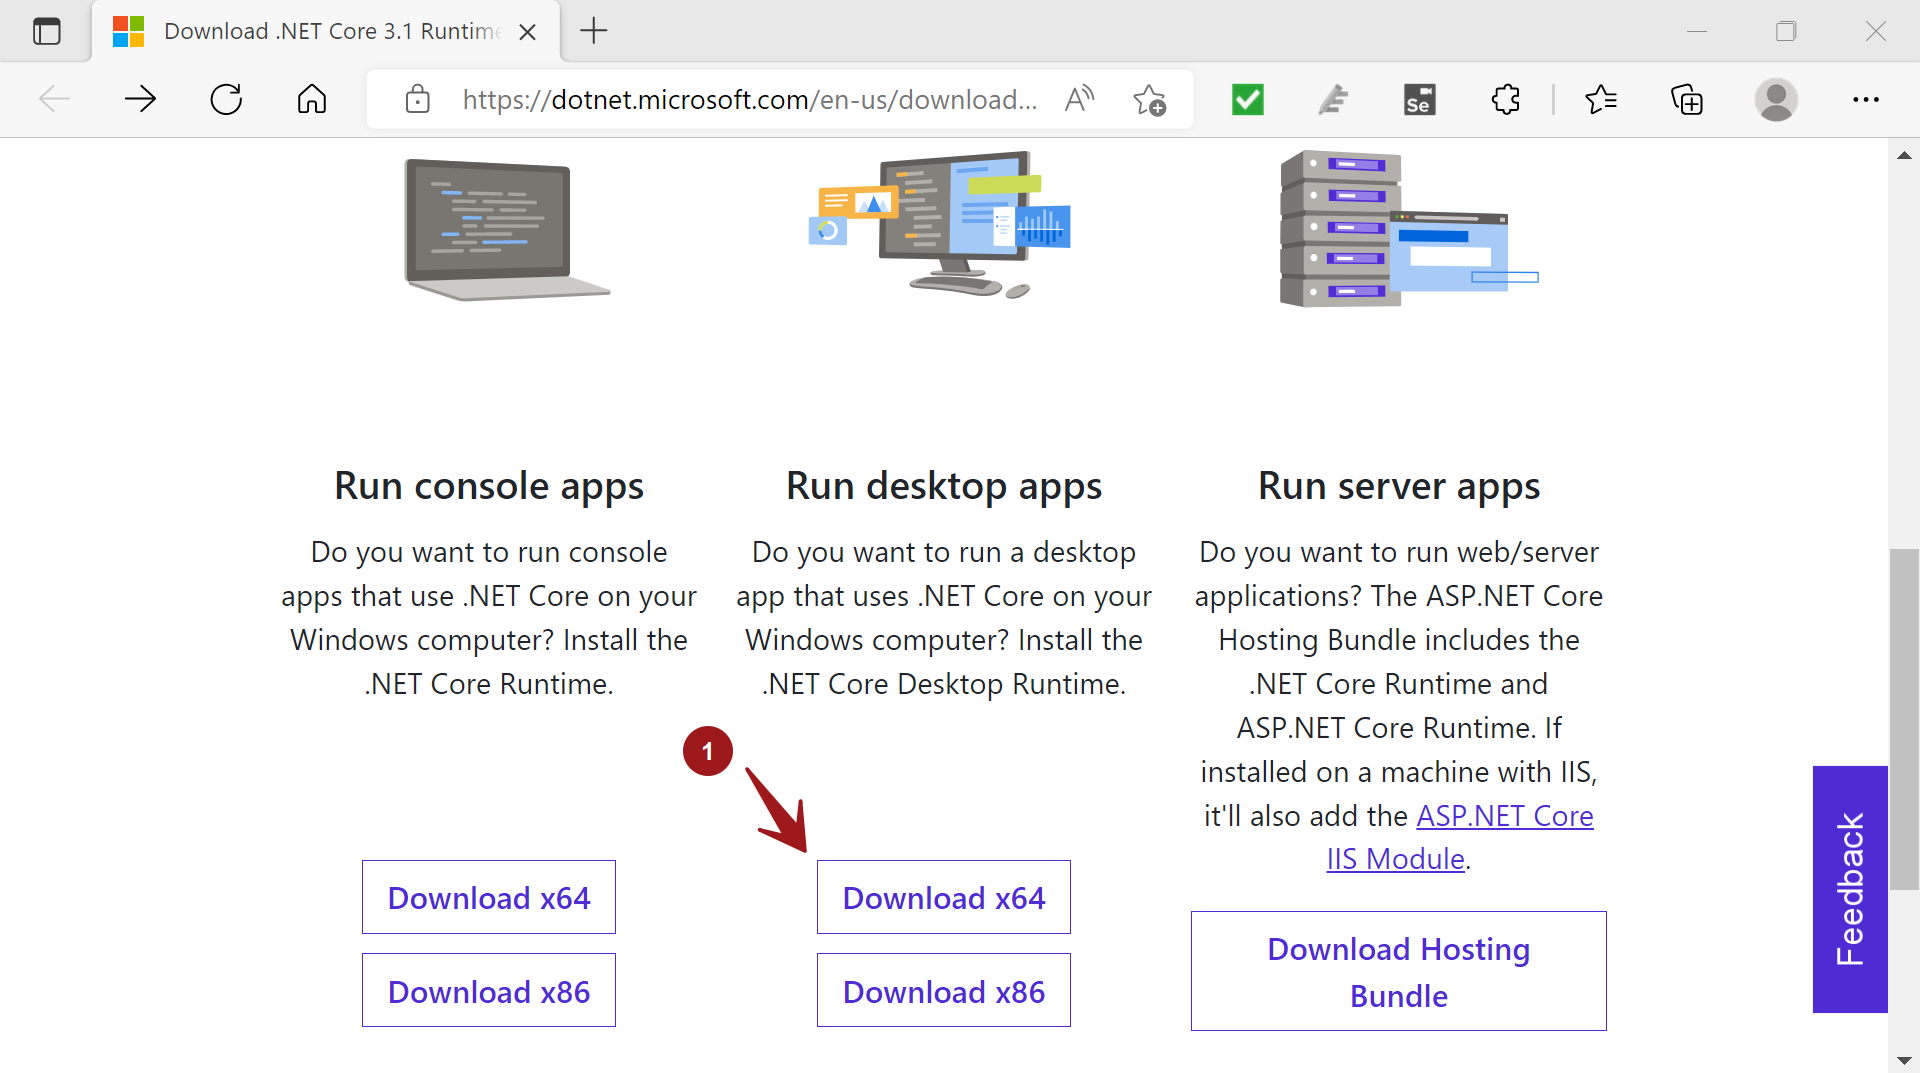
To run desktop applications that use .NET core on your computer, download the .NET Core Desktop runtime. On 64-bit modern computers and laptops, click on the Download x64 download button.
Install .NET Core
Locate the runtime installer file. This would be, by default, the Downloads folder.
Double-click on the installer file to install the runtime on the computer. This will launch the setup wizard screen.
Install the .NET Core Desktop Runtime. Click on the Install button to install it on the setup install screen.
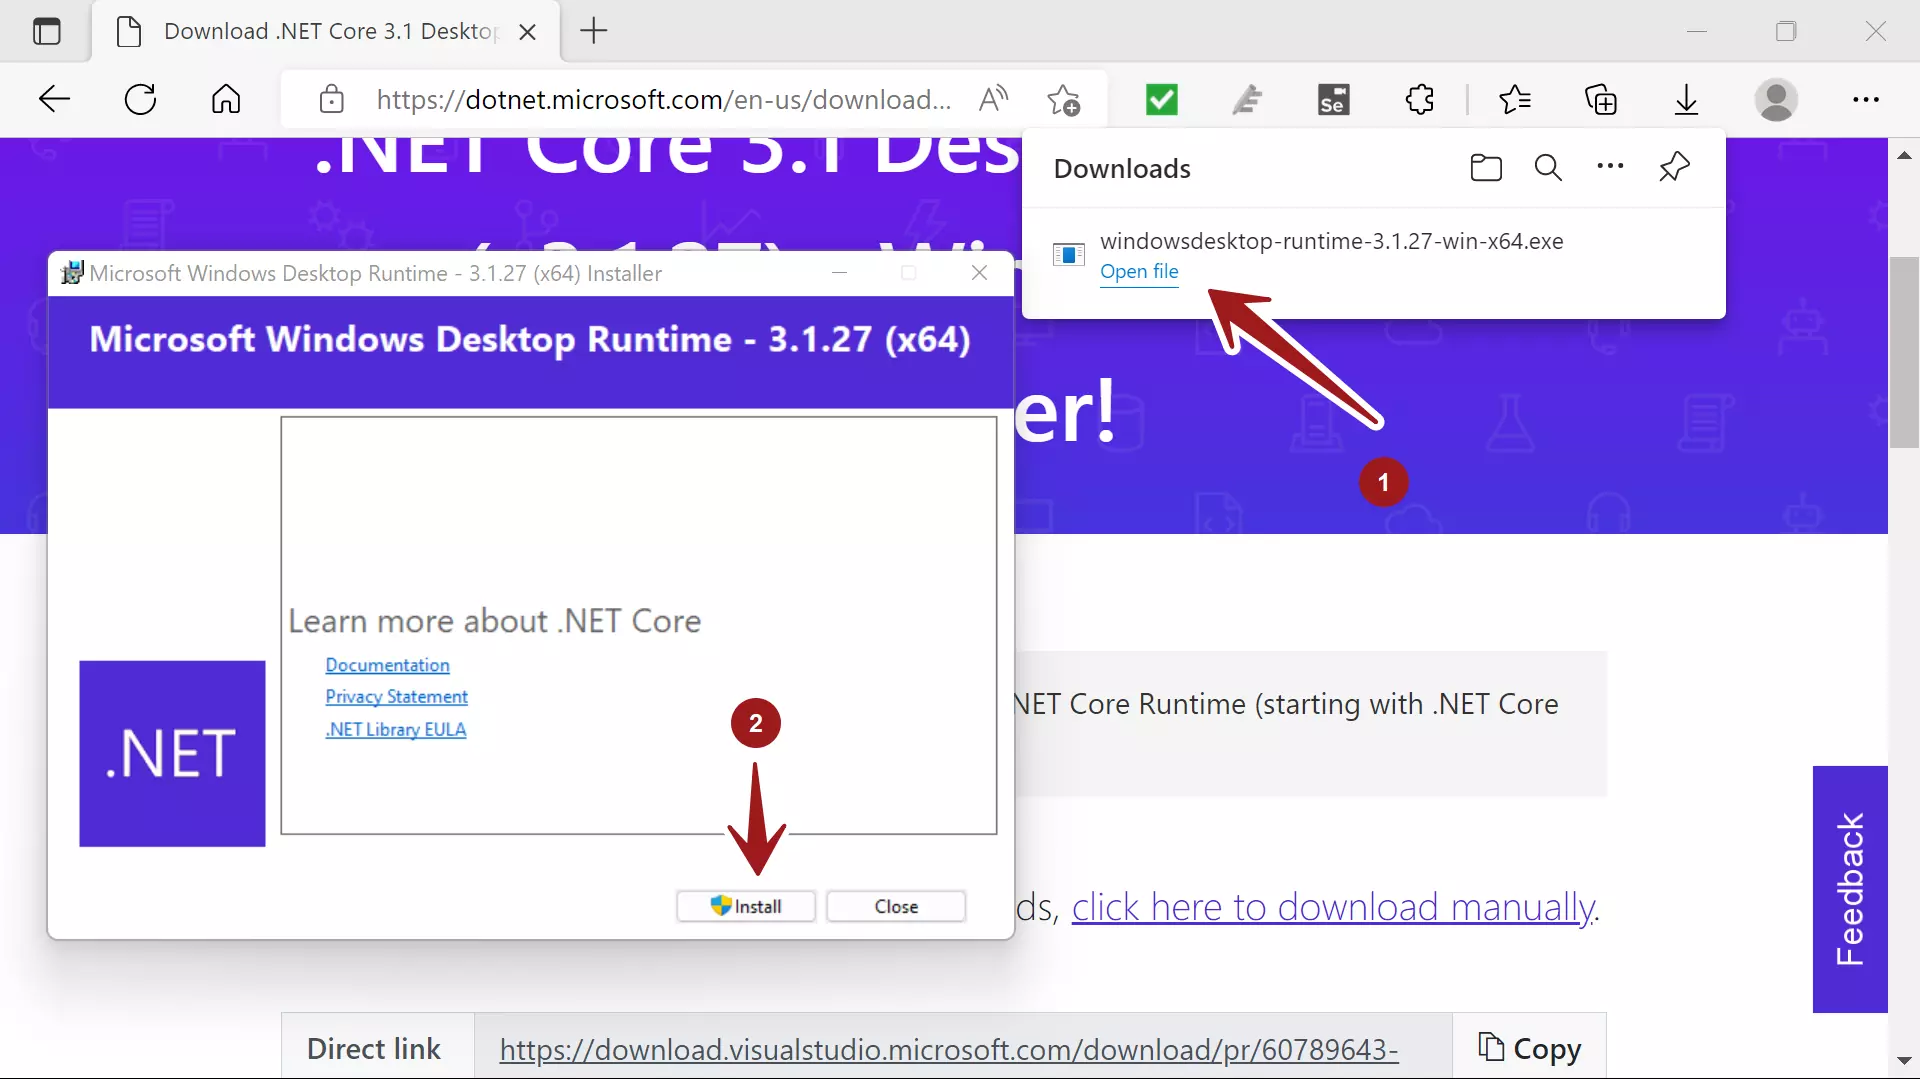
The shield icon indicates that admin privileges are required to install the tool. The UAC prompt will be displayed. Click on the Yes button. The setup will install the .NET core runtime on the machine.
That’s it. This will install the Microsoft Windows Desktop Runtime x64 bit onto the computer.


