CentOS 8 Stream Install Guide
CentOS 8 Stream Install Guide
This tutorial is a step-by-step guide to installing CentOS 8 Stream Linux distribution on a machine. The distribution supports many install types. However, we will look at the steps for installing the Workstation on a desktop or laptop.
To know more information on CentOS Linux distribution:
https://www.testingdocs.com/centos-linux-distribution/
Download ISO File
First things first, download the CentOS File from the official website. Copy the .iso file to a portable USB Pendrive.
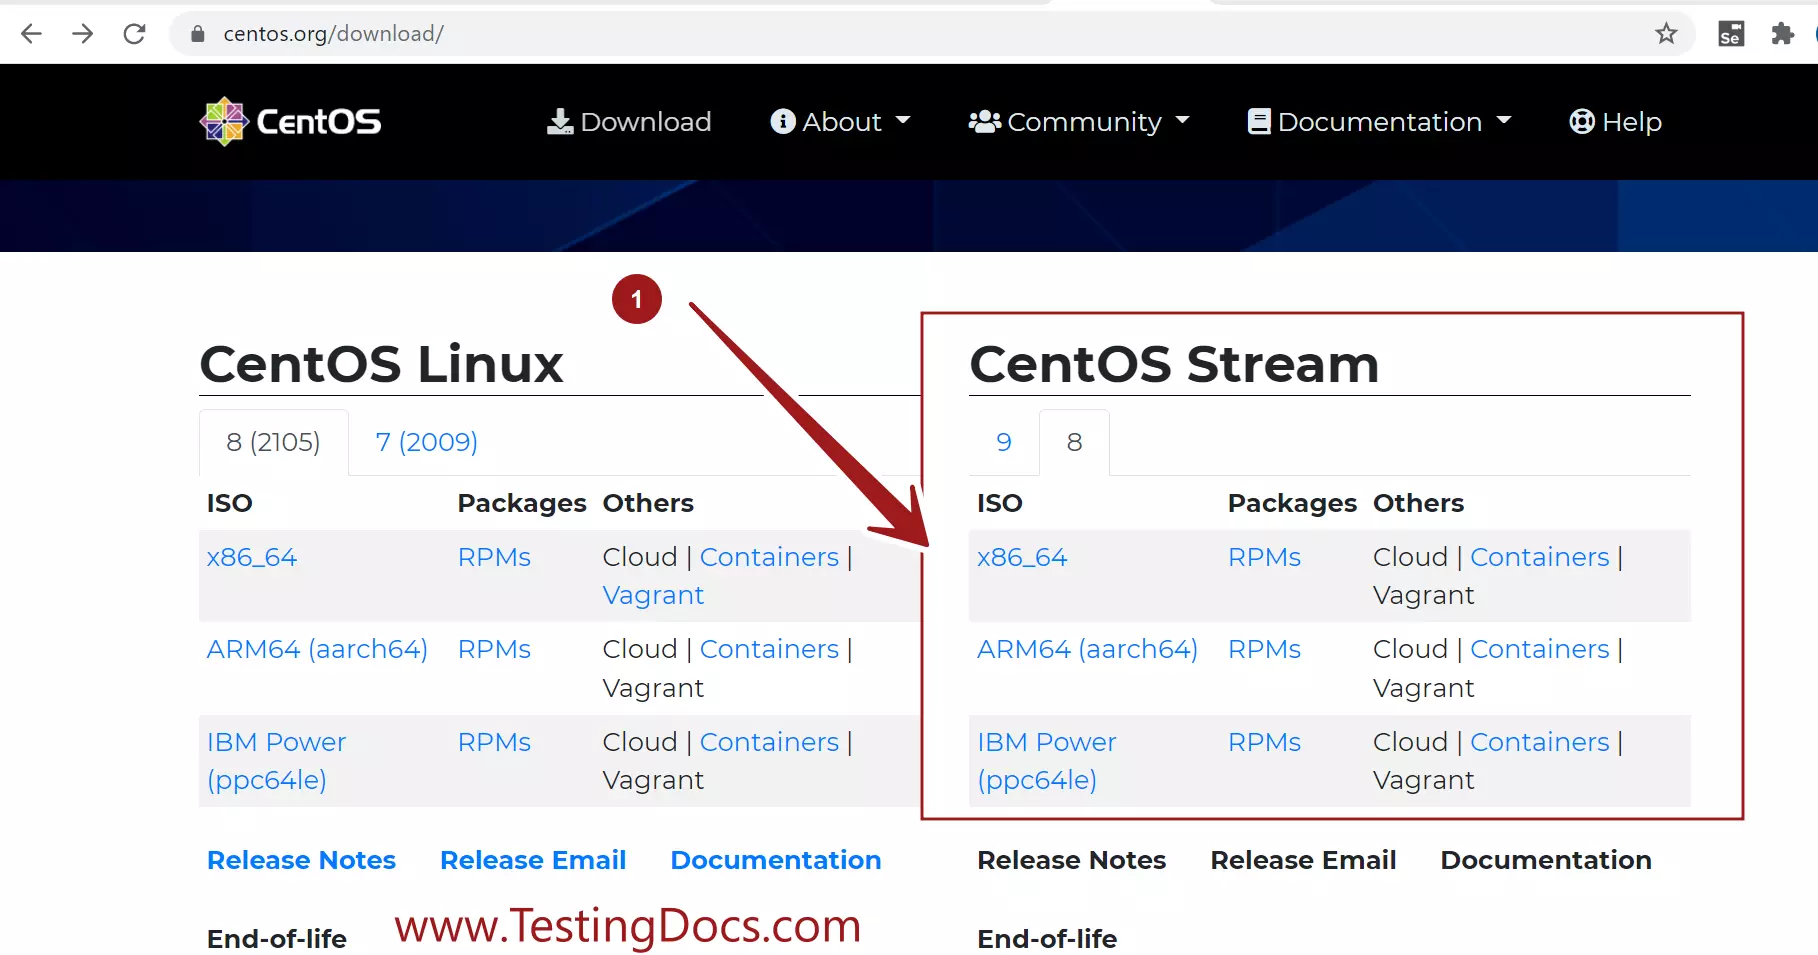
Alter the boot sequence of the machine if needed in the UEFI firmware/ BIOS settings.
Insert the pen drive in the USB slot. Reboot the machine.
CentOS 8 Stream Install
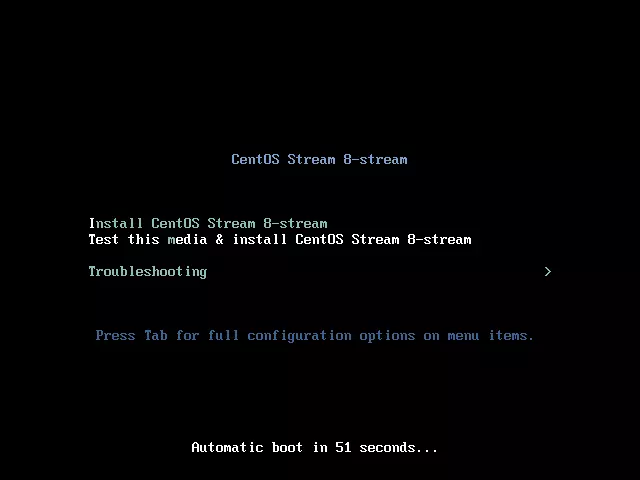
Choose Install CentOS Stream 8-stream option to install CentOS.
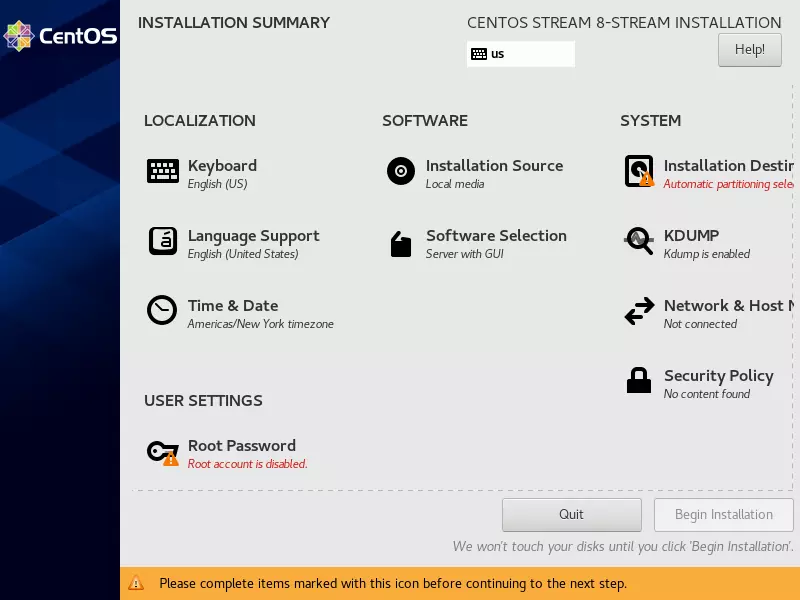
There are several installation tasks that we can customize during the new CentOS 8 Stream install process.
- Keyboard and Language Settings
- Date and Time Setting
- Installation Source
- Software Type
- Disk partitions
- Network Settings
- User Creation
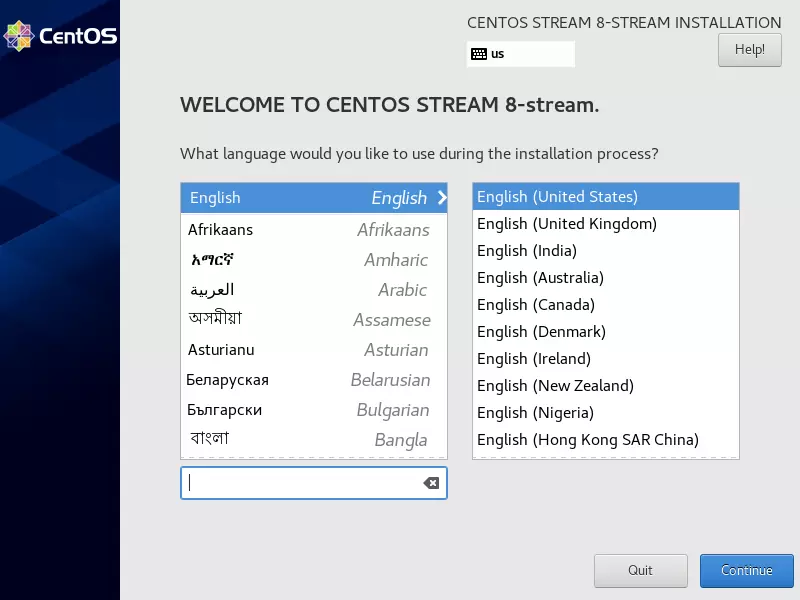
Localization Settings
Choose the language that you would like to use on CentOS.
Keyboard type and Language Locale settings.
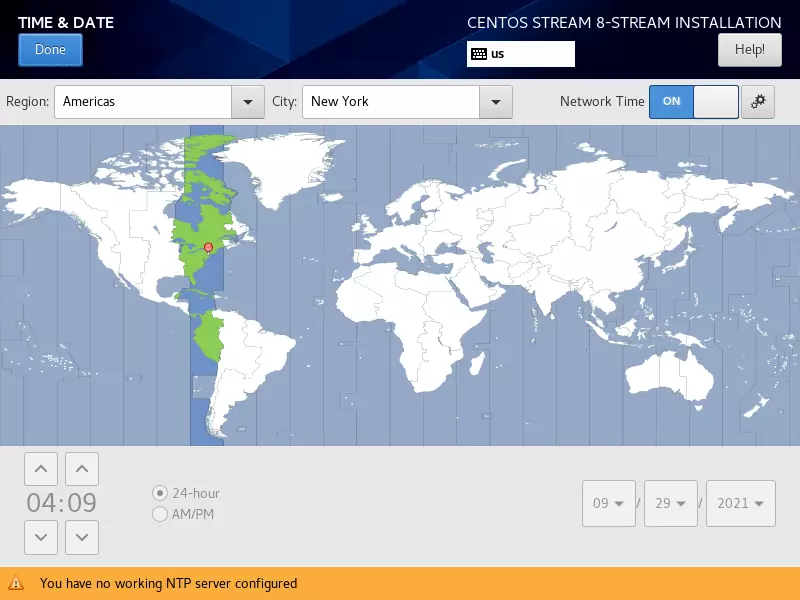
Data and Time
Choose the Region and City.
Software Selection
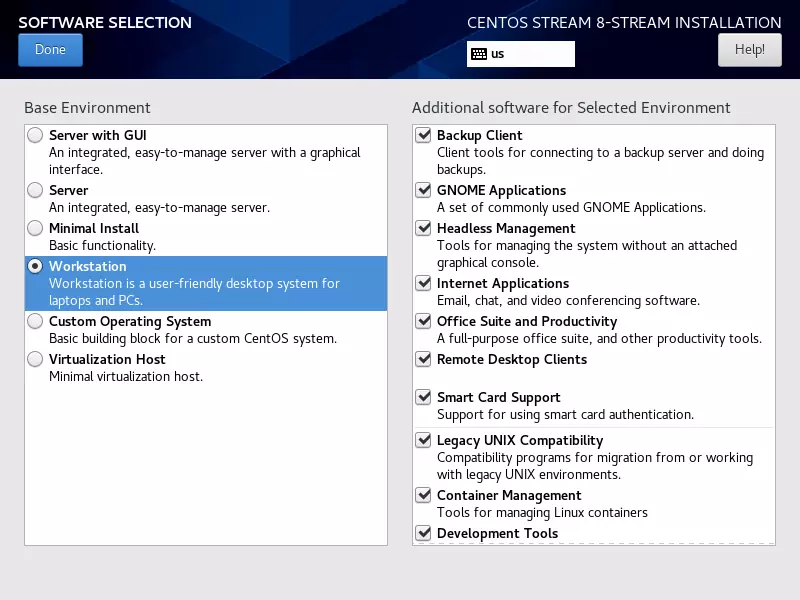
To install CentOS on a desktop PC or a Laptop device, choose the option Workstation in the base environment on the left-hand side. We can add additional software from the options on the right hand side.
For example, if we want to add Libre Office applications, check the Office Suite and Productivity. To get the default applications to check the GNOME Applications options etc.
If you are not sure do not worry, we can install these applications at a later point in time. If the hardware configuration of the machine is high-end then you can check all the applications.
Disk Partition
There are two options for disk partitioning.
- Automatic partitioning
- Manual partitioning
Automatic partitioning
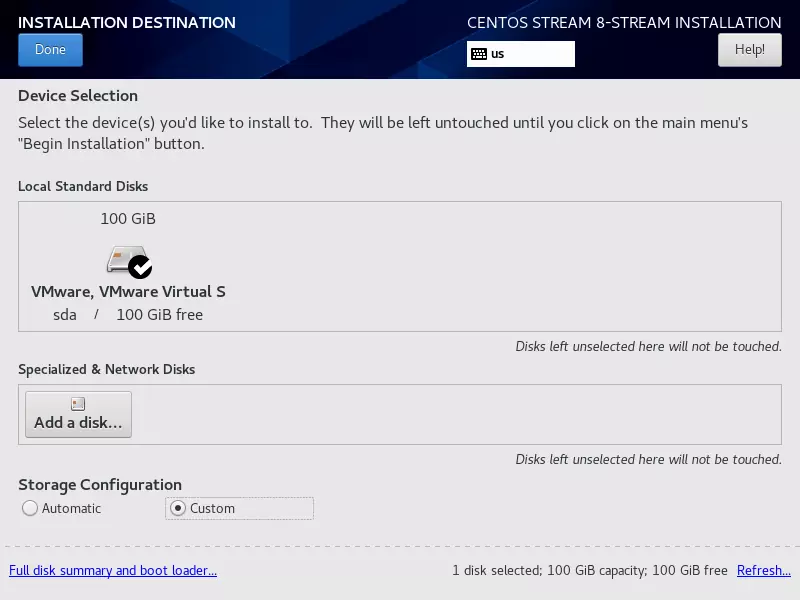
This option is easy and the partitions are taken care of by the install wizard. Less customization options. Choose Automatic radio button option for automatic storage condiguration.
Manual partitioning
We have to create the disk partitions manually. We can customize the partitions according to their needs. A lot depends on the hard disk space and the install options for this type. Many things change for example if you dual install CentOS alongside another operating system etc.
Click on Installation Destination and Choose Custom option under Storage Configuration for Manual disk partitioning.
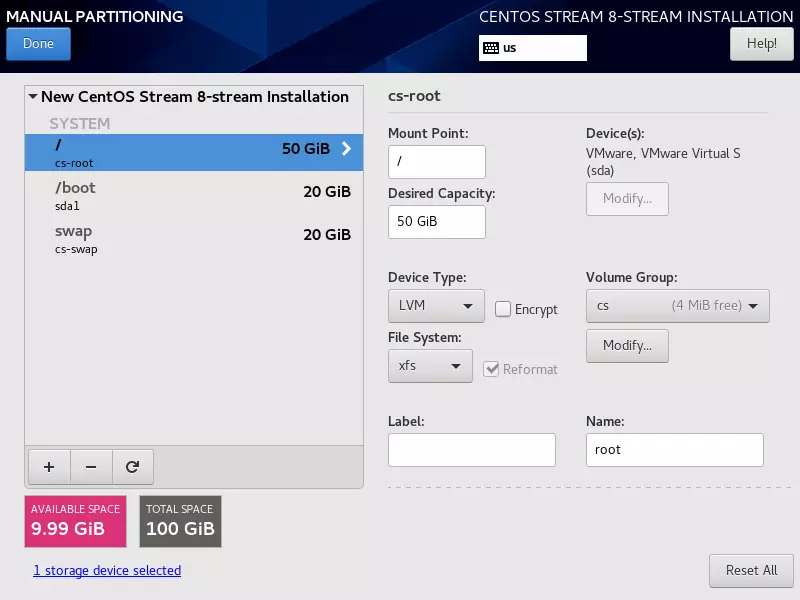
Let’s take a 100 GB hard disk and a normal CentOS Workstation install. To create partitions hit on the ‘+’ button on the below screen.
Create mount points for the /boot and swap partitions. For example, if you have 8 GB of RAM allocate at least 2.5*RAM space to the swap partition.
Give ample disk space for the root file system/mount point and as per the hard disk space.
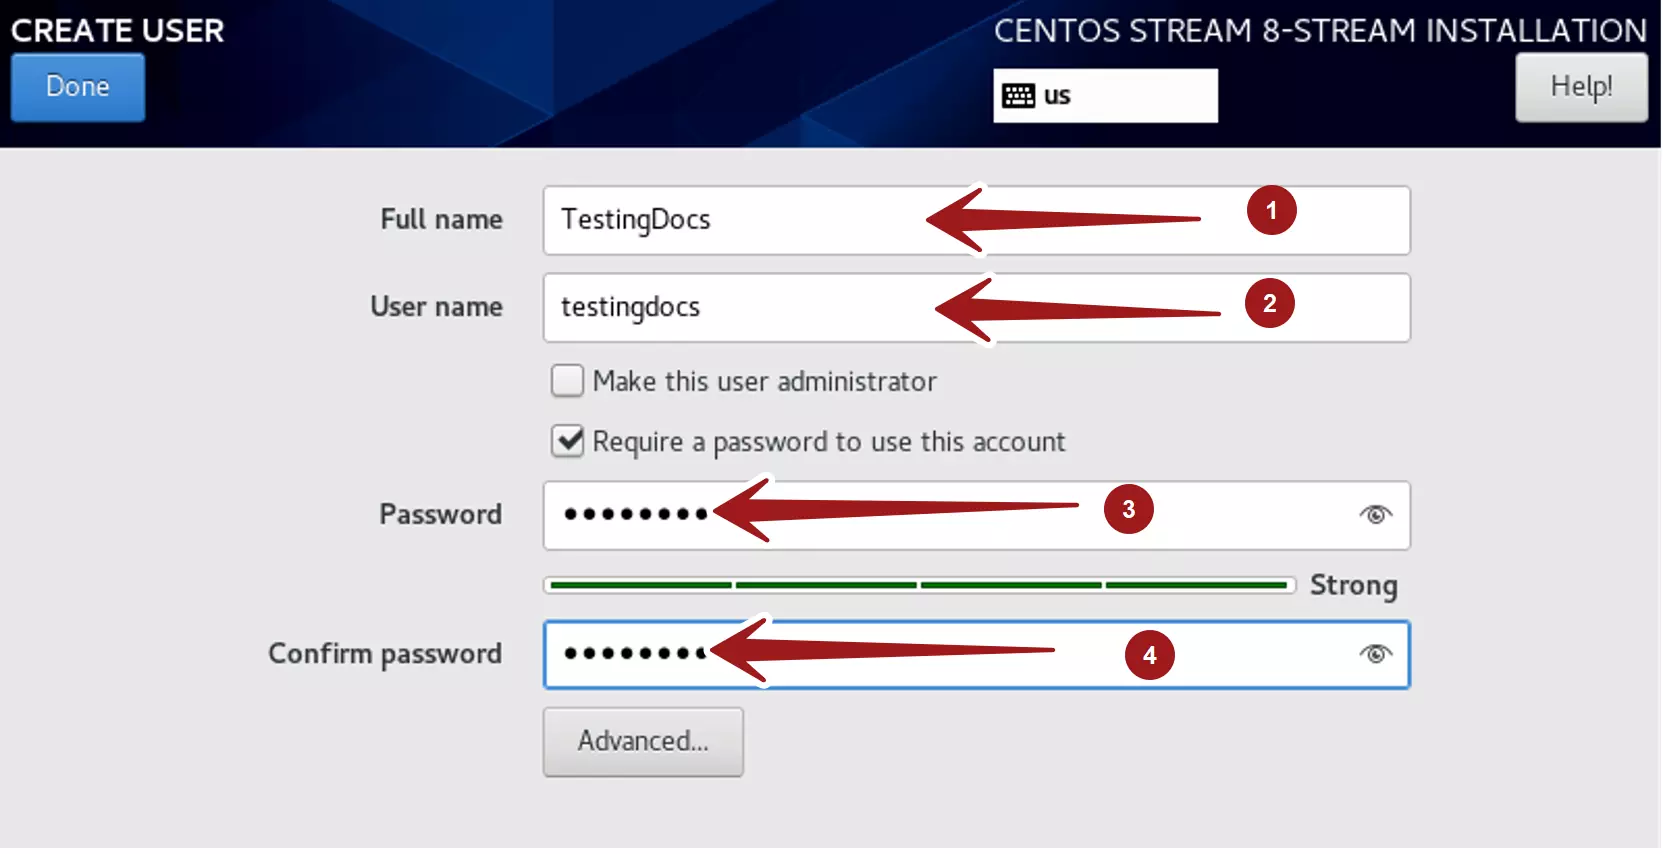
Create User
Create user.
Enter necessary details for the user.
- Full name
- User name
- Password
- Confirm Password.
Choose a strong password for the user.
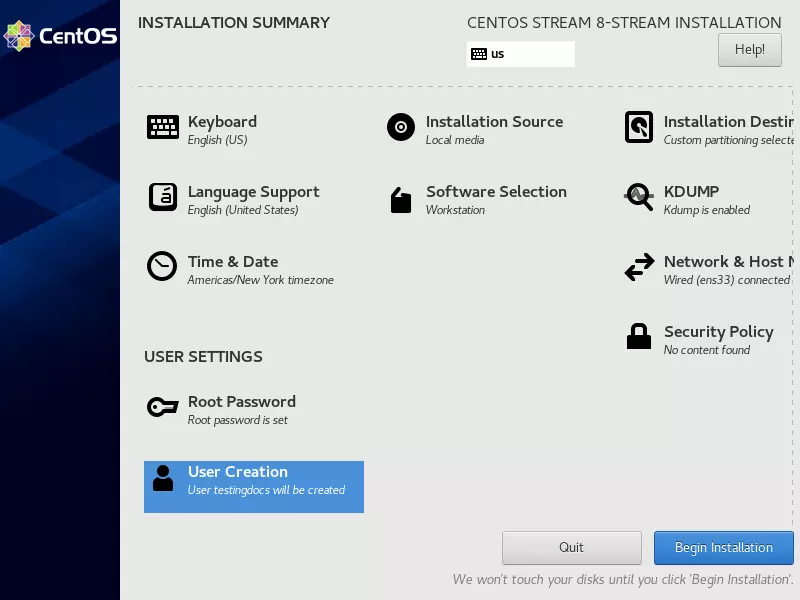
Installation Summary
Once completed all the installation tasks, hit the Begin Installation button to install the OS.
Depending on the machine configuration, the installation process might take a while. Once complete, remove the USB pen drive and reboot the machine.
That’s it. We have successfully installed CentOS on a laptop.
—
CentOS Official website
For more information about CentOS, visit the official website at:


