Install JBehave Eclipse Plugin
Install JBehave Eclipse Plugin
In this post, we will look at the step-by-step of Installing the JBehave Eclipse Plugin. JBehave Eclipse Plugin provides JBehave Story Editor with syntax highlighting, step auto-completion, and lookup. Its features are as below:
How to Install the JBehave Eclipse Plugin
Step to step guide to installing the plugin is as follows:
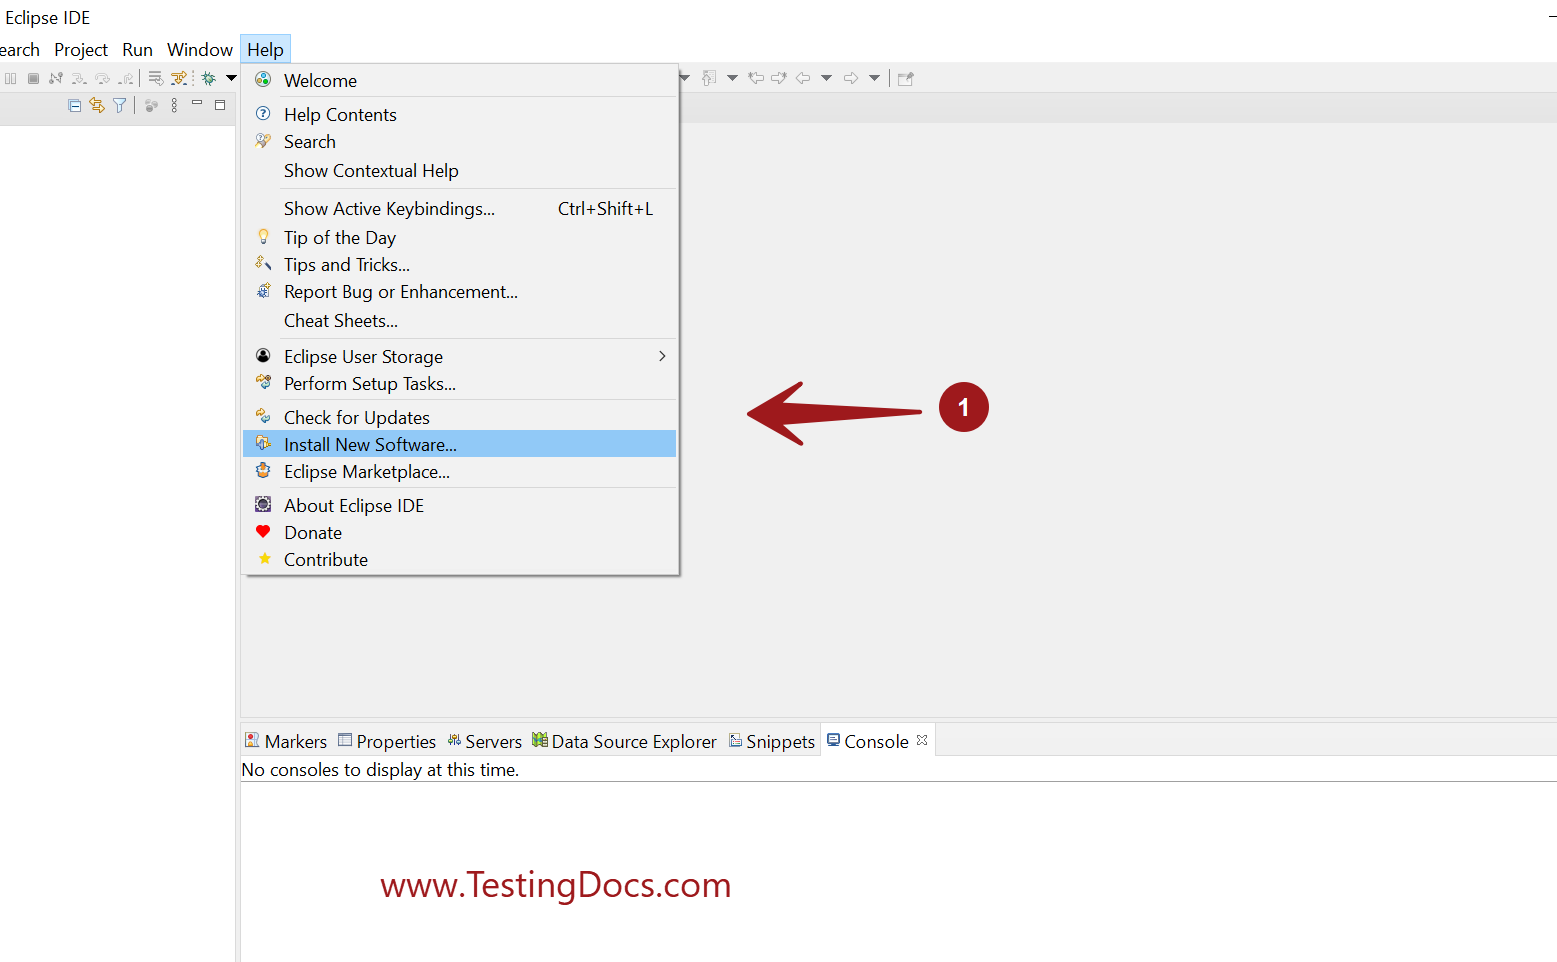
- Launch Eclipse on your machine.
- Go to Help > Install New Software…as shown in the below picture.
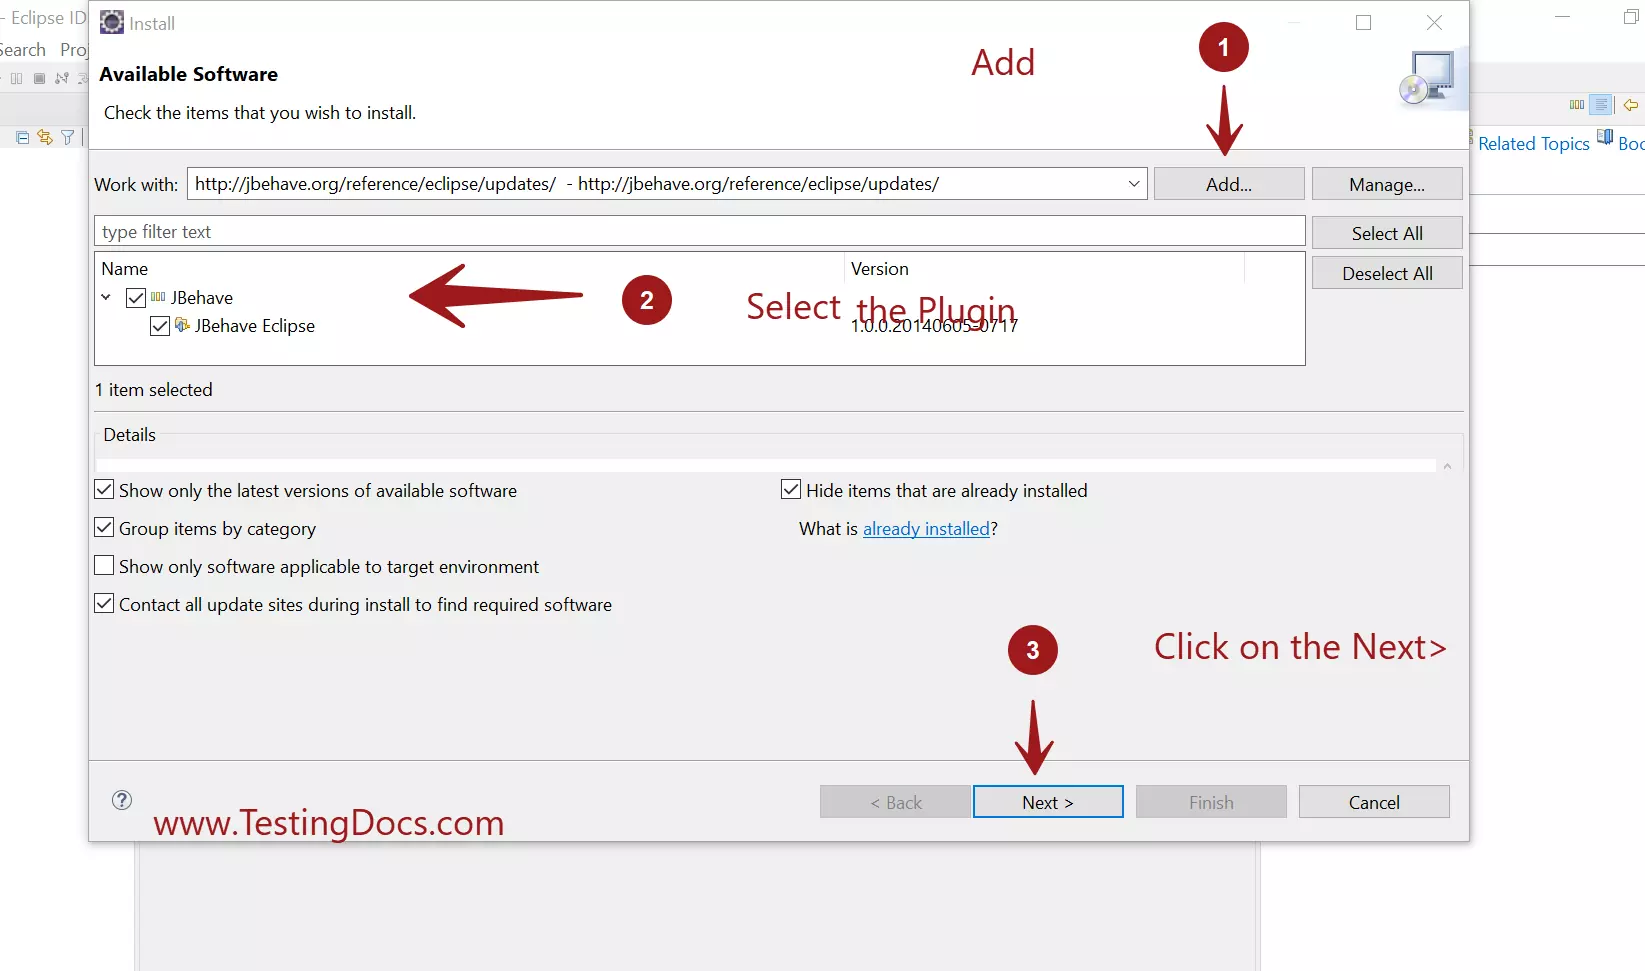
- Add the new site location:
http://jbehave.org/reference/eclipse/updates/
- Select the JBehave Eclipse plugin feature.
- Click on the Next> button to proceed.
- Click on the Finish button.
Read and Accept the end-user license agreement of the plugin and hit on the Finish button.
Installation might take a while depending on your network & machine speed.
Restart Eclipse
After the installation, Eclipse will prompt for a restart for the installation to be complete. Restart your eclipse. If you are in the middle of something choose to restart later.
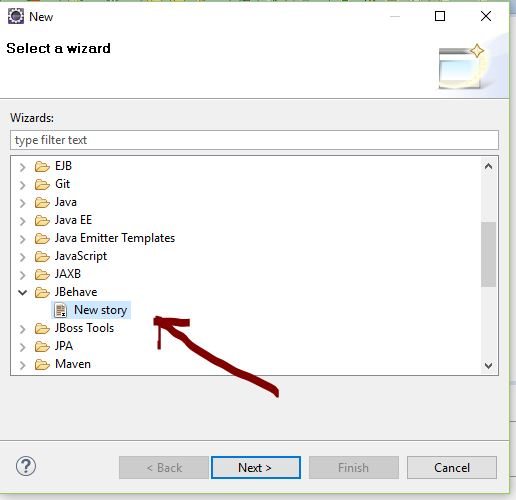
Verify the installation by creating a new story after the restart as shown in the below screenshot.
To modify the preferences of the plugin go to Window > Preferences > JBehave
Also note that, If you’re behind a company firewall and cannot access the update site, you can download the Eclipse Repository and install it from a local archive.
Plugin Features
Eclipse plugin with a custom JBehave Story Editor features include:
- Syntax highlighting
- Hyperlink detection in steps and link to the corresponding Java method.
- Step auto-completion
- Validation, detecting both unimplemented steps and ambiguous steps, matching multiple methods, etc
Other features include the ability to set via a Preference page:
- Syntax color themes
- Story language
- Console logger levels
—
JBehave Tutorial
JBehave Tutorial on this website:


