Install JBehave IntelliJ Plugin
Install JBehave IntelliJ Plugin
In this post, we will install the JBehave IntelliJ plugin. Please follow the step-by-step guide to install necessary JBehave-related plugins on your IDE.
Windows
Install JBehave Plugins
Open IntelliJ IDEA IDE.
Click on Configure on the Welcome screen as shown in the below picture.
Configure >> Plugins will launch the plugins window.
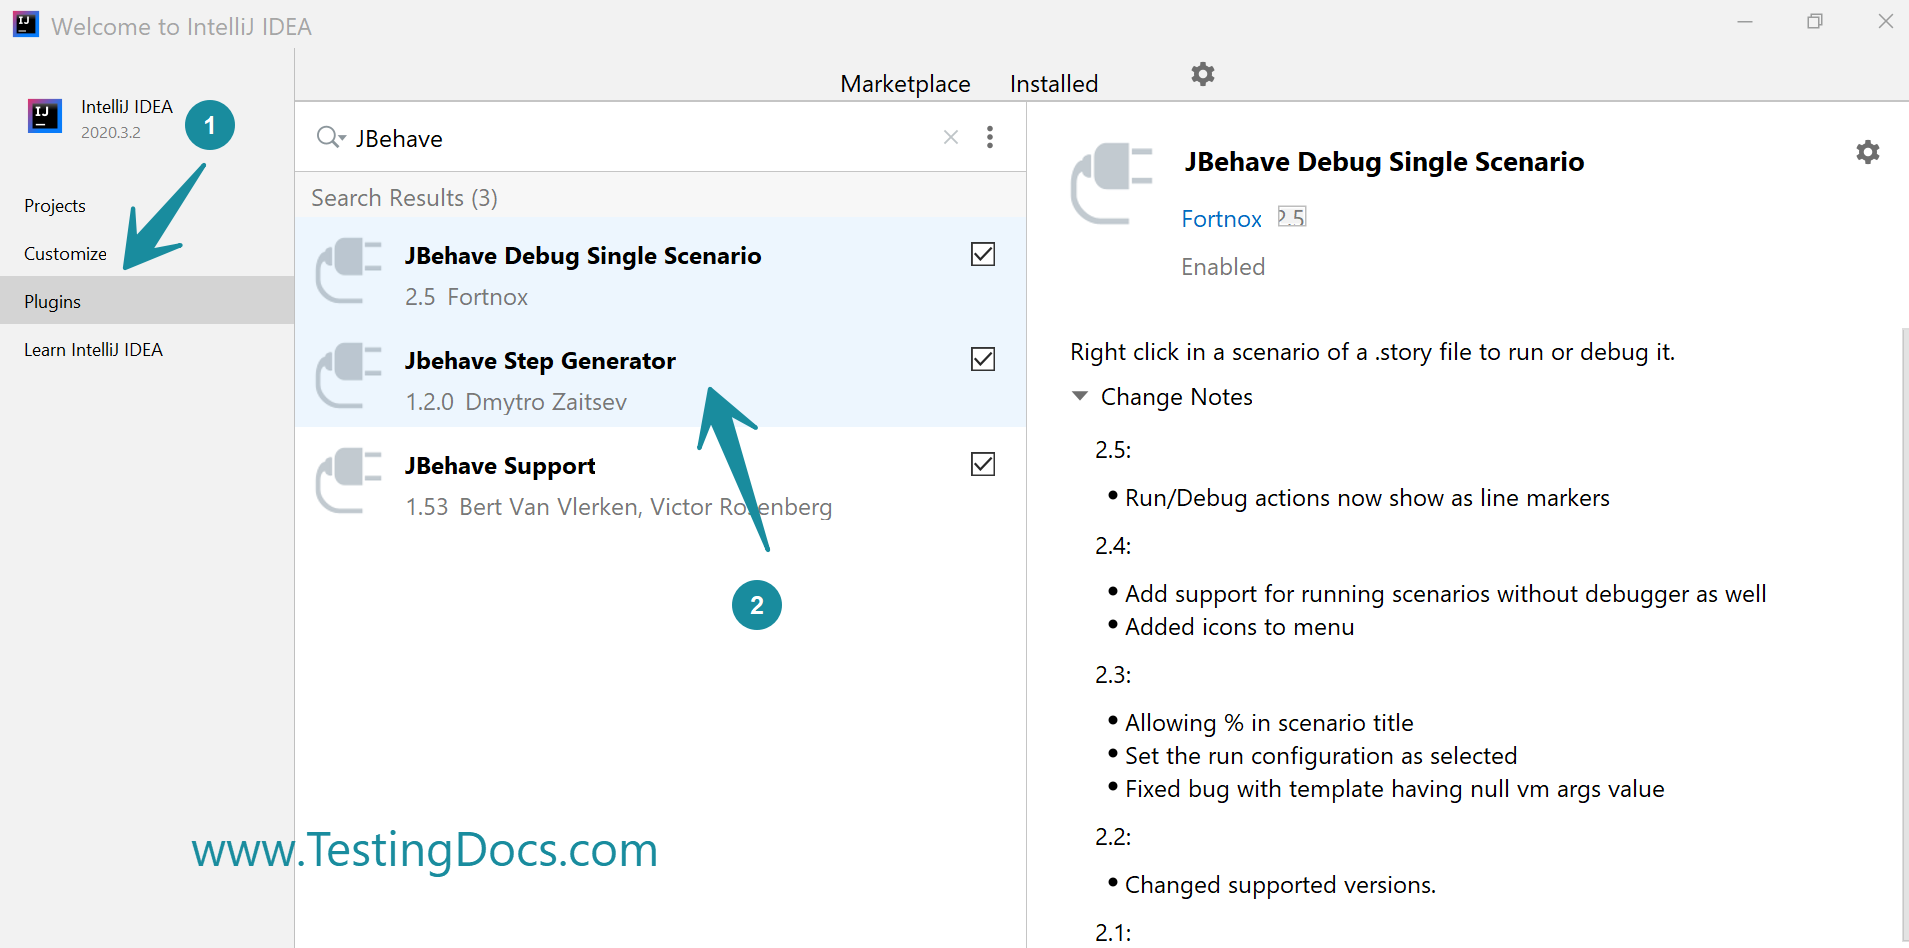
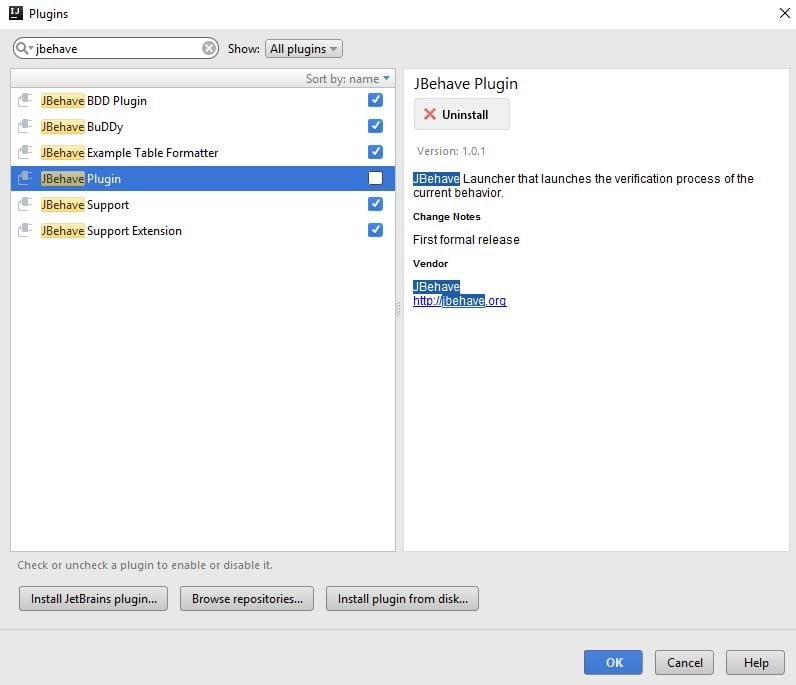
This window shows all the plugins installed. Also, all the checked plugins are active and enabled plugins. Search if any JBehave plugins are installed.
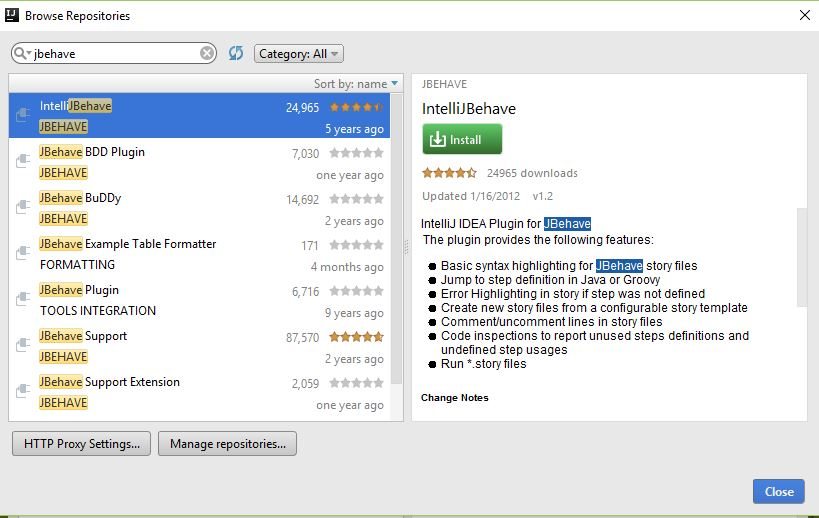
If there are no results means that you don’t have plugins installed. ( that are related to JBehave ). Now click on search in Repositories/ Marketplace as shown in the figure.
In the search results choose the plugins you want to install and click on the install button.
Note
Note that these are old screenshot and may no longer valid. Scroll down for new IDE screenshots. Some plugins might have been deprecated in the Jet Brains Marketplace.
Once you click on the install button, the plugin will download and install as shown in the picture.

You may need to restart IntelliJ IDE to activate the changes to the plugins. You may also postpone the restart by clicking on the postpone button.
To Install, Search JBehave on the Marketplace by clicking
Configure >> Plugins >> Search JBehave.
Note that: In-case the plugin installation encounters any errors, IDE would disable the plugin.
**Updated Screenshots for Latest IDE Version**
How to Uninstall a Plugin?
Choose the plugin that you may wish to uninstall and click on the uninstall button, as shown in the screen. We may also disable the plugin in the latest IDE.
Ubuntu Linux
Steps to install plugins on Ubuntu Linux
https://www.testingdocs.com/install-jbehave-plugins-on-ubuntu/
—
JBehave Tutorials on this website can be found at:
https://www.testingdocs.com/jbehave-framework-tutorial/


