Create a Snapshot of Virtual Machine
Overview
In this tutorial, we will go through the steps involved to create a Snapshot of Virtual Machine using the VMWare Workstation application. A snapshot captures the state of the Virtual machine and all the system files, folders, applications of the Guest operating systems are backed up.
Environment:
- Windows 10 Host Operating System.
- VMWare Workstation 15.x
- Ubuntu Desktop Guest Operating System.
We will capture the snapshot of the Ubuntu VM in this tutorial.
Take a Snapshot
- Launch VMWare Workstation.
- Open a Virtual Machine that we need to take a snapshot.
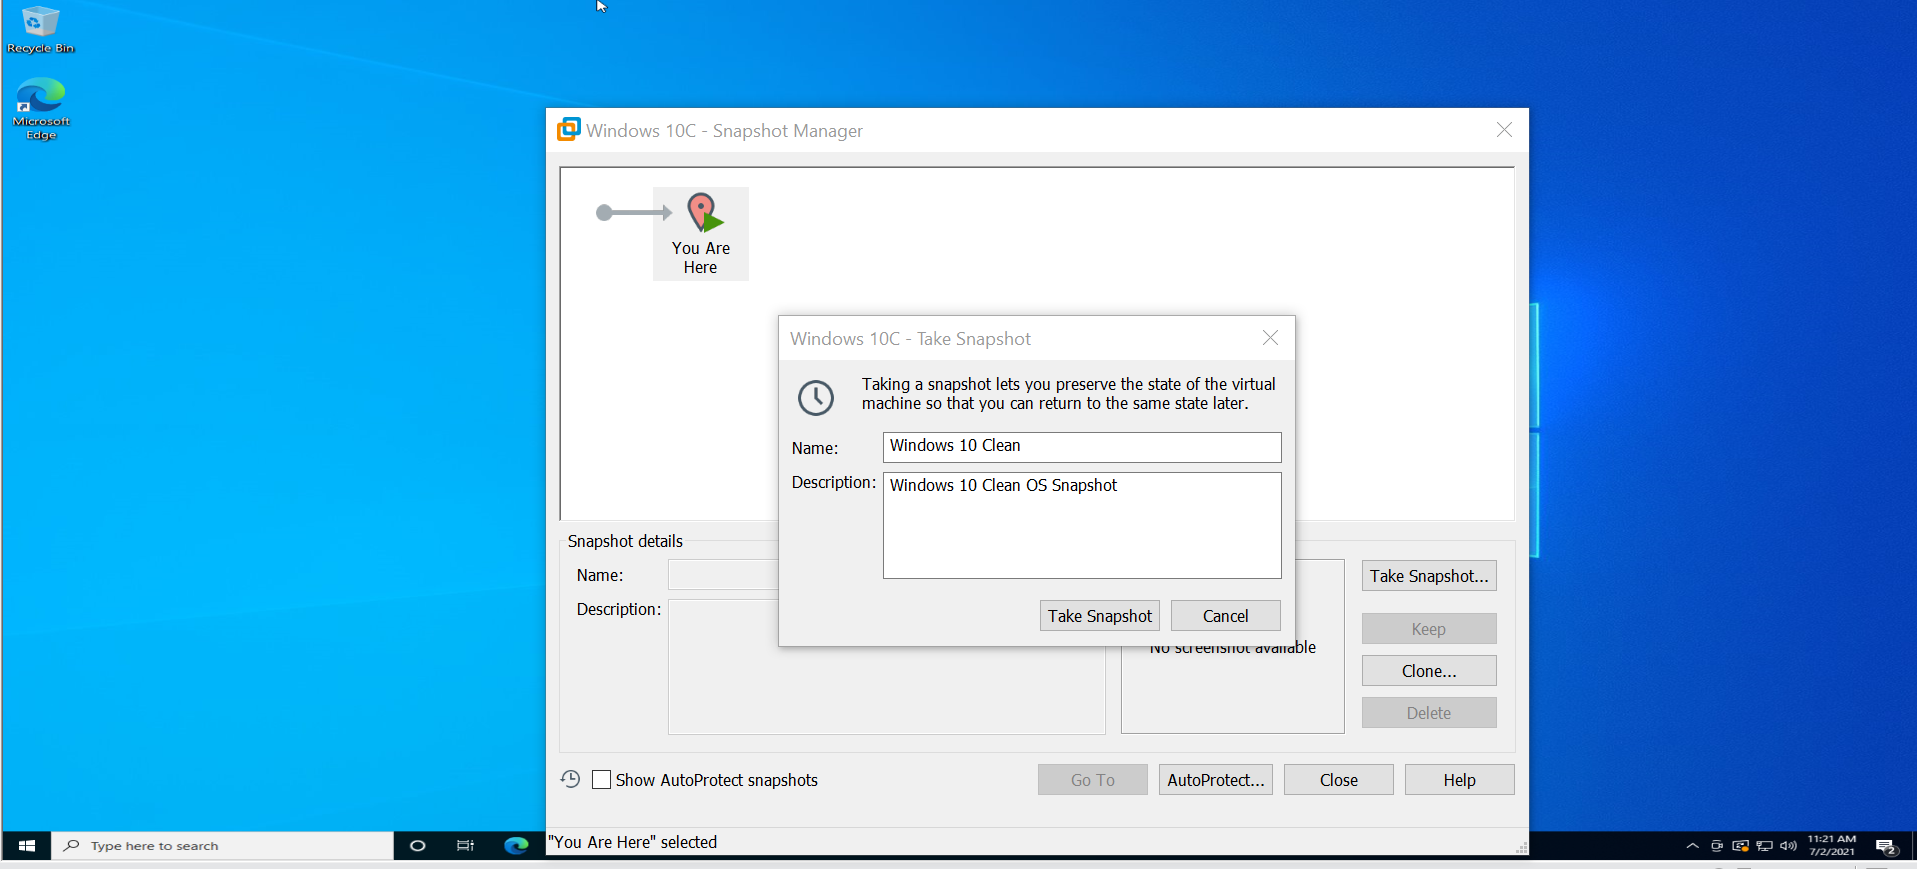
- Click on the ‘Take a snapshot of this virtual machine’ button as shown.
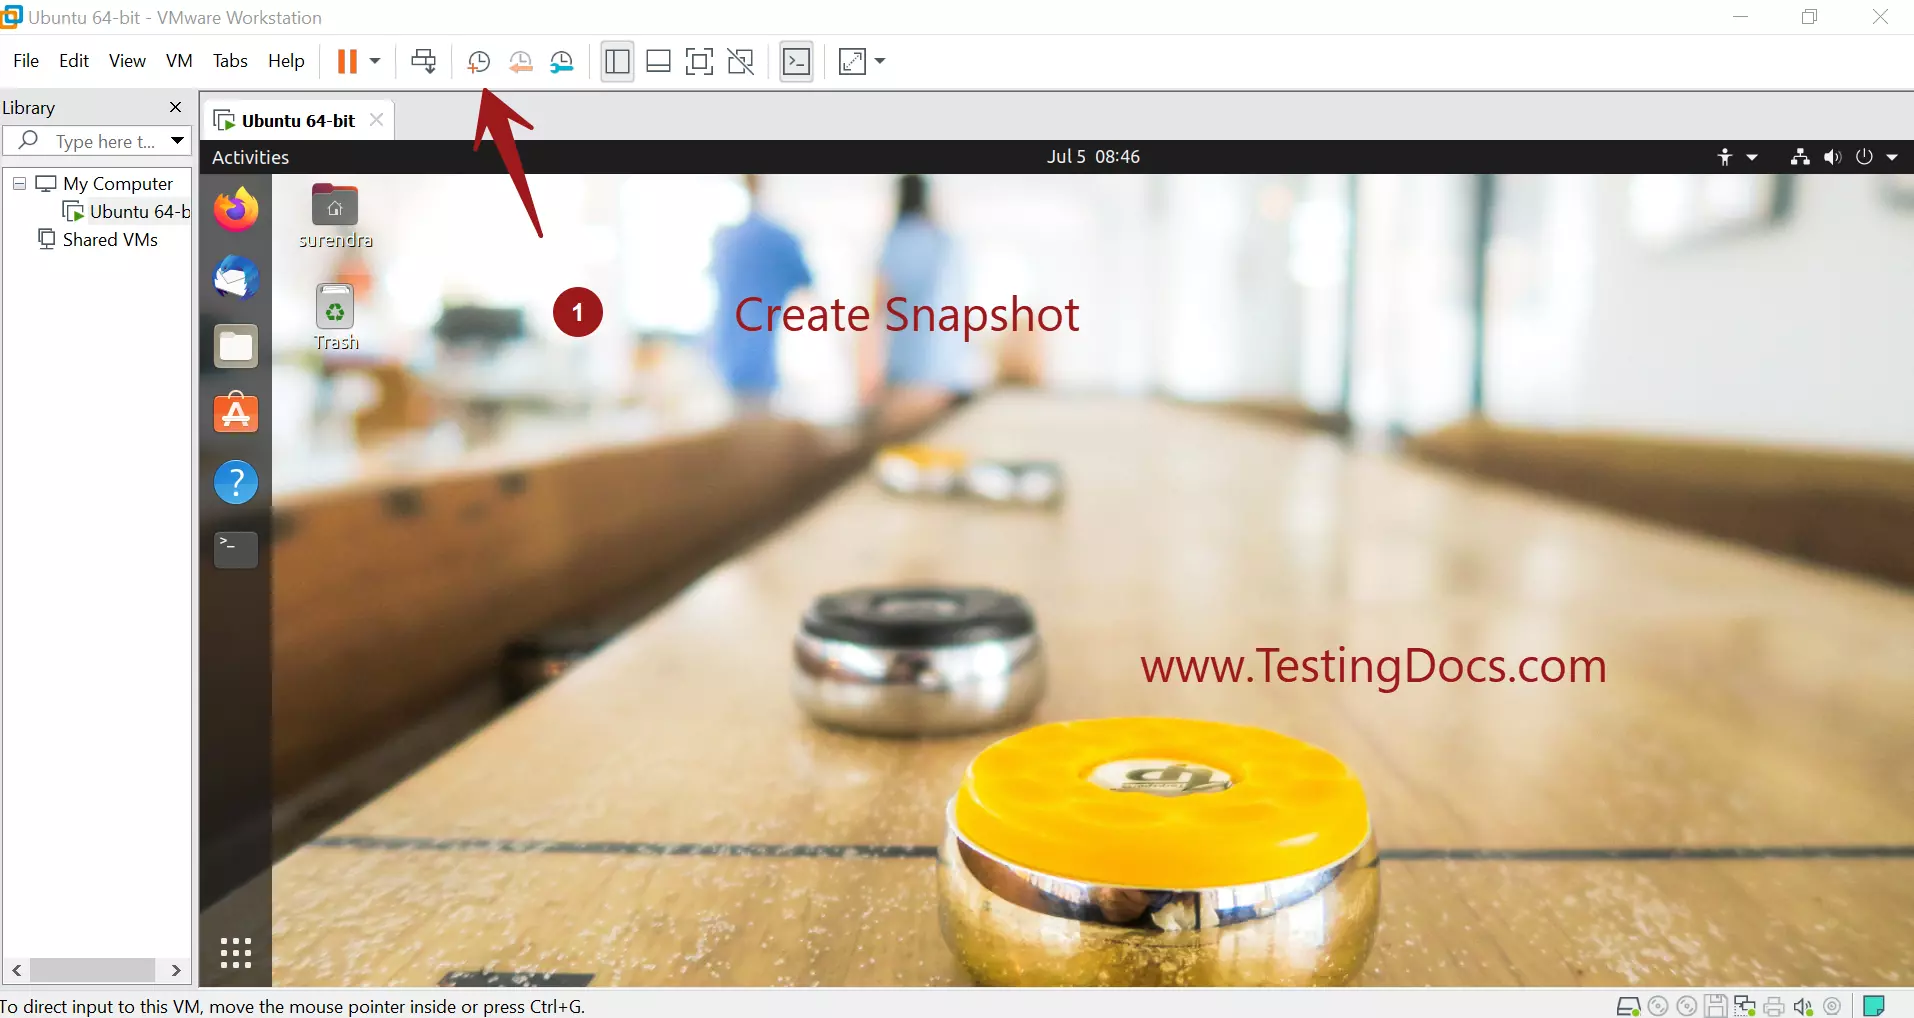
or
Choose VM >> Snapshot >> Take Snapshot…
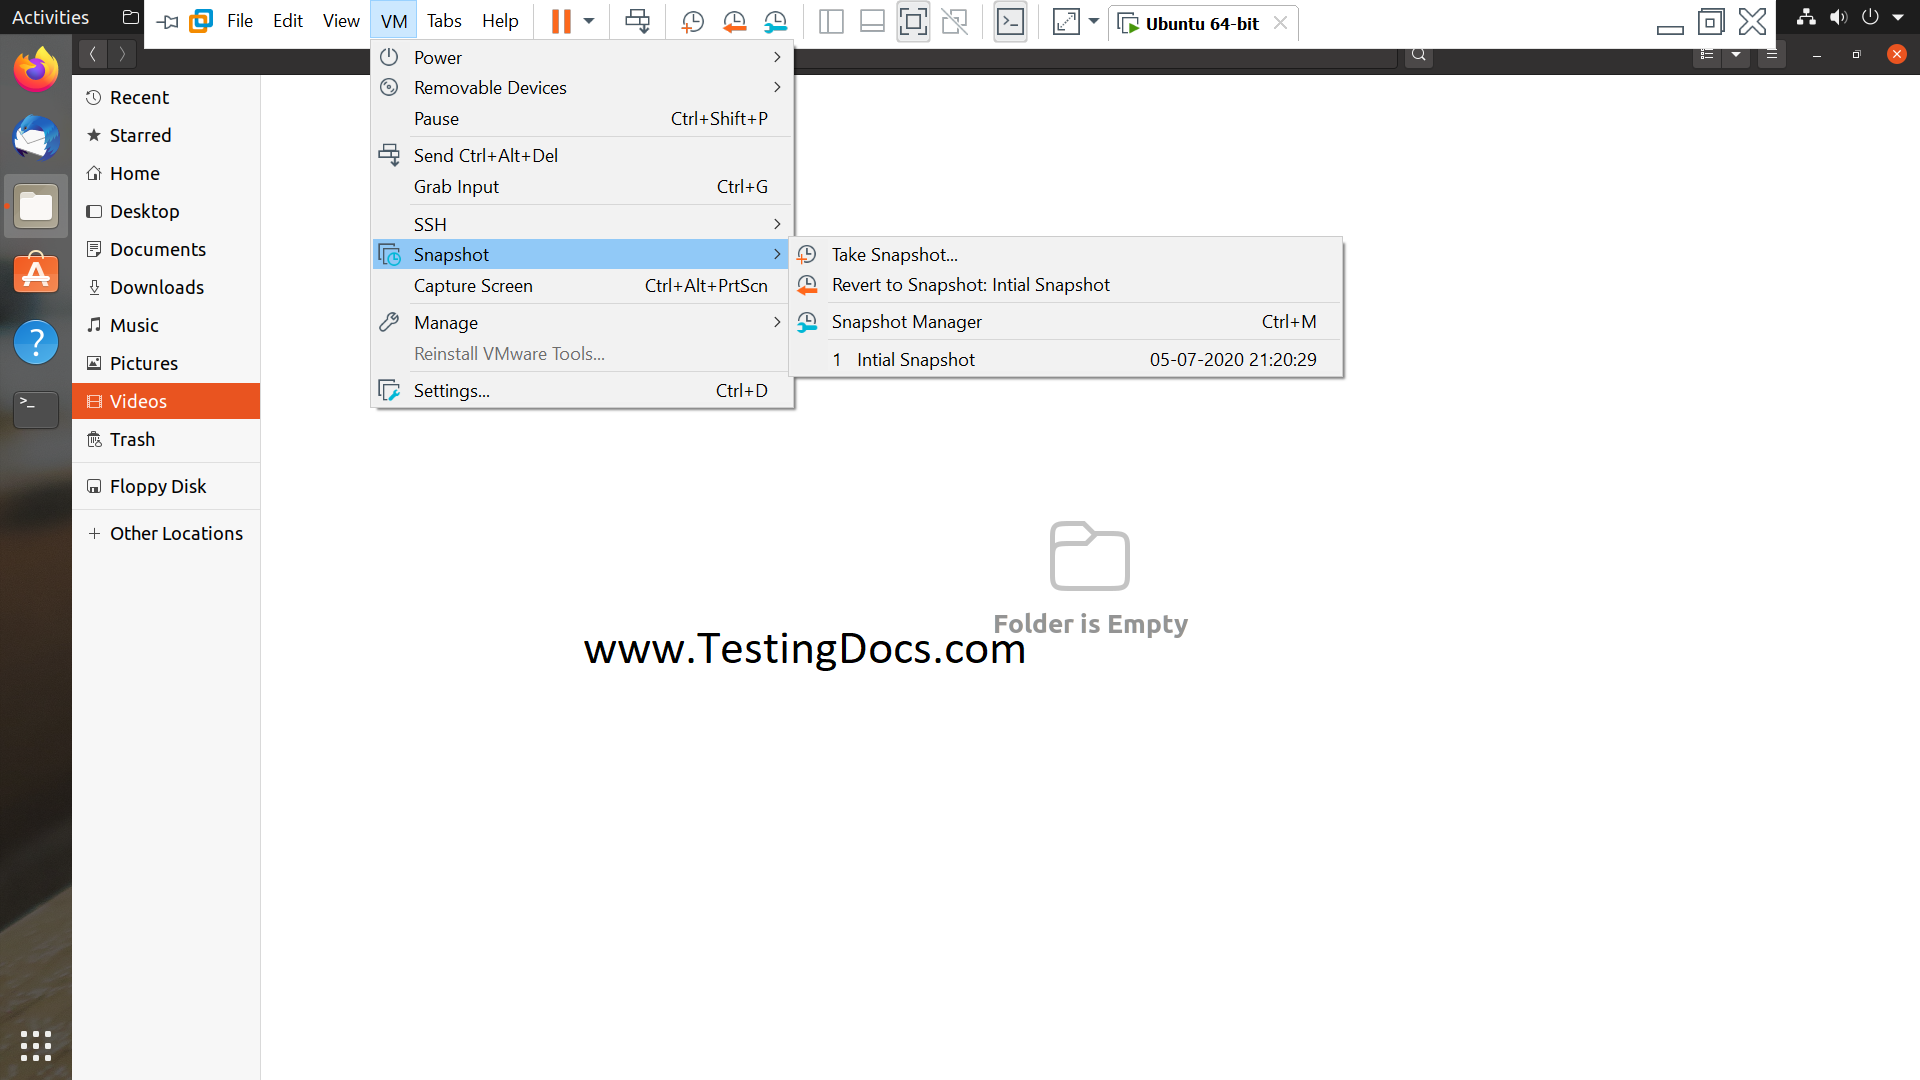
Snapshot details
Enter the snapshot details and description and click on the ‘Take Snapshot’ button to create a snapshot of the Virtual machine. This information helps us to identify the snapshot main goal so that this information may be used while reverting to a particular snapshot.
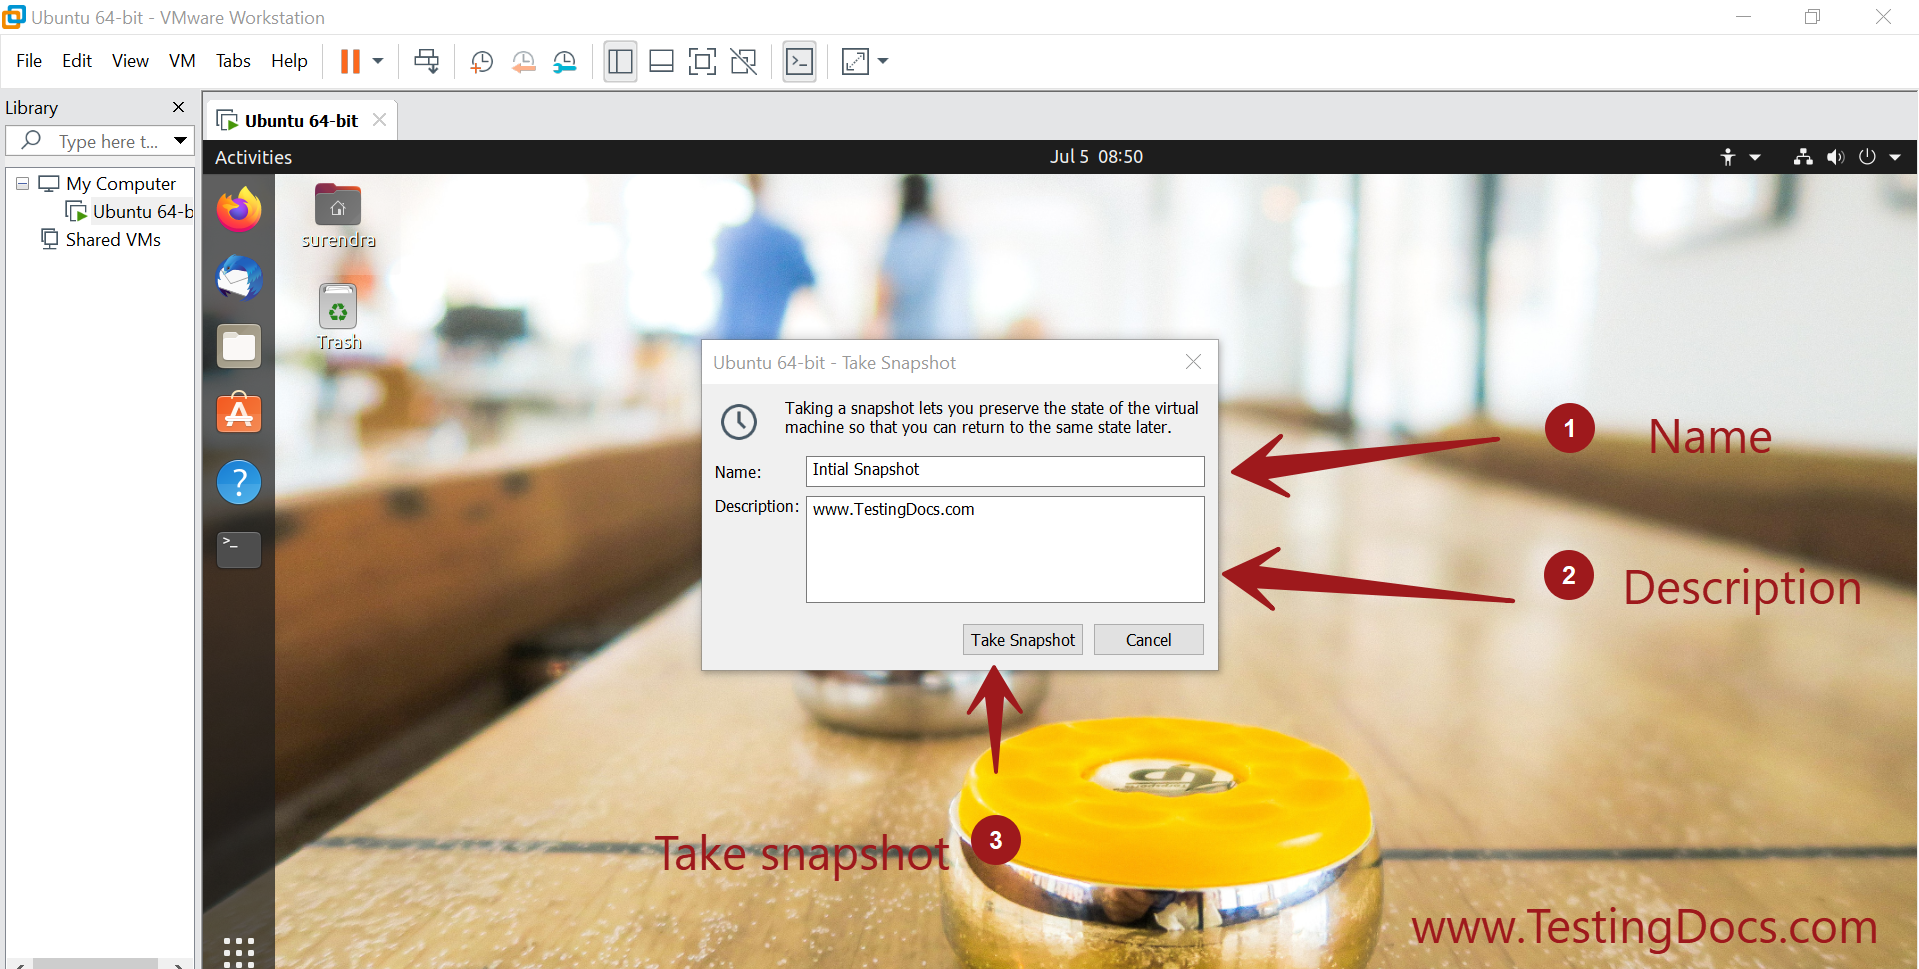
Snapshot Manager
Snapshot manager helps to manage the snapshots of the Virtual machine. We can revert to an older snapshot and move forward using this tool.
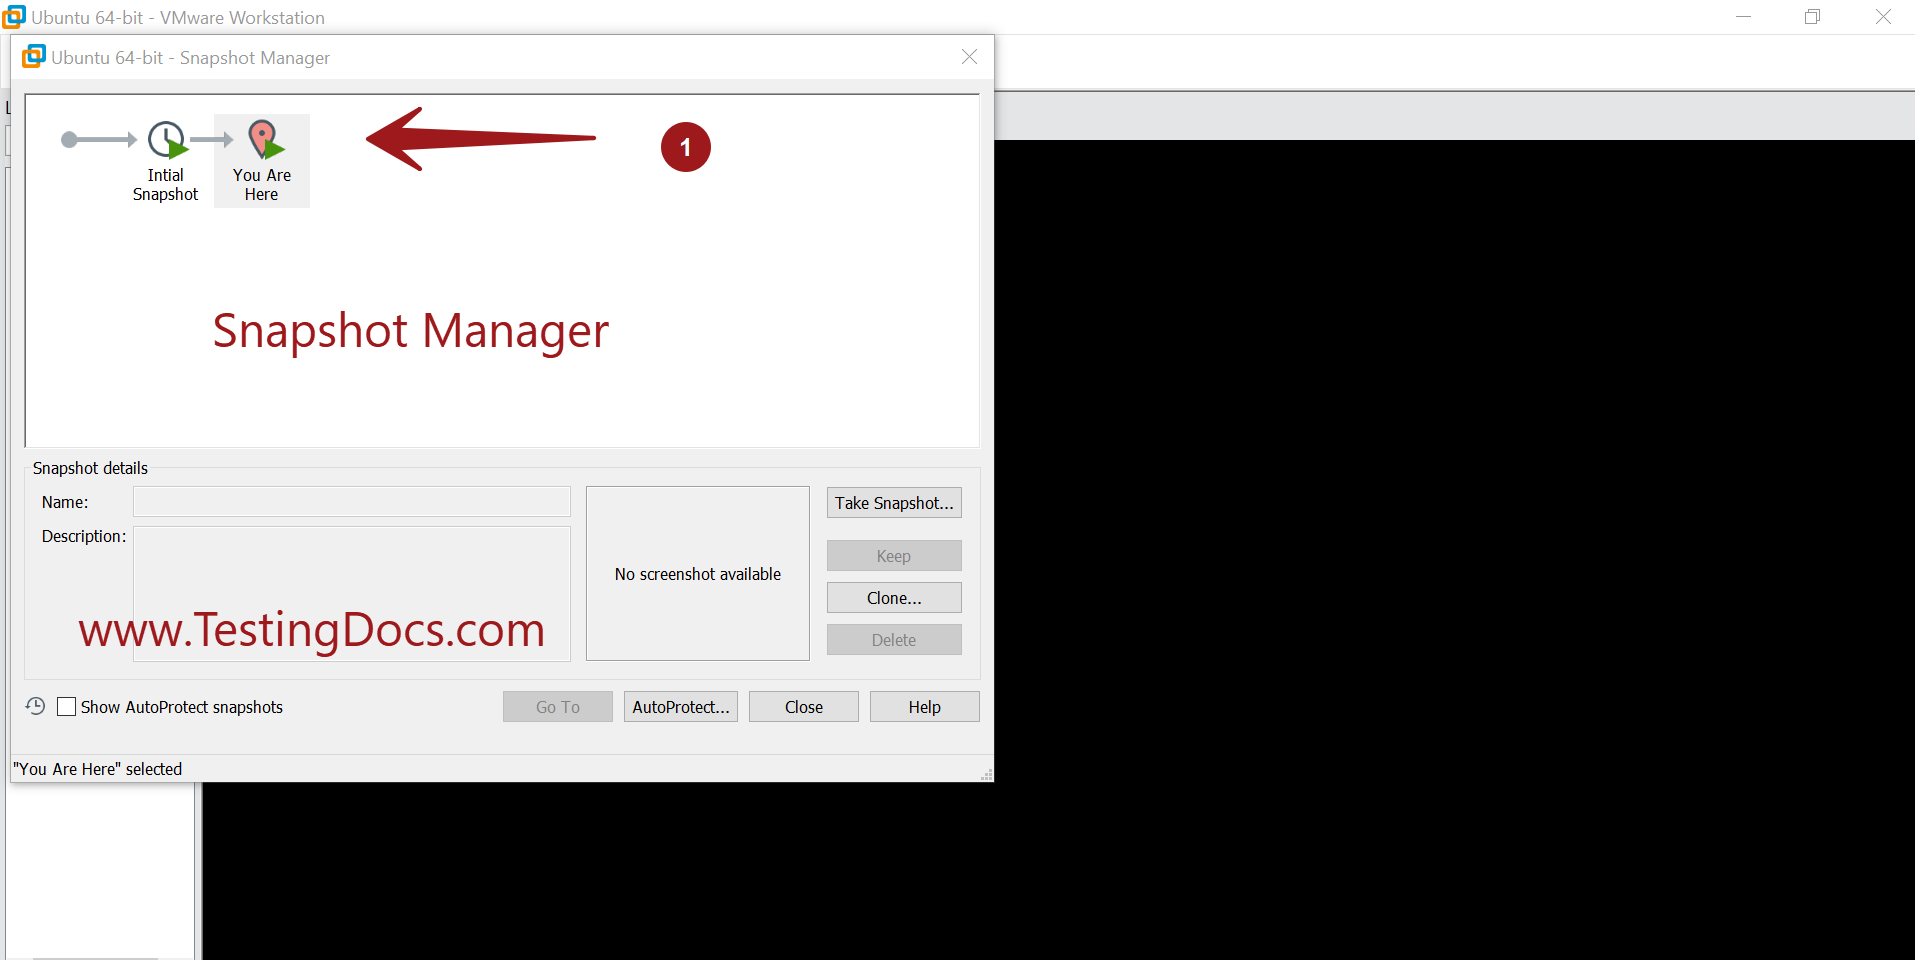
The following functions can be performed using the snapshot manager tool:
- Create Snapshot
- Clone
- Auto protect
- Revert to an earlier created snapshot
Sample Use case
A sample use case using snapshots is while performing repetitive testing or reproducing a particular scenario.
- Create a Virtual machine from the .iso file.
- Save the initial clean known state of the Guest OS.
- Perform testing tasks like installing an application.
- Test the application. ( this may lead the Virtual machine state -> to some unclean state )
- Revert to Snapshot i.e the clean initial known state of the Virtual Machine. )
- Repeat the testing task.
For example, clean Windows 10 snapshot taken after the installation of the Windows 10 operating system on the virtual machine.
