Install CLion IDE on Windows 11
Install CLion IDE on Windows 11
This tutorial will install CLion IDE on the Windows 11 operating system. CLion is a cross-platform IDE from JetBrains for C and C++ development.
Download
To try the tool, we can download and evaluate it for 30 30-day free trial.
Open a web browser and navigate to the following URL.
https://www.jetbrains.com/clion/download/
Choose the Windows tab, .exe option in the drop-down and click on the Download button.
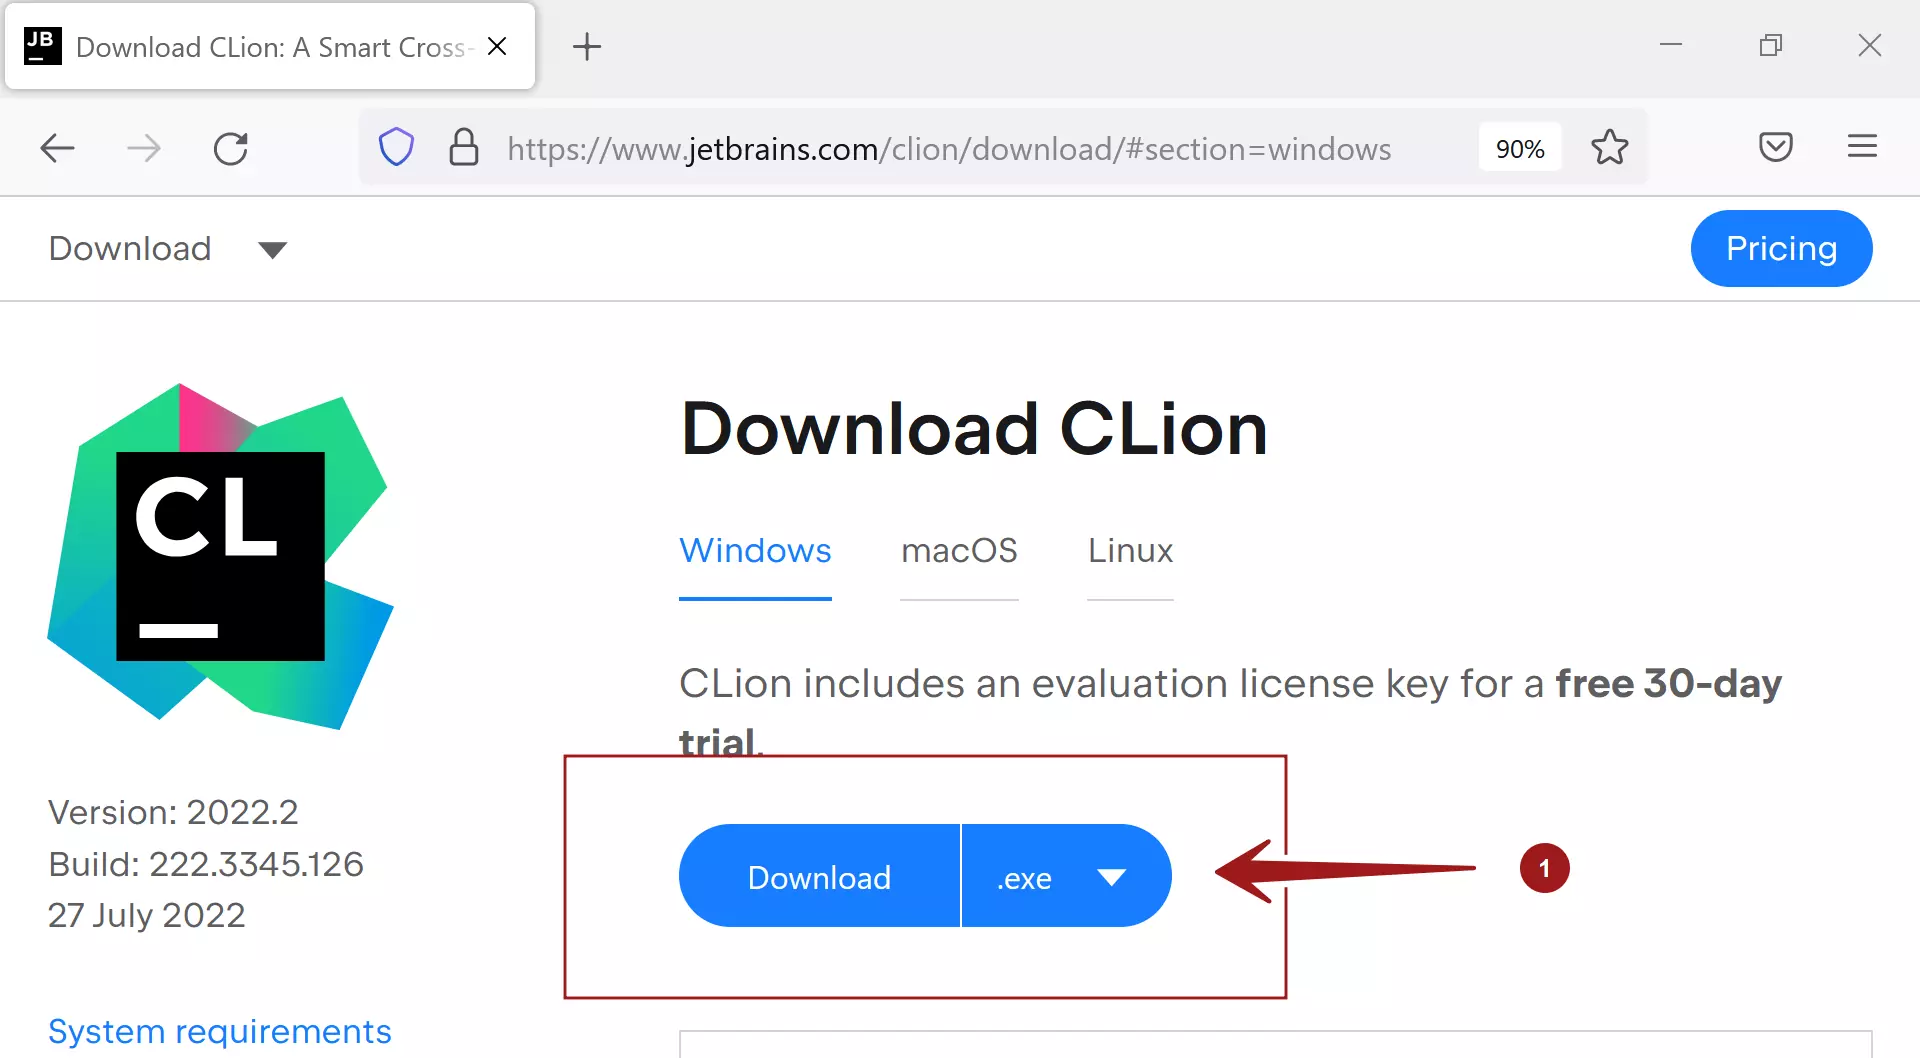
Download the .exe installer. File format
CLion<version>.exe
Install
Double click on the CLion .exe installer file to install the tool. We need to have administrative privileges to install the tool.
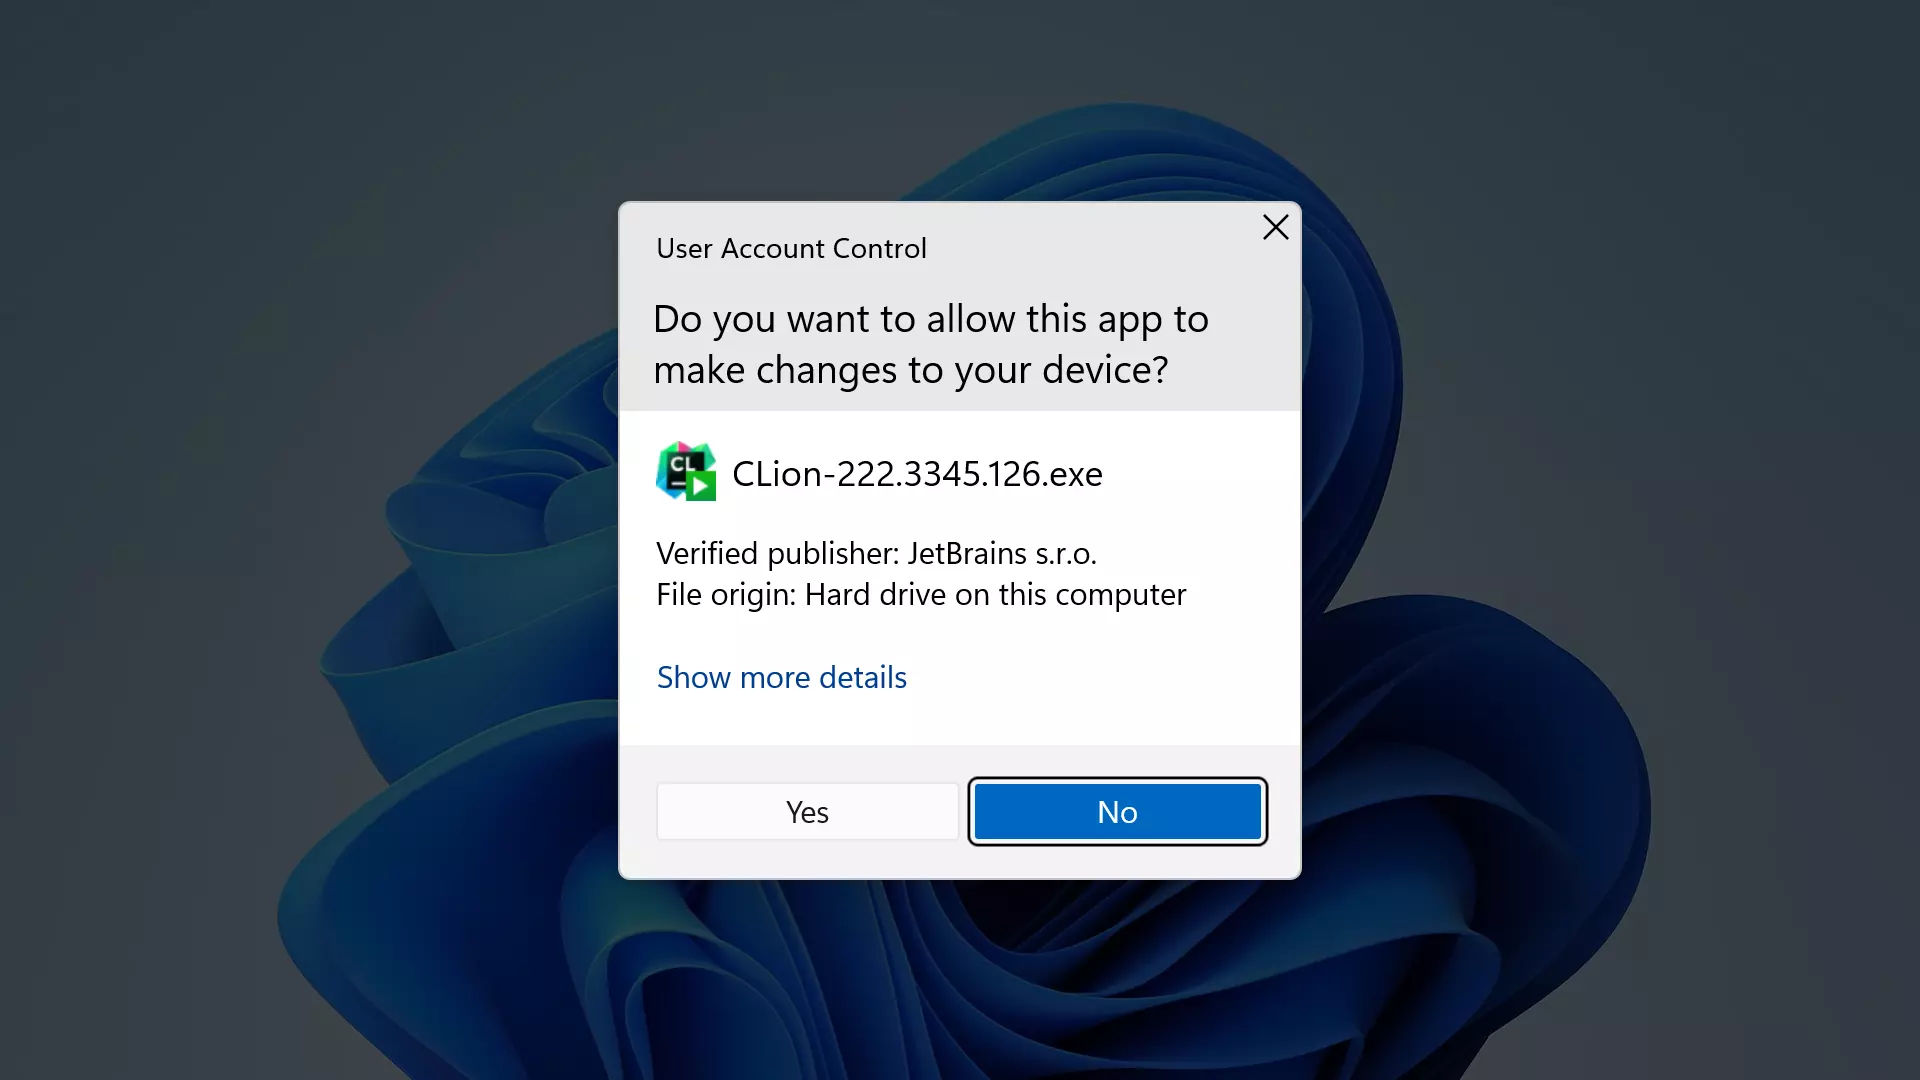
Click on the Yes button in the UAC prompt. This will launch the CLion Setup wizard screen.
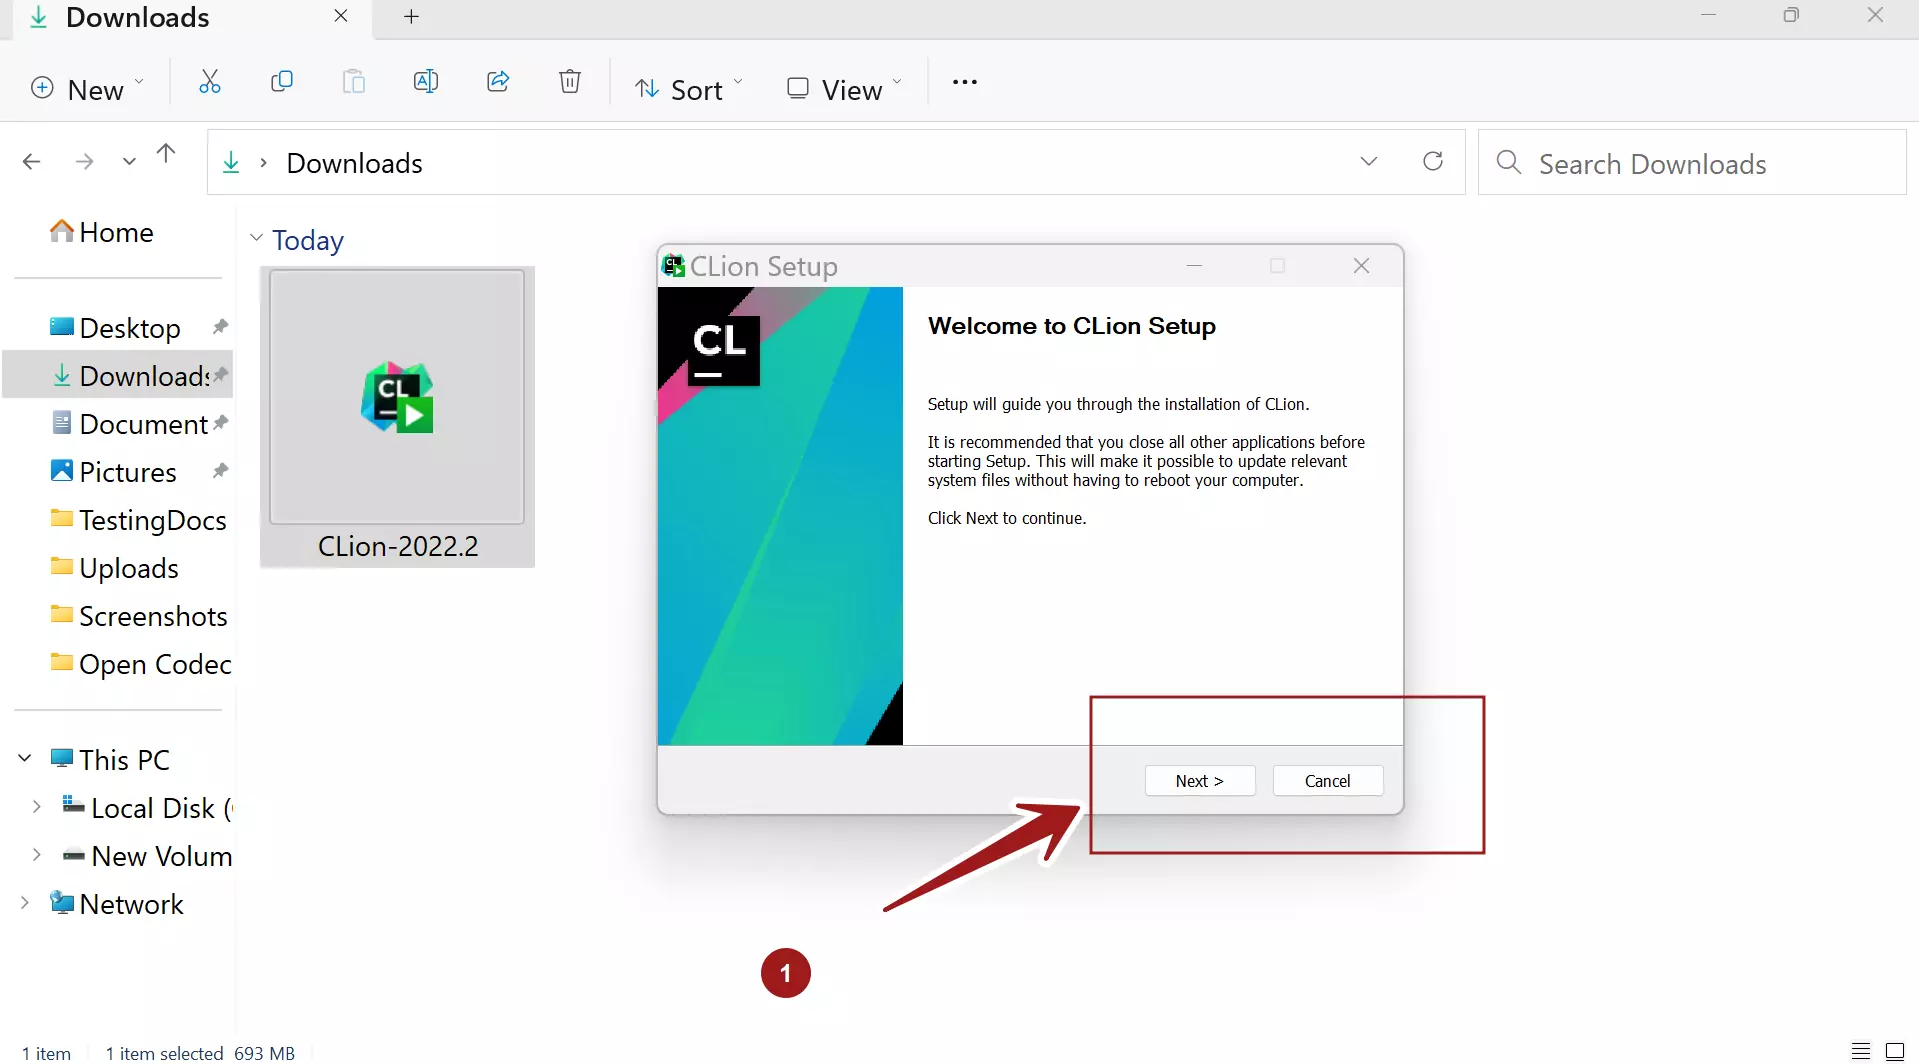
Click on the Next > button.
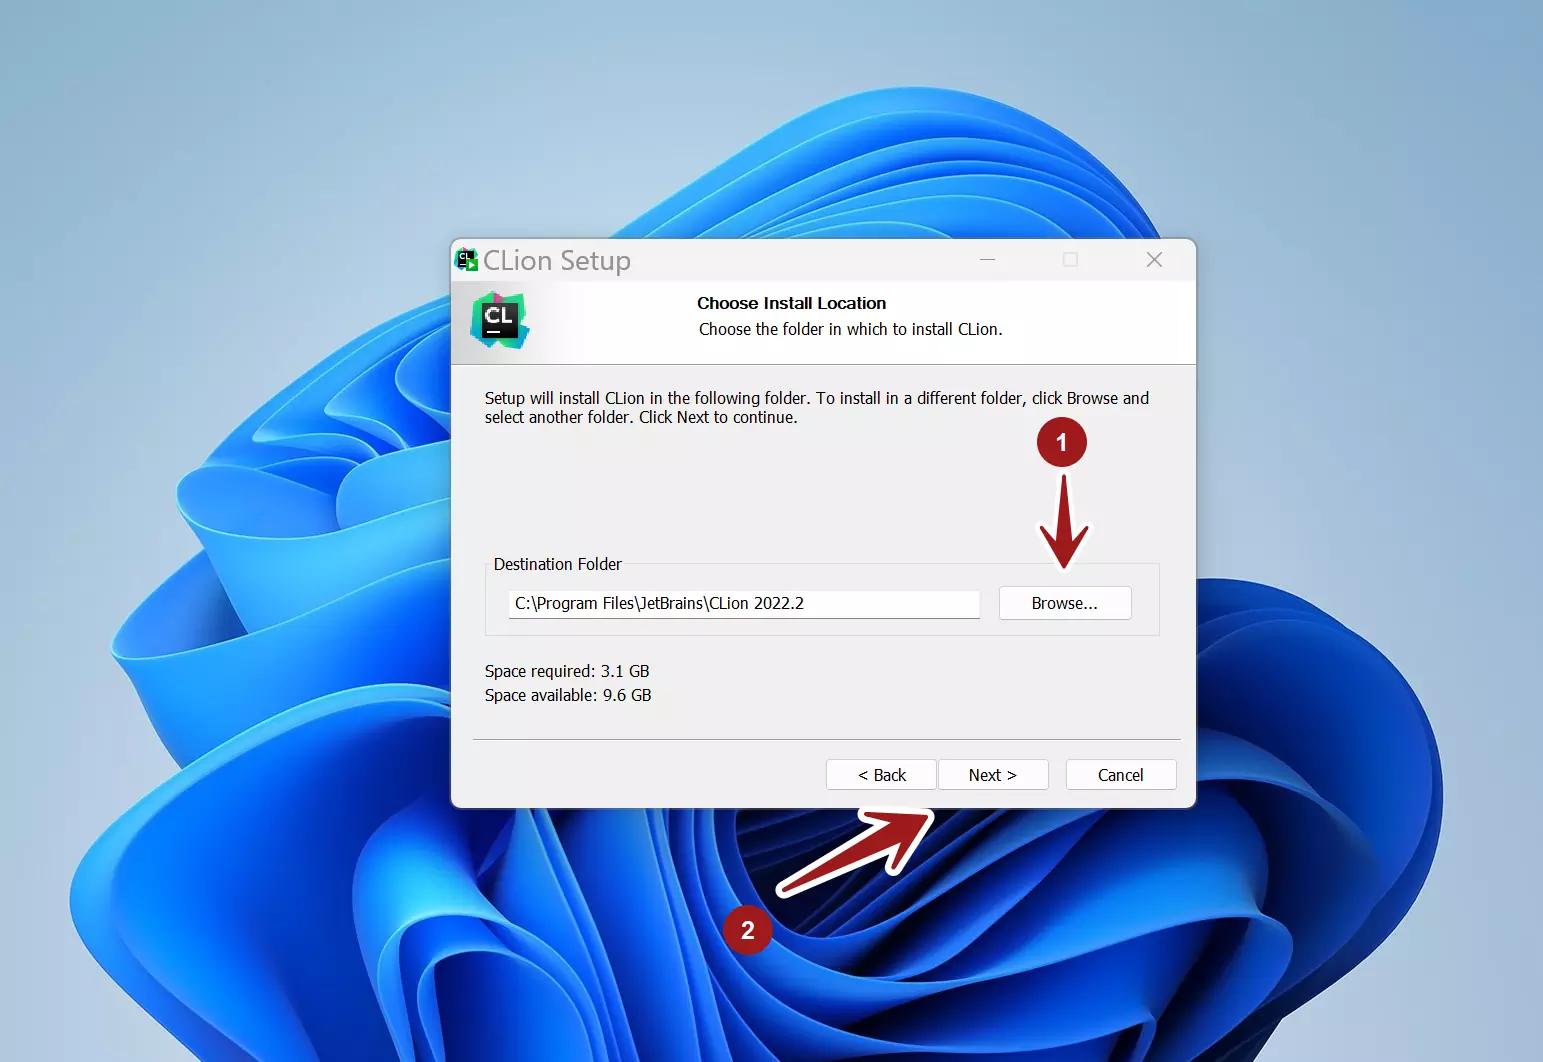
Choose the Install location for the IDE tool. By default, the tool would be installed under the Program Files folder at
C:\Program Files\JetBrains\CLion <version> folder.
It’s recommended to install on the default location. However, to change the install location, click on the Browse… button and choose the install folder. Make sure you have the write privileges on the location.
Click on the Next > button.
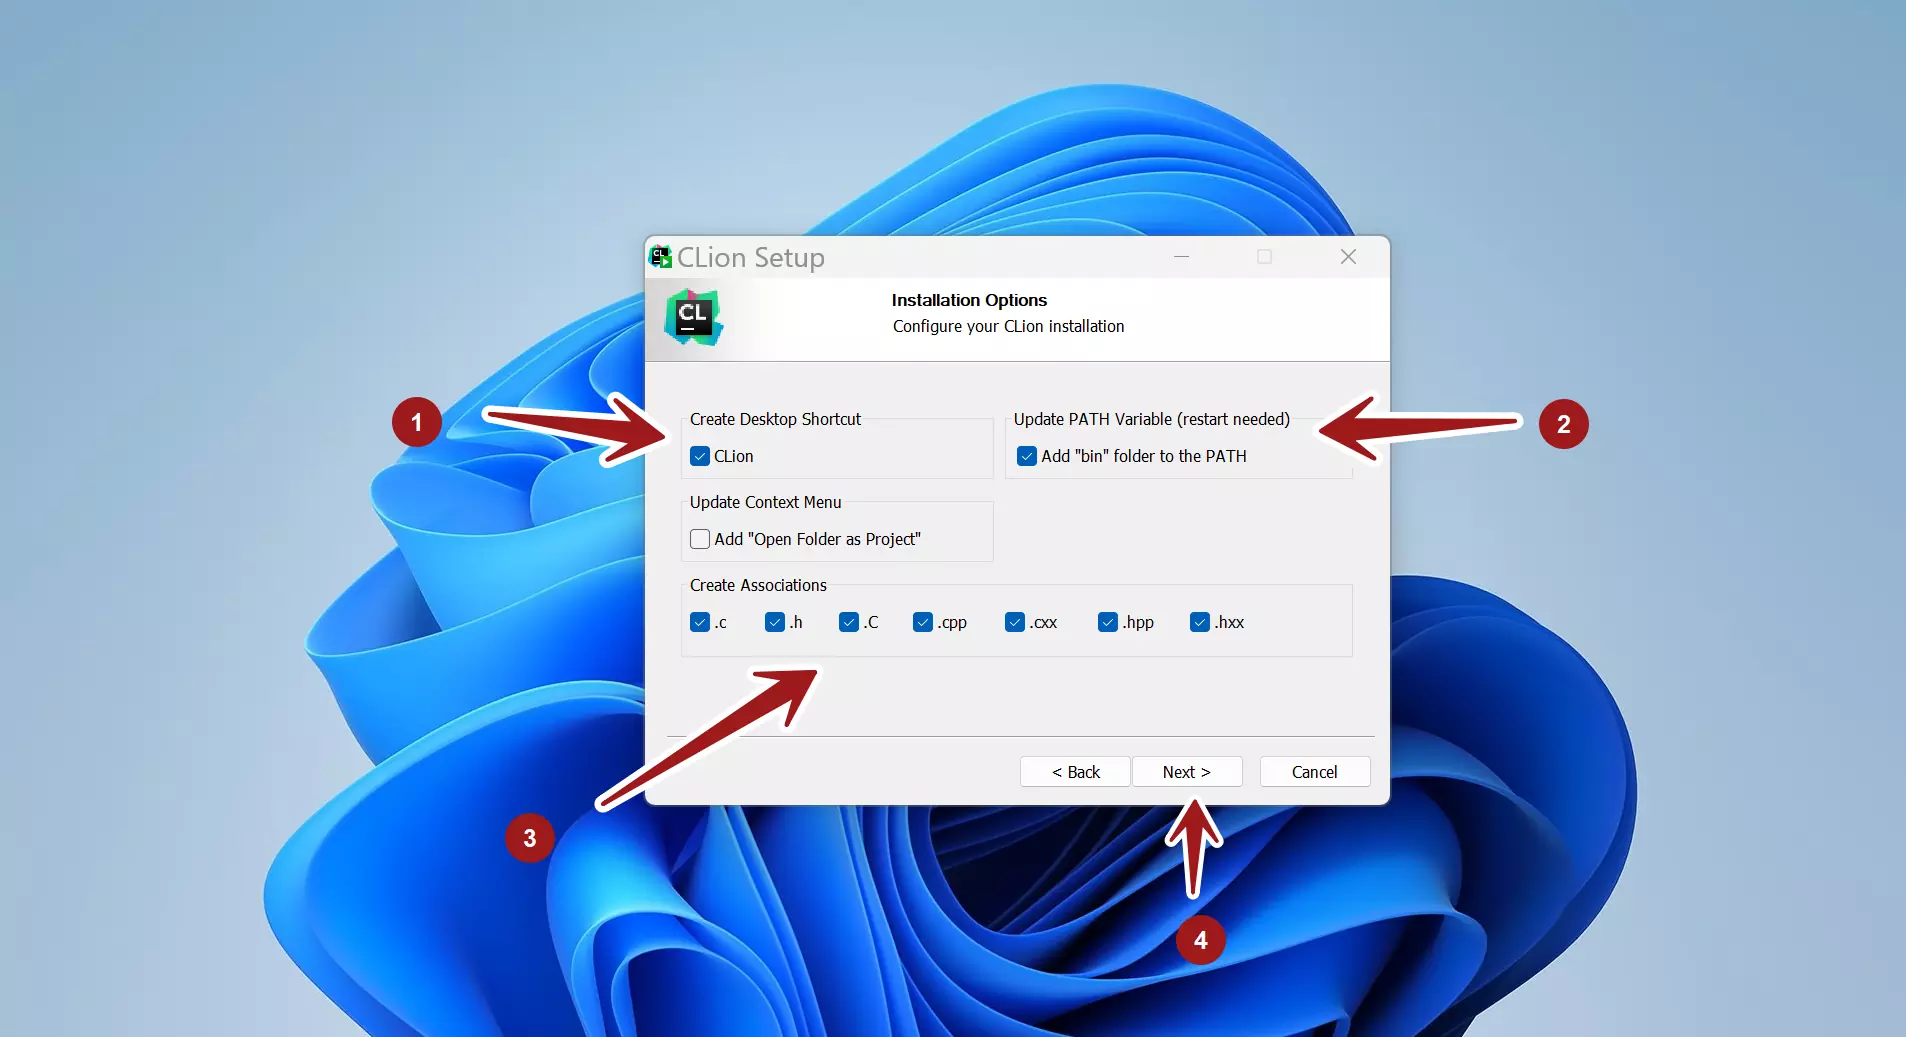
On this screen, we can opt to create a CLion desktop shortcut icon.
Update the PATH environment variable to include the bin directory.
Create file associations with the CLion software. The file extensions that we can associate CLion are: .c , .h , C, .cpp, .hpp, .cxx, .hxx. When we do this, we can later directly launch the files with those extensions with the CLion IDE software.
Click on the Next > button to install CLion on the Windows machine. The setup installer will install all the necessary files on the machine.
Once done with the installation, reboot the machine.
That’s it. We have successfully installed CLion IDE on the Windows 11 machine.
—
CLion Tutorials
CLion Tutorials on this website can be found at:
https://www.testingdocs.com/clion-ide-tutorials/
For more information on CLion IDE, visit the official website:


