TestingDocs.com
Software Testing website
  • Automation
    • Selenium
    • JBehave Framework
  • Tutorials
    • MySQL Tutorials
    • Testlink
    • Maven
    • Git
  • IDEs
    • IntelliJ IDEA
    • Eclipse
  • Flowcharts
    • Flowgorithm
    • Raptor
  • About

JUnit

Adding JUnit5 library to a Project

JUnit Tutorial

Overview

In this post, we will learn how to add the JUnit5 library to a standalone java project using Eclipse IDE.

Environment used:

JDK 12

Eclipse 2019.xx

Windows 10 operating system

Steps:

Launch Eclipse IDE.

Click on Create a Java Project link in the Package Explorer.

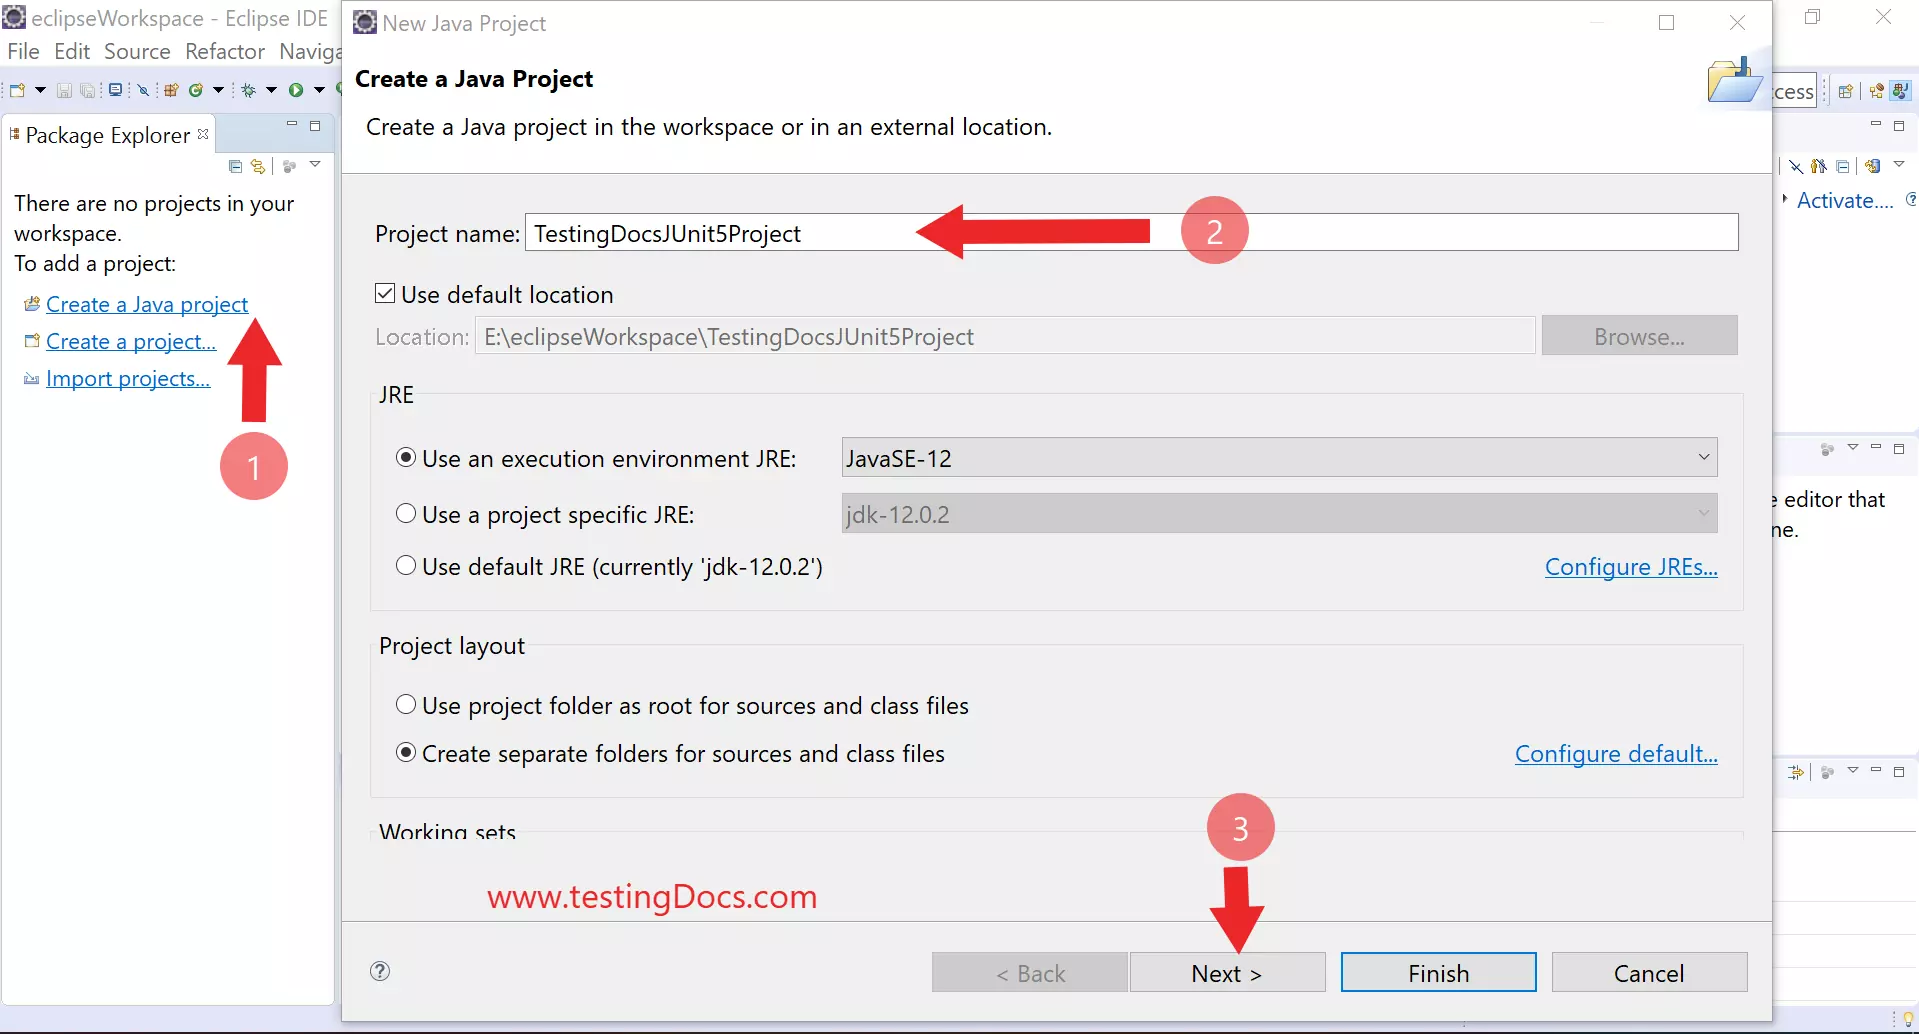
Enter the Project name.

Click on the Next> button.

Click on the Finish button.


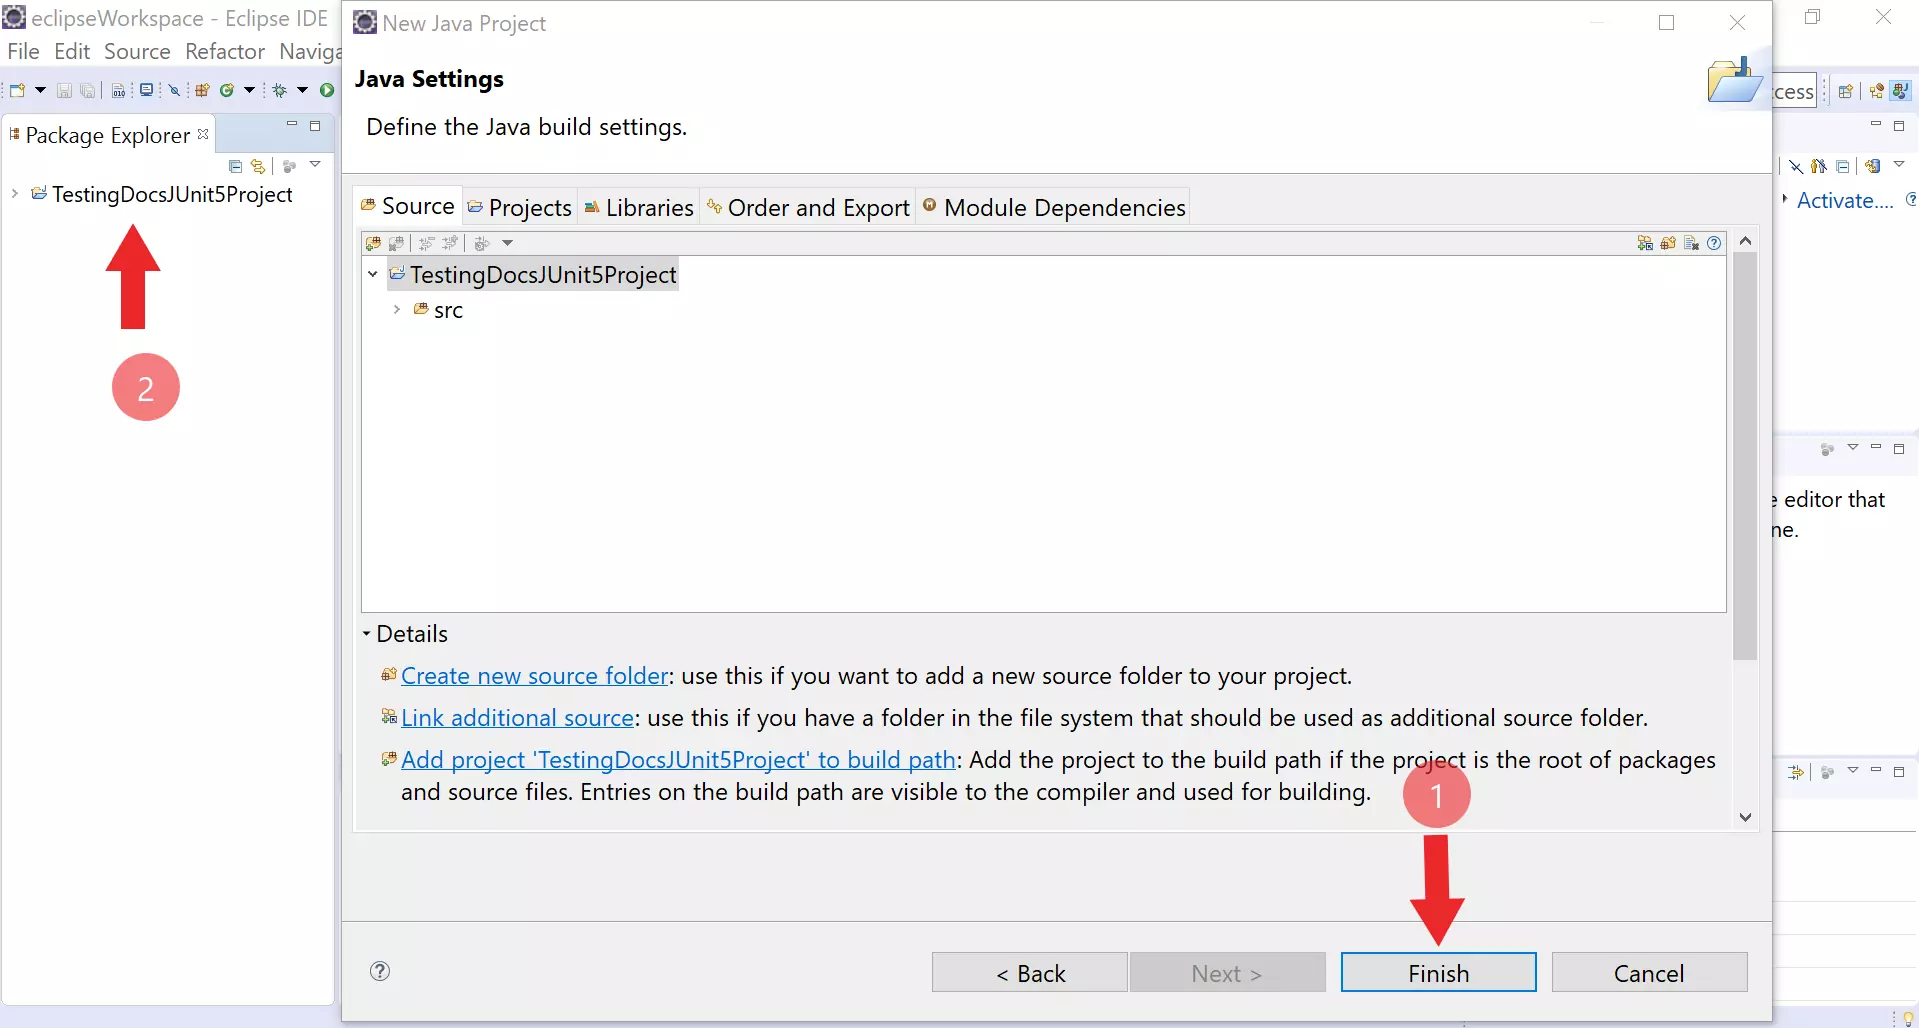
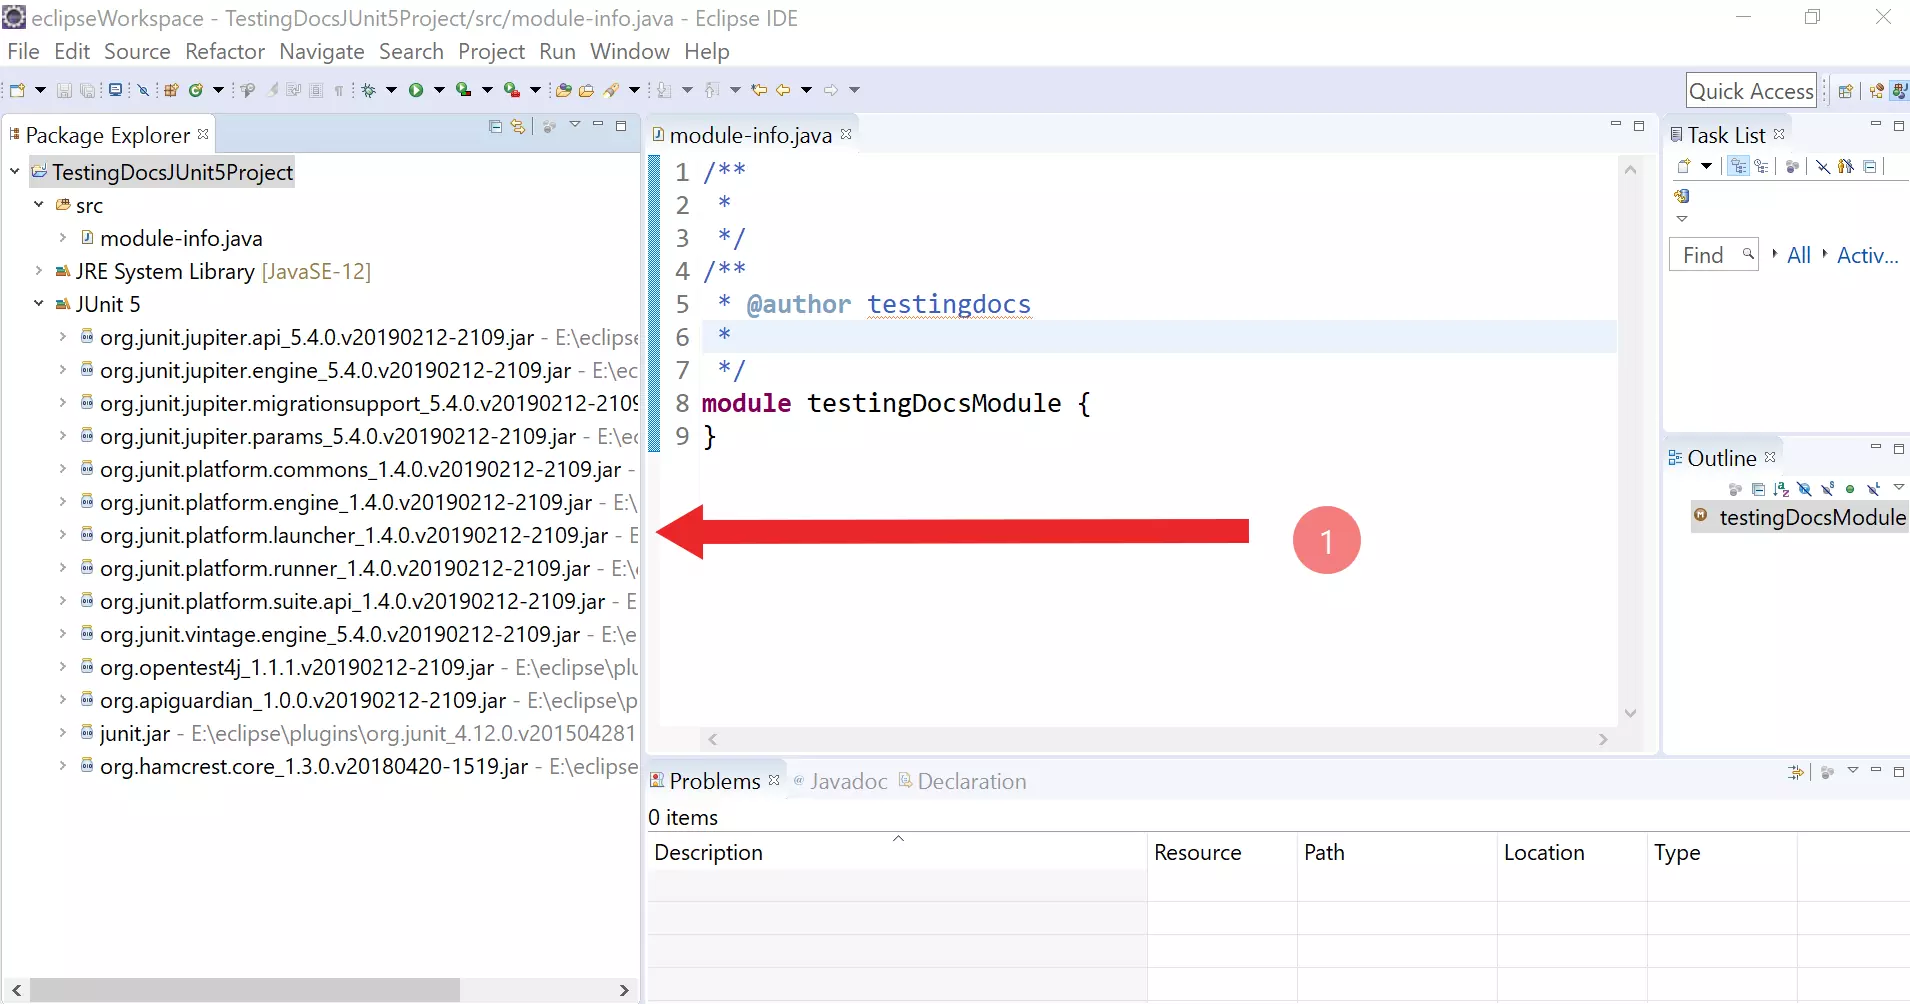
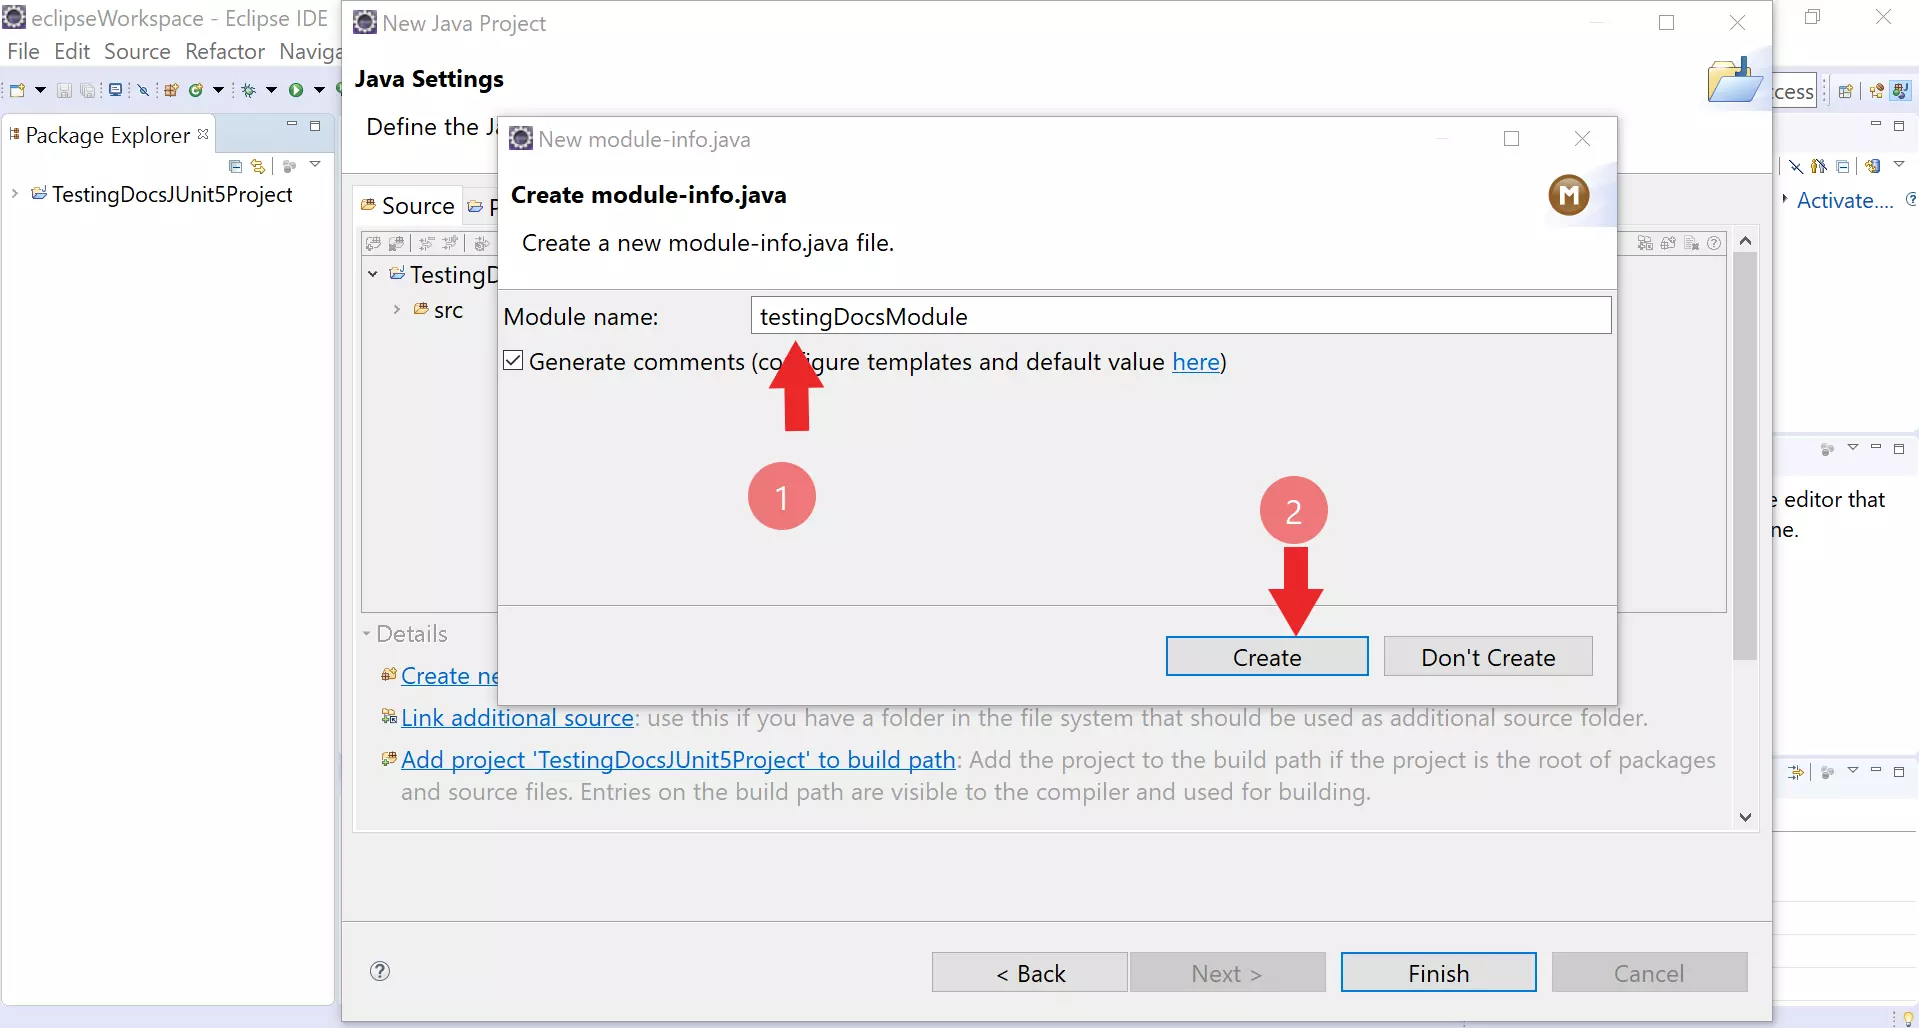
Optionally, you can create a module name, by creating module-info.java

To add JUnit5 library

Right Click on the Project >> Build Path >> Java Build Path.

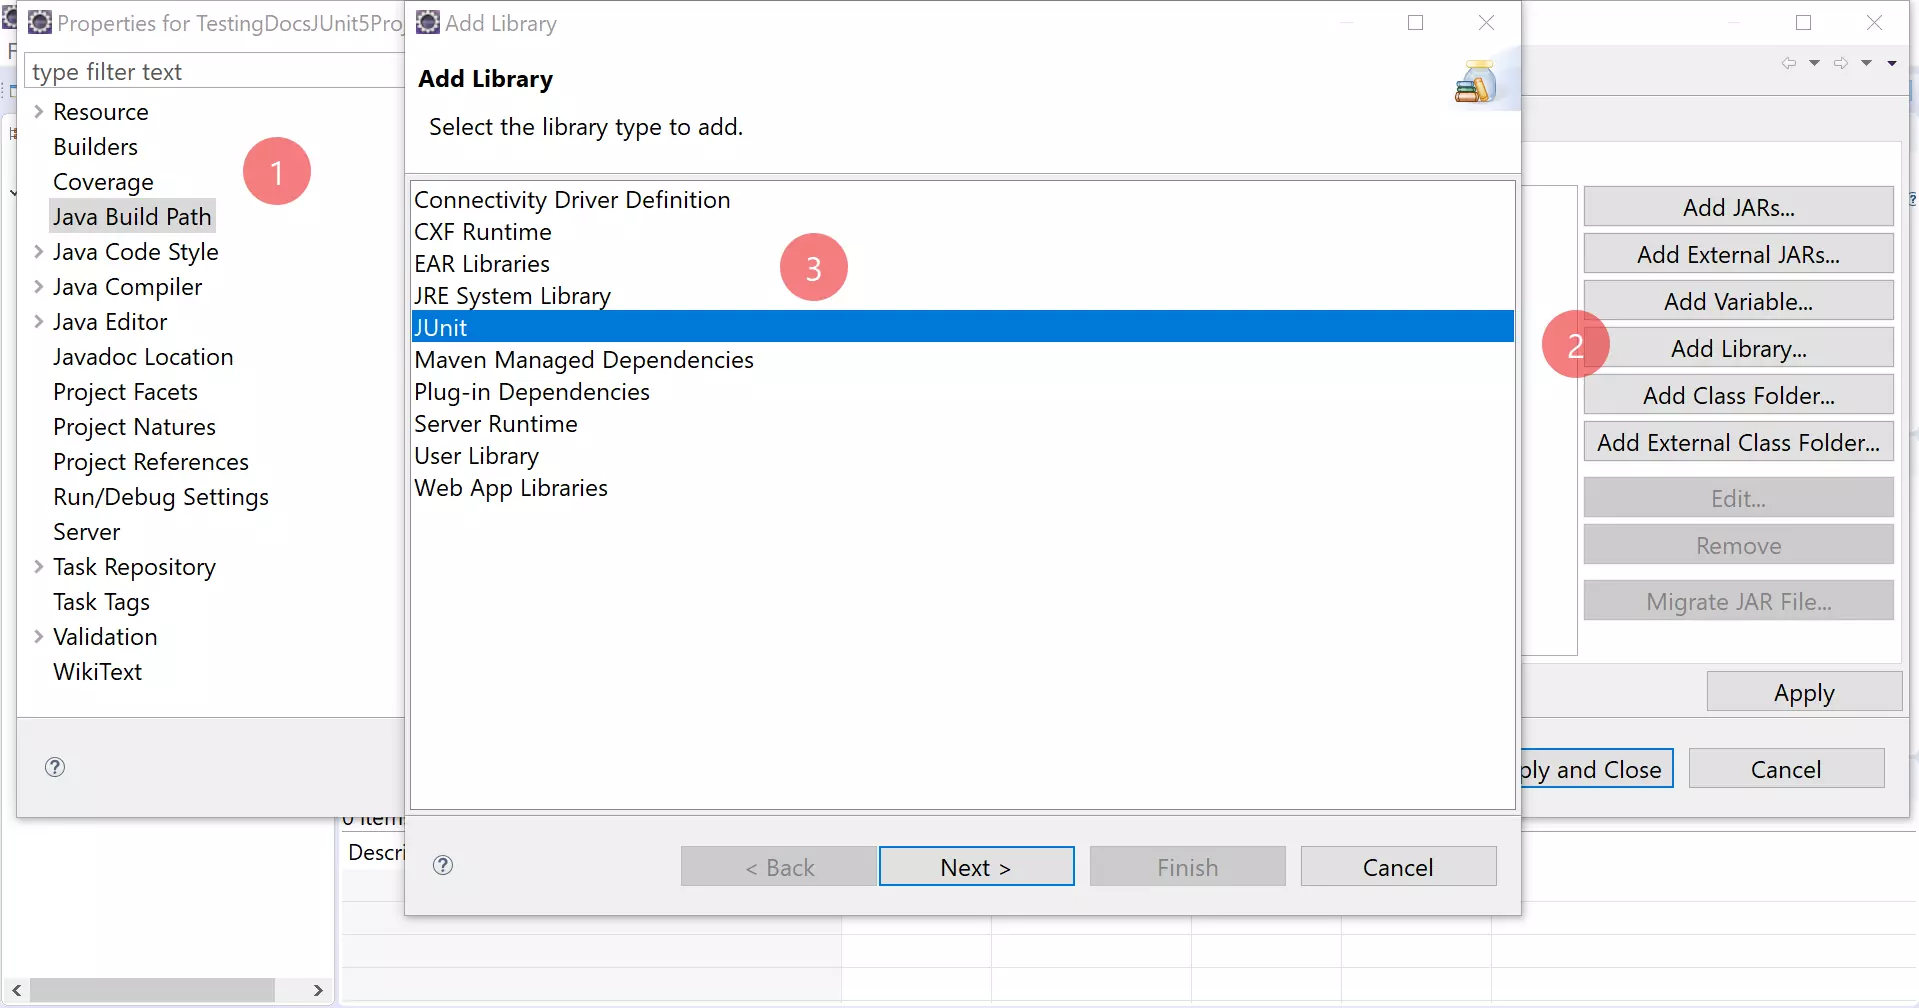
Choose Libraries tab >> Add Library…

Select JUnit.

Click on the Next> button.

Choose Library version: JUnit 5

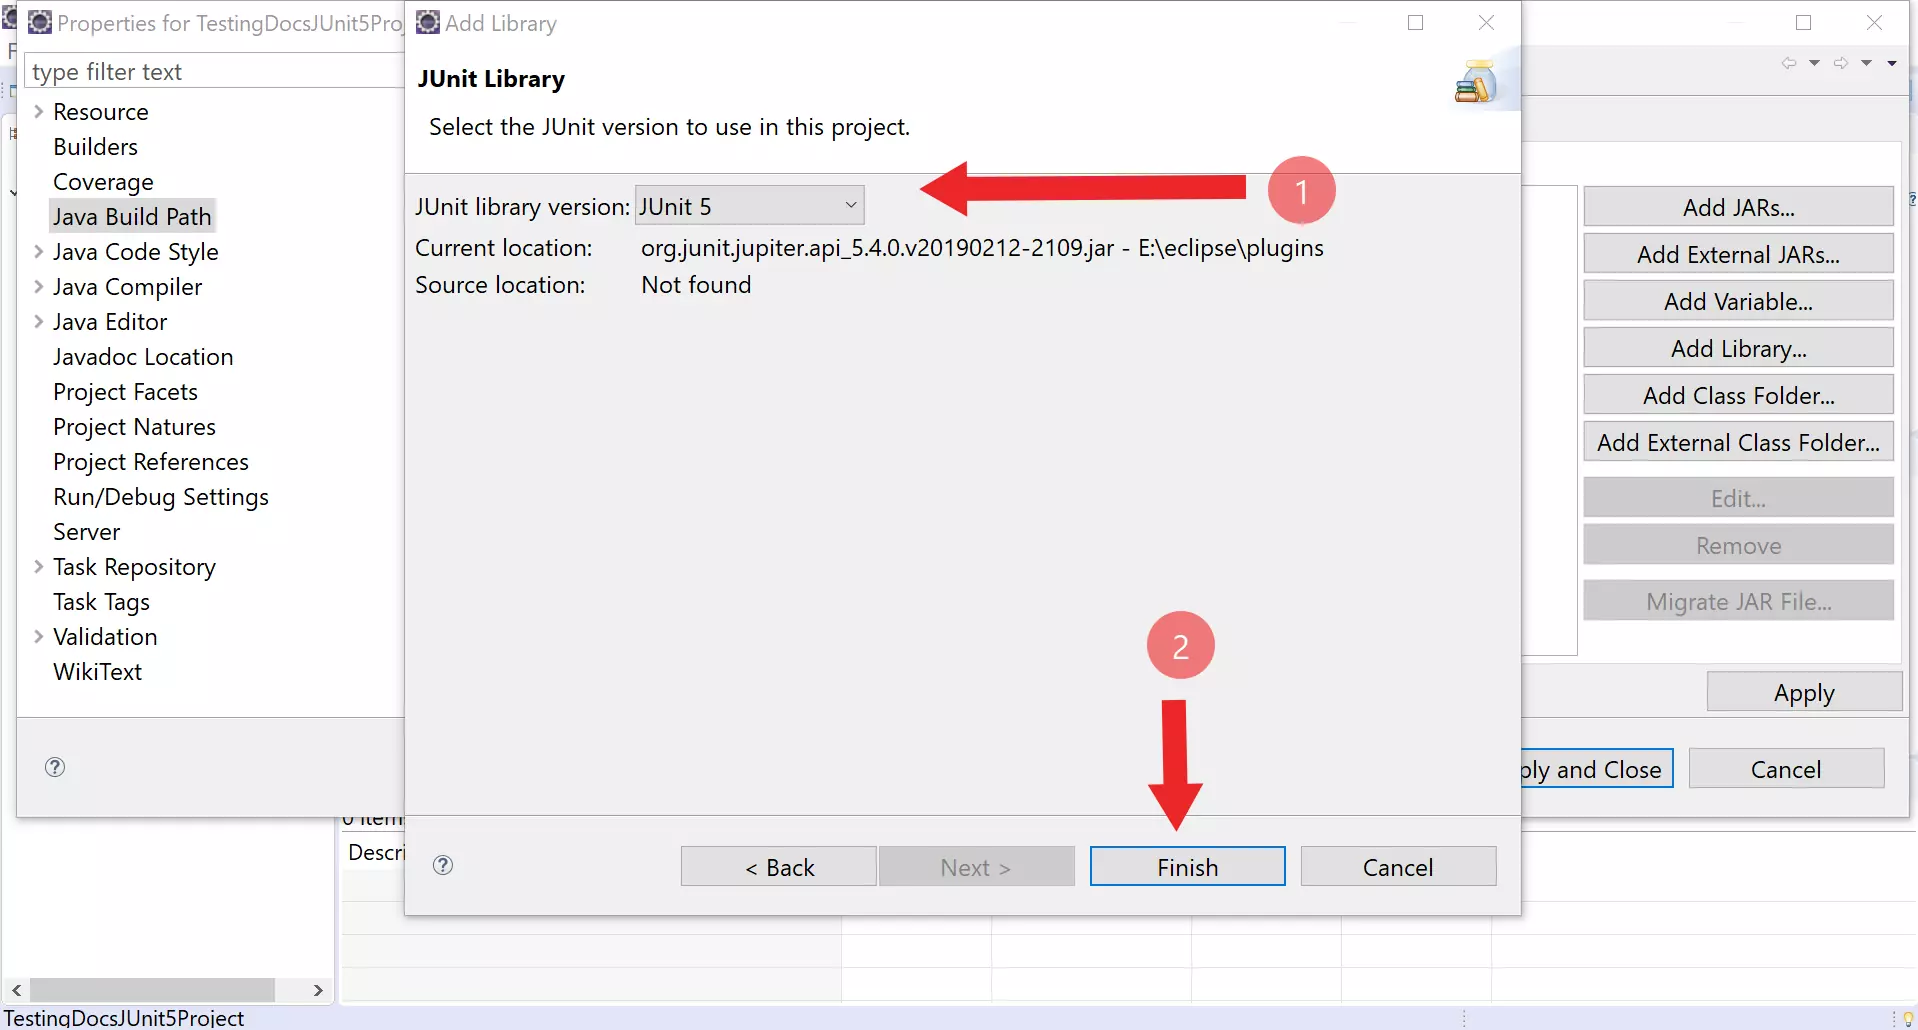
Click on Finish button >> Apply and Close button.

You can verify that the JUnit 5 library got added to your project.


Related Posts

Getting Started with JUnit Framework

JUnit /

Getting Started with JUnit Framework

Run JUnit tests from command line

JUnit /

Run JUnit tests from command line

Working with JUnit in Eclipse IDE

JUnit /

Working with JUnit in Eclipse IDE

Test Failure JUnit

JUnit /

Debug JUnit Tests using IDE

Adding Calculator Test Methods in Eclipse

JUnit /

Adding Calculator Test Methods in Eclipse

‹ Debug JUnit Tests using IDE› Working with JUnit in Eclipse IDE

Recent Posts

  • MS Access Data Types
  • Install RAPTOR Avalonia on CentOS
  • Download RAPTOR Avalonia Edition on Windows
  • npm doctor command
  • Build & Run CLion Project
  • Create New CLion C Project on Windows
  • Configure CLion Toolchains on Windows
  • Launch CLion IDE on Windows
  • Activate CLion IDE
  • CLion IDE for C/C++ Development

Back to Top

Links

  • Contact
  • Privacy Policy
  • Cookie Policy

www.TestingDocs.com

Go to mobile version