Run JUnit tests from command line [ 2024 ]
Run JUnit tests from the command line
In this article, we will learn how to run JUnit tests from the command line using the Windows 10 operating system’s command prompt.
Environment
The below environment is used to run the tests in this example.
- JUnit jar
- Hamcrest core jar
- Java Development Kit ( JDK)
- Windows 10 OS
Set up to run JUnit tests
Create a folder and download junit.jar and hamcrest core jar.
Compile the class under test classes. In this example, we will use calculator class.
/**
 * Calculator class:
 * Basic Mathematical functions like
 * Add,Subtract,Multiply.
 *
 */
public class Calculator {
    //no-arg constructor
    public Calculator() {
    }
    /**
     * Sum method.
     */
    public int add(int a, int b) {
        return a + b;
    }
    /**
     * Subtract method.
     */
    public int subtract(int a, int b) {
        return a - b;
    }

    /**
     * Multiply method.
     */
    public long multiply(int a, int b) {
        return a * b;
    }

}
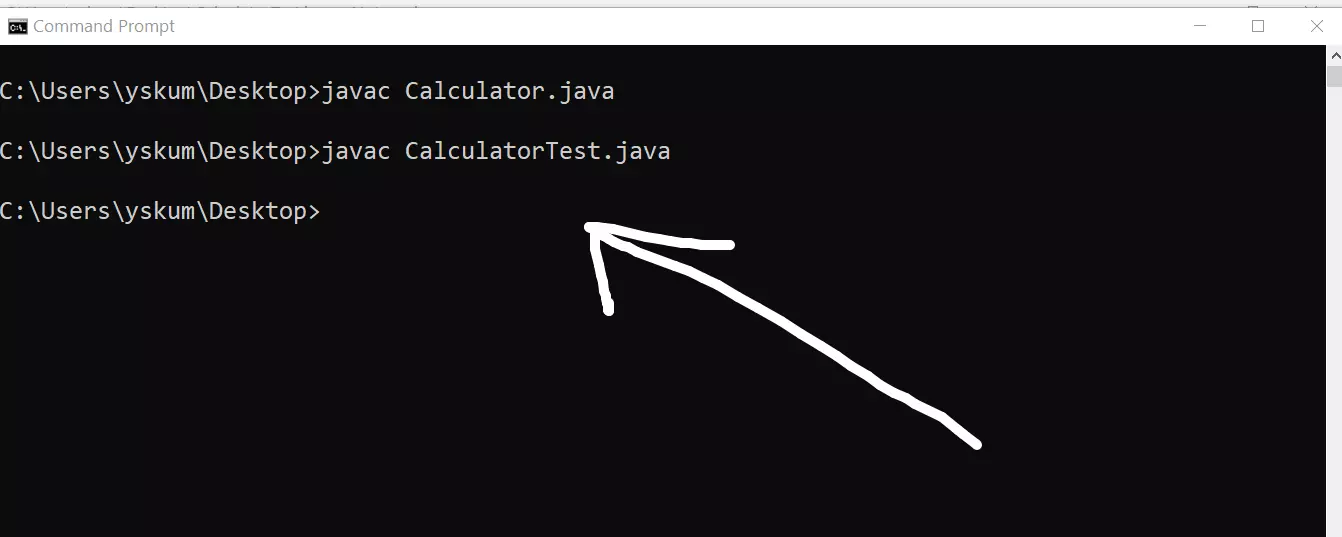
/> javac Calculator.java
Copy the Calculator class file to the folder.
Set the folder as CLASSPATH. Add junit and hamcrest-core jar files to the class path.
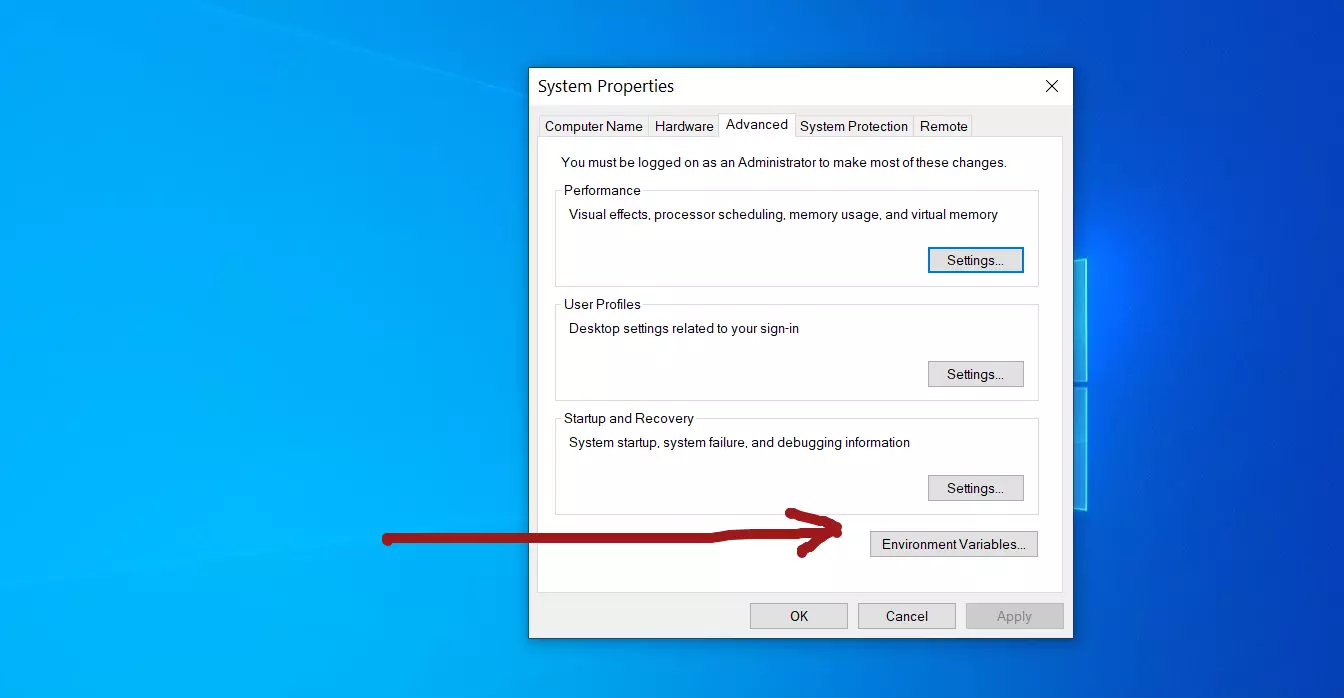
Run > Edit the system environment variables in the Control panel.

Click on the Environment variables button.
Create a New System variable called CLASSPATH. Alternatively, you can append to the existing if the variable exists.
Click on New button to add junit and hamcrest jar files to the class path.
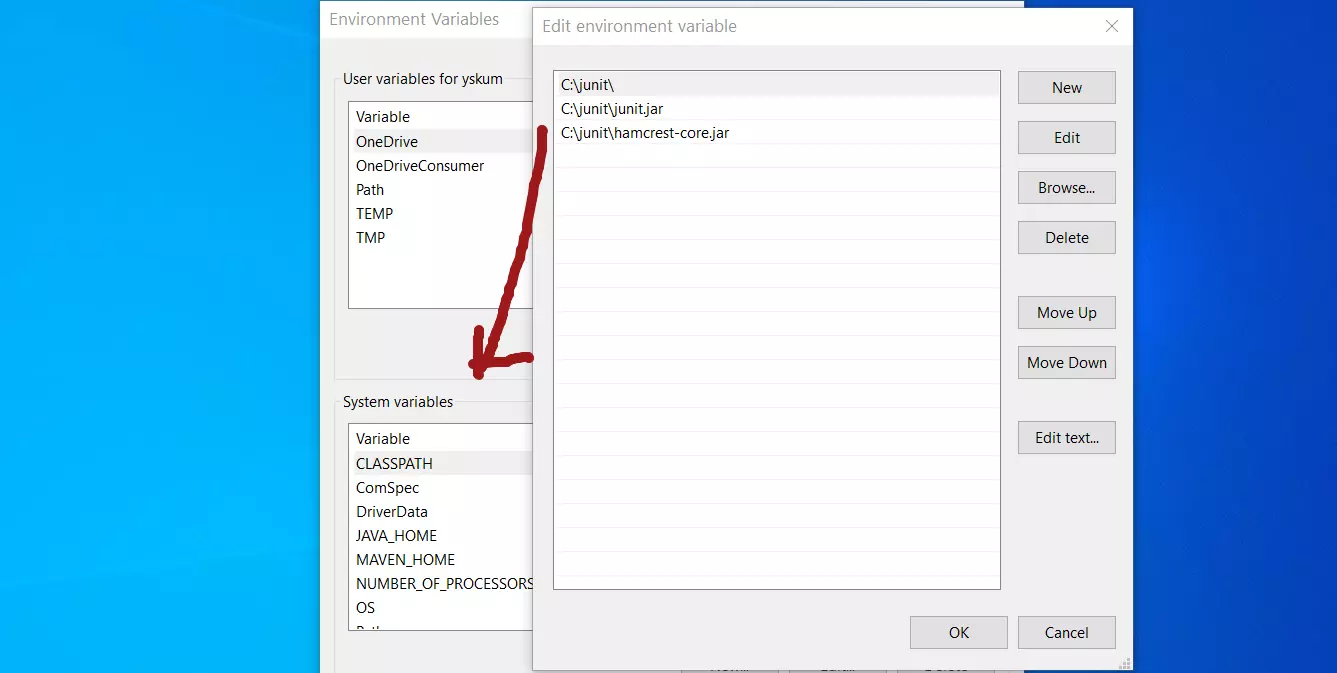
We can use the directory c:\junit\ ( in my example) to hold the classes or jar files. Copy the complied classes to this folder. Alternatively, you can run the javac and java commands with -cp switch to specify the class path.
Compile the CalculatorTest.java
import org.junit.Test;
import org.junit.Assert;
import org.junit.Before;
import org.junit.After;

public class CalculatorTest {

    private Calculator objCalcUnderTest;

    @Before
    public void setUp() {
        objCalcUnderTest = new Calculator();
    }

    @Test
    public void testAdd() {
        int a = 15;
        int b = 20;
        int expectedResult = 36;
        long result = objCalcUnderTest.add(a, b);
        Assert.assertEquals(expectedResult, result);;
    }

    @Test
    public void testSubtract() {
        int a = 25;
        int b = 20;
        int expectedResult = 5;
        long result = objCalcUnderTest.subtract(a, b);
        Assert.assertEquals(expectedResult, result);;
    }

    @Test
    public void testMultiply() {
        int a = 10;
        int b = 25;
        long expectedResult = 250;
        long result = objCalcUnderTest.multiply(a, b);
        Assert.assertEquals(expectedResult, result);;
    }


  @After
    public void tearDown() {
        objCalcUnderTest = null;
    }
}
/> javac CalculatorTest.java
Run the Test
To run the tests issue the following command.
/> java org.junit.runner.JUnitCore CalculatorTest

Command-line Output
JUnit version 4.12
…
Time: 0
OK (3 tests)
The dots indicate the number of tests in your junit suite. OK result is outputted when all the tests pass.
Sample failure output
JUnit version 4.12
.E..
Time: 0.047
There was 1 failure:
1) testAdd(CalculatorTest)
java.lang.AssertionError: expected:<36> but was:<35>
        at org.junit.Assert.fail(Assert.java:88)
        at org.junit.Assert.failNotEquals(Assert.java:834)
        at org.junit.Assert.assertEquals(Assert.java:645)
        at org.junit.Assert.assertEquals(Assert.java:631)
        at CalculatorTest.testAdd(CalculatorTest.java:21)
        at sun.reflect.NativeMethodAccessorImpl.invoke0(Native Method)
        at sun.reflect.NativeMethodAccessorImpl.invoke(NativeMethodAccessorImpl.java:62)
        at sun.reflect.DelegatingMethodAccessorImpl.invoke(DelegatingMethodAccessorImpl.java:43)
As you can see there was one failure with the error stack trace debug information. In this case you need to debug the tests ( false negatives ) or the object code under test for defects and find the root cause of the errors.
See also for running the tests in an IDE:
For more information on JUnit, visit the official website:
