Adding Calculator Test Methods in Eclipse
Adding Calculator Test Methods in Eclipse
In this tutorial, we will see how to create a new JUnit test case and test methods in Eclipse for Calculator Java class.
Creating a JUnit Test Case
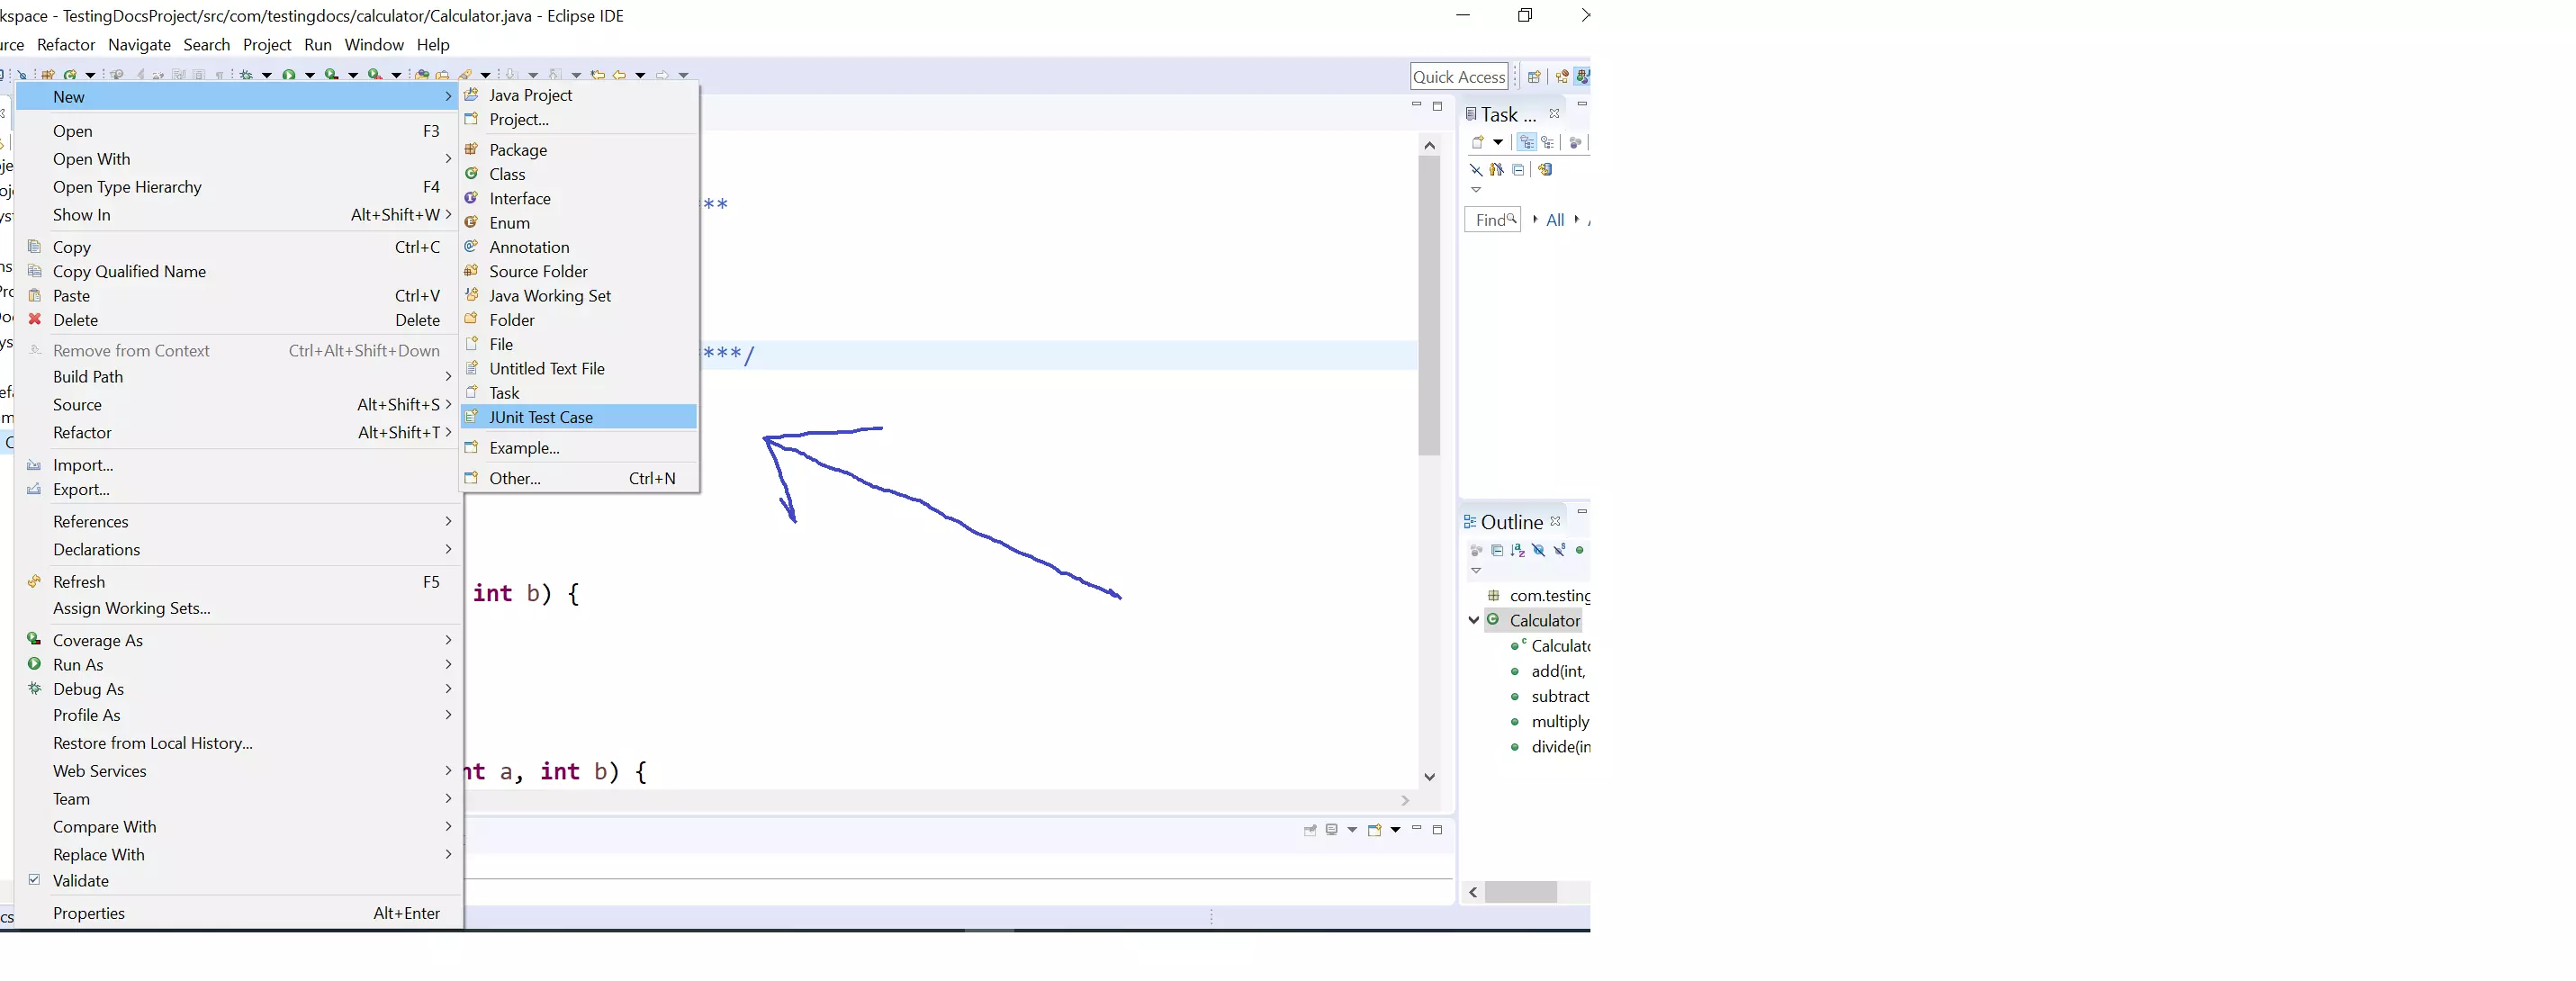
Junit Test Case is a test class that will test one of the existing classes in the Project. In our example its the Calculator class. To create a new JUnit test case, right-click the class you want to test in the Package Explorer >> New >> JUnit Test Case as shown in the picture.
New Test Case
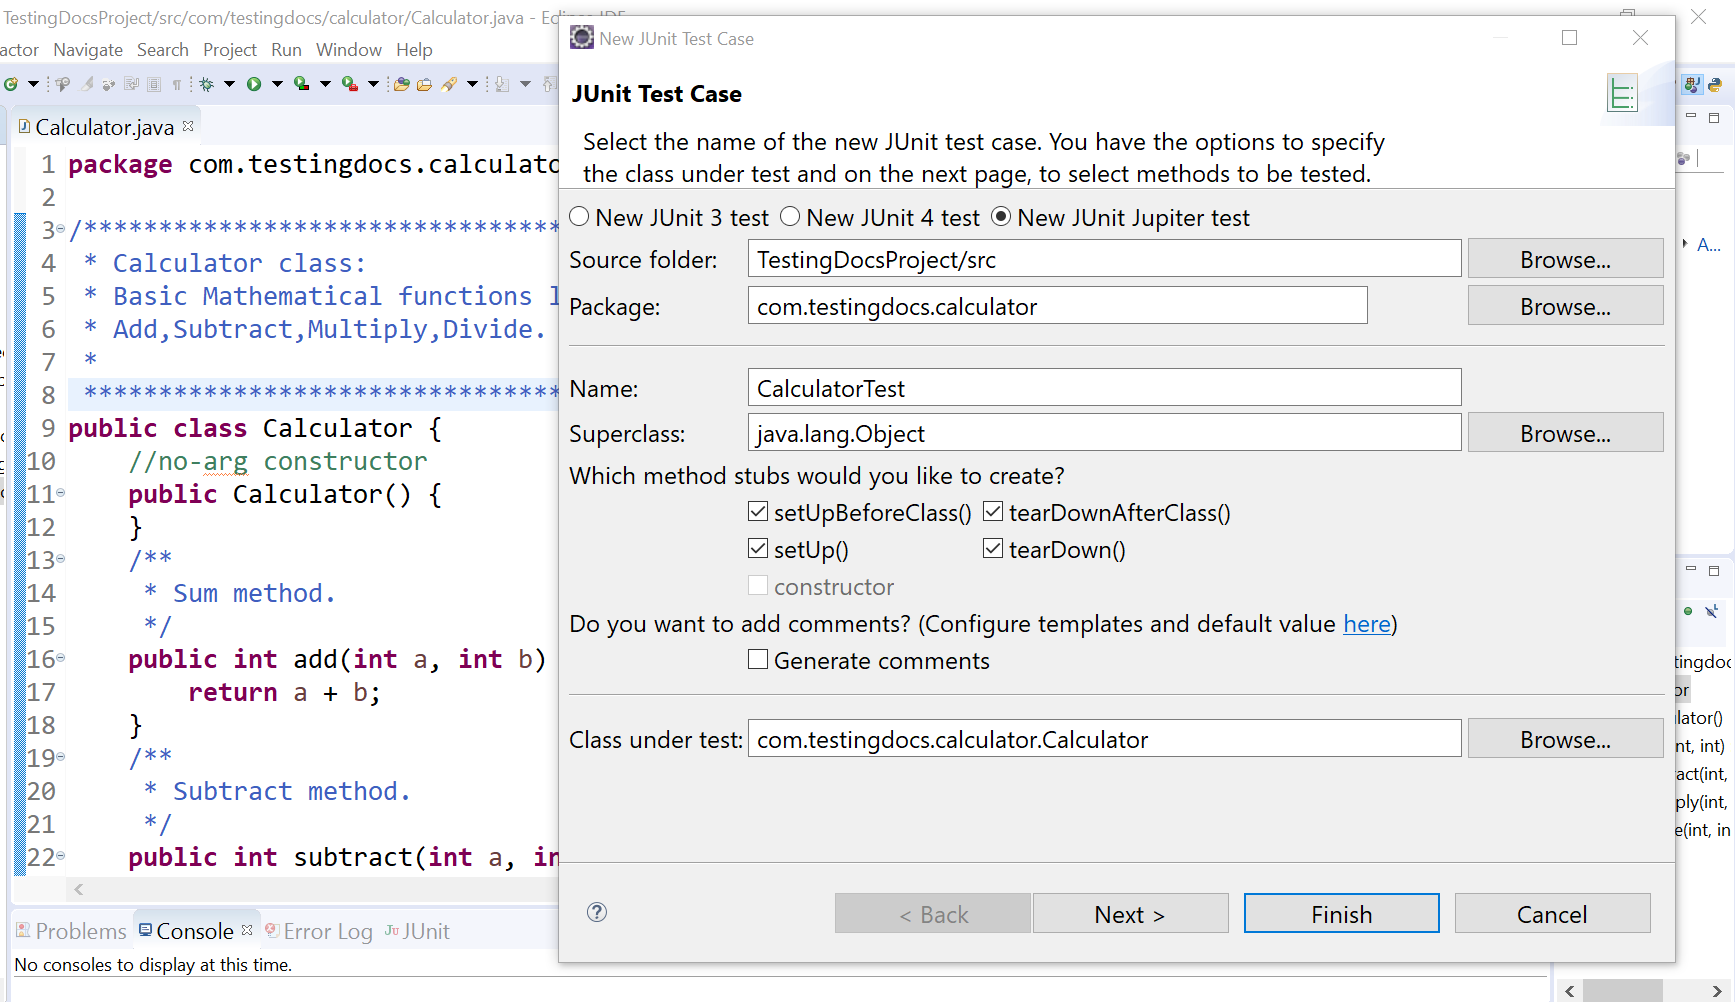
In the new screen, enter the test class name and choose the JUnit library version.
Once done click on the Next button.
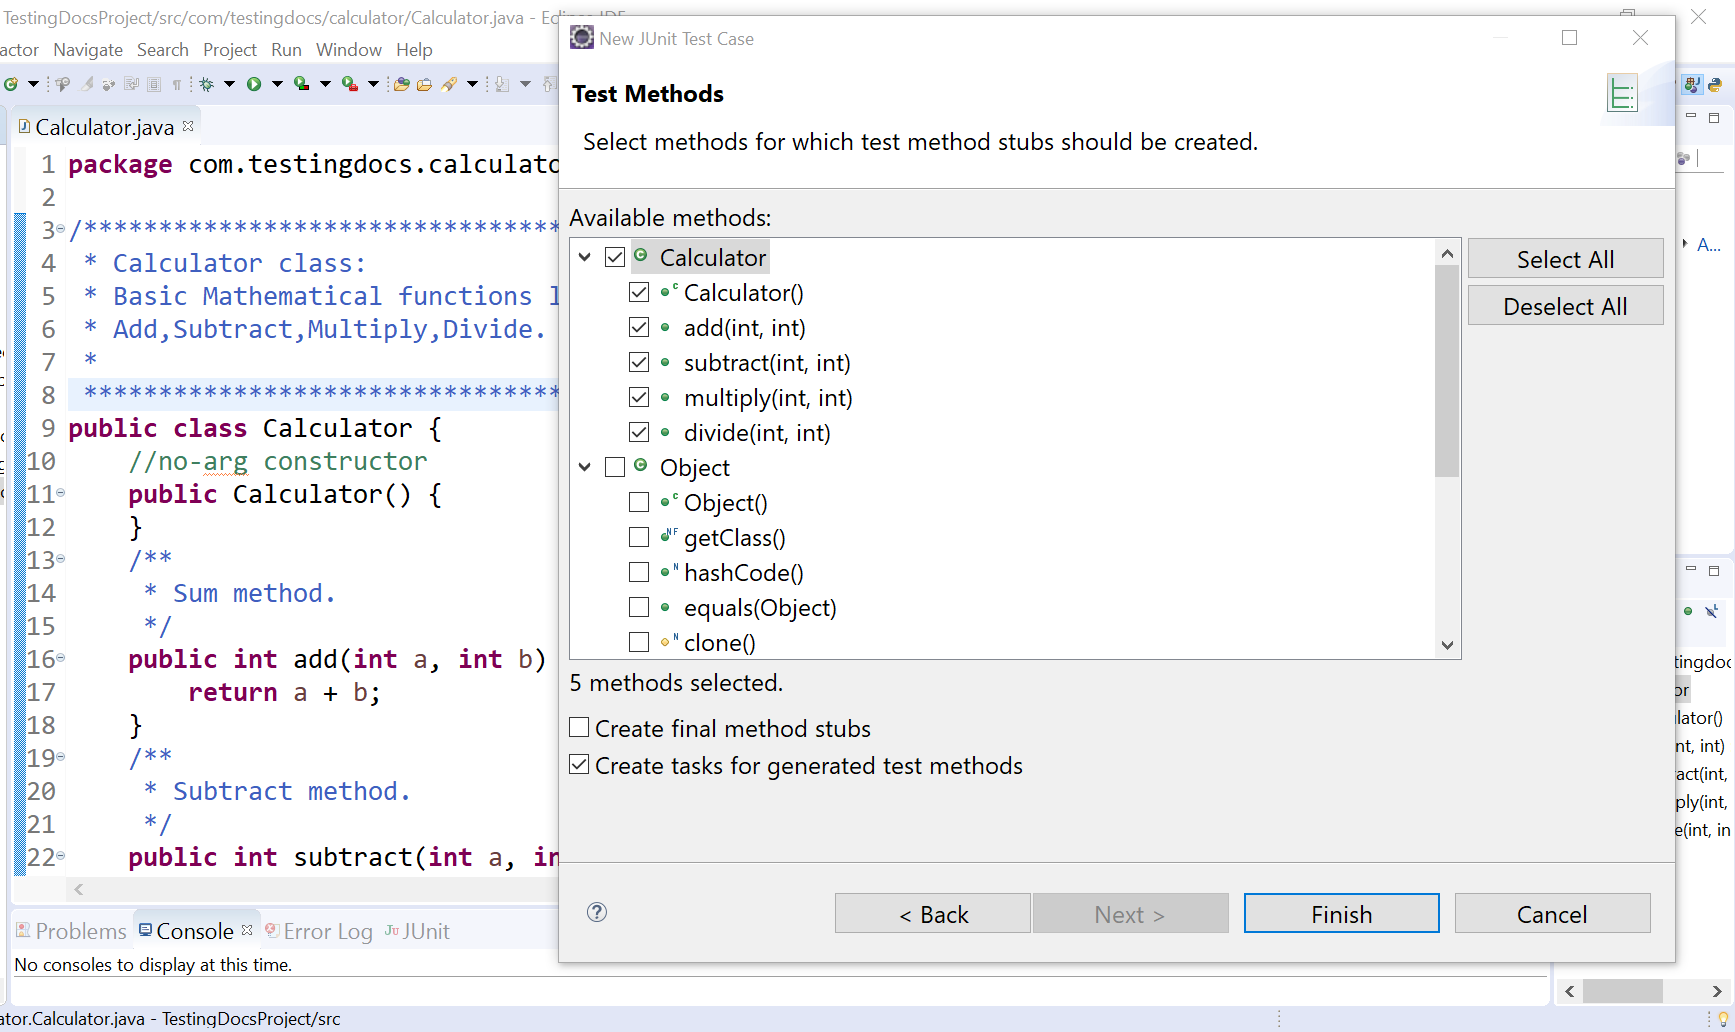
Check the checkboxes to add the test method stubs you want to test. Choose the test methods and click on the Finish button.
In the next process, Eclipse IDE would prompt you to add the JUnit library to your project.
Click on the OK button.

Calculator Test Methods
package com.testingdocs.calculator;

import static org.junit.jupiter.api.Assertions.*;

import org.junit.jupiter.api.AfterAll;
import org.junit.jupiter.api.AfterEach;
import org.junit.jupiter.api.BeforeAll;
import org.junit.jupiter.api.BeforeEach;
import org.junit.jupiter.api.Test;

class CalculatorTest {

  @BeforeAll
  static void setUpBeforeClass() throws Exception {
  }

  @AfterAll
  static void tearDownAfterClass() throws Exception {
  }

  @BeforeEach
  void setUp() throws Exception {
  }

  @AfterEach
  void tearDown() throws Exception {
  }

  @Test
  void testCalculator() {
    fail("Not yet implemented"); // TODO
  }

  @Test
  void testAdd() {
    fail("Not yet implemented"); // TODO
  }

  @Test
  void testSubtract() {
    fail("Not yet implemented"); // TODO
  }

  @Test
  void testMultiply() {
    fail("Not yet implemented"); // TODO
  }

  @Test
  void testDivide() {
    fail("Not yet implemented"); // TODO
  }

}
Once you’re done, you should have a new JUnit test case test class created in your project. We can add the test logic to the test methods as shown in this example:
