JUnit Calculator Test Case Example
JUnit Calculator Test Case Example
We will examine a Simple Calculator Test case example for writing JUnit Tests. This tutorial helps beginners understand how to write and execute JUnit Tests.
Calculator class
The Calculator class is the class to be tested. The class contains mathematical methods, including adding, subtracting, multiplying, and dividing. We will write JUnit test methods to test these methods.
Steps to create a Calculator Java class:
Calculator User Story
Sample User Story in Agile scrum story card format :
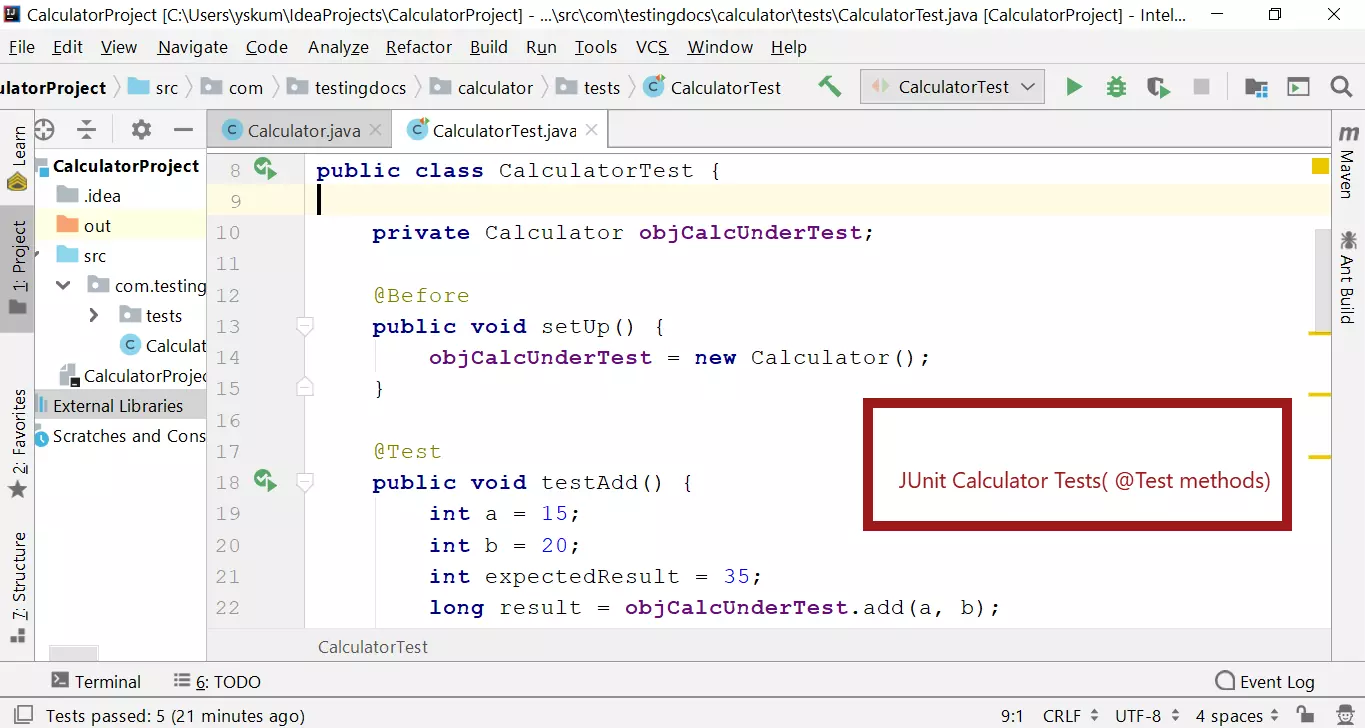
JUnit Test Mechanism
The @Test annotation methods test the Calculator object under test.

Arrange-Act-Assert pattern
AAA pattern for writing unit tests for the method under test. AAA stands for:
- Arrange
- Act
- Assert
Arrange – set up, create objects, data, etc
Act – Invoke the method under test
Assert – Verify pass or fail
Calculator Test Case
The below example shows some basic sample JUnit test cases.
package com.testingdocs.calculator.tests;

//Arrange-Act-Assert pattern
import com.testingdocs.calculator.Calculator;
import org.junit.Test;
import org.junit.Assert;
import org.junit.Before;

public class CalculatorTest {
private Calculator objCalcUnderTest;

@Before
public void setUp() {
//Arrange
objCalcUnderTest = new Calculator();
}

@Test
public void testAdd() {
int a = 15; int b = 20;
int expectedResult = 35;
//Act
long result = objCalcUnderTest.add(a, b);
//Assert
Assert.assertEquals(expectedResult, result);
}

@Test
public void testSubtract() {
int a = 25; int b = 20;
int expectedResult = 5;
long result = objCalcUnderTest.subtract(a, b);
Assert.assertEquals(expectedResult, result);
}

@Test
public void testMultiply() {
int a = 10; int b = 25;
long expectedResult = 250;
long result = objCalcUnderTest.multiply(a, b);
Assert.assertEquals(expectedResult, result);
}

@Test
public void testDivide() {
int a = 56; int b = 10;
double expectedResult = 5.6;
double result = objCalcUnderTest.divide(a, b);
Assert.assertEquals(expectedResult, result,0.00005);
}

@Test(expected = IllegalArgumentException.class)
public void testDivideByZero() {
int a = 15; int b = 0;
objCalcUnderTest.divide(a, b);
}
}
Screenshot
Screenshot of the tests in Eclipse IDE.
Right-click the JUnit test example class and run the test methods as “JUnit Test”.
In this example, we have placed the Calculator class( the test class intended to be tested) in the same package as the test-case example class. However, this might not be the case while writing real tests. The application source code can be separated from the test or automation code.
Junit Calculator test case example video
Jenkins CI
Running Calculator tests using Jenkins job. In real projects, the development team wants to run the tests automatically for every code change to the source code. Jenkins is a Continuous Integration (CI ) tool that does the job automatically.
