Create HTML file with NetBeans IDE
Create HTML file with NetBeans IDE
Let’s learn how to create an HTML file with NetBeans IDE. We can create HTML files using text editors like Notepad editor. However, using IDE tools like NetBeans, IntelliJ, and Eclipse to create HTML code has numerous advantages. IDE tools increase productivity and take less time to develop HTML code.
Steps to install NetBeans IDE on Windows:
Create HTML5 Project
To create a new HTML5/JavaScript application configured for HTML, CSS and JavaScript:
Create HTML File
To create a new HTML file, choose the following menu options.
File ->> New File… ->> HTML5/JavaScript ->> HTML File
Under Categories: choose HTML5/JavaScript option.
Under File Types: Choose HTML File option.
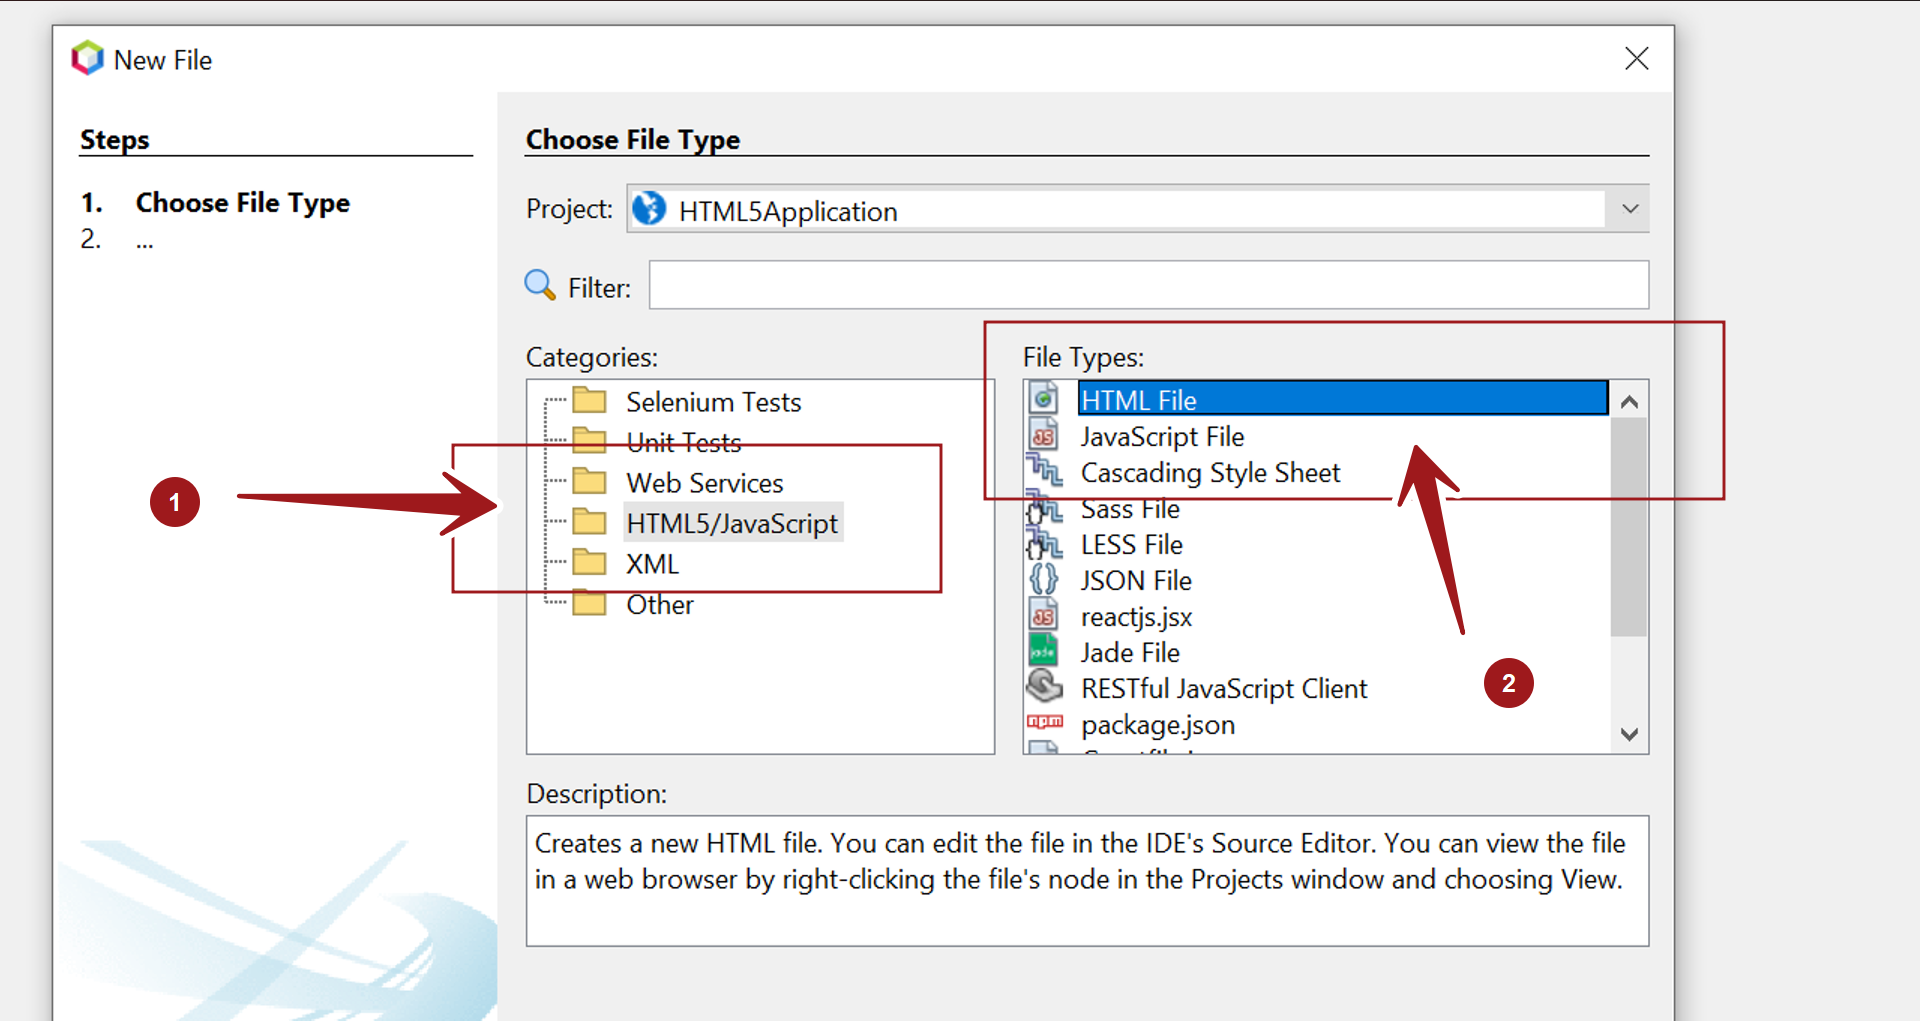
Click on the Next > button. Give a File name.
Click on the Finish button to create the file. By default, it will be created under the public_html folder in the NetBeans Projects.
NetBeansProjects\<ProjectName>\public_html\<filename>.html
File Contents
The file would be created with sample HTML content.
<!DOCTYPE html>
<!–
Click nbfs://nbhost/SystemFileSystem/Templates/Licenses/license-default.txt to change this license
Click nbfs://nbhost/SystemFileSystem/Templates/ClientSide/html.html to edit this template
–>
<html>
<head>
<title>TODO supply a title</title>
<meta charset=”UTF-8″>
<meta name=”viewport” content=”width=device-width, initial-scale=1.0″>
</head>
<body>
<div>TODO write content</div>
</body>
</html>
We can edit the file in the IDE’s Source Editor. We can remove the TODO and add the custom HTML code to the file.
Once done, we can view the file in a web browser by right-clicking the file and choosing Run File.
—
HTML Tutorials
HTML Tutorials on this website:
