Create Android Virtual Device with AVD Manager
Introduction
In this post, we will learn how to create an Android virtual device using the AVD Manager. (AVD stands for Android Virtual Device). Virtual devices allow you to test your application without having to own any physical devices.
Prerequisite:
Android Studio should be installed on your machine.
Steps to create an Android Virtual Device:
Launch Android studio.
Navigate
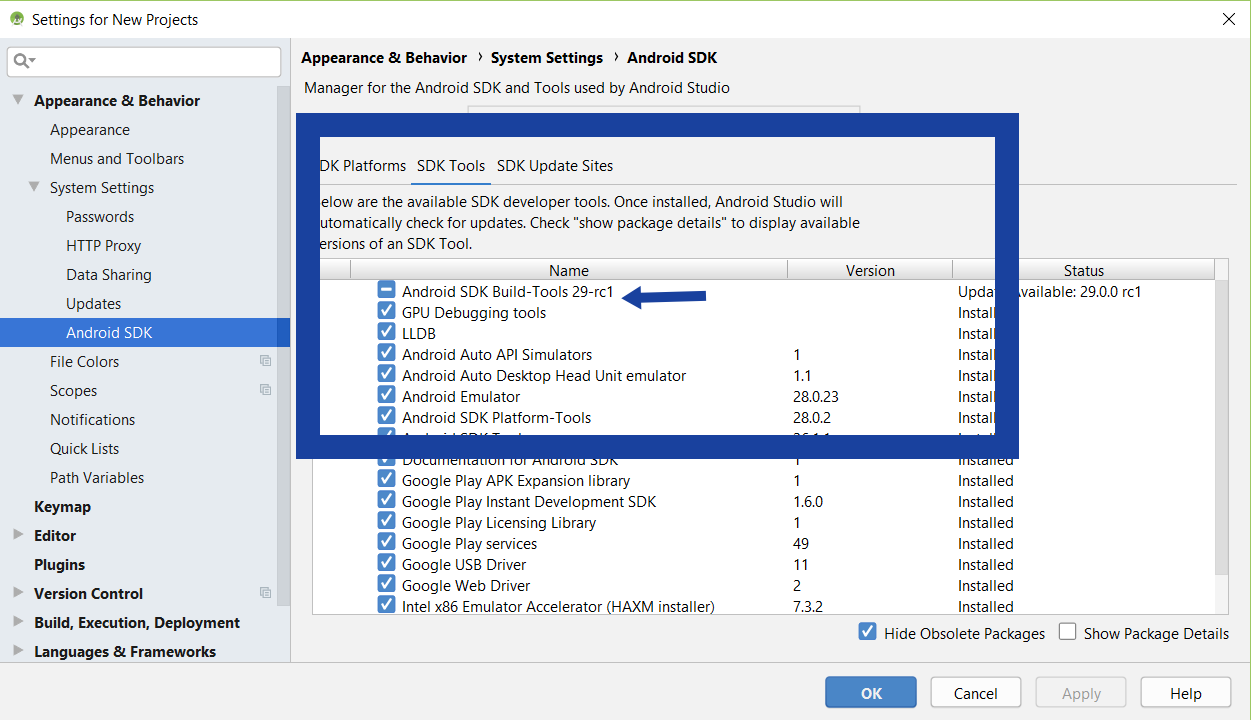
Configure >> Appearance & Behavior >> System Settings >> Android SDK.
Click on the SDK Tools tab and make sure you have Android SDK Build-Tools installed.
Create a Virtual Device
Launch AVD Manager
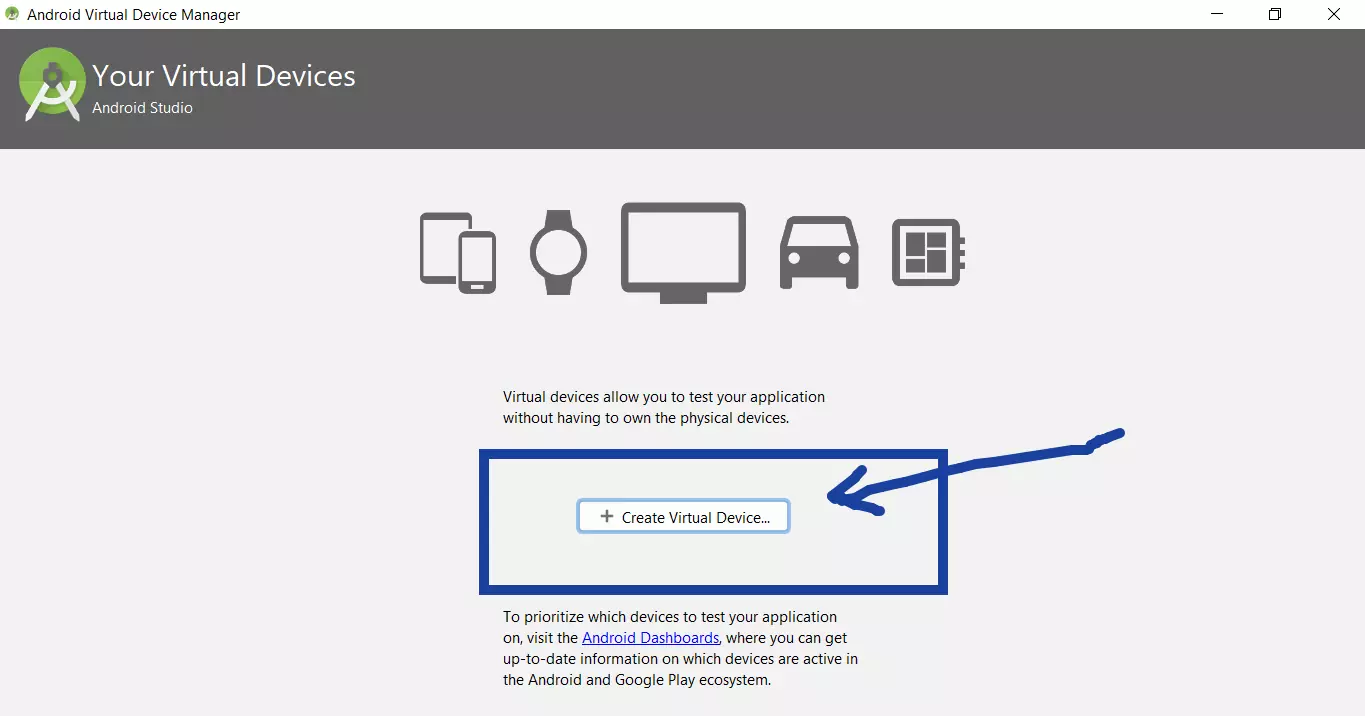
Configure >> AVD Manager
Press the +Create Virtual Device… button as shown in the picture.
Select hardware for your virtual device.
Choose the device definition of your target virtual device. Choose the type of hardware you’d like to emulate: Category, Name, Resolution, etc.
Once you are done, click on the Next button.
Select a system image.
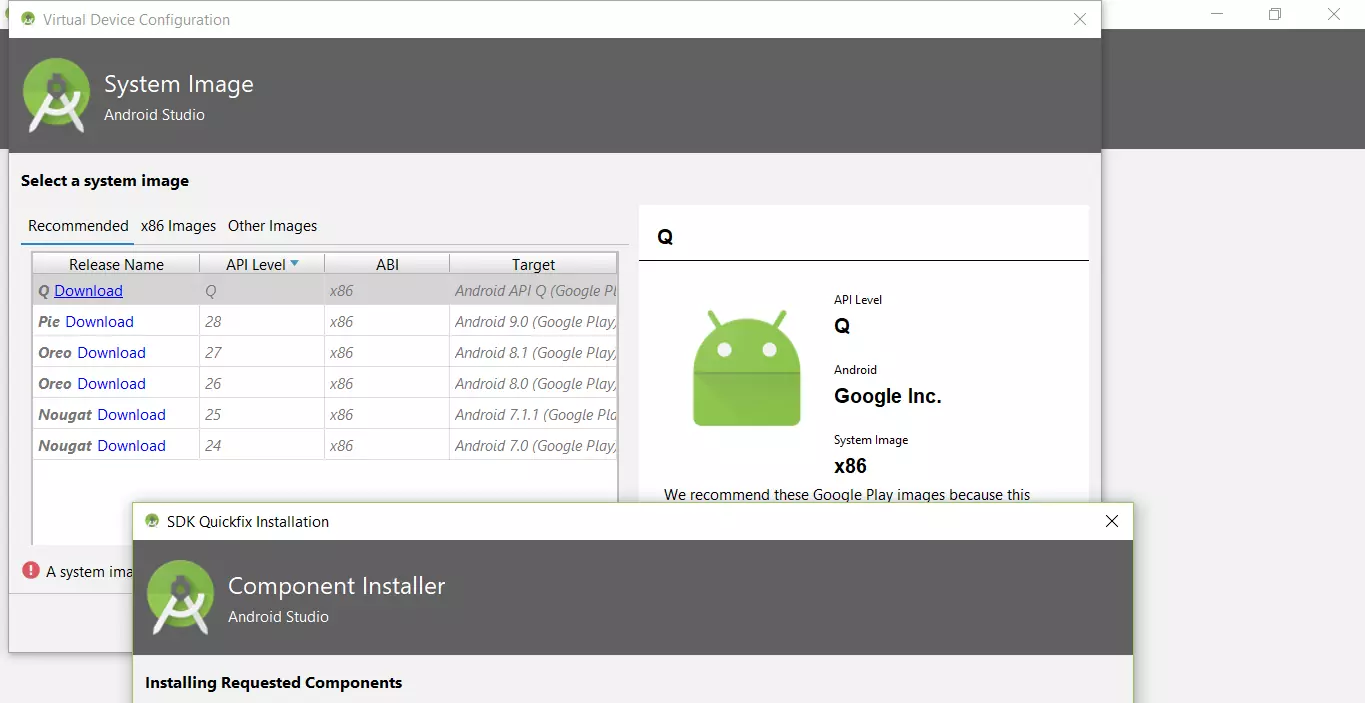
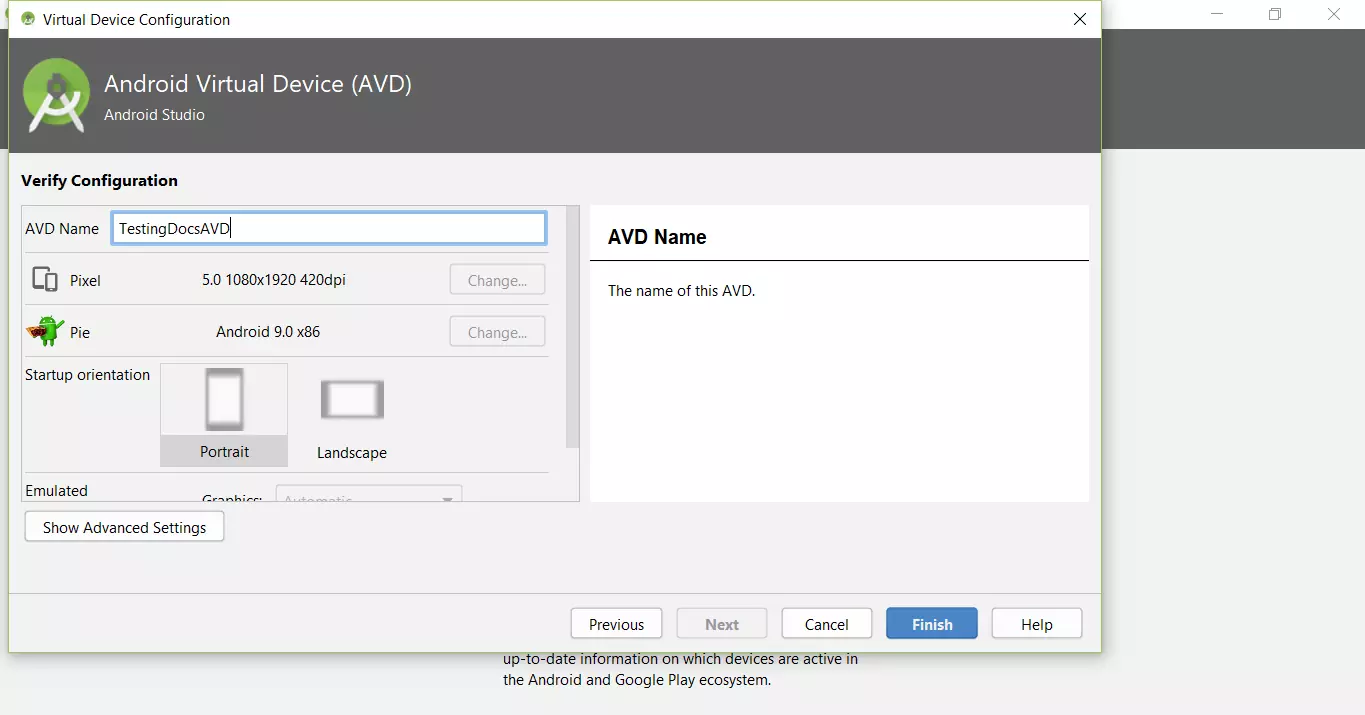
Verify the configuration. Give a name for the virtual device and hit on the Finish button.
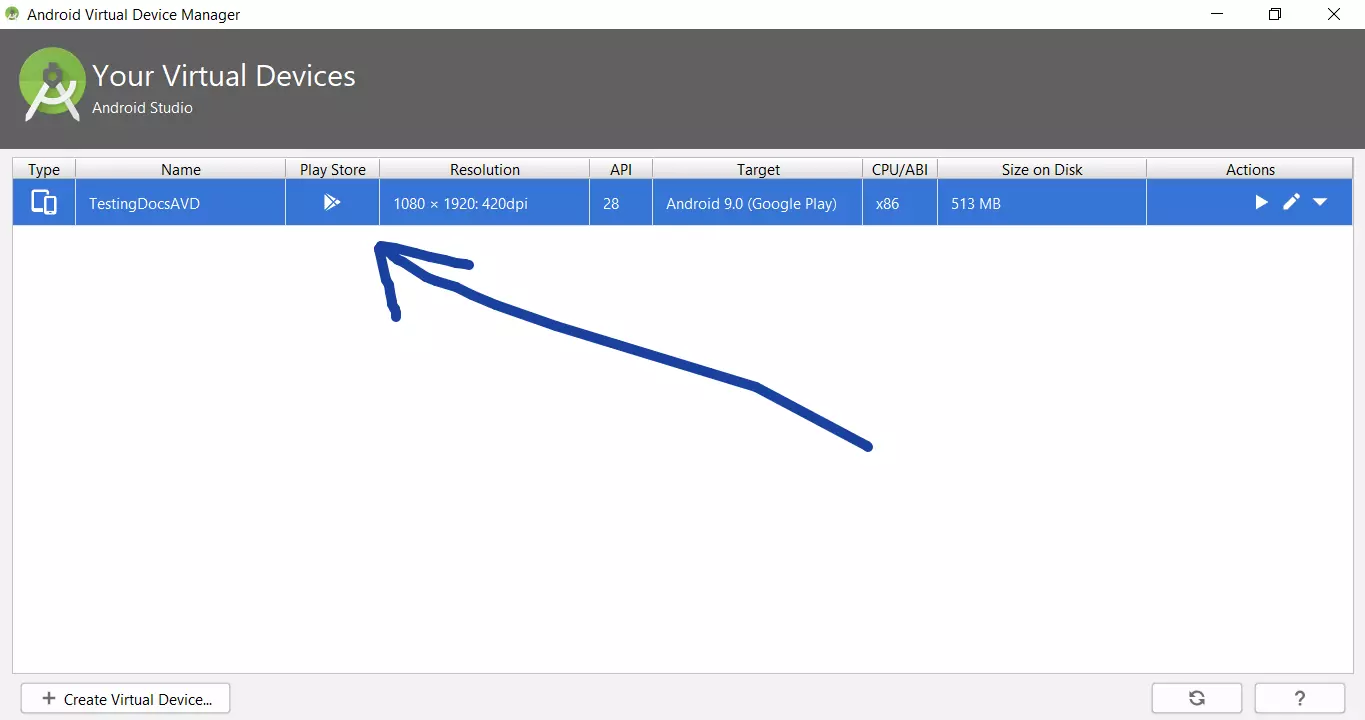
Your virtual device would be created and listed in the device list as shown in the picture.
