Download & Install MySQL on Windows 11
Download & Install MySQL [Windows 11]
This tutorial outlines the steps for downloading and installing MySQL Community Server on Windows 11, Microsoft Corporation’s latest operating system.
Environment
The environment used in this tutorial is as follows:
- Windows 11 Operating System 💻
- Web Browser: Firefox Browser/Google Chrome 🌐
- MySQL Server 8.x Community Server 📦
Download MySQL
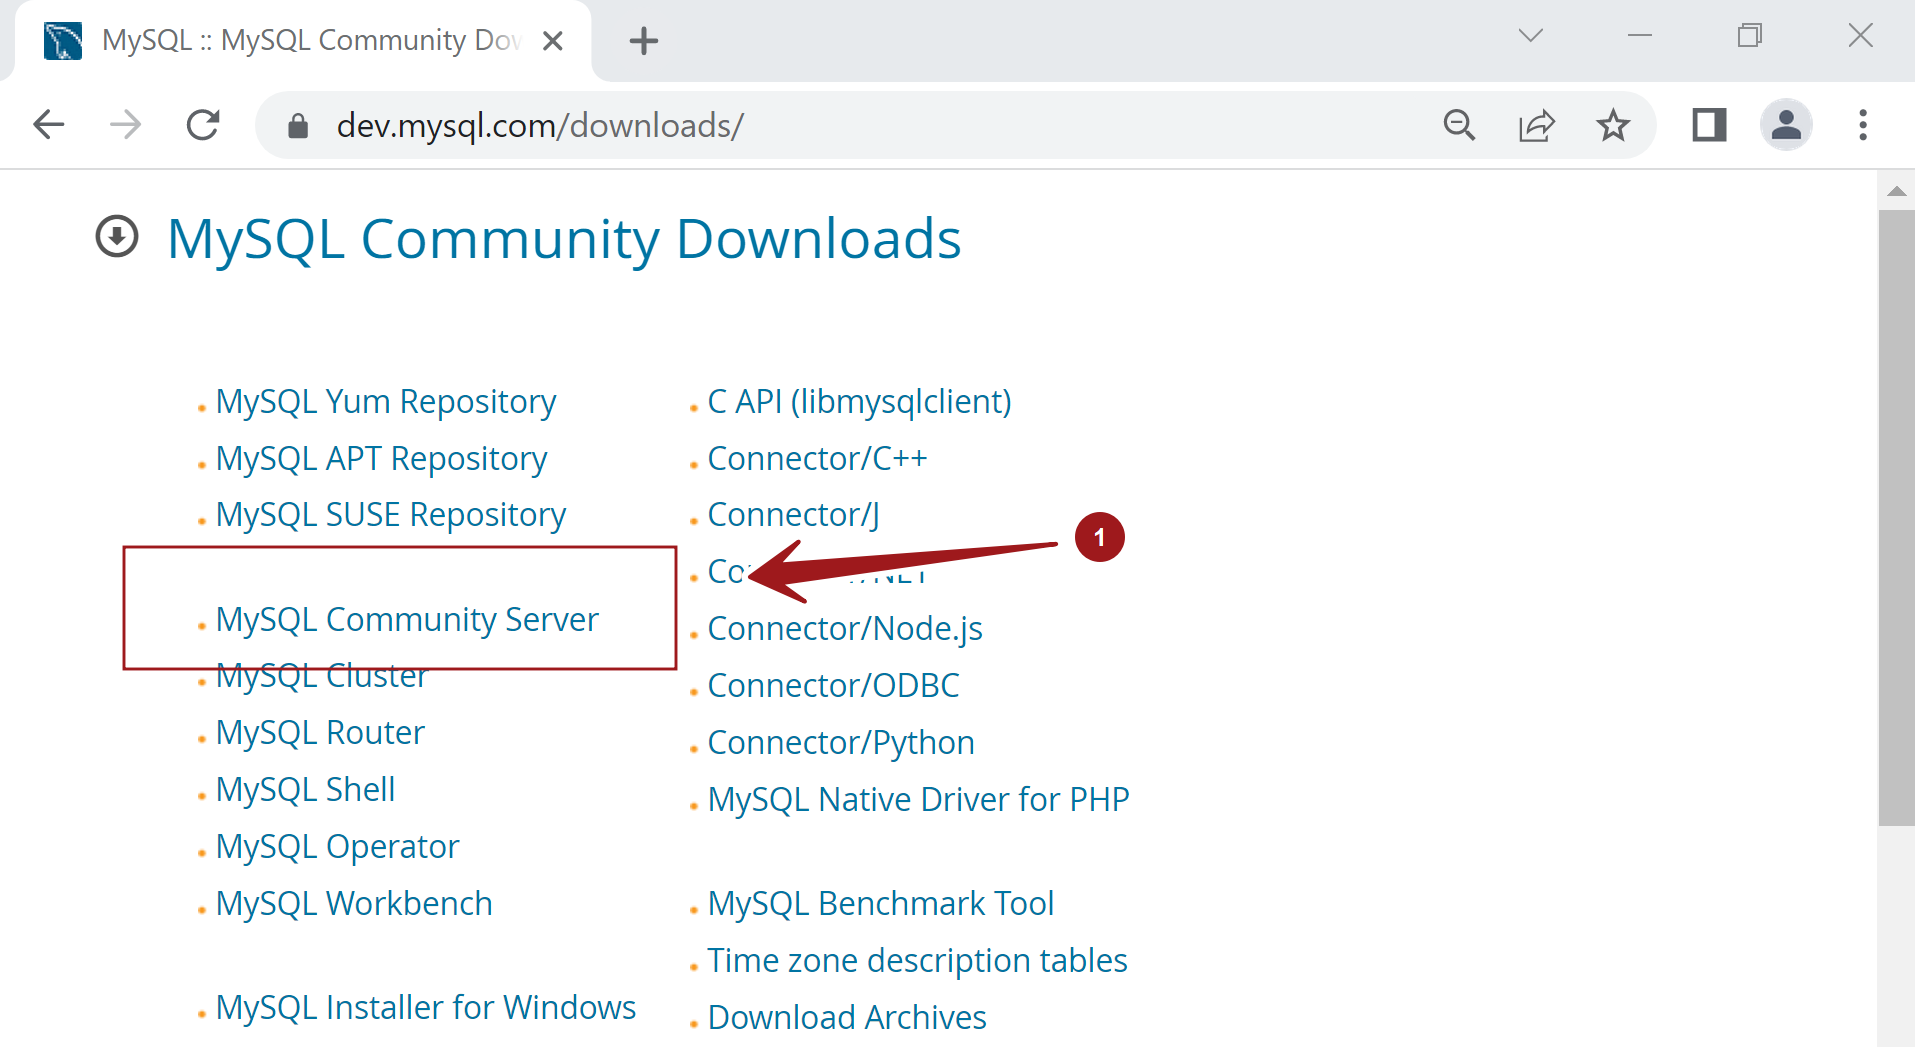
Open a web browser and navigate to the MySQL website download page:
- https://dev.mysql.com/downloads/
This will launch the MySQL Community downloads page. Click on the link: MySQL Community Server.
Choose Microsoft Windows from the Select Operating System drop-down:
Click on the MySQL Installer for Windows. The installer is a single file with all the MySQL components bundled into a single package.
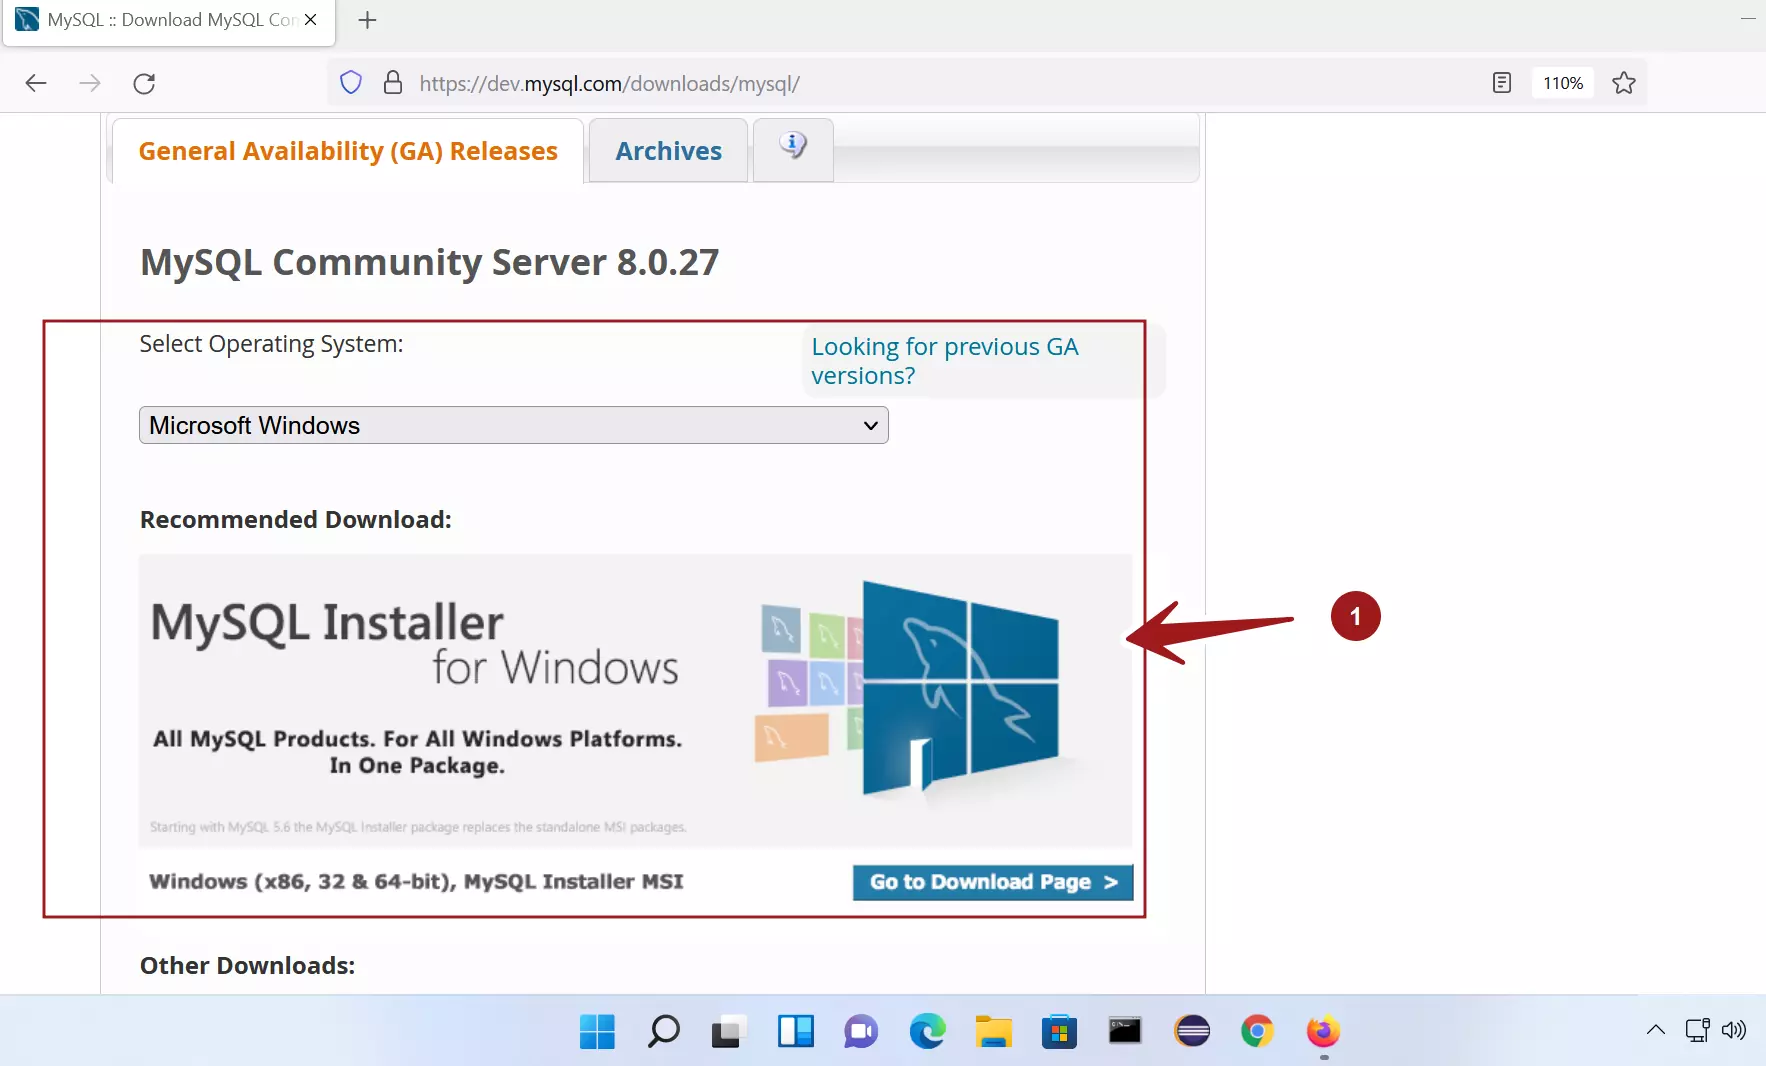
Click the Download button and save the installer onto the Windows 11 computer.
Optional Step
At this step, you can optionally Sign Up for an Oracle Web Account. The login or signup on this page is optional.
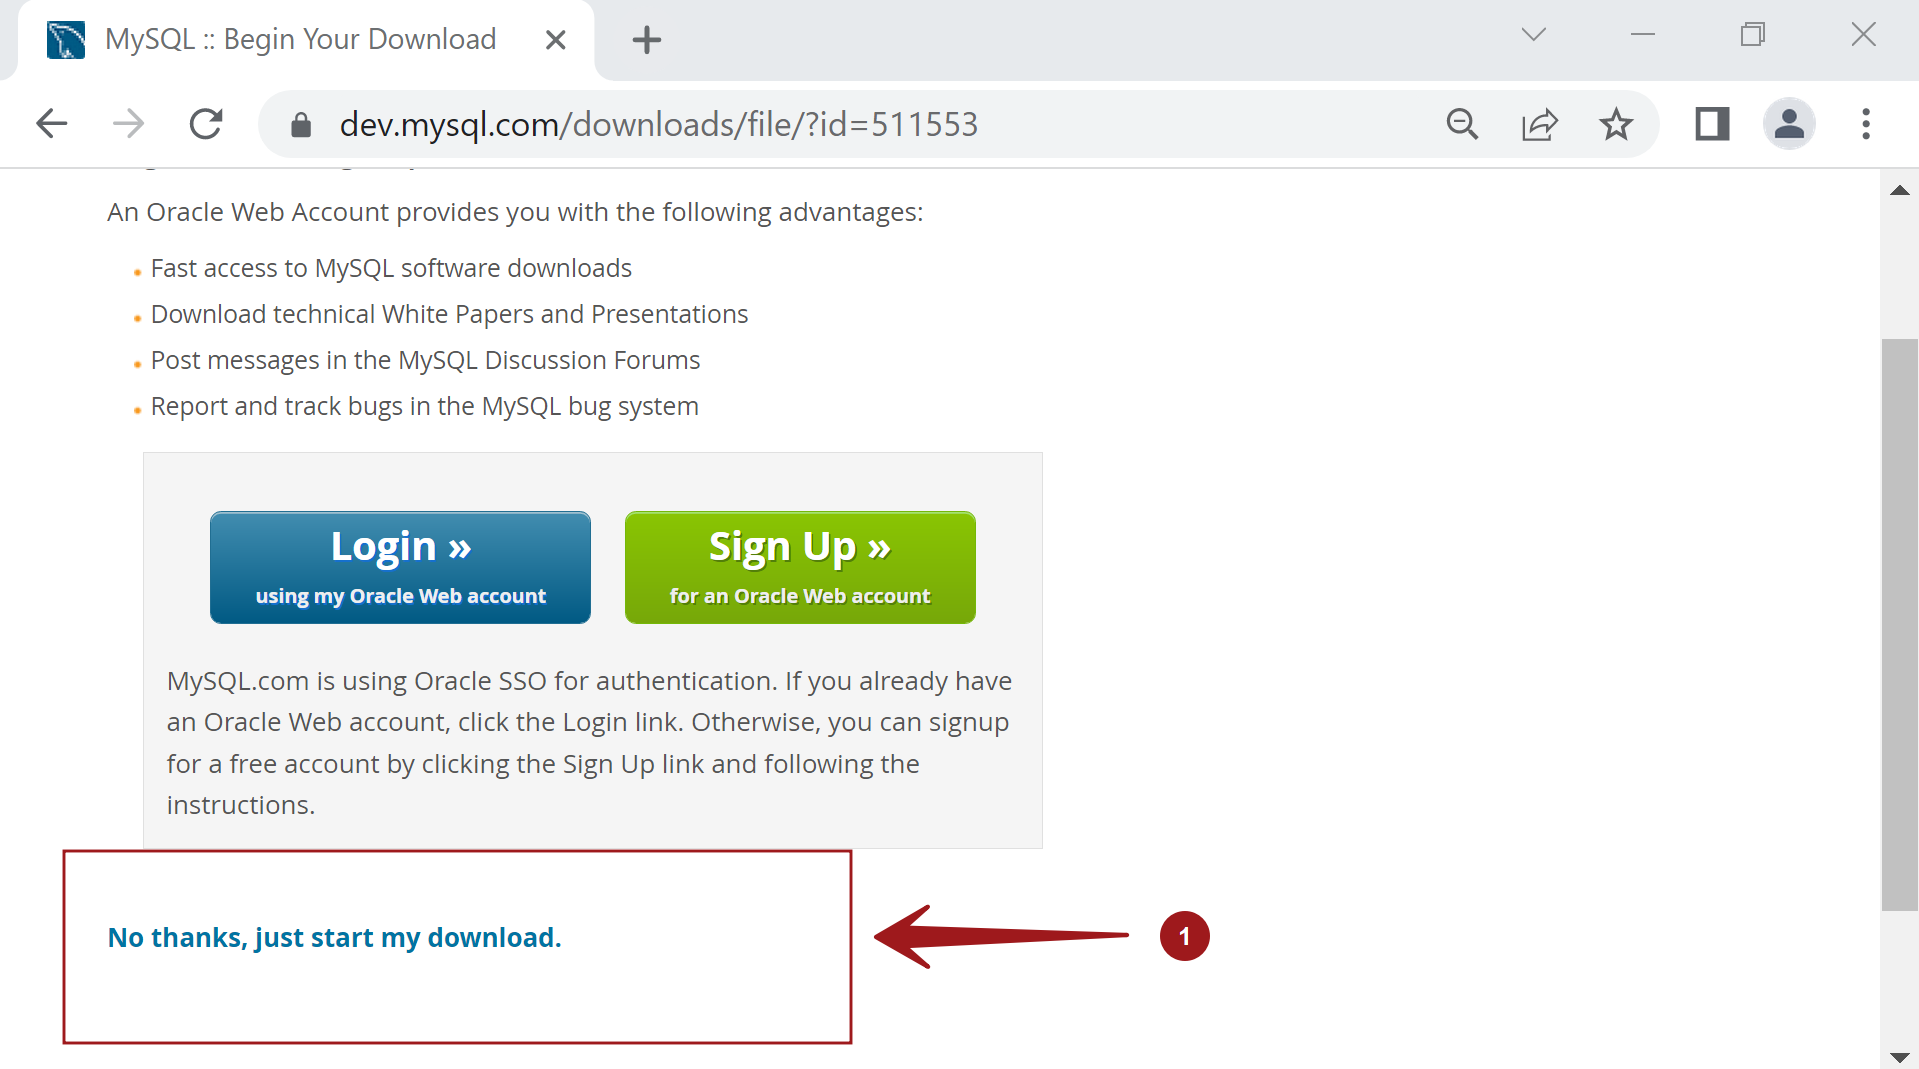
To continue with the download, click on the ‘No thanks, just start my download’ link.
Install MySQL
Open File Explorer and locate the downloaded MySQL Installer file.
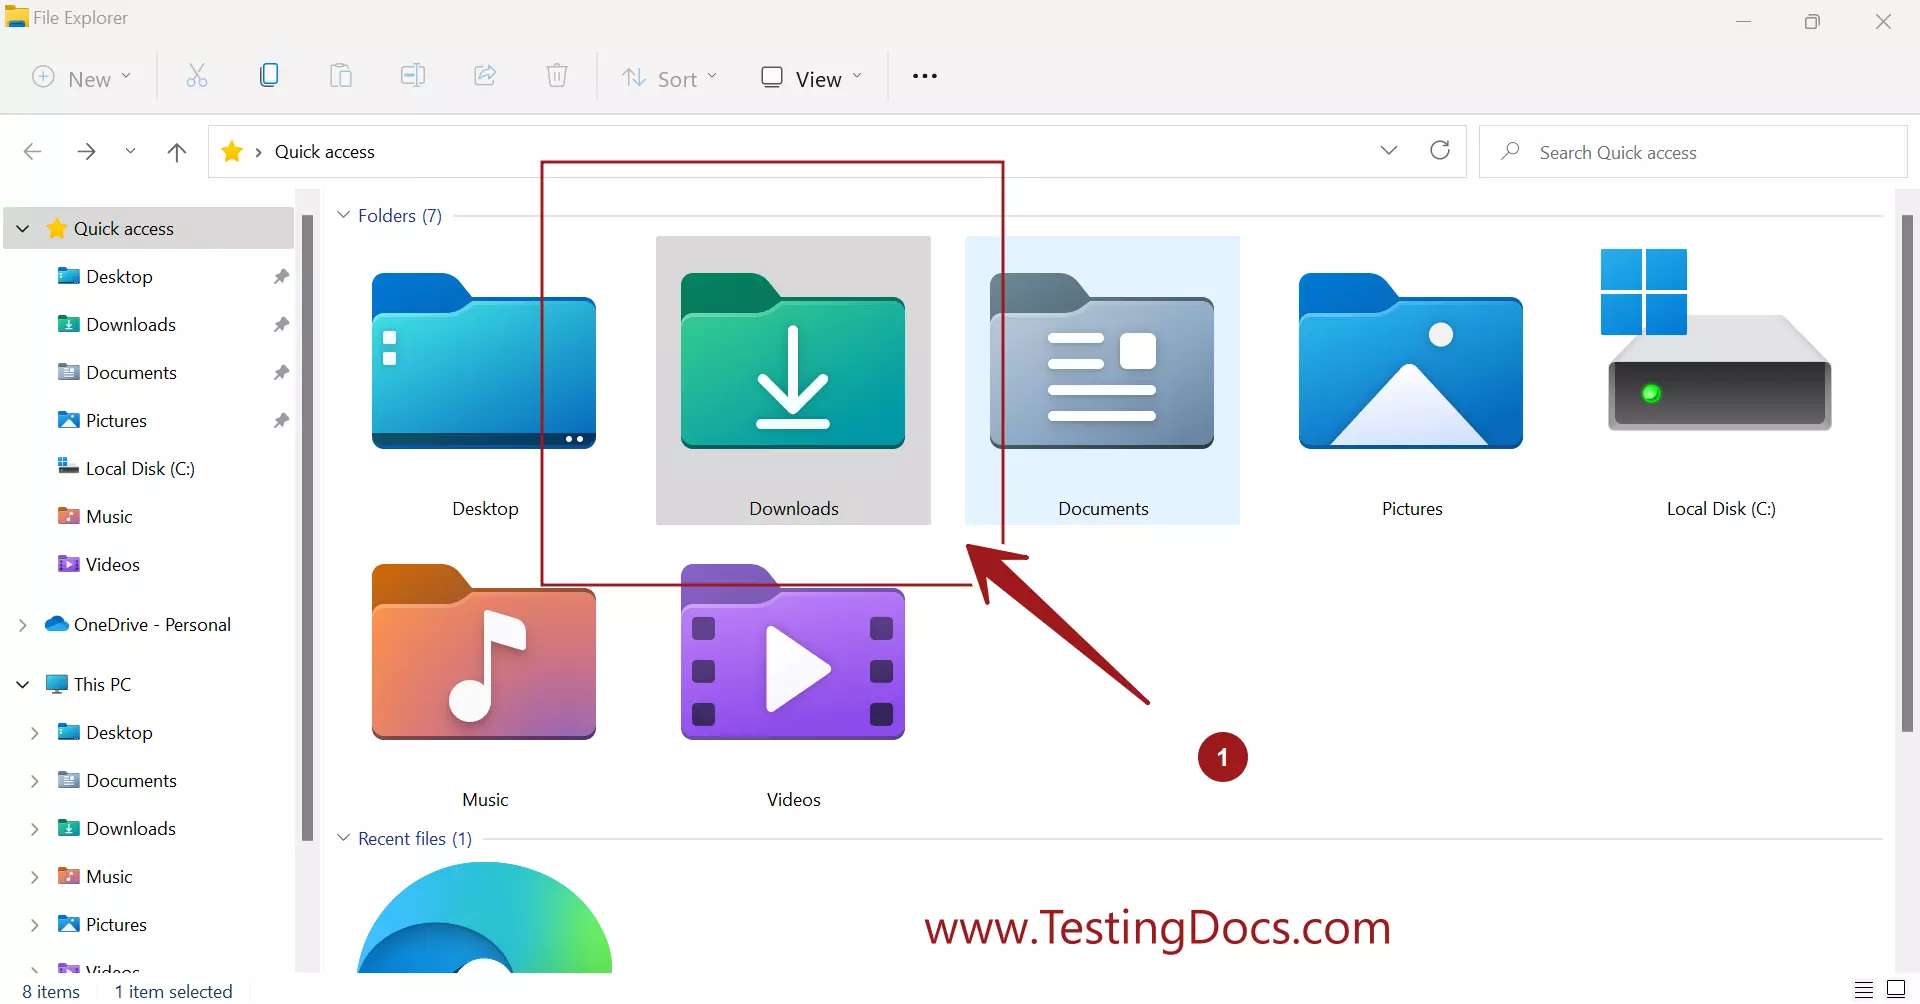
Double-click on the MySQL Installer file to run it.
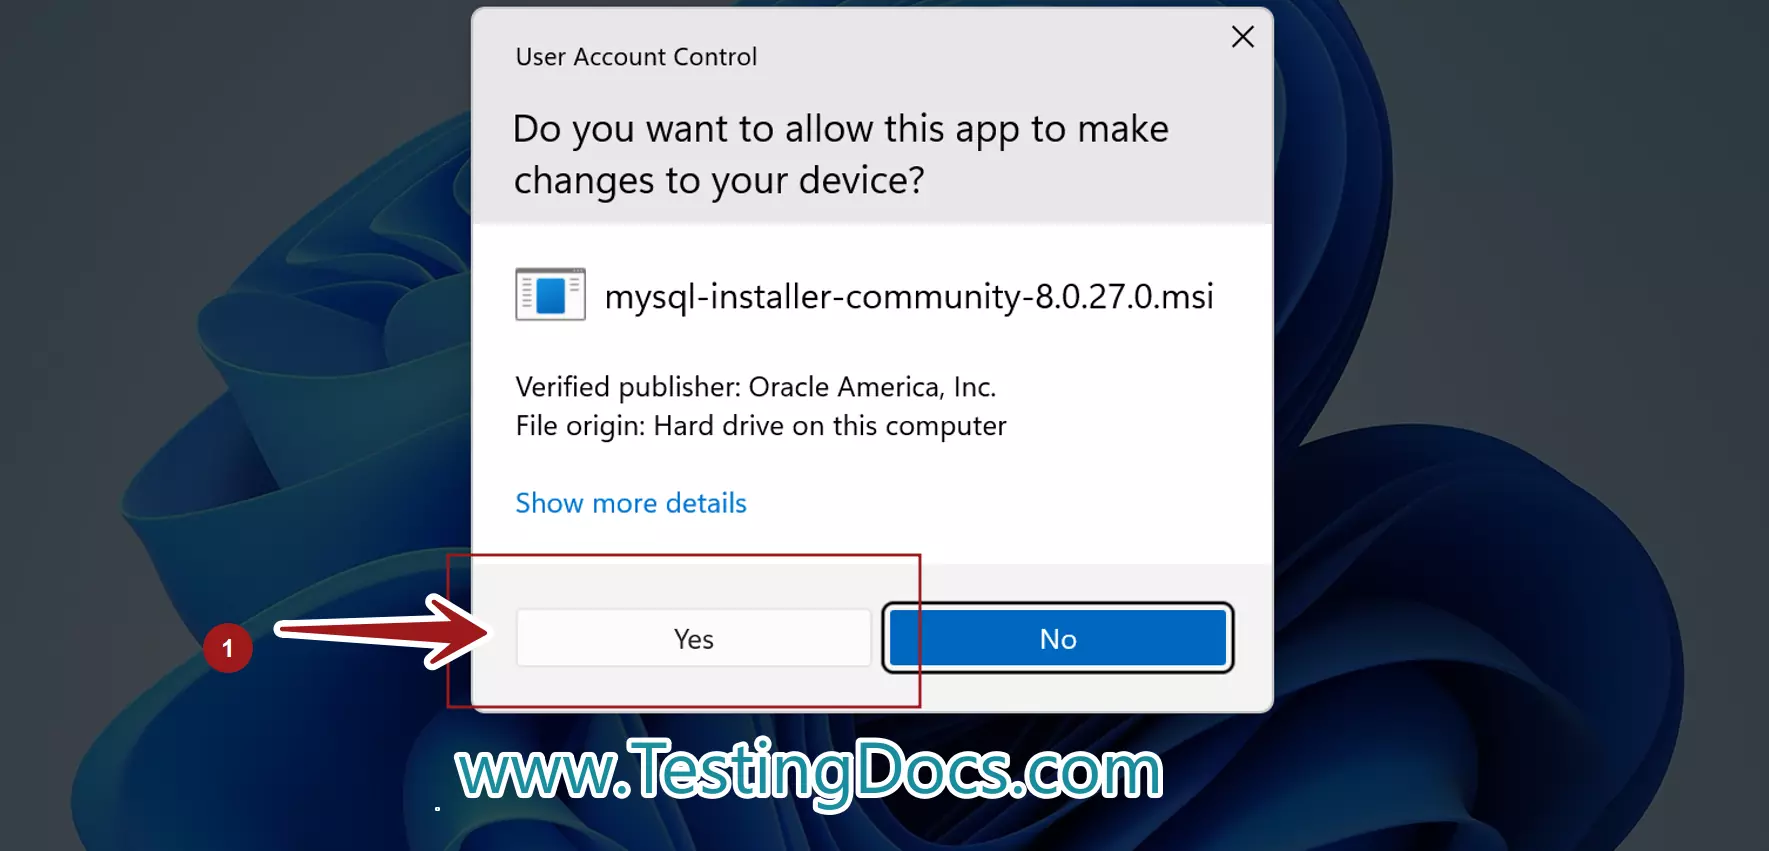
Click on the Yes button on the UAC elevation prompt. Verify the Publisher information in the UAC dialog prompt. A MySQL server install requires administrator privileges on the machine. UAC( User Account Control) is a built-in Windows security feature that alerts you if any program attempts to perform an administrative task.
Tampered or malicious installer would not be signed or stomped with legitimate Publisher information.
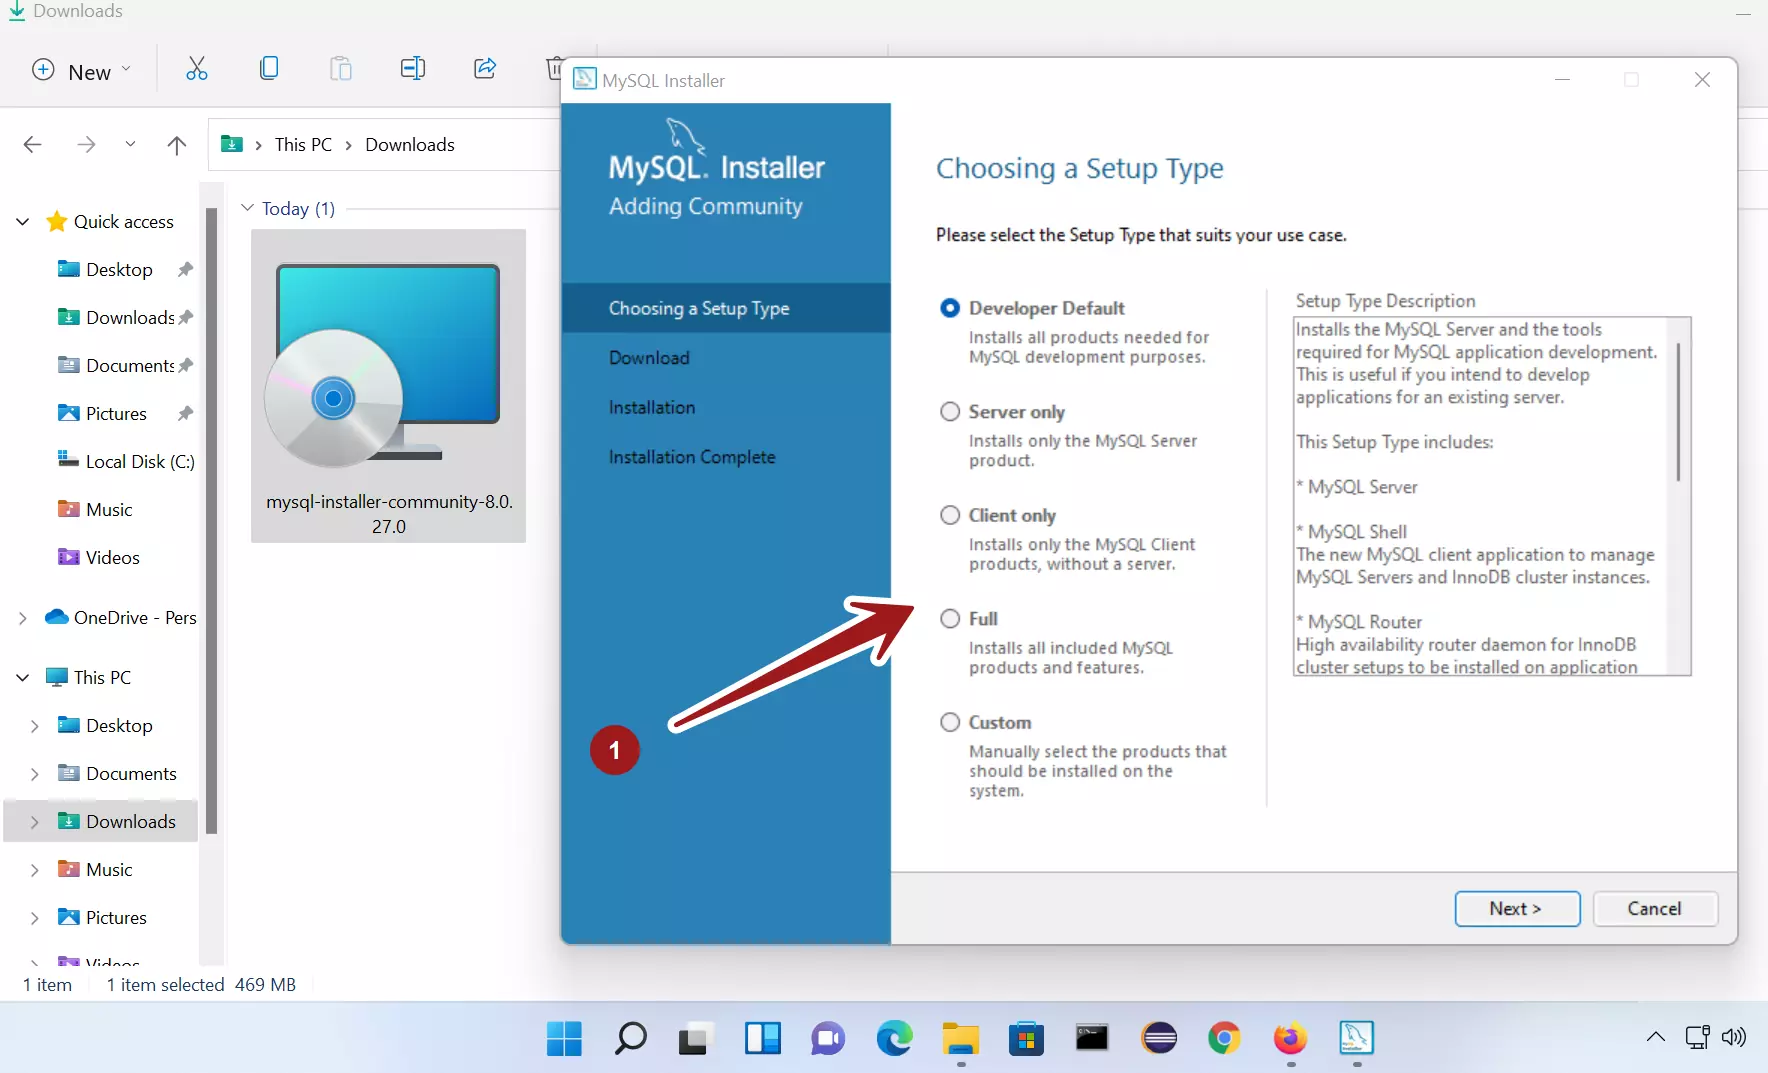
Setup Type
Choose the Setup type and click on the Next > button. MySQL supports many install types like:
- Developer
- Server only
- Client only
- Full
- Custom
For example, select Full install type to install all MySQL components.
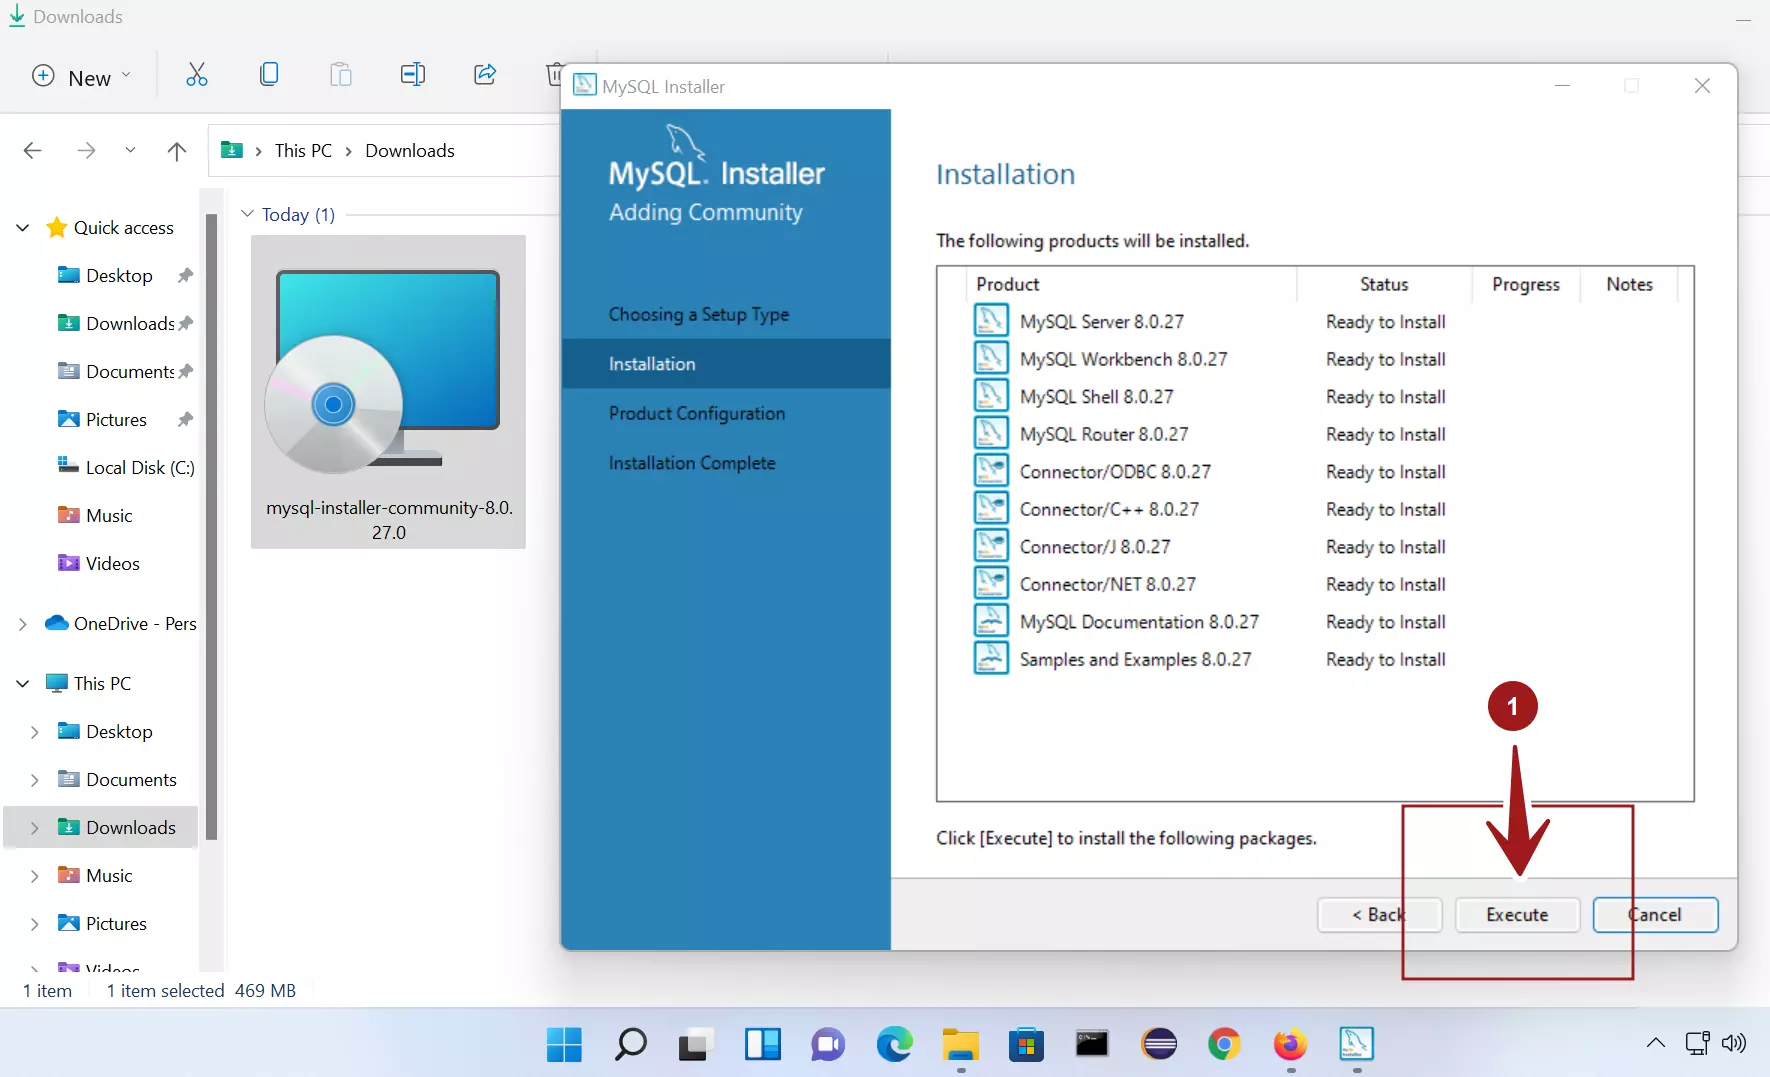
Click on the Execute button to install the MySQL components.
Configuration
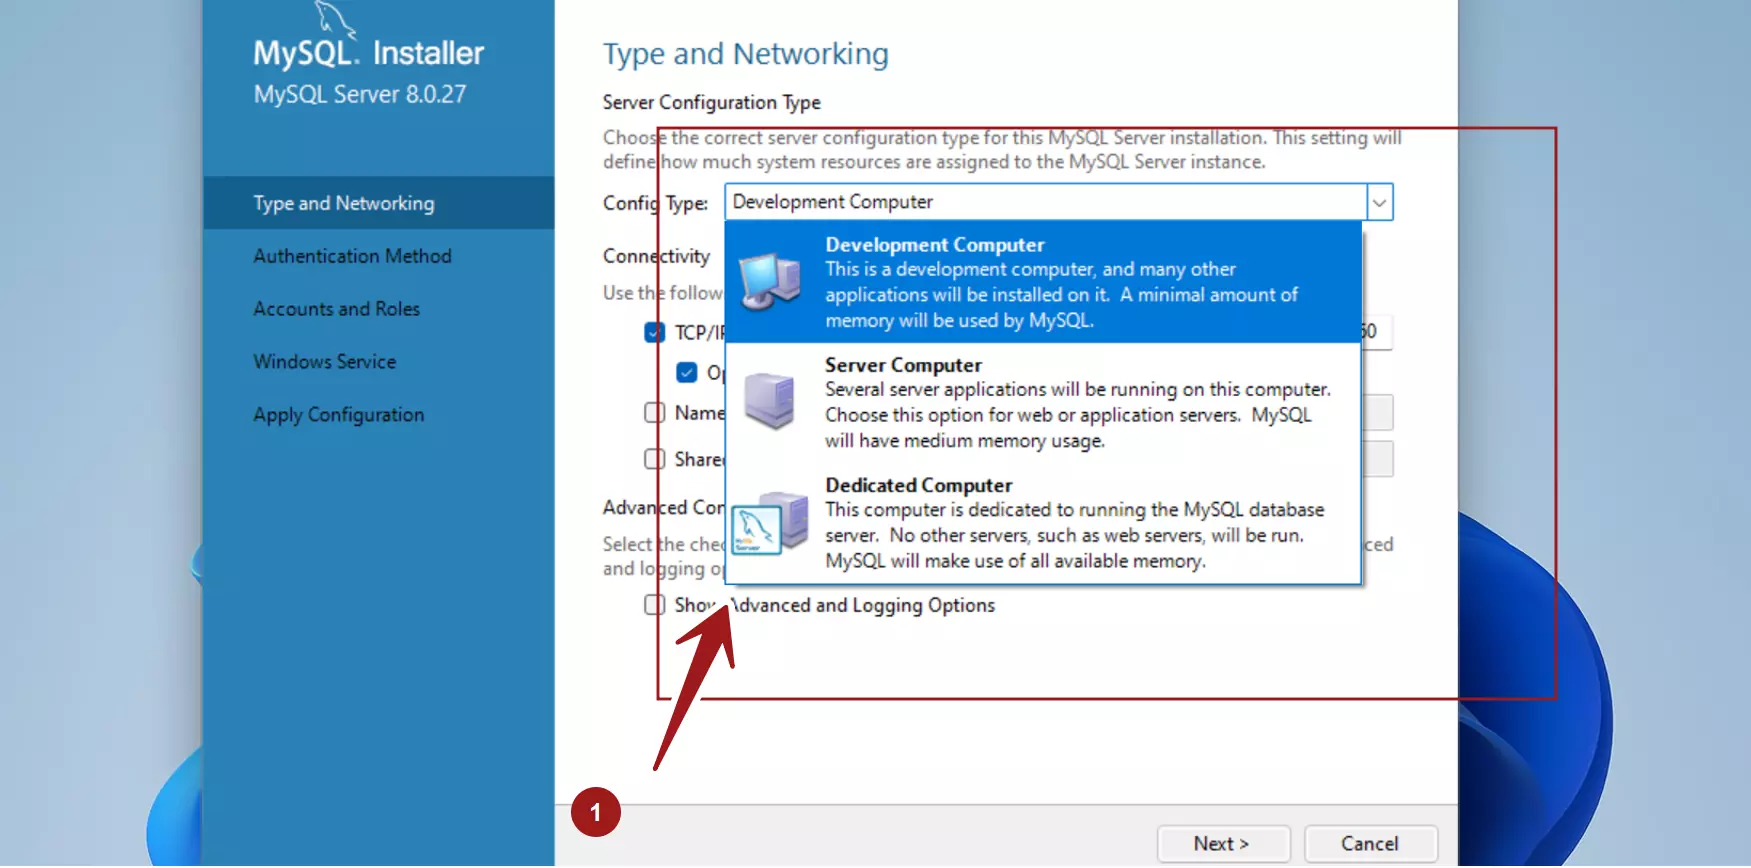
Type and Networking
Choose the Config Type. We have three options
1️⃣ Development Computer
2️⃣ Server Computer
3️⃣ Dedicated Computer
- Development Computer: Choose this if several applications and servers run on the installed computer. MySQL will use a minimum memory footprint on this configuration.
- Server Computer: Choose this configuration if other servers run on the computer.
- Dedicated Computer: Choose this configuration if only the MySQL server runs on the computer. MySQL would use all the available memory.
TCP/IP Ports
We can configure TCP/IP ports for server communication. It’s recommended that we leave the default ports as they are. Click on the Next > button.
Authentication Method
Use Strong Password Encryption for Authentication. MySQL 8 supports new authentication based on SHA256 encryption.
Click on the Next > button.
Accounts and Roles
On this screen, we can set the root password. Set a strong password and store it in a secure place. To add user accounts, click on the Add User button.
An anonymous user account is not recommended due to the lack of security.
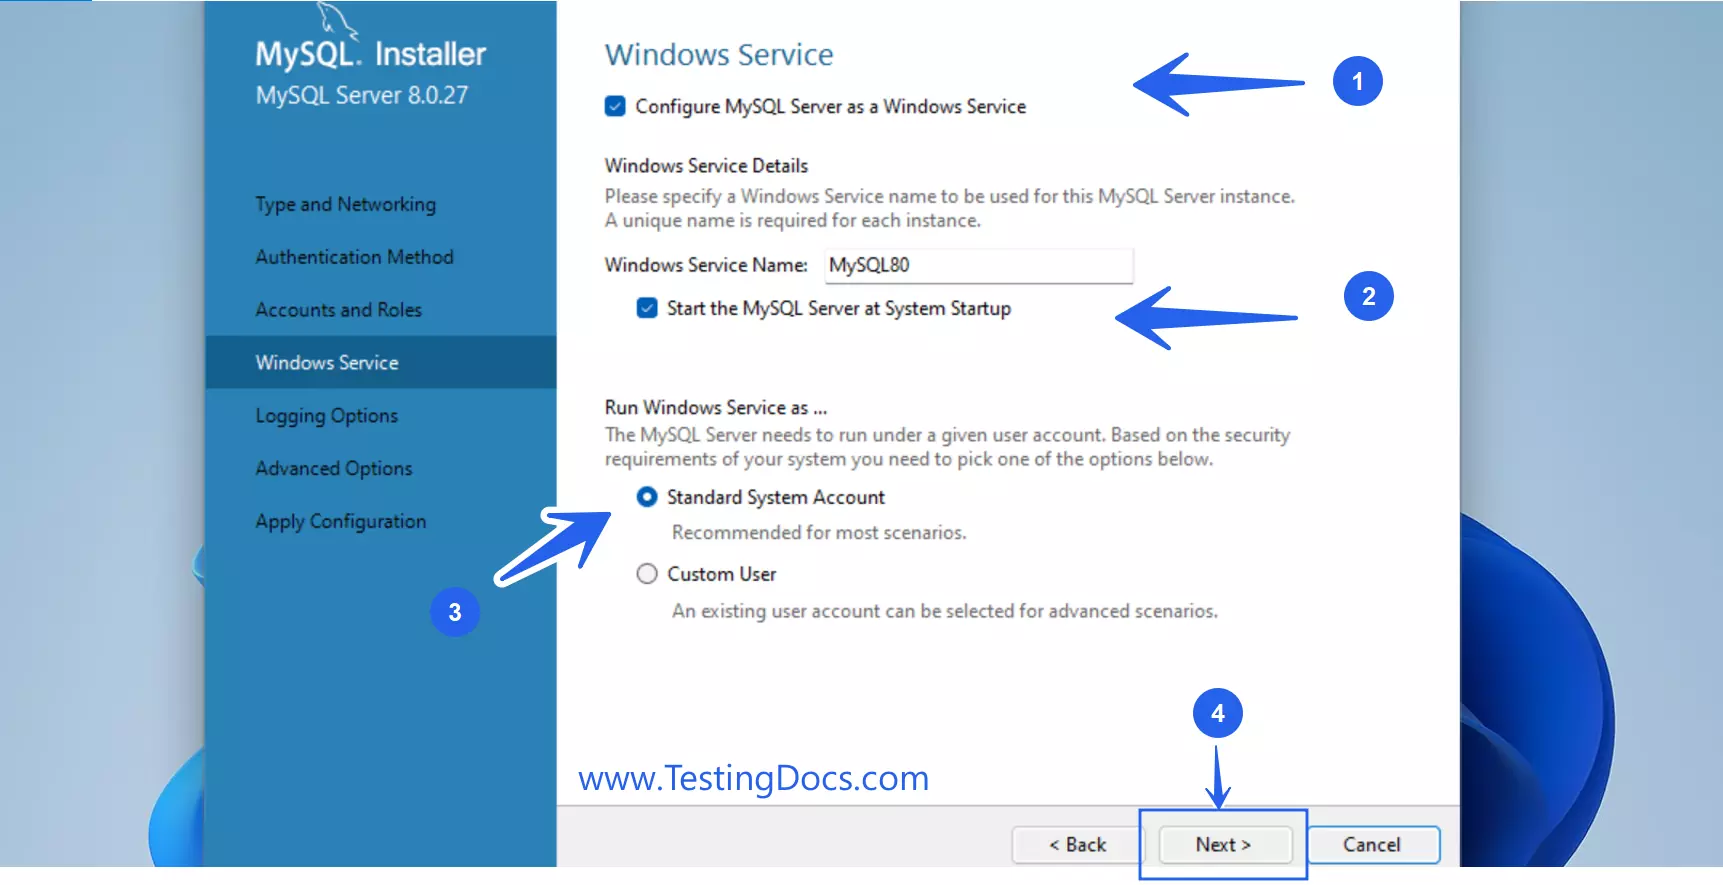
Windows Service
Configure MySQL Server as a Windows service. To start the MySQL server at system startup
Check the option ‘Start the MySQL Server at System Startup’. This option will start the MYSQL Server Service during the Windows 11 boot/ restart process. We can also configure the user account for the MySQL Windows Service.
Apply Configuration
Click on the Execute button to apply the changes. Once complete, click on the Finish button. Depending on the machine and network configuration, the MySQL installation might take a while.
That’s it. 👏 We are done with the MySQL installation on the Windows 11 operating system. MySQL Server would be started by default.
Start MySQL Service
Steps to start MySQL Server Service manually on Windows:
Start MySQL Client
Connect MySQL client and connect to MySQL server to issue SQL commands:
Video Tutorial
MySQL Tutorials
MySQL Tutorials on this website:
