Install MySQL Server on Linux
Install MySQL Server on Linux
In this tutorial, we’ll be going through the steps to Install MySQL Server server on the Ubuntu Linux machine. MySQL is one of the most popular open-source relational database.
In this series of installing LAMP ( Linux, Apache, MySQL server and PHP) stack components, the next step after installing Apache Webserver is to install MySQL.
Steps to install Apache:
https://www.testingdocs.com/install-apache-http-server-on-ubuntu-linux/
Environment: Ubuntu Linux Server LTS.
Install MySQL Server
To install MySQL on Linux follow the steps.
Open the terminal prompt window
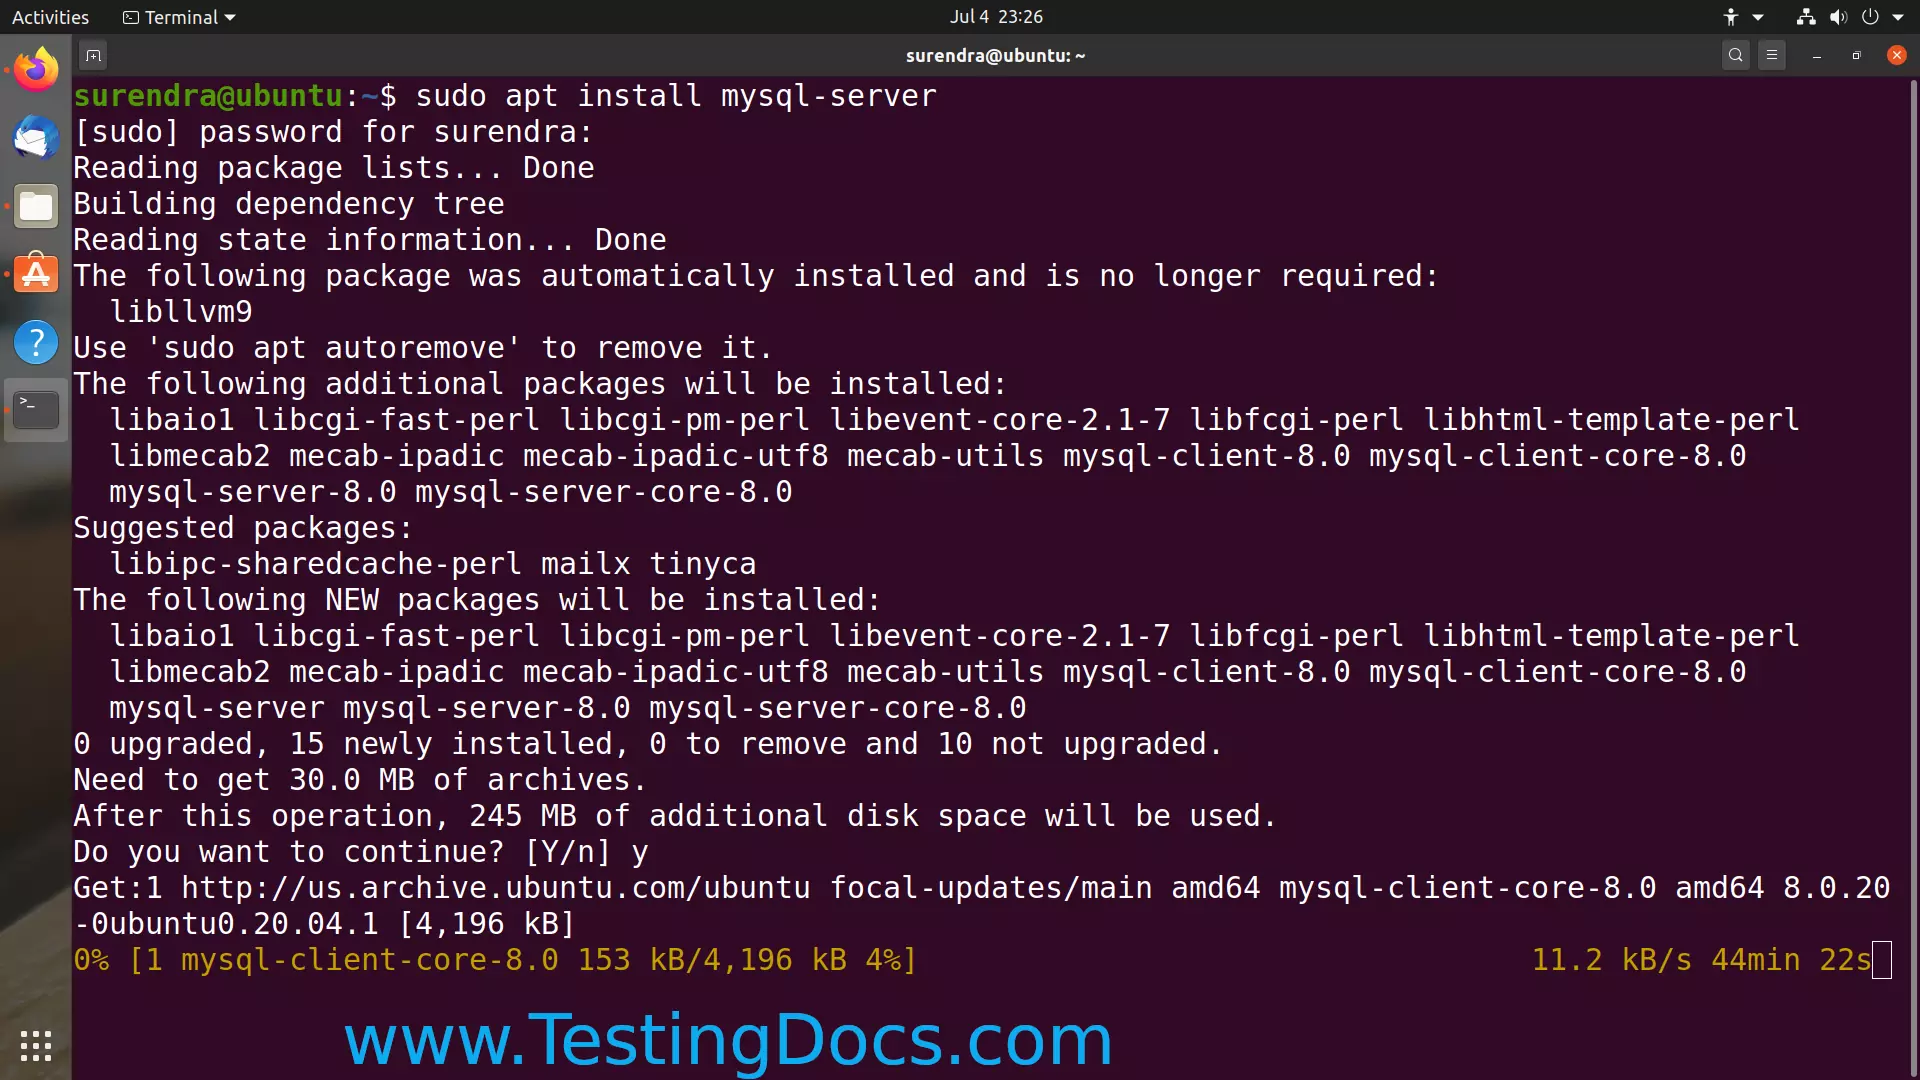
Issue the following commands to install Mysql.
$ sudo apt update
$ sudo apt install mysql-server
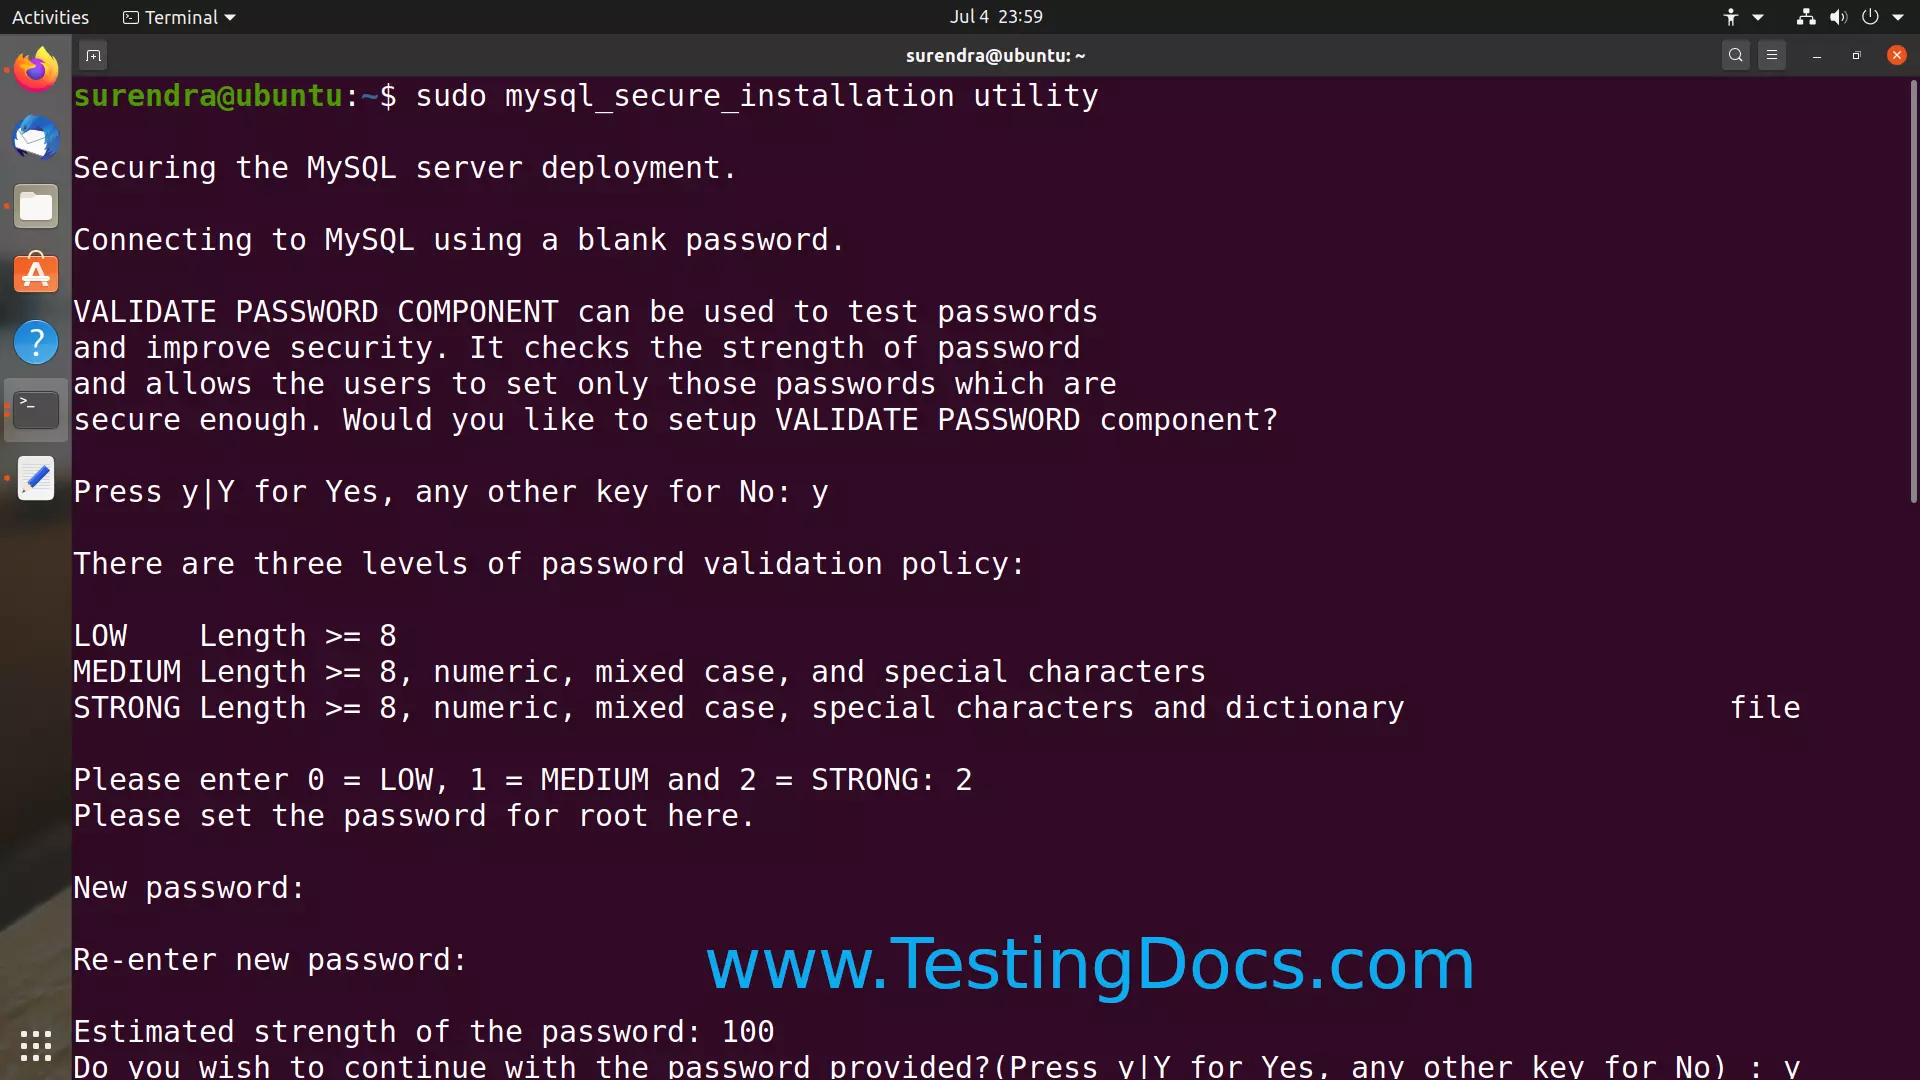
Securing the MySQL server deployment.
Run the utility to set the root password and other security parameters for the MySQL server.
$ sudo mysql_secure_installation utility
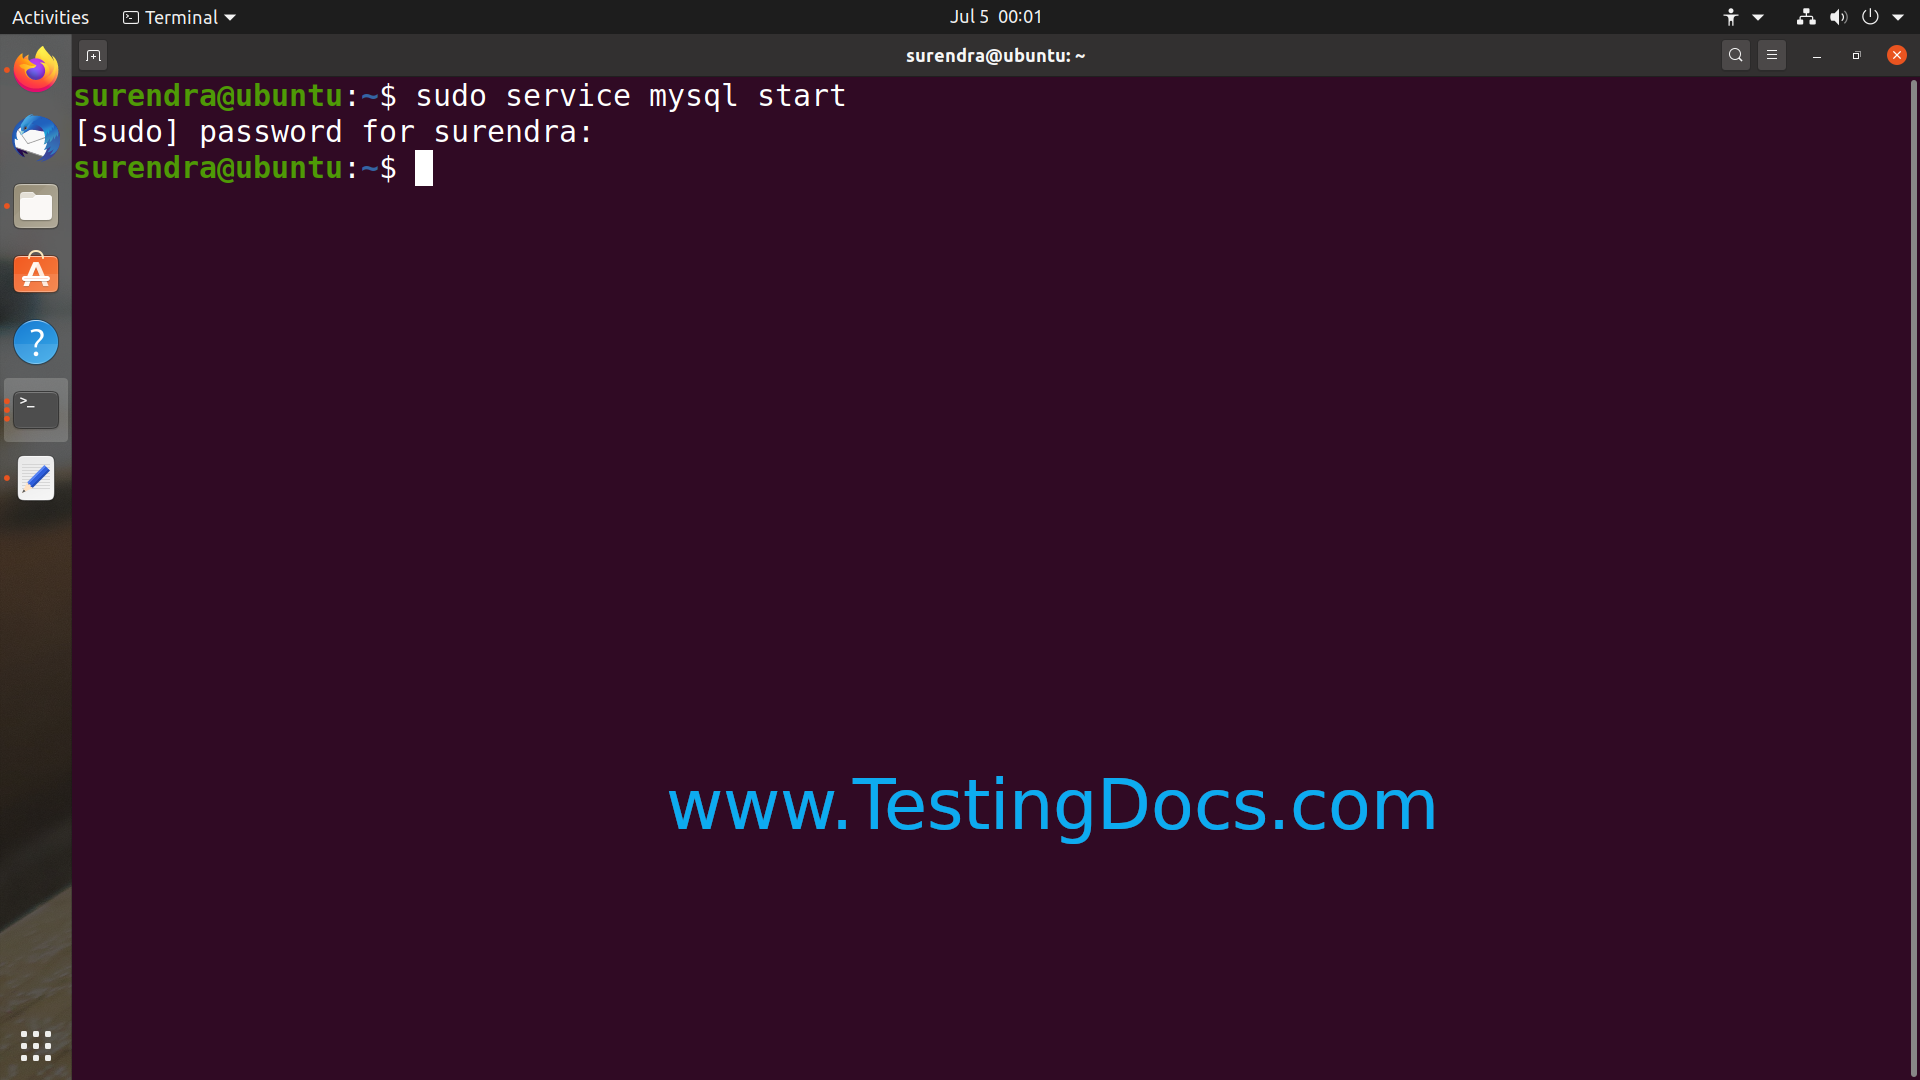
Start the service
$ sudo service mysql start
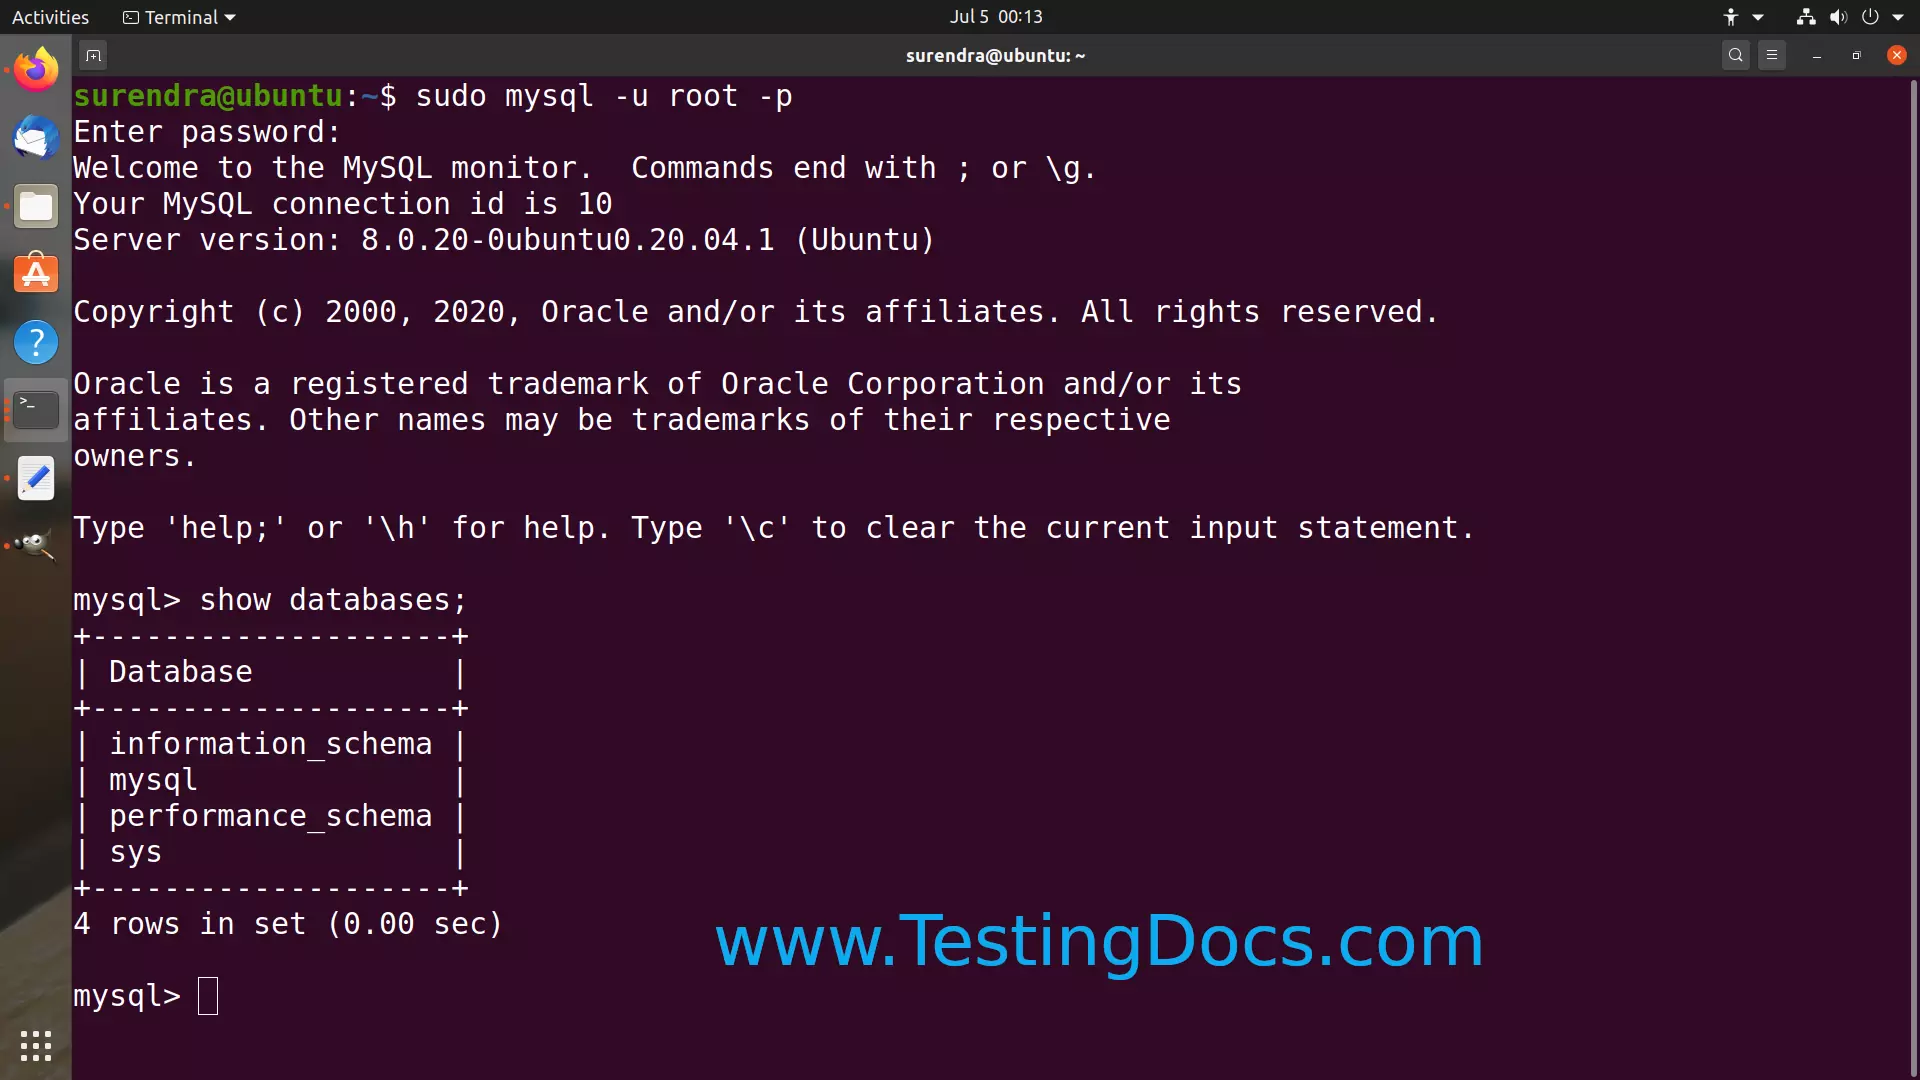
Test MySQL server instance
Type the following command to connect to MySQL instance and run a sample test command.
$ sudo mysql -u root -p
Enter password:
Welcome to the MySQL monitor. Commands end with ; or \g.
Your MySQL connection id is 10
Server version: 8.0.20-0ubuntu0.20.04.1 (Ubuntu)
Copyright (c) 2000, 2020, Oracle and/or its affiliates. All rights reserved.
Oracle is a registered trademark of Oracle Corporation and/or its
affiliates. Other names may be trademarks of their respective
owners.
Type ‘help;’ or ‘\h’ for help. Type ‘\c’ to clear the current input statement.
mysql> show databases;
+——————–+
| Database |
+——————–+
| information_schema |
| mysql |
| performance_schema |
| sys |
+——————–+
Install PHP
https://www.testingdocs.com/install-php-on-ubuntu-linux/
