Create Java Project using NetBeans IDE
Create Java Project using NetBeans IDE
In this post, you will learn how to create a standard Java project using the NetBeans IDE. Standard Java projects can be used to create, build, debug and run Java SE applications.
Prerequisites
- Java JDK
- Apache NetBeans IDE
Steps to download and install NetBeans IDE
Create a Java Project
Launch NetBeans IDE.
Click on File >> New Project…
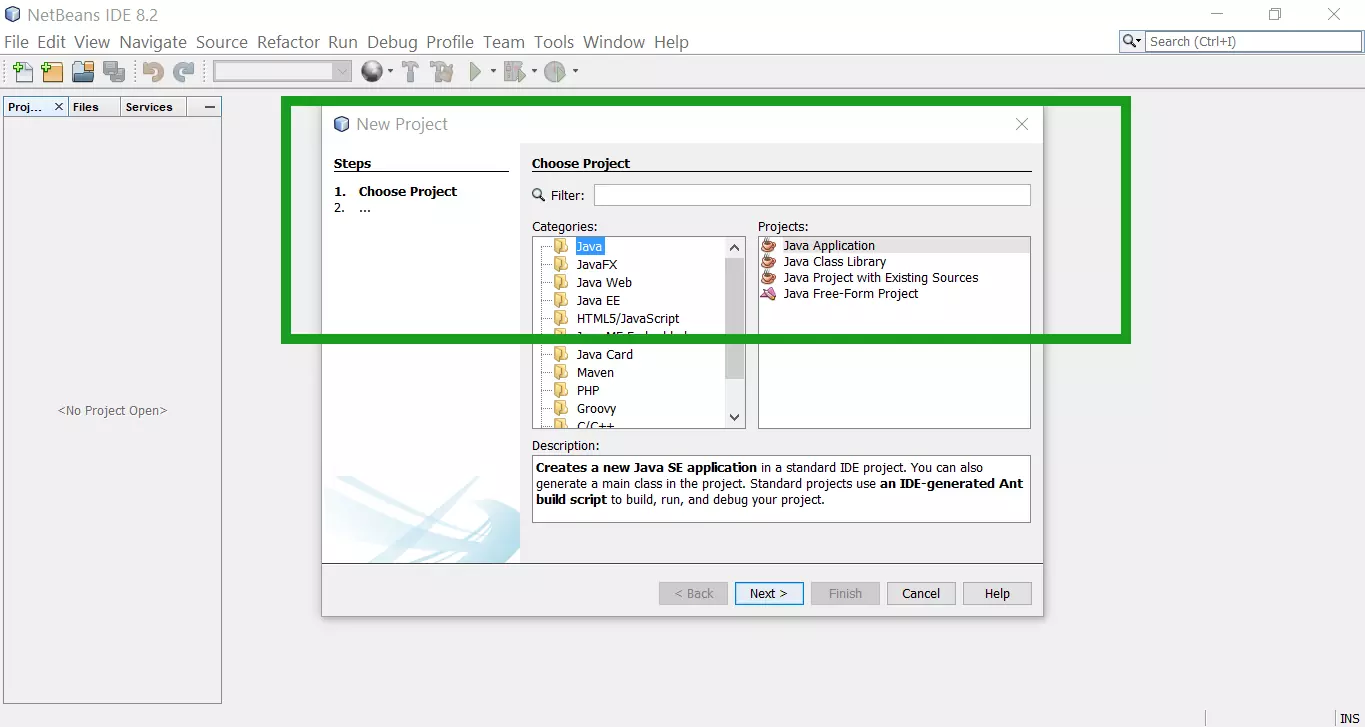
Select the Java application.
This option creates a new Java SE application. You can also generate a main class in the project.
Click on the Next > button.
On the next screen, you can enter the project details like Project Name, Project Location, etc.
You can also Create Main Class for the project.
For example : com.testingdocs.ProjectMain
Click on the Finish button to create the project.

Main class naming format
The main use of the Java package is to avoid class naming collisions across different organizations. It’s a good practice to use the organization’s reversed domain name for the package names.
com.testingdocs.automationprojectname
You can replace com.testingdocs with your company domain name in the reverse format.
automationprojectname is a placeholder for the automation project you are working on.
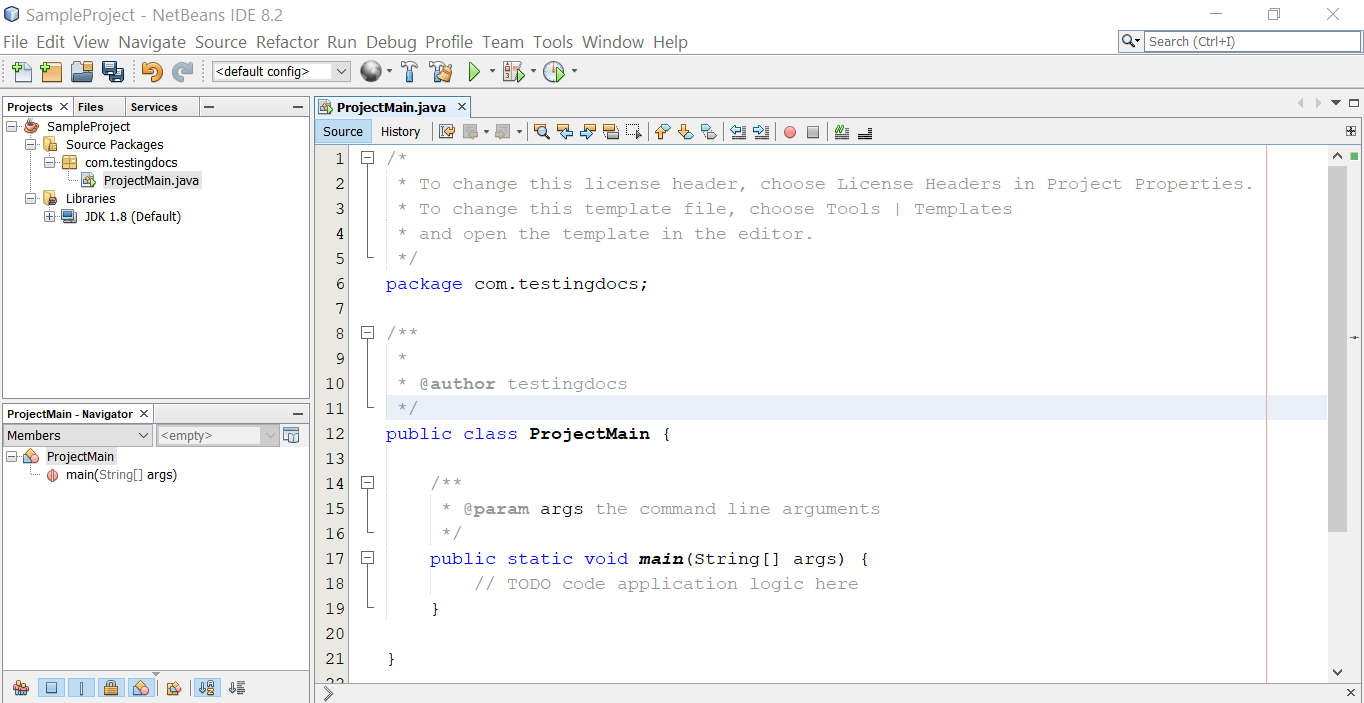
Once you click on the Finish button, the project would be created. Projects Explorer
displays the Sources and Libraries used in the project.
/*
 * To change this license header, choose License Headers
 * in Project Properties.
 * To change this template file, choose Tools | Templates
 * and open the template in the editor.
 */
package com.testingdocs;

/**
 *
 * @author testingdocs
 */
public class ProjectMain {

    /**
     * @param args the command line arguments
     */
    public static void main(String[] args) {
        // TODO code application logic here
        System.out.println("Java Project Created...");
    }

}
NetBeans also created the Main class so that we can quickly add the application code logic or automation code to the project.
That’s it! We have created a sample Java Project and a Java class using NetBeans IDE.
NetBeans IDE Tutorials
https://www.testingdocs.com/apache-netbeans-ide-tutorials/
More Information on NetBeans IDE
- https://netbeans.apache.org/


