Create New Class in IntelliJ IDEA
Create a New Class in IntelliJ IDEA
In this tutorial, we will learn how to create a new class in a Java project using IntelliJ IDEA IDE. In Java, a class is a blueprint for creating objects, and it consists of fields (attributes) and methods (behavior). When creating a new class, it’s important to think about the attributes and methods that make sense for the class and its intended purpose.
IntelliJ IDEA provides a powerful coding environment with features such as code completion, refactoring, and debugging, which can help streamline the process of writing and organizing your code.
Create Java Project in IntelliJ:
Create New Class
To create a new class in IntelliJ IDEA, first, open the project in which you want to create the new class.
It’s recommended to create a package before creating a class. Steps to create a package:
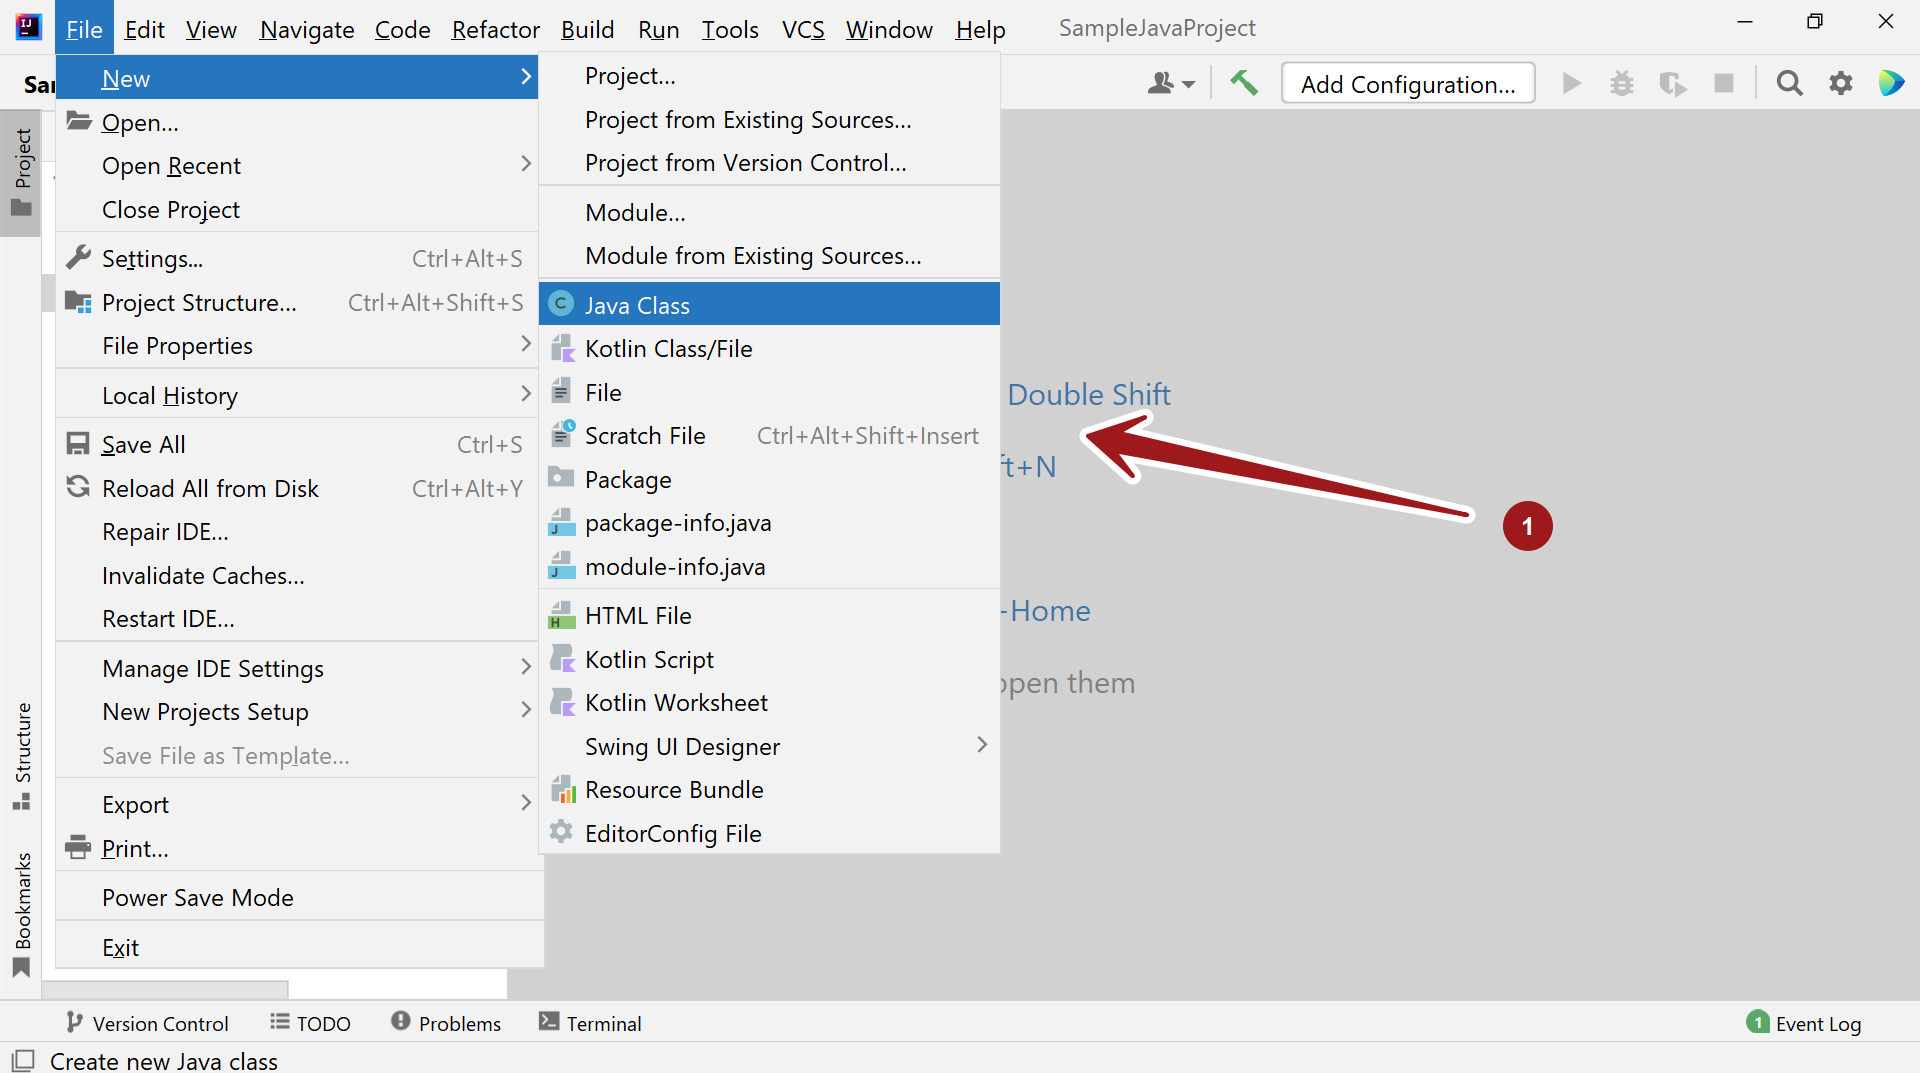
Then, Select the package and right click on the package in which you want to create the new class, and select “New” from the context menu. From the “New” menu, select “Java Class” to create a new class file.
File >> New >> Java Class
Alternatively, choose the package and right-click on the package, choose New >> Java Class.
Enter the new class name and hit the Enter button. For Example, HelloWorld
Once the new class file is created, you can start defining the class by giving it a name and adding the necessary attributes and methods.
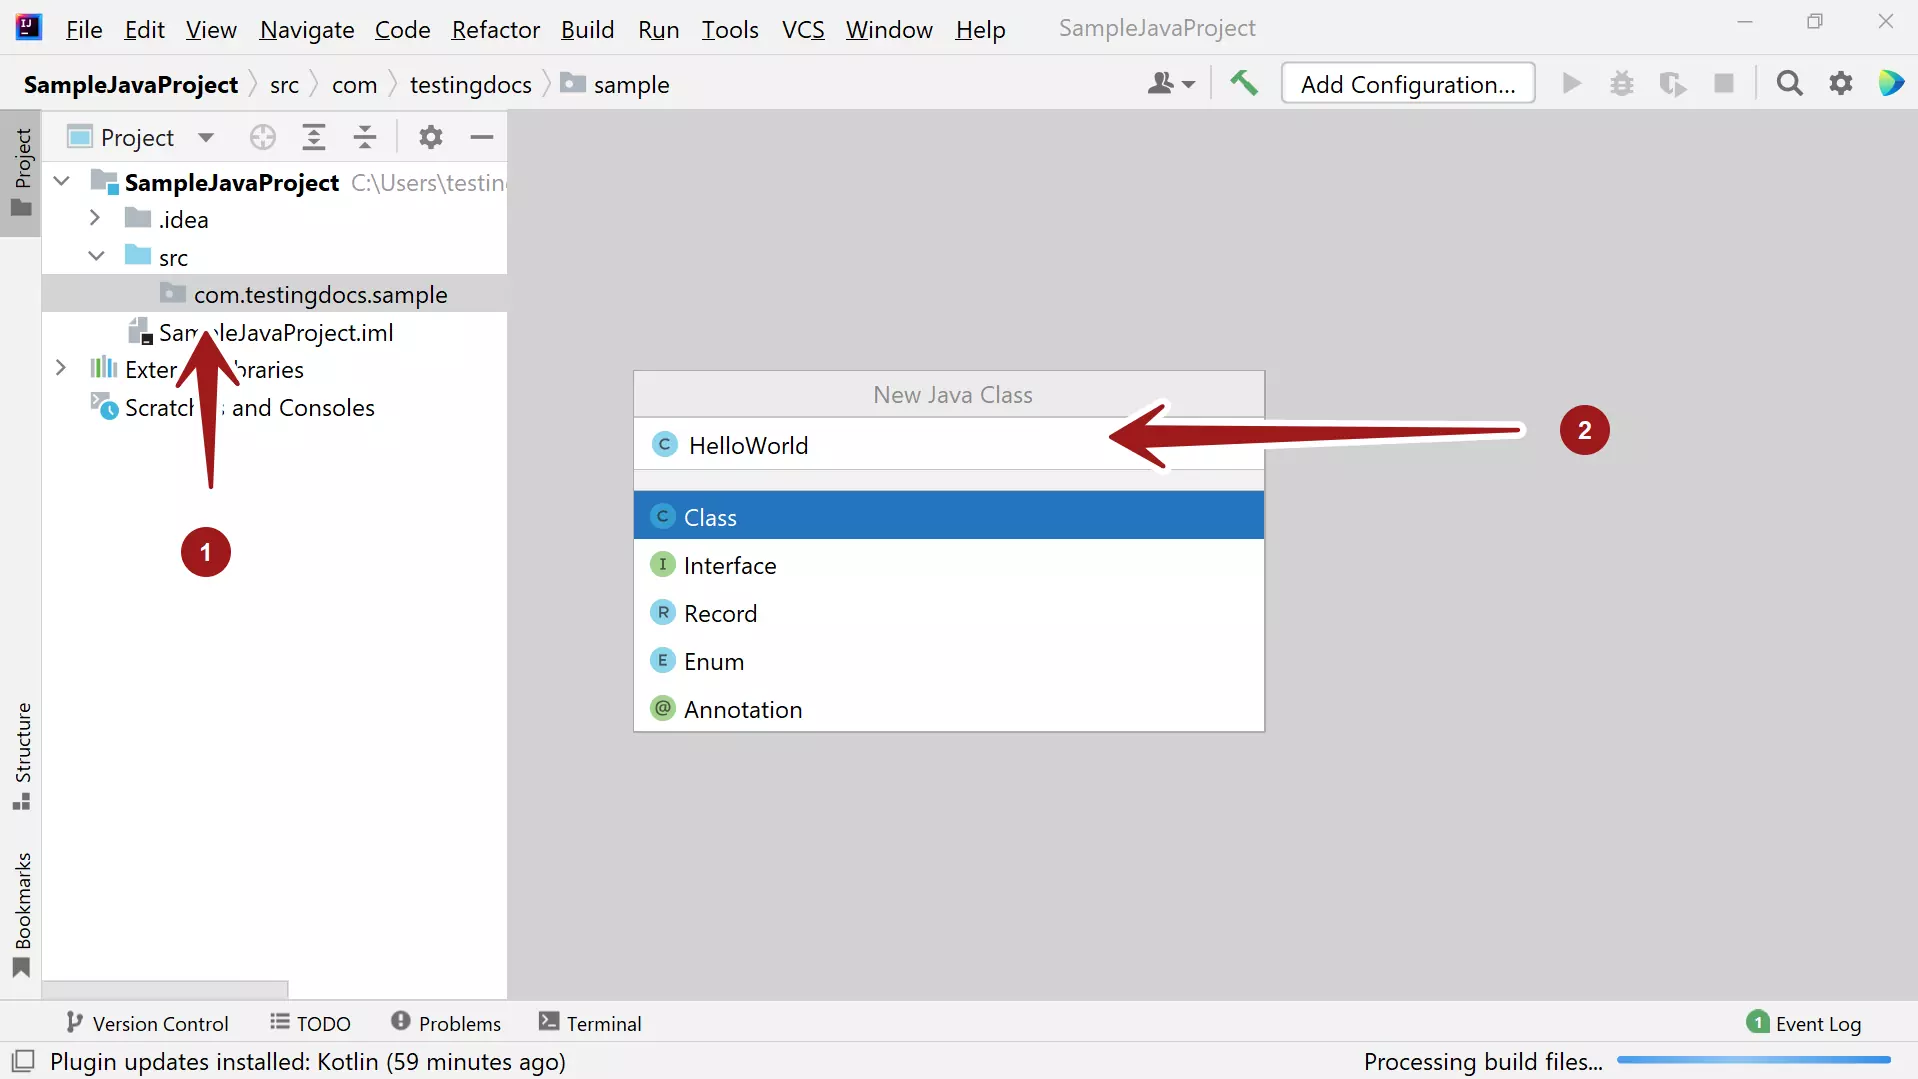
This will create a class under the selected package. The filename HelloWorld.java would be created in the project under the directory
<JavaProject>\src\com\testingdocs\sample\HelloWorld.java
That’s it. We have successfully created a new Java class in IntelliJ IDE. Now, we can add Java code to the class.
After defining the class structure, you can start implementing the behavior of the class by writing the necessary methods.
IntelliJ IDEA Tutorials
IntelliJ IDE tutorials on this website can be found at:


