Hello World Application using IntelliJ IDE
Hello World Application using IntelliJ IDE
In this tutorial, we will go through the basics of working with IntelliJ IDEA IDE. At the end of this post, you should be able to run a simple Java program using the IDE. We assume that Java and IntelliJ are installed on the machine.
A common way to test something new is to create a simple “Hello World” program with the language or tools we are learning. So, let’s get started!
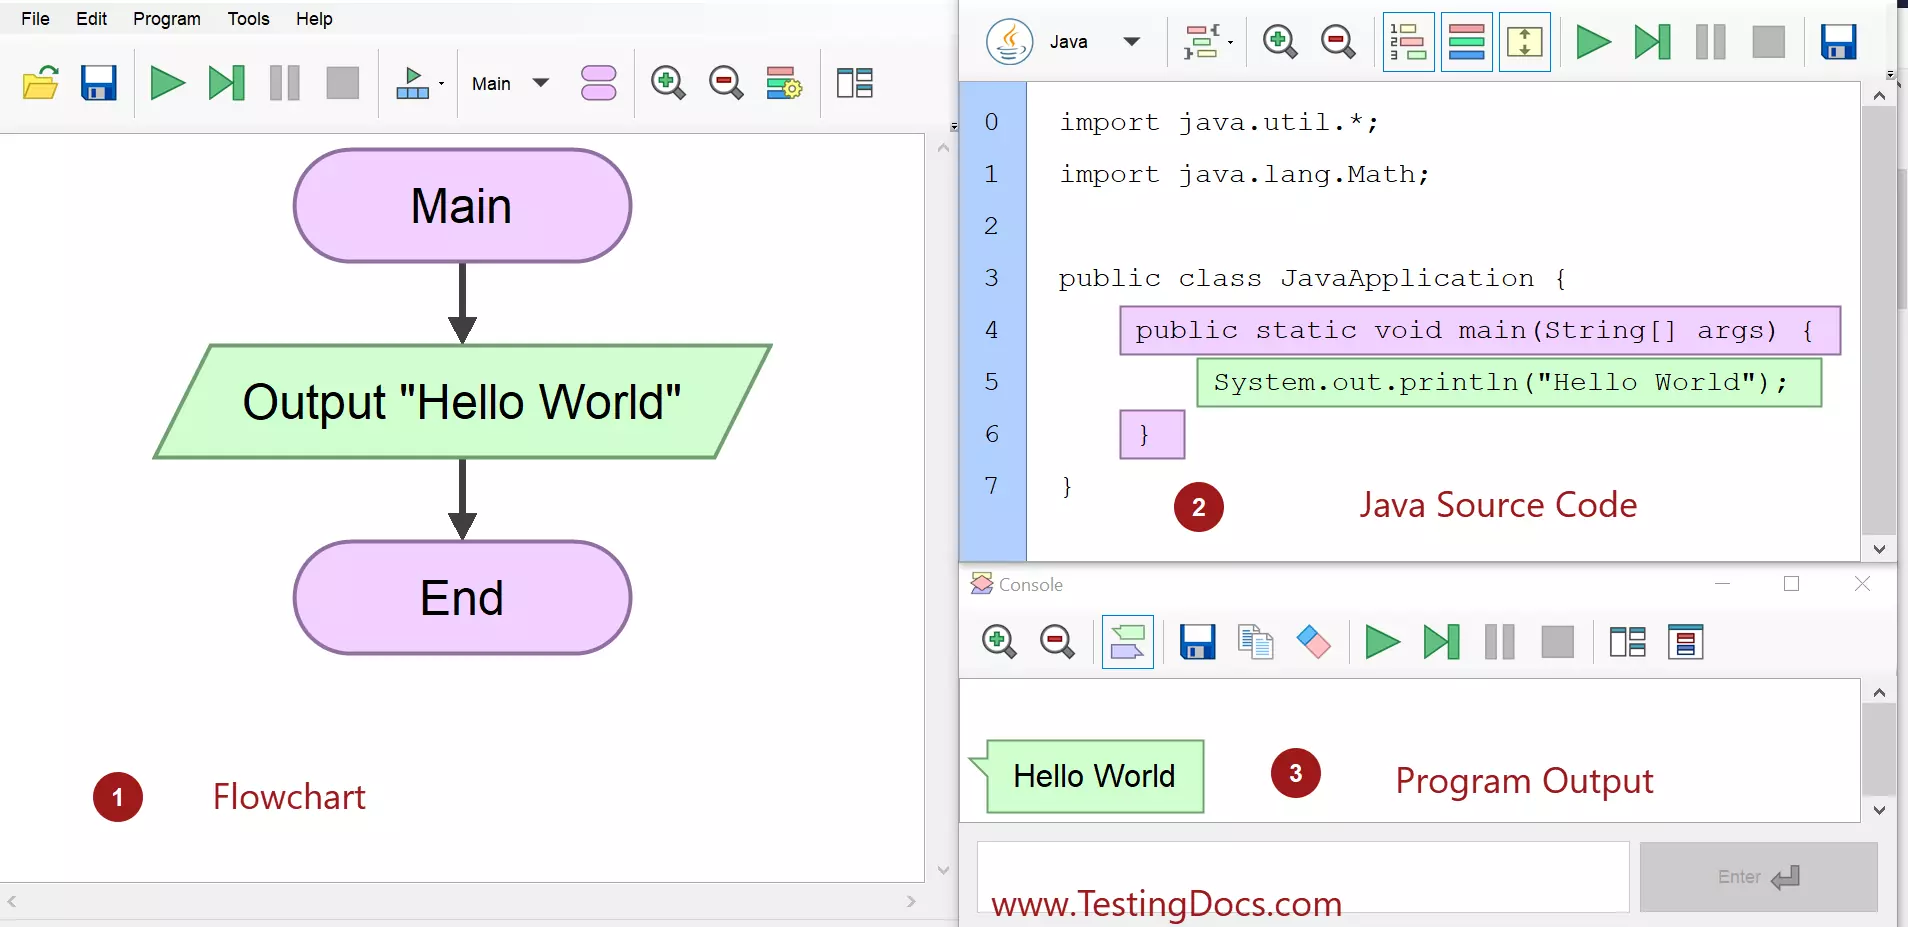
Flowchart
Create a New Project
To create a project in IntelliJ, follow the steps:
New Java class
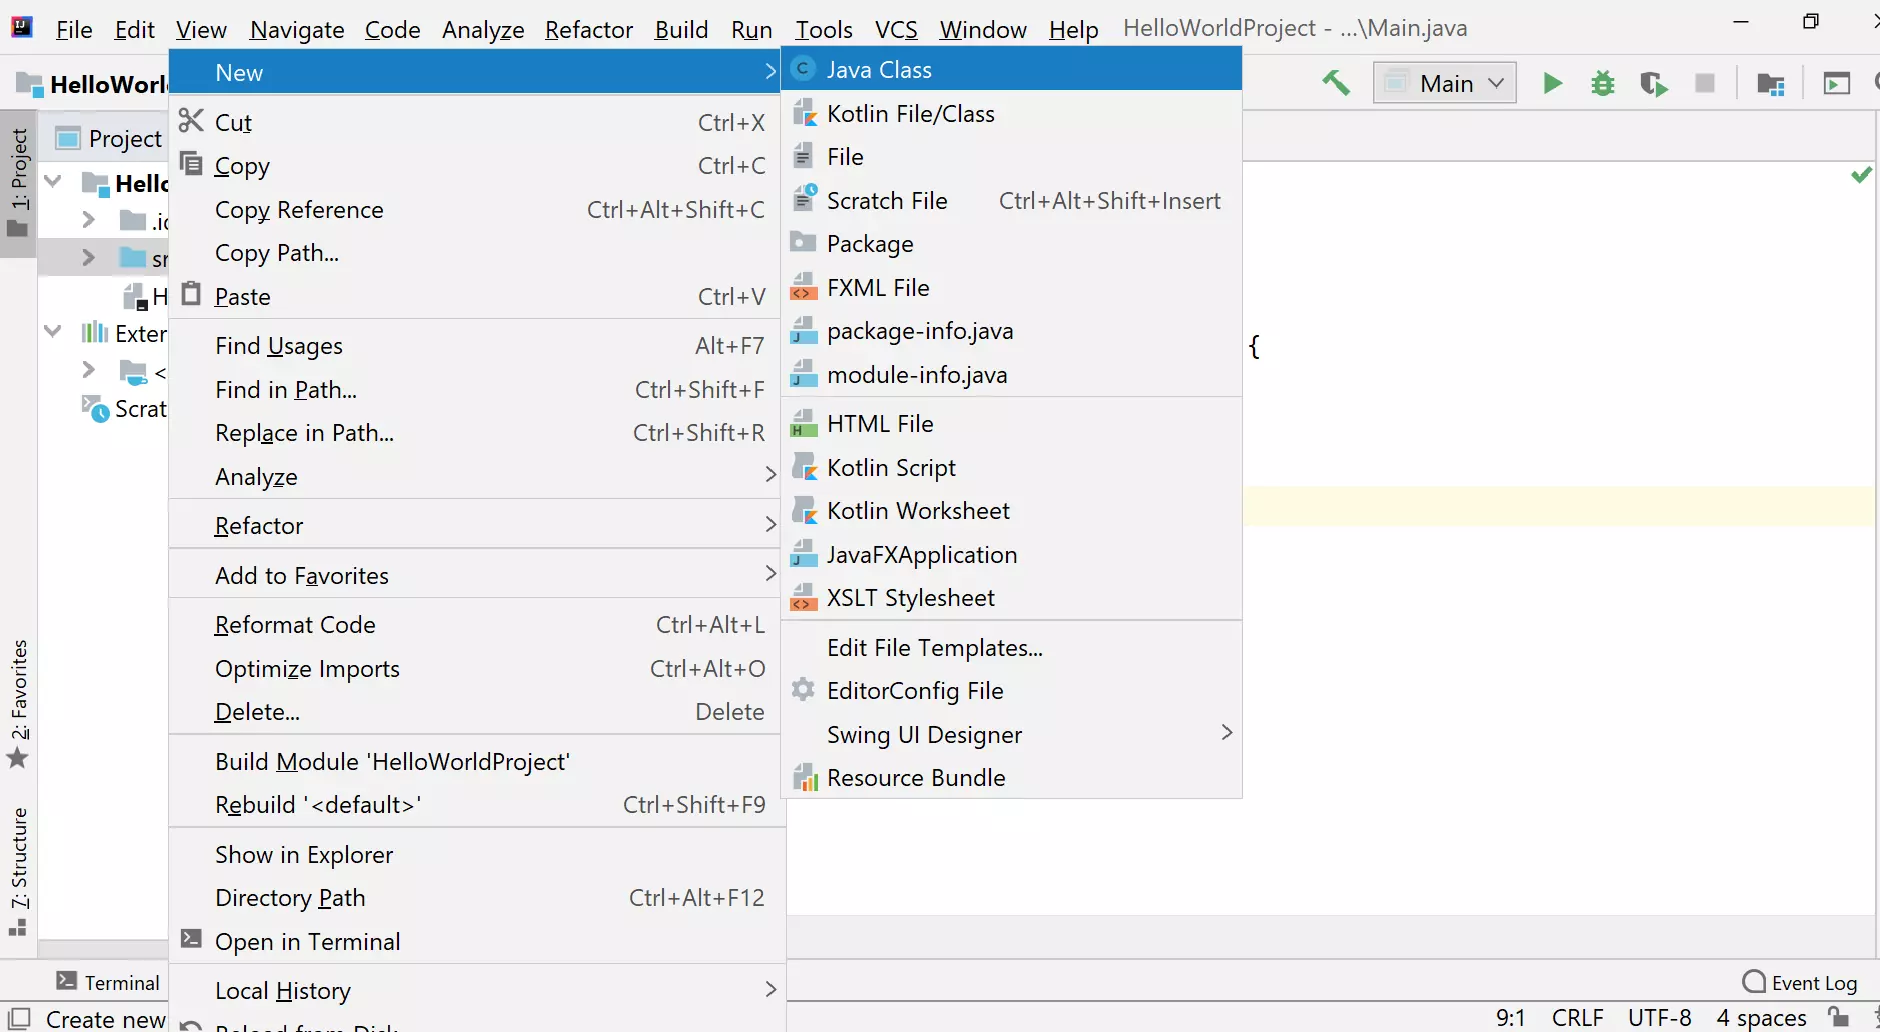
The next step is to create a New class. In the project side window, right-click on the src folder and choose
Right-click >> New >> Java class
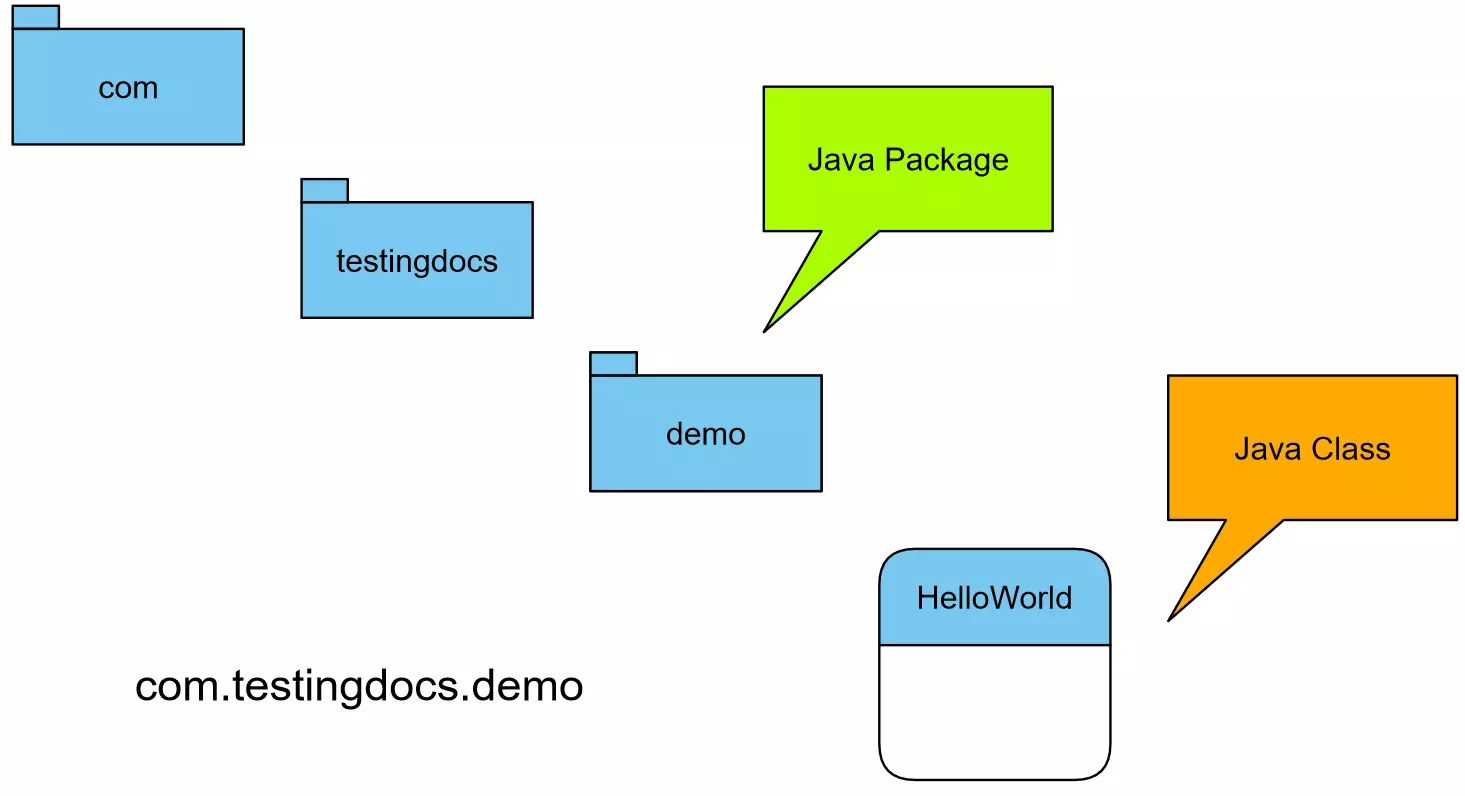
Type the class name, for example, HelloWorld.
It’s encouraged to specify the package for your class. We have specified “com.testingdocs.demo” as the package. Java packages are like directories or folders that hold Java classes to avoid name conflicts. We can group relevant classes into one package. We cannot have a “HelloWorld” class twice in the same package “com.testingdocs.demo“. However, we can have a ”HelloWorld” class in a different package let’s say “com.testingdocs.sampledemo“.
Other users/programs need to import the packages to use the functionality implemented by the classes.
Hello World Application
package com.testingdocs.demo;

public class HelloWorld {

    public static void main(String[] args) {
        // write your code here
        System.out.println("Hello world!");
    }
}
Now that you have your class, in the main() method, add the following statement to print “Hello World!” on the console. Then save your changes
Run the Application
To run your application, right-click on your class and select Run main. The Console view should appear at the bottom and display the “Hello, world!” output.
Console output
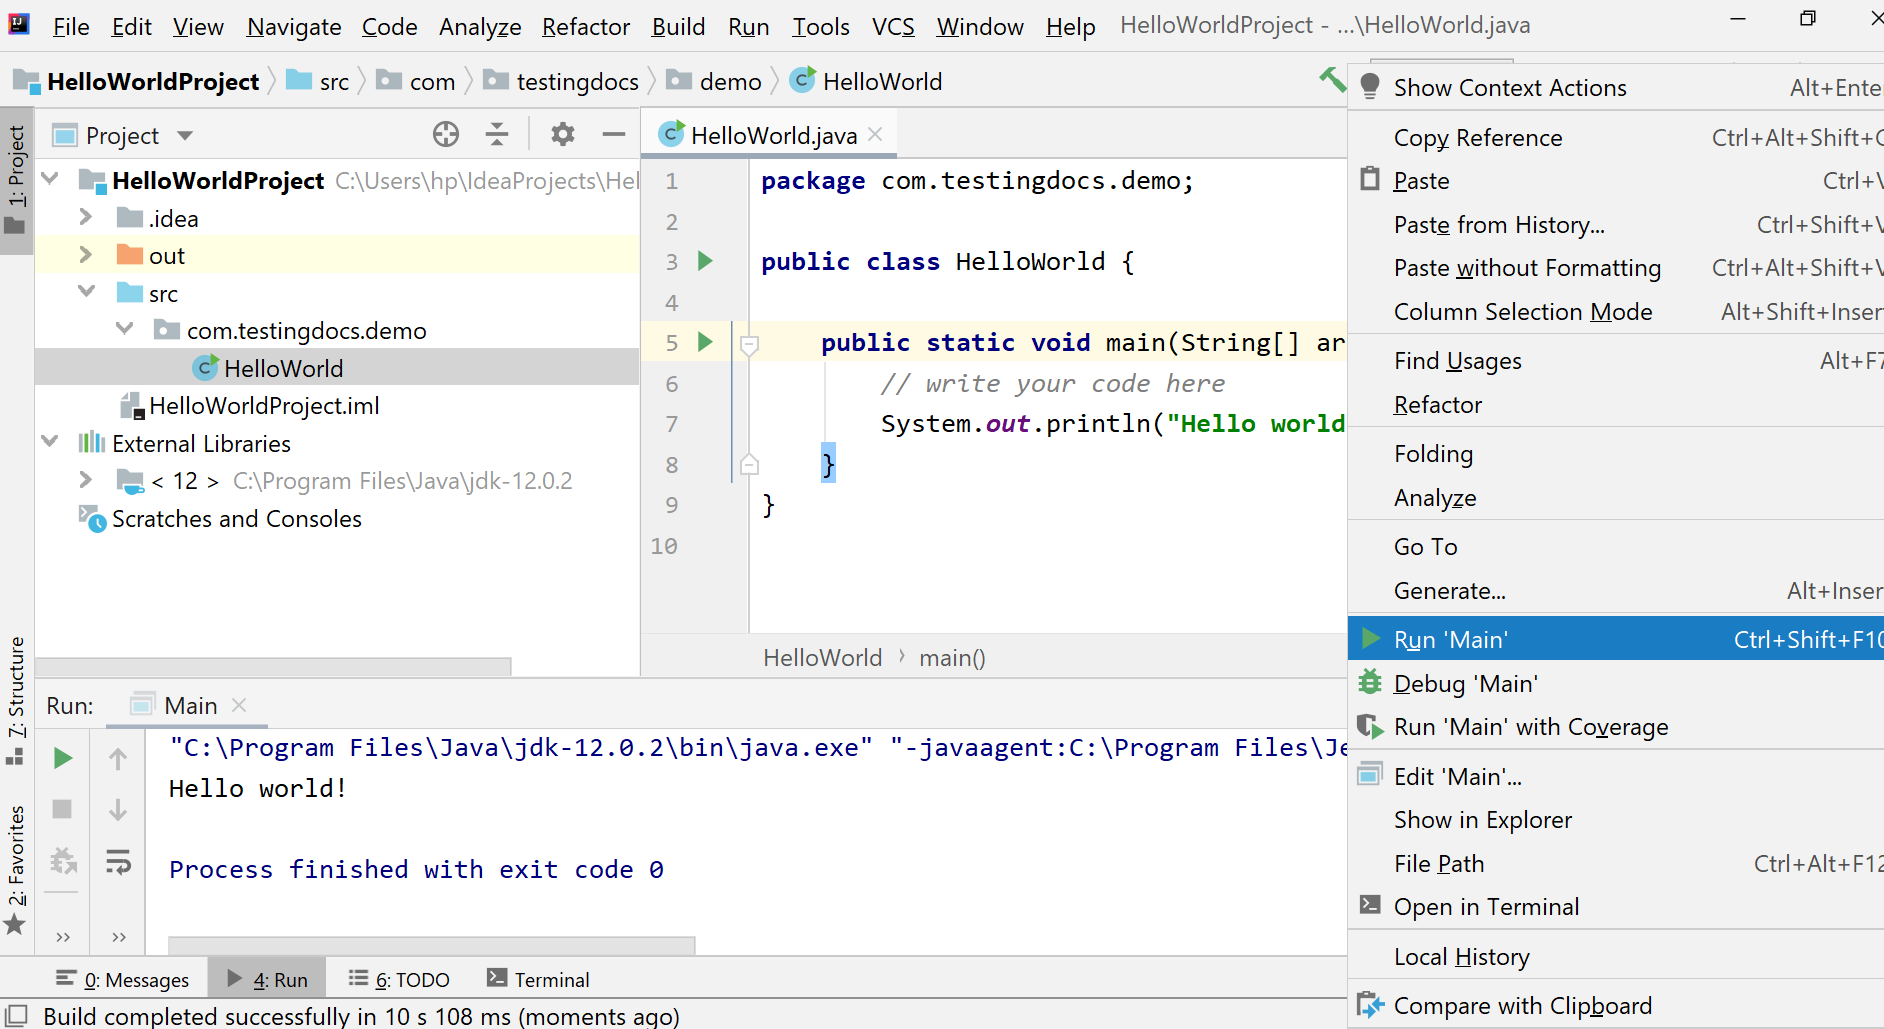
After the Java application runs, you will see the console output that displays “Hello World!”.
That’s it! You have successfully created a Hello World Java application using IntelliJ IDEA.
—
IntelliJ Tutorials on this website can be found at:


