Download and Install MantisBT
Download and Install MantisBT
In this tutorial, we will learn how to download and install MantisBT, the Mantis Bug Tracker tool. Mantis can be installed on either the WAMP or LAMP stack.
Prerequisites
- Apache Web Server
- MySQL Database
- PHP Scripting language.
WAMP stack components
Install links for the WAMP stack components.
LAMP stack components
Install links for the LAMP stack components.
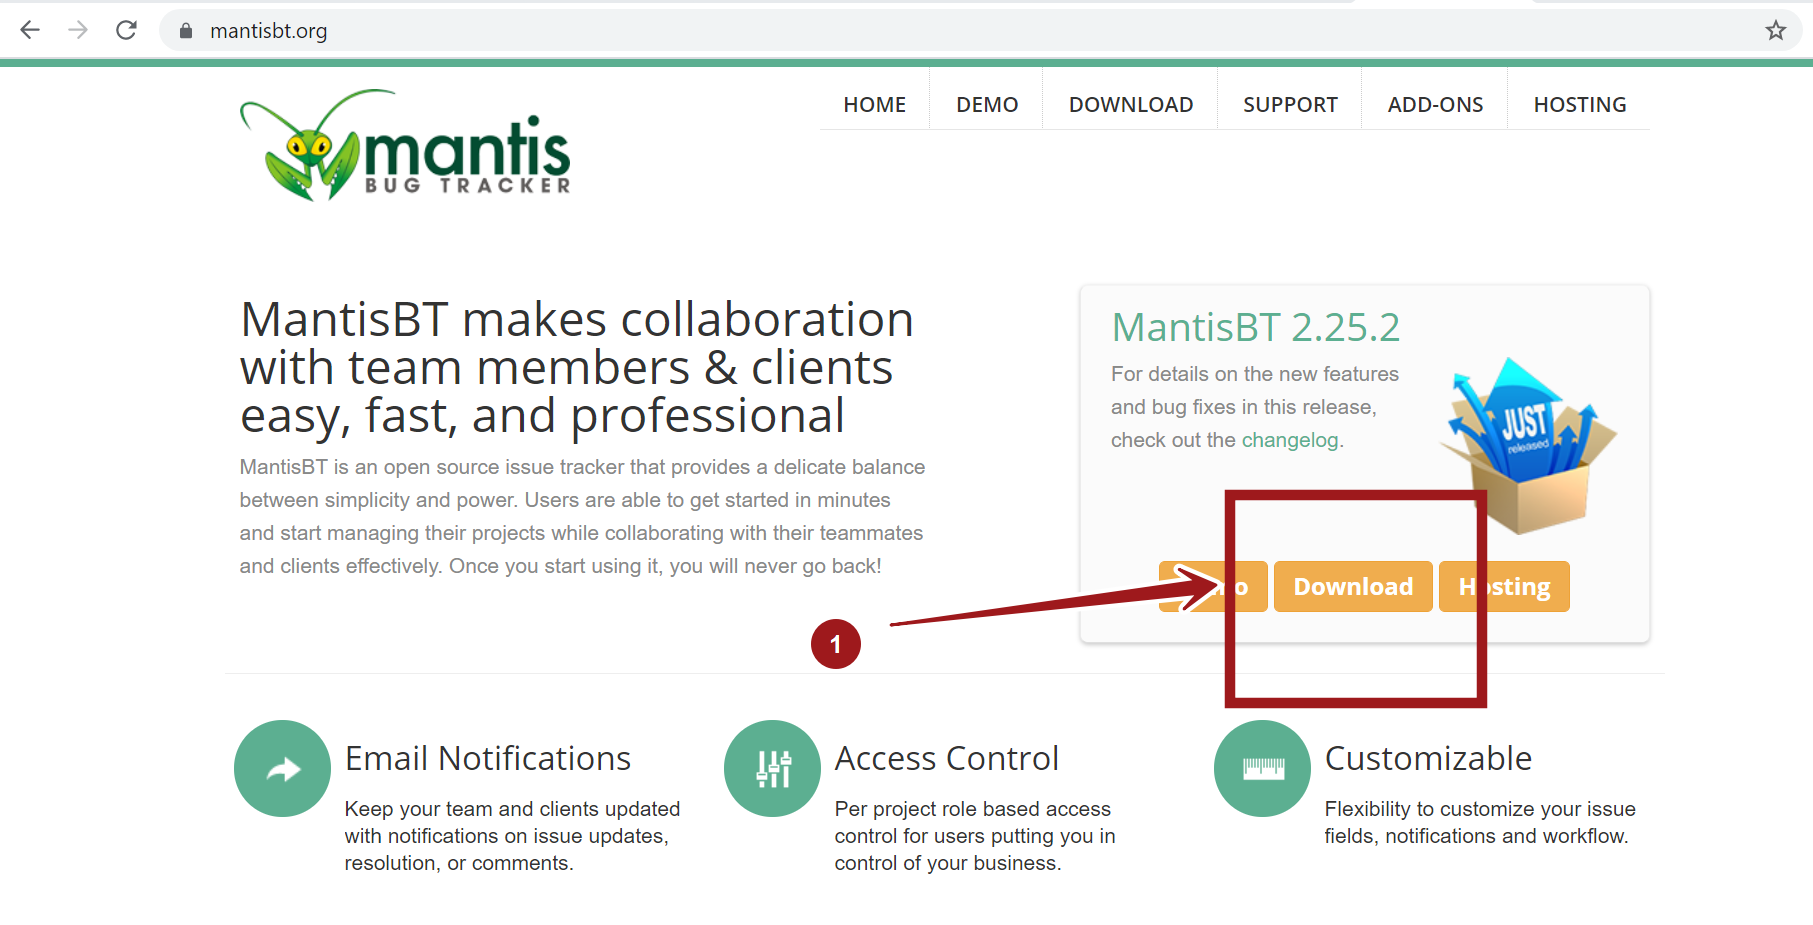
Download MantisBT
To download the tool, Navigate to the Mantis Official website and click on the download button.
- https://mantisbt.org/download.php
Pick the release. It is recommended to pick the latest stable release. Mantis supports other releases. To know more :
Download and Extract the Mantis archive folder. The download file is compressed in two formats tar.gz or .zip format. We can unpack the file using a utility like 7-zip on the Windows operating system. On Linux machines, we can use the tar command to extract the contents.
Install MantisBT
Copy the folder mantis directory contents to the htdocs directory.
Launch the <mantis_root>/admin/install.php URL on the web browser.
For example :
- http://localhost/mantis/admin/install.php
![]()
Check for any install errors on this page. ( if any ). All install parameters should be Good to go.
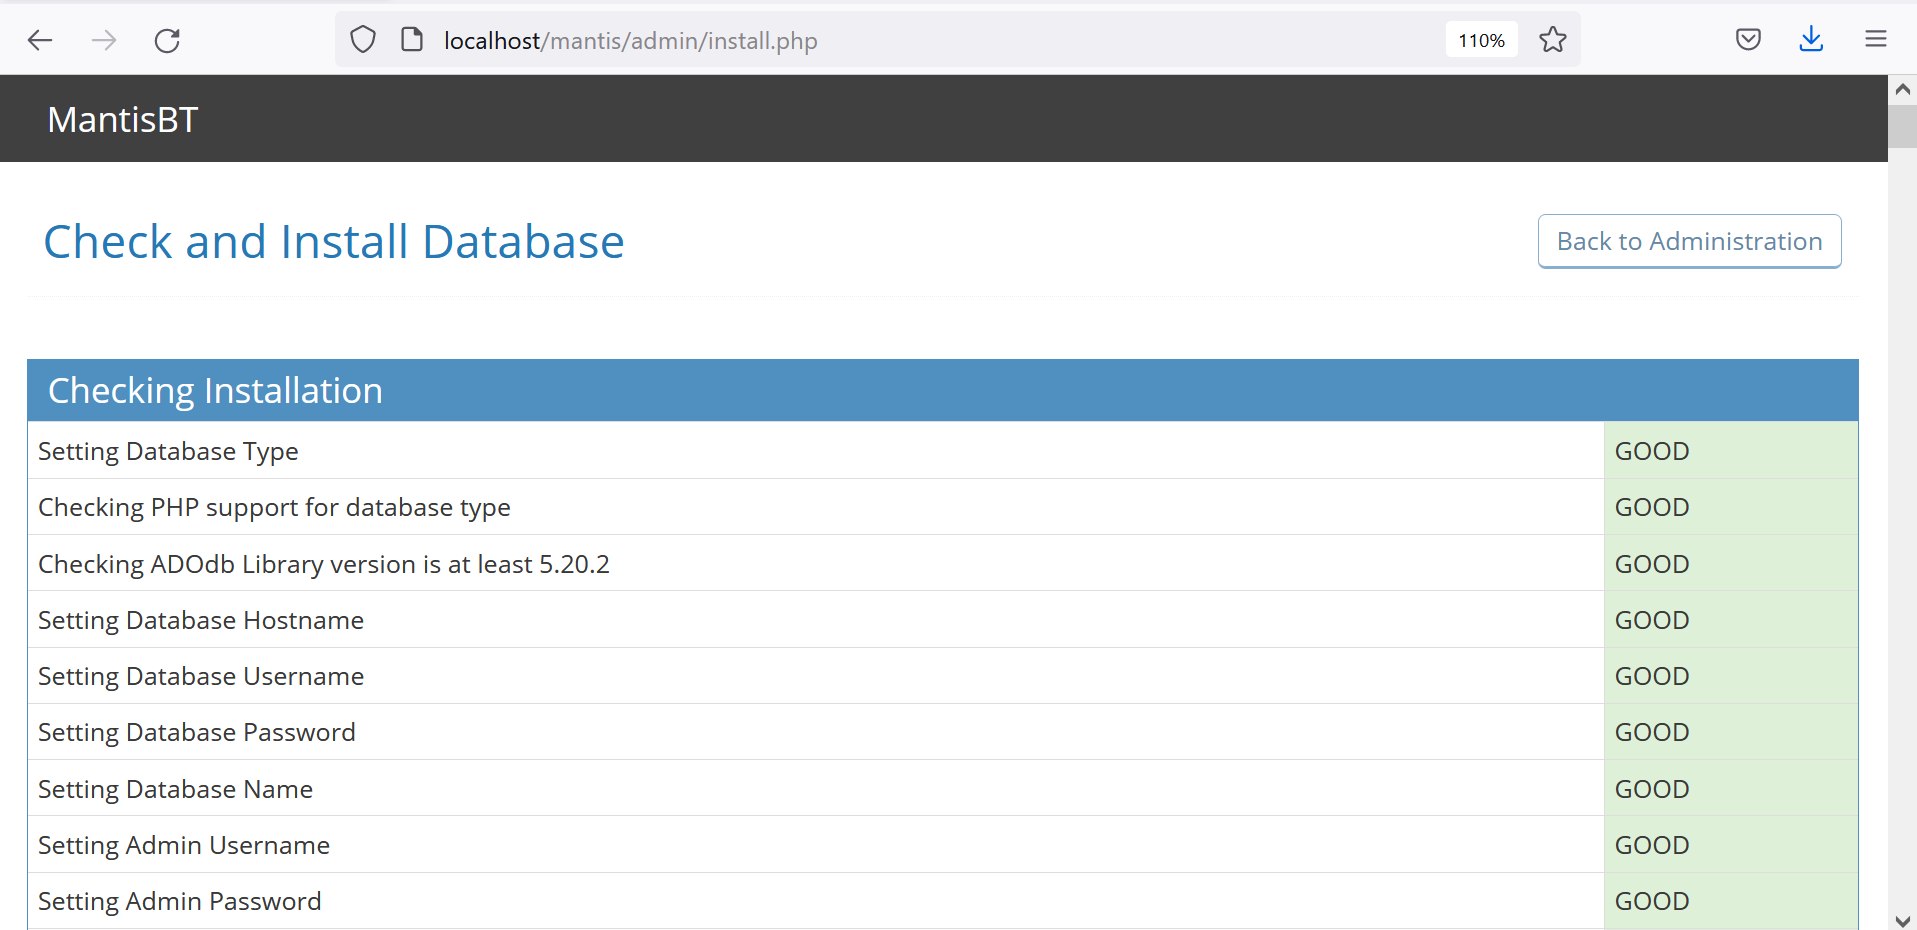
Provide the MySQL database root credentials. Change the database names and prefixes and other parameters if required.
Add Admin username and password credentials.
Click on the Install/Upgrade Database button.
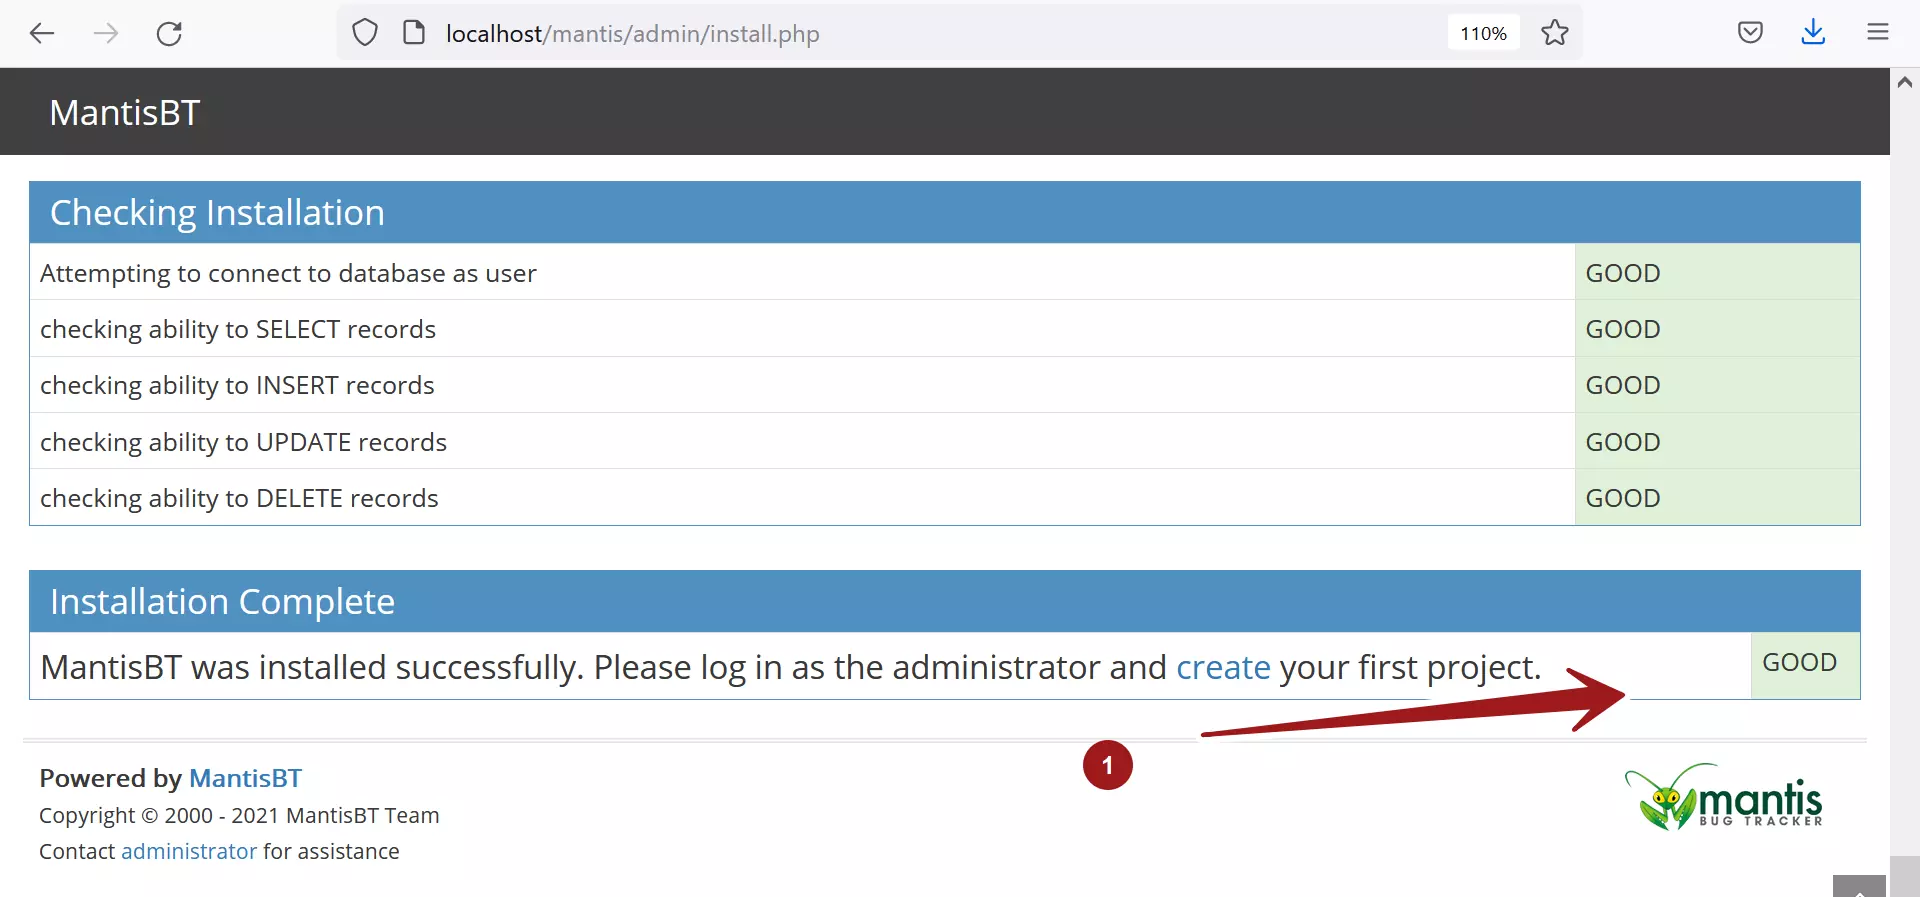
MantisBT should be installed successfully.
That’s it! You can log in as the administrator and start using the MantisBT instance. Log in to the instance and check major functionality. For example, create your project, and submit a sample issue to check everything is working as expected without any errors.
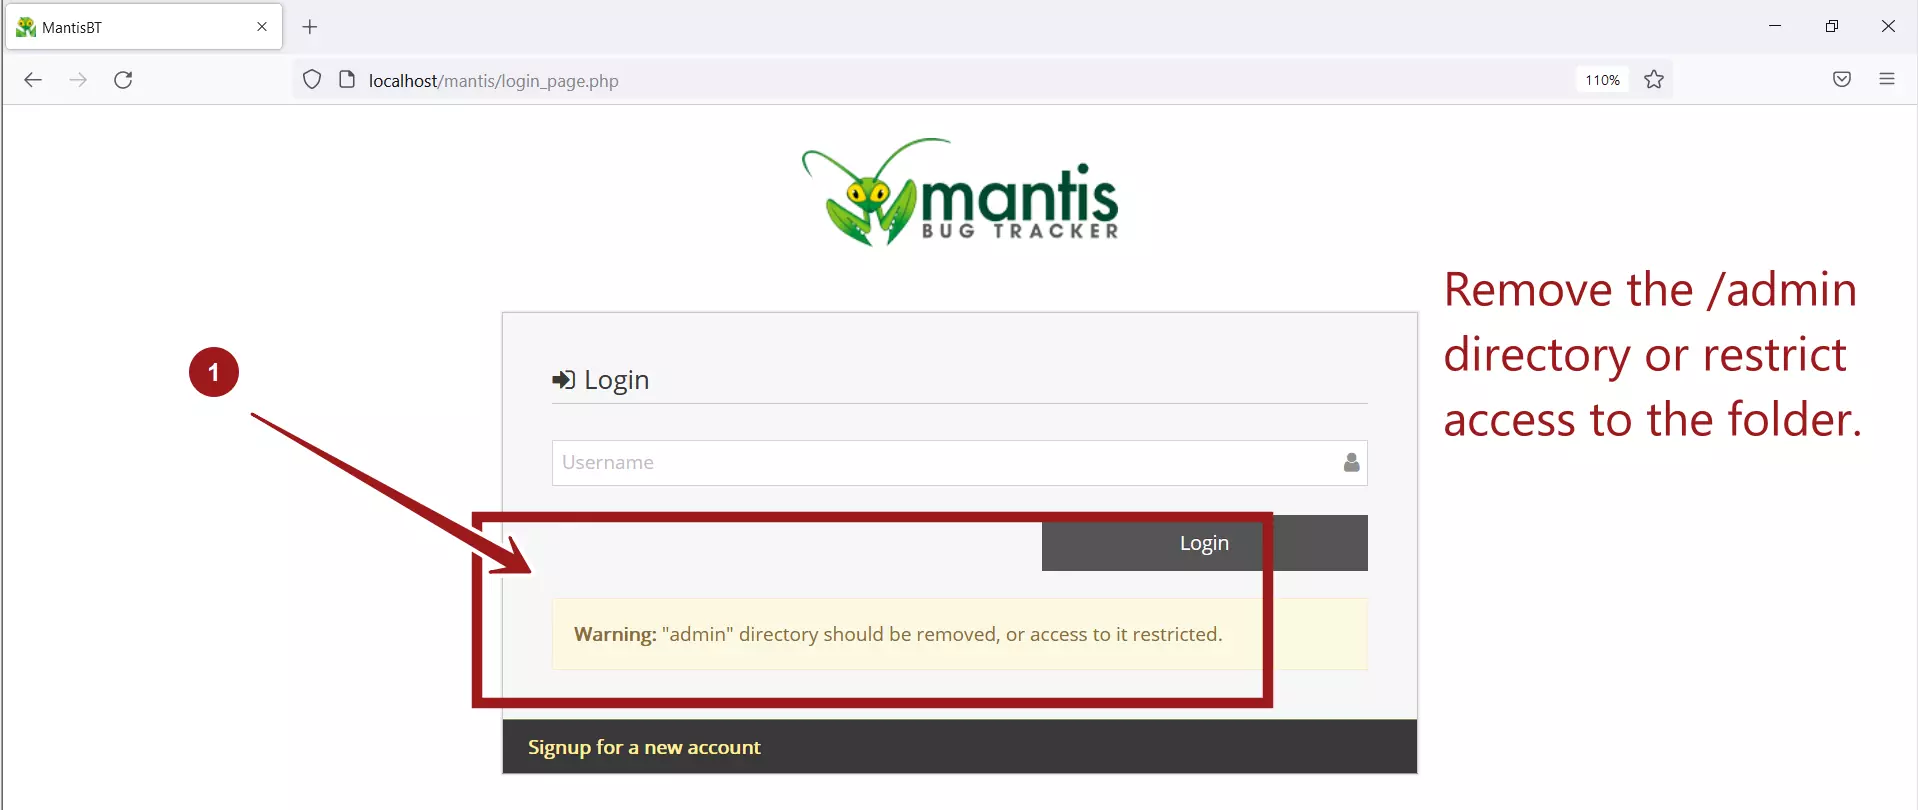
<mantis_root>/login_page.php
http://localhost/mantis/login_page.php
If the tool is installed on the public domain, delete or restrict access to the <mantis_root>/admin directory.
Create Project Steps


