Install AutoIT on Windows
Install AutoIT on Windows
In this tutorial, we will download and install AutoIT on Windows. AutoIt v3 is a general BASIC-like scripting language for automating Windows GUI applications. It uses a combination of simulated keystrokes, mouse movement, and window/control manipulation to automate tasks in a way that is not possible or reliable with other languages.
📥 Download AutoIT
Launch a web browser.
Navigate to the following download URL:
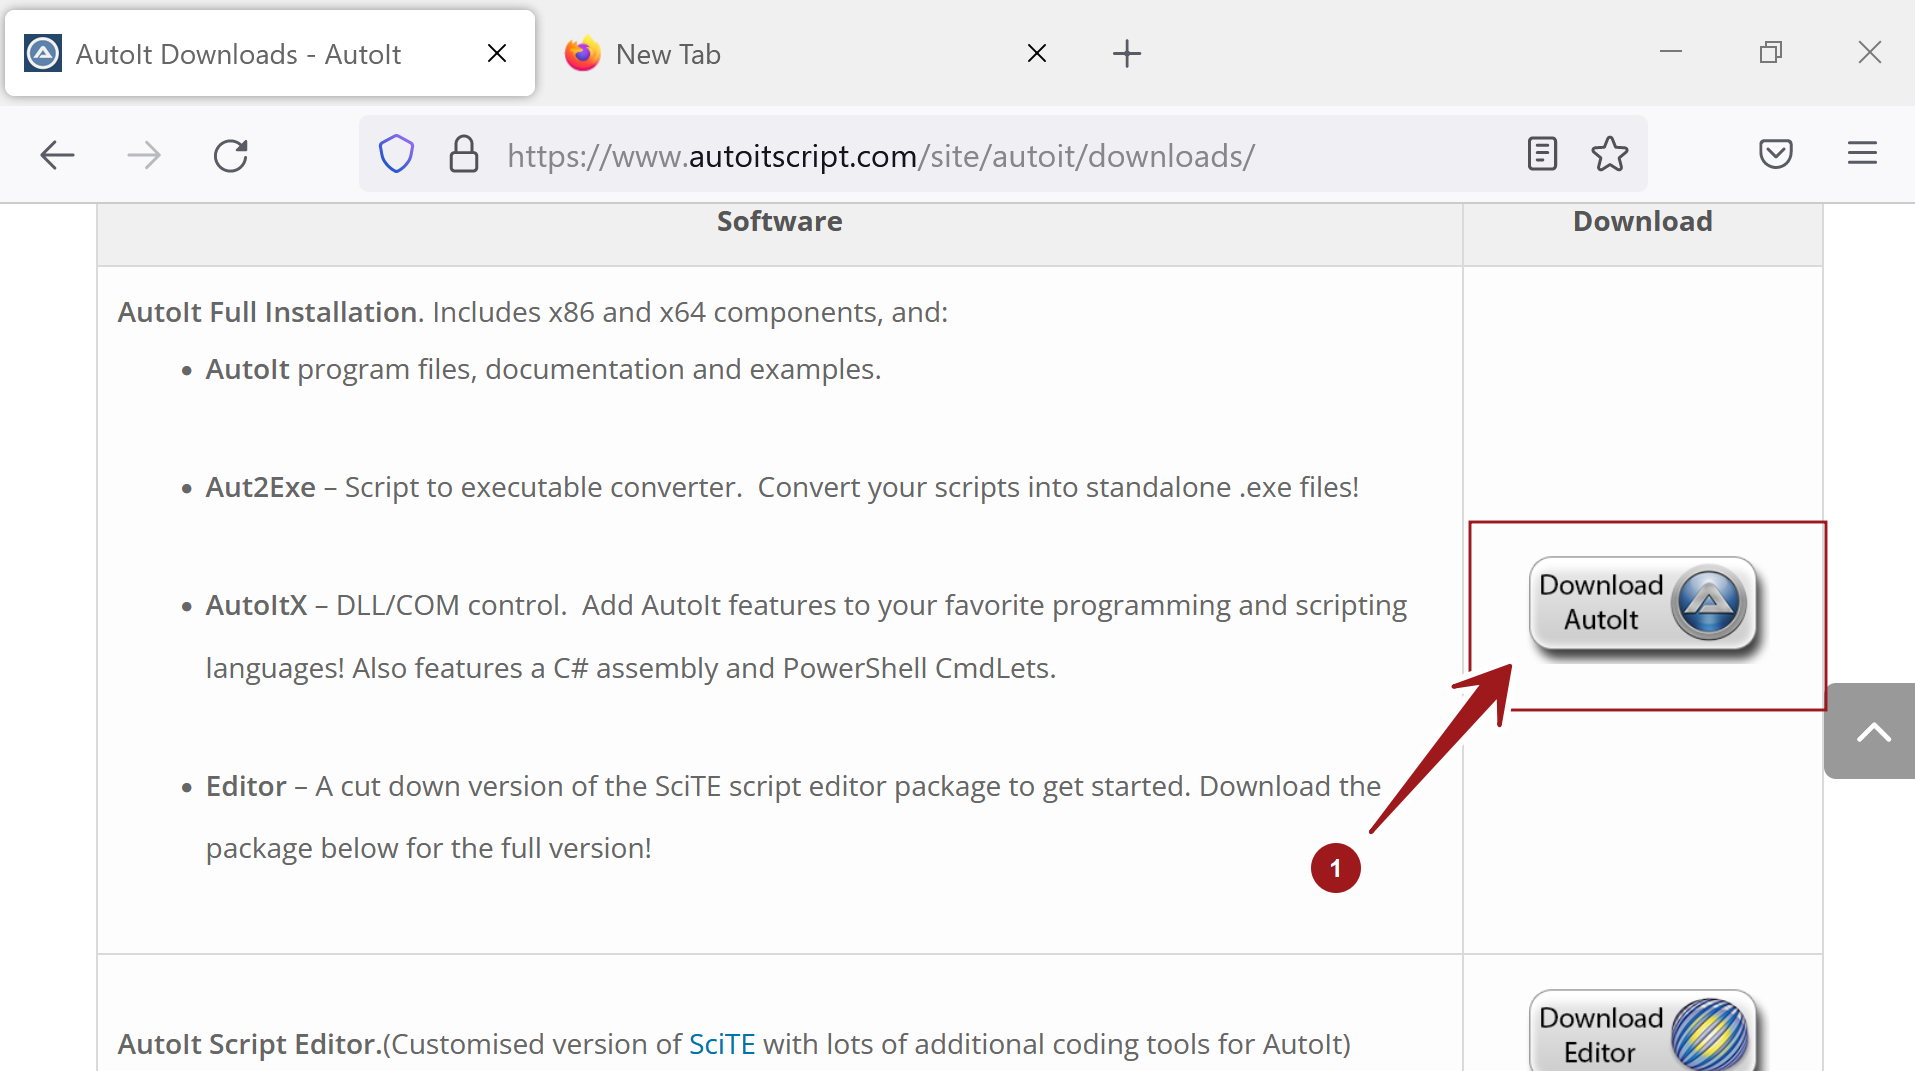
- 🌐 https://www.autoitscript.com/site/autoit/downloads/
Click on the Download AutoIt button.
Save the installer onto the computer. The file name would be
autoit-<version>-setup.exe
🛠️ Install AutoIT
Locate the installer and extract the contents of the file.
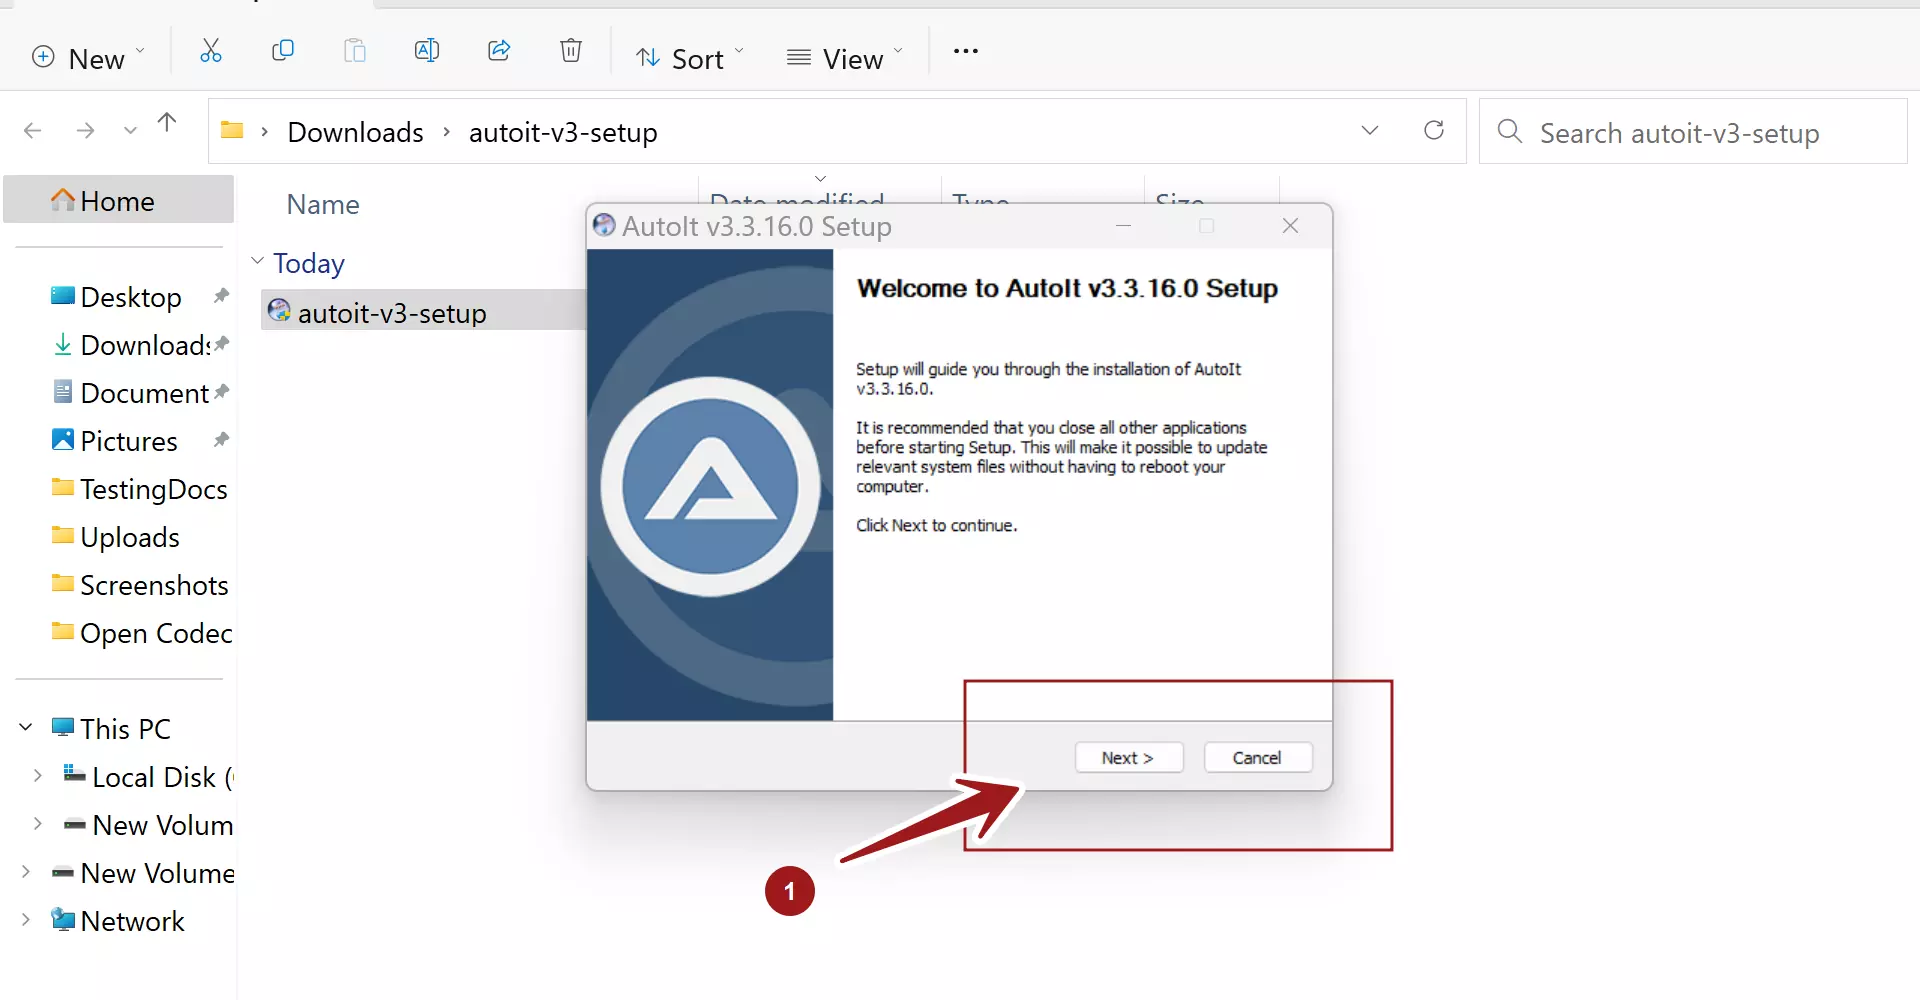
Double-click on the setup file. Accept the UAC prompt.
This will launch the AutoIt setup wizard. Click on the Next > button.
Accept the license by clicking on the ‘I Agree’ button.
64-bit Operating System support.
You can choose the native x64 tools if you run on the Windows 64-bit operating system. Choose x86 tools on a 32-bit operating system.
Click on the Next > button.
📄File association
We can choose AutoIt software to associate with the *.au3 script files. We can either run the script or Edit it. It depends on the use cases; if you are a developer, choose to edit the script when you double-click on the *.au3 files.
Click on the Next > button.
💻 Choose components
The main components are the AutoIT core and the script examples. It is recommended that you select all the components to install.
Then click on the Next > button.
📁 Install Location
The tool installs under the following directory by default:
C:\Program Files (x86)\AutoIt3
However, we can change the install location by clicking the Browse… button. Then, click on the Install button, which will install the tool.
Optional: Check the box ‘Show release notes’ for new features and bug fixes.
Once done, click the Finish button to complete the setup and exit the install wizard window.
That’s it. 👏 You are done with the installation of the software.