Hello World Java Program
Hello World Java Program
This tutorial is a step-by-step guide for creating the first Java example program(e.g., Hello World Java).
Create a New Java Project
After this post, you can create a Java project and a Java class that prints “Hello world!” in the console when it runs.
So, let’s get started!
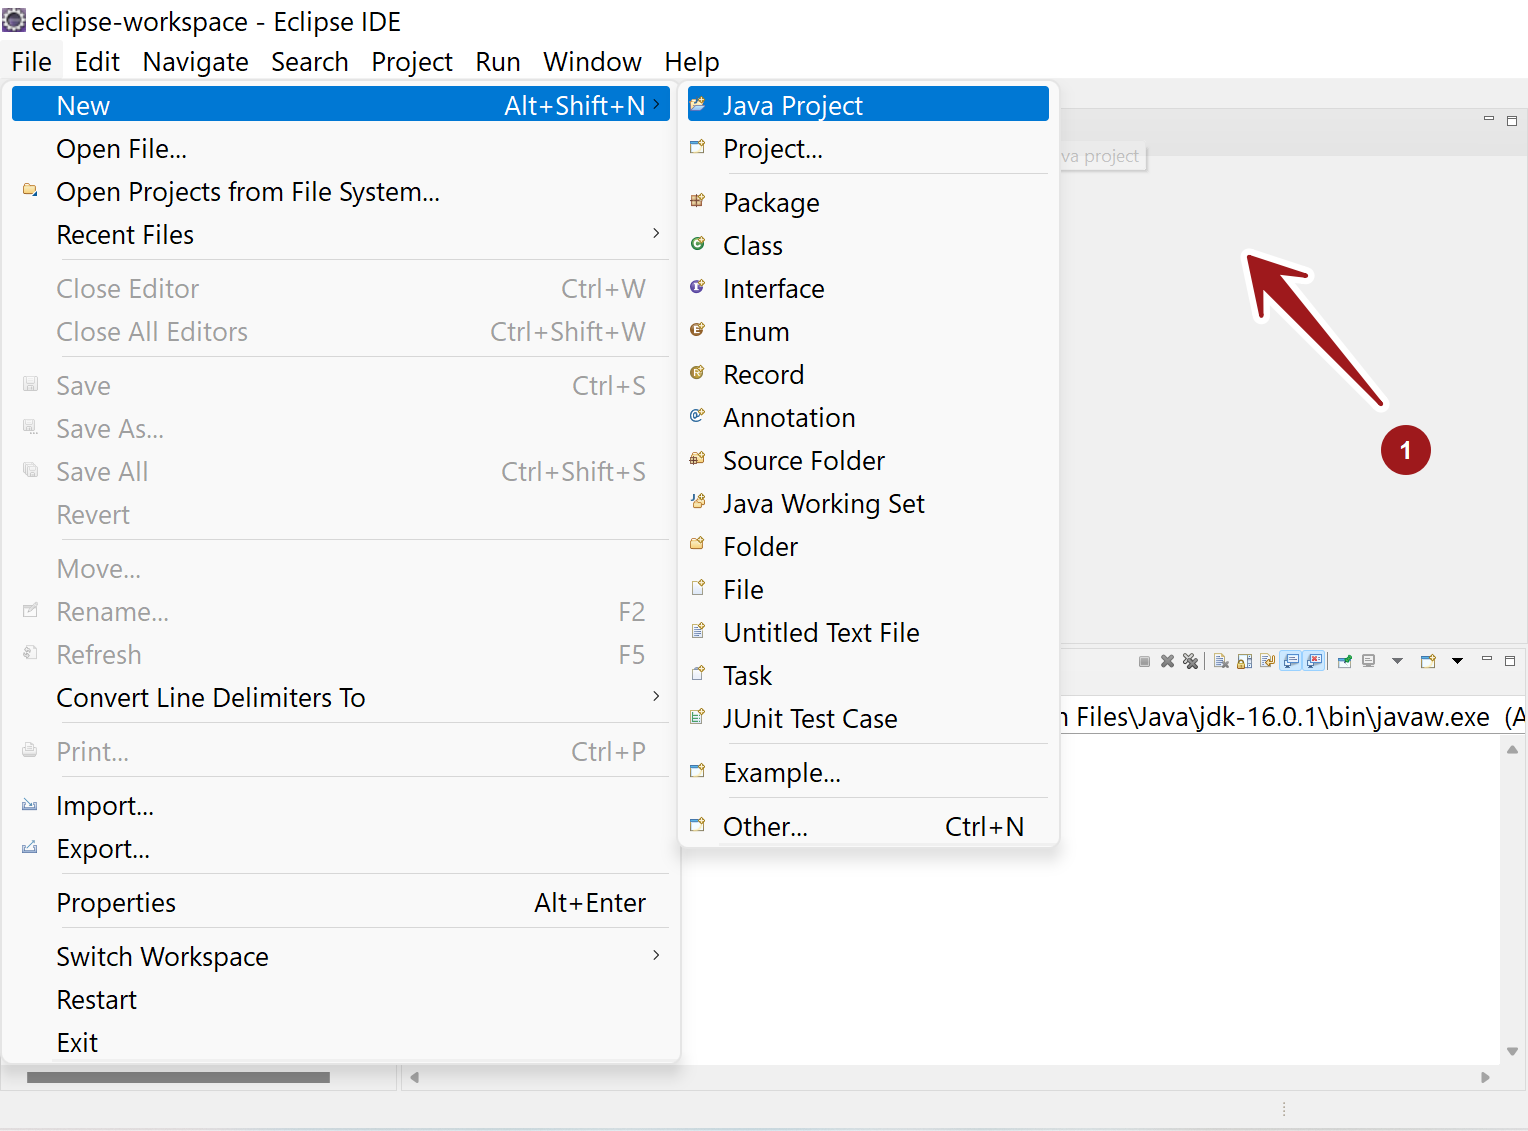
To start with, we need to create a Java project. In the main menu, click on the
File -> New -> Java Project button as shown in the below figure:
Enter Project name
Enter the project name for the project name in the dialog box, then click Finish. Give a meaningful name to identify the project. However, you may choose any name of your choice.
Create a New Package
You are encouraged to specify the package for your class. To create a new package
- File -> New -> Package
Packages are folders with Java classes to organize them better and avoid naming conflicts. The same class cannot be in the same package more than once, but the same class name can be in a different package.
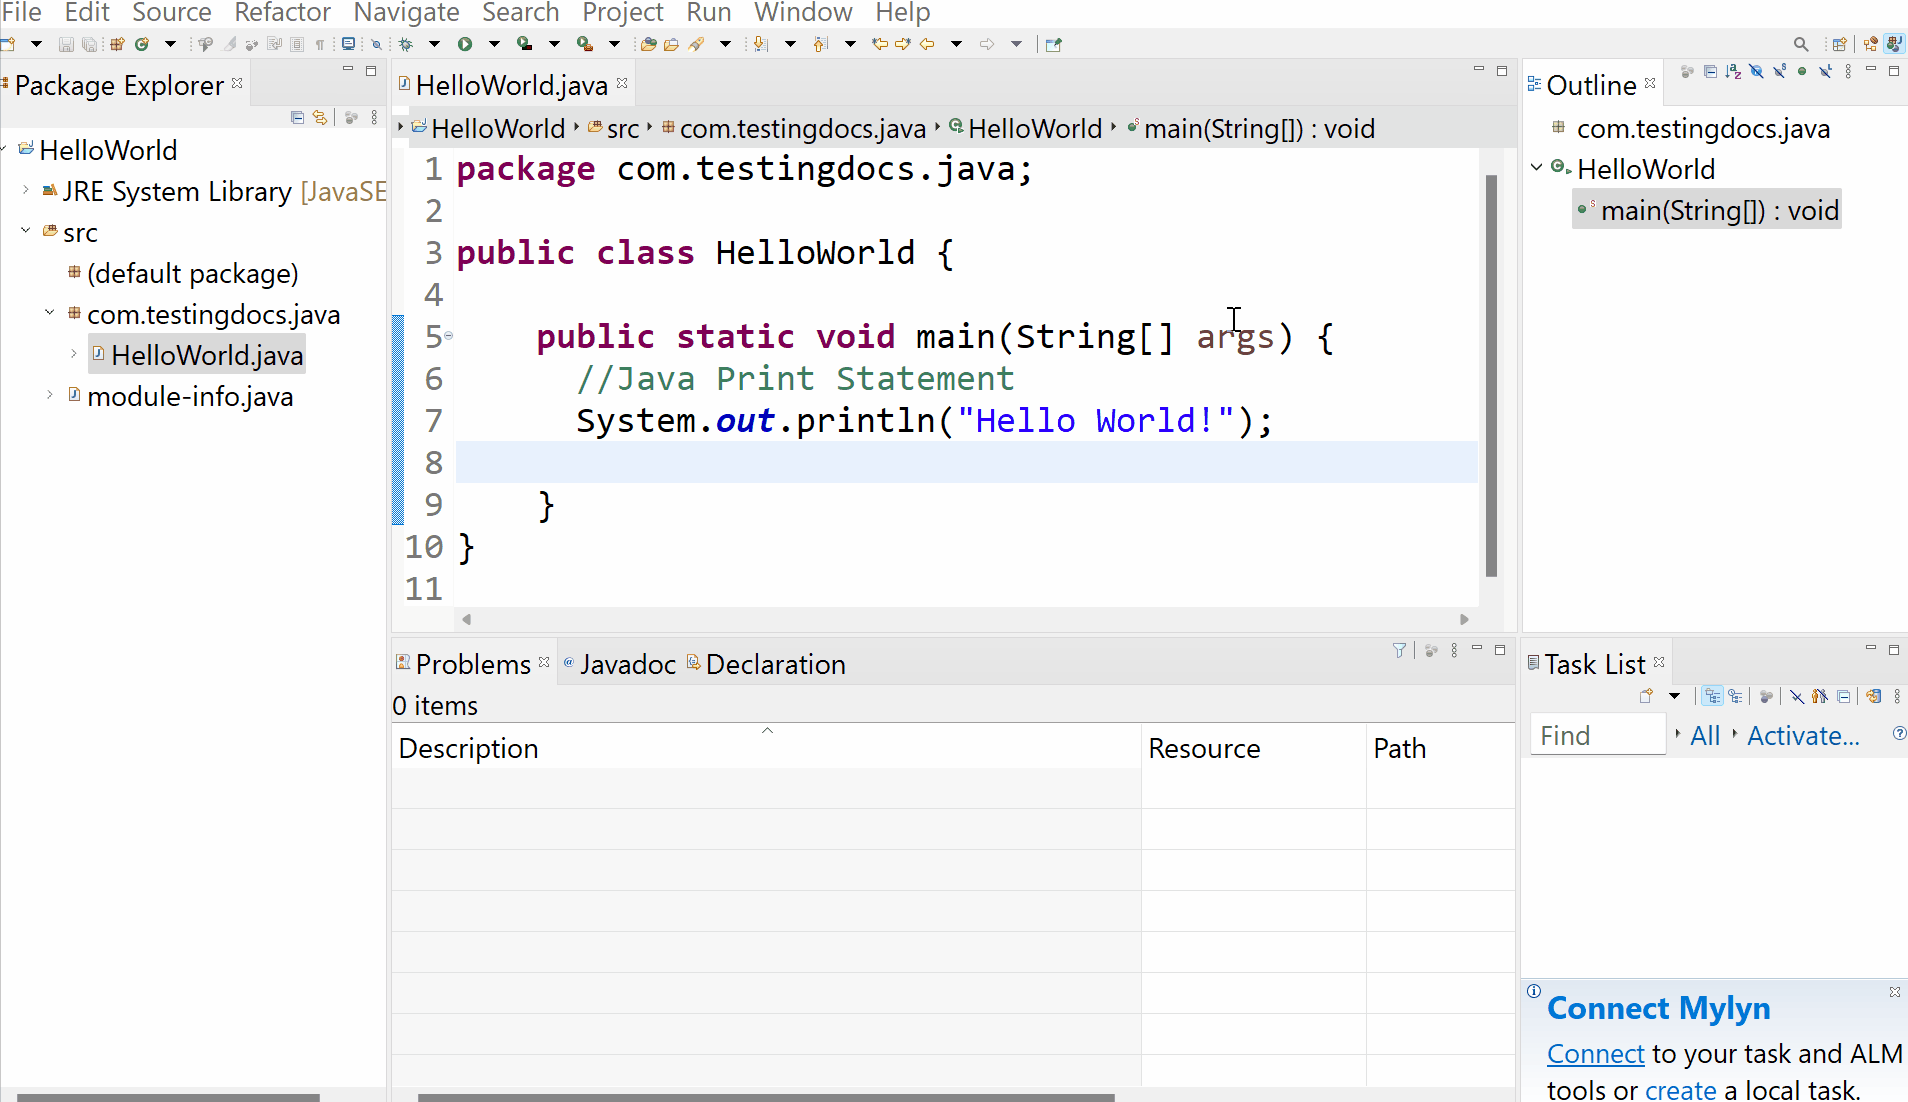
Create a New Java Class
This step is to create a new class. In the main menu, click on the New Java Class button. Enter “HelloWorld” for the class name, then click Finish.
Code the Java Program
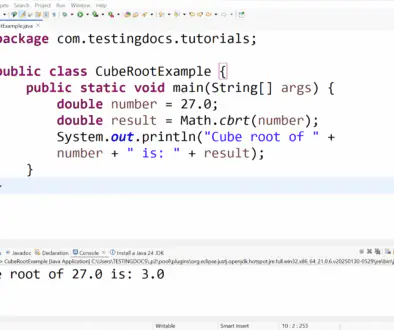
Enter the below Java code snippet in the IDE editor for the class :
public class HelloWorld {

public static void main(String[] args) {
          System.out.println("Hello world!");
    }
}
Then save your changes File -> Save or by the combination of keys Ctrl + S
Run the Hello World Java program
We can run the Java application in many ways. The easiest way is to right-click and run the application as shown below:
Program Output
The console window allows you to check the program’s run output. To enable the console window in the Eclipse IDE, go to the main toolbar,
- Windows—> Show View—> Console.
That’s it! We have successfully created and run a Hello World Java application.
Video Tutorial