JUnit Annotations order
Introduction
JUnit annotations are used to setUp and tearDown test fixtures. Different annotations in
JUnit4 are:
- @BeforeClass
- @AfterClass
- @Before
- @After
@BeforeClass and @AfterClass
@BeforeClass annotated method will be executed once before all the tests in the class. This method would be used to perform one time initialization.
On the other hand, @AfterClass annotated method will be executed once after all the tests in the class. This method is used to release any resources acquired during the tests etc.
@Before and @After
@Before annotated method will run before each test method in the class. For example, if you have 3 test annotated method, @Before method will run 3 times before each @Test annotated method.
On the other hand, @After annotated method will run after each test method in the class.
@Test annotation can be found here: JUnit @Test annotation
Example
In the below example, we will see the order of JUnit annotations.
package com.testingdocs.junit;
import static org.junit.Assert.*;

import org.junit.After;
import org.junit.AfterClass;
import org.junit.Before;
import org.junit.BeforeClass;
import org.junit.Test;

/**
 * A sample JUnit4 Test annotation demo
 * class
 */

/**
 * @author testingdocs
 *
 */
public class SampleJUnit4TestCase {

  /**
   * @throws java.lang.Exception
   */
  @BeforeClass
  public static void setUpBeforeClass() throws Exception {
    System.out.println("@BeforeClass");
  }


  /**
   * @throws java.lang.Exception
   */
  @AfterClass
  public static void tearDownAfterClass() throws Exception {
    System.out.println("@AfterClass");
  }

  /**
   * @throws java.lang.Exception
   */
  @Before
  public void setUp() throws Exception {
    System.out.println("@Before");
  }

  /**
   * @throws java.lang.Exception
   */
  @After
  public void tearDown() throws Exception {
    System.out.println("@After");
  }

  @Test
  public void firstTestMethod() {
    System.out.println("Test method 1");
    fail("Not yet implemented1");
  }

  @Test
  public void secondTestMethod() {
    System.out.println("Test method 2");
    fail("Not yet implemented2");
  }

  @Test
  public void thridTestMethod() {
    System.out.println("Test method 3");
    fail("Not yet implemented3");
  }
}
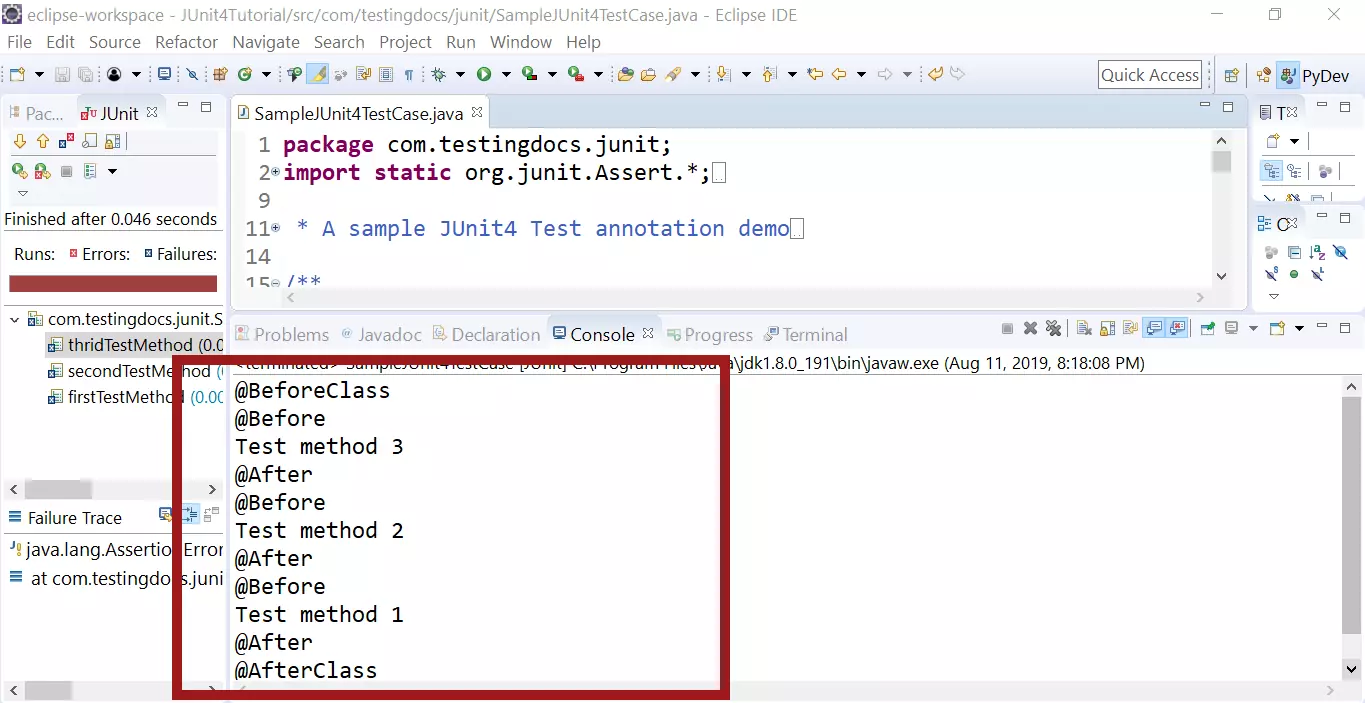
Run output
@BeforeClass
@Before
Test method 3
@After
@Before
Test method 2
@After
@Before
Test method 1
@After
@AfterClass
