Assign Test Case to Tester in TestLink
Overview
In this tutorial, we will learn the steps involved in Assigning Test Cases in the TestLink tool. The Assign Test Case Execution page allows Test Leaders and Managers to assign users to Test cases and test Suites within the Test Plan in the Test Project.
Steps to Assign Test Cases
Launch the TestLink tool.
Select the Test Project from the drop-down list.
Choose the Current Test Plan from the drop-down list.
Click on the Assign Test Case Execution dashboard link.
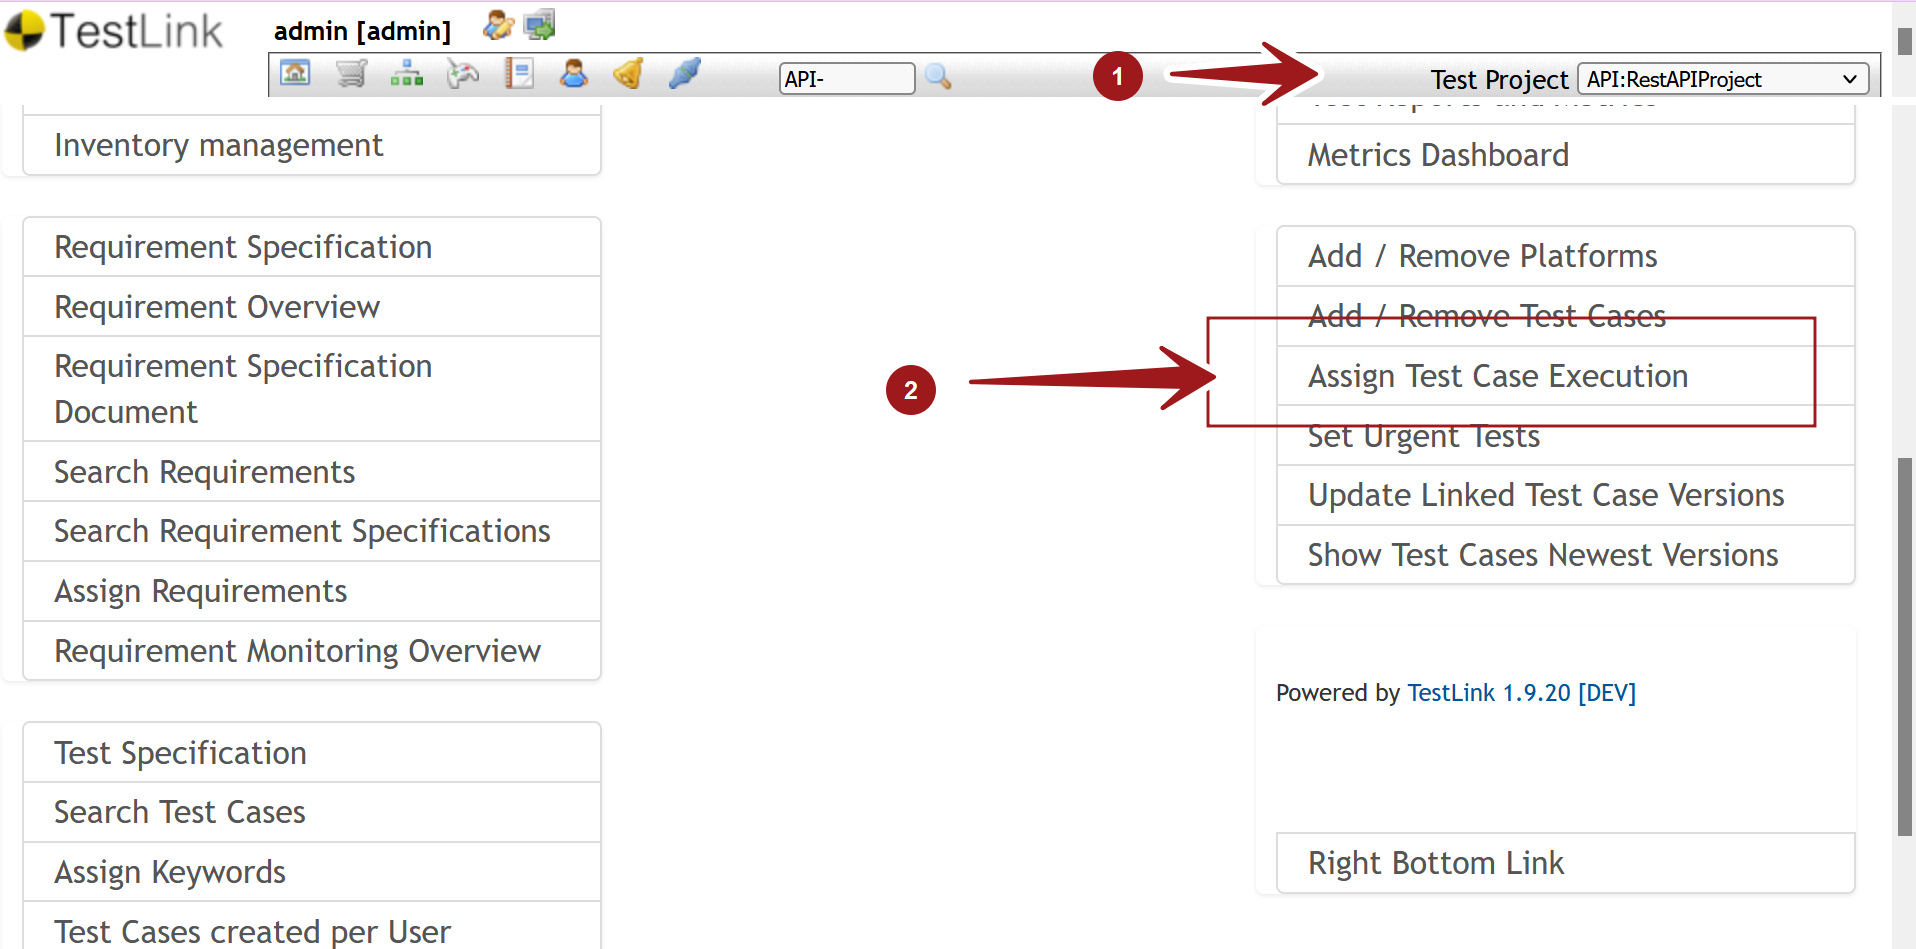
This will open the Assign Test Case Execution page. This page allows Test Leaders/Test Managers to assign testers to test cases within the Test Plan in Test Project.
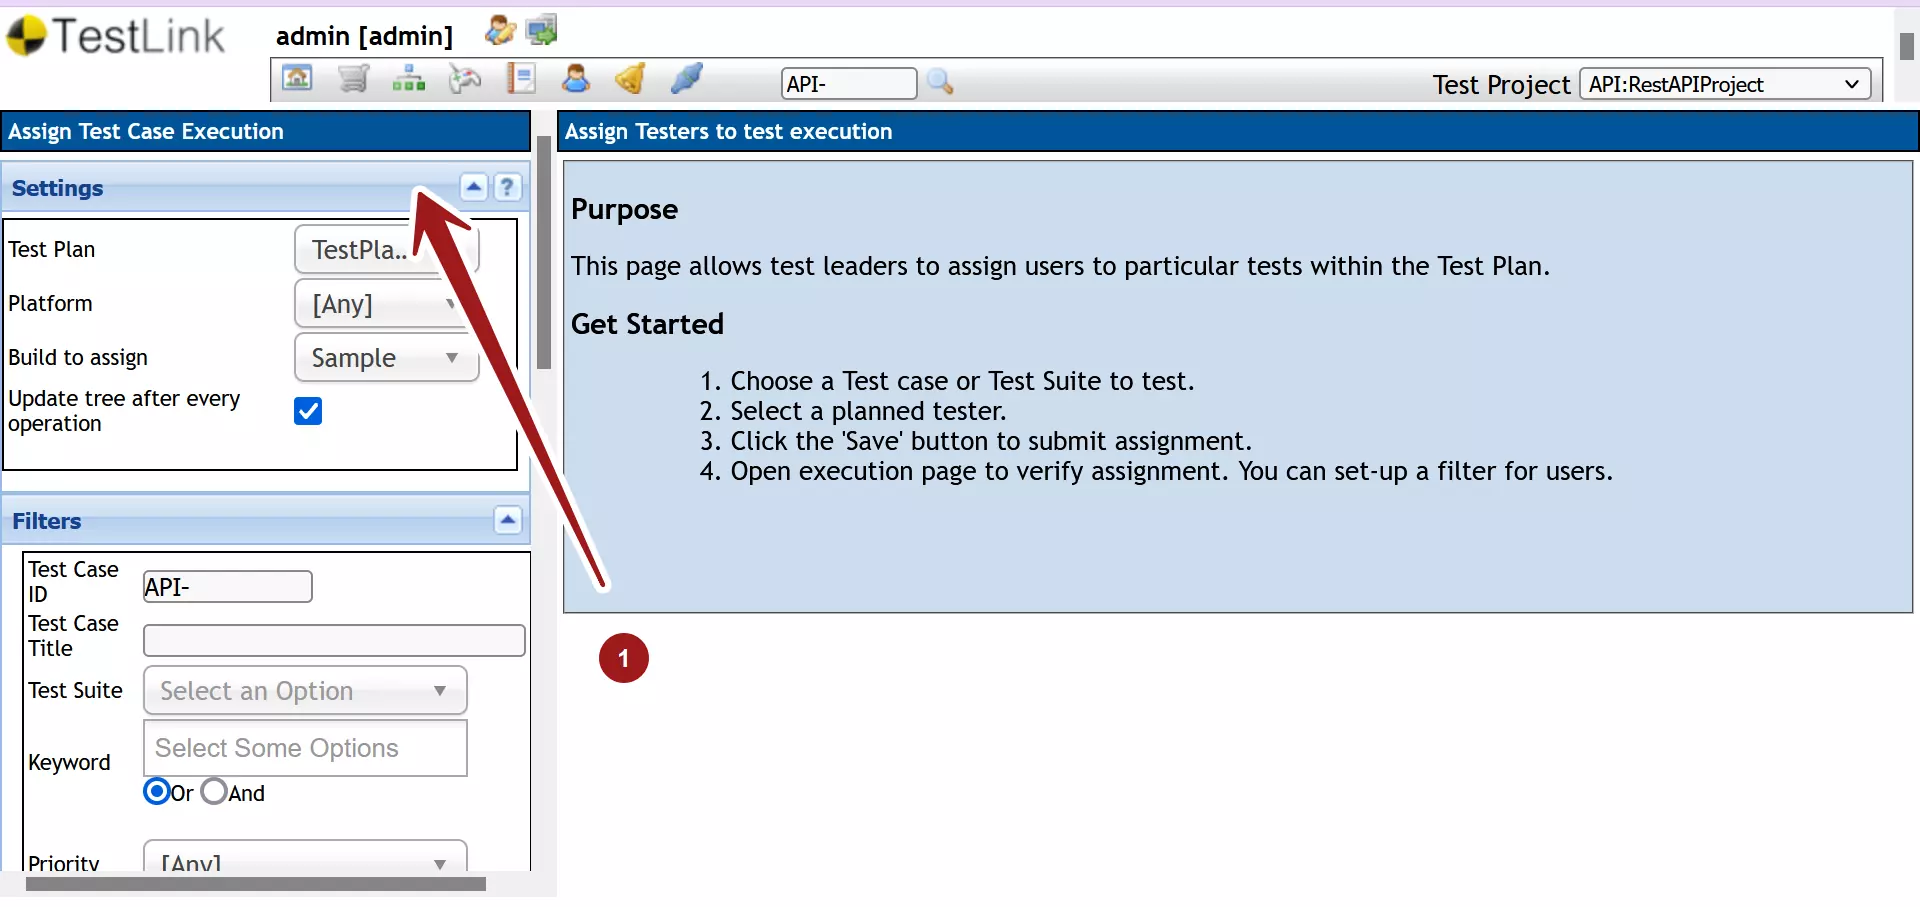
We can either perform bulk assignments or perform individual test cases assignments.
Bulk Assignment
Steps to bulk assign a Test suite:
Choose a Test Suite in the left Navigator.
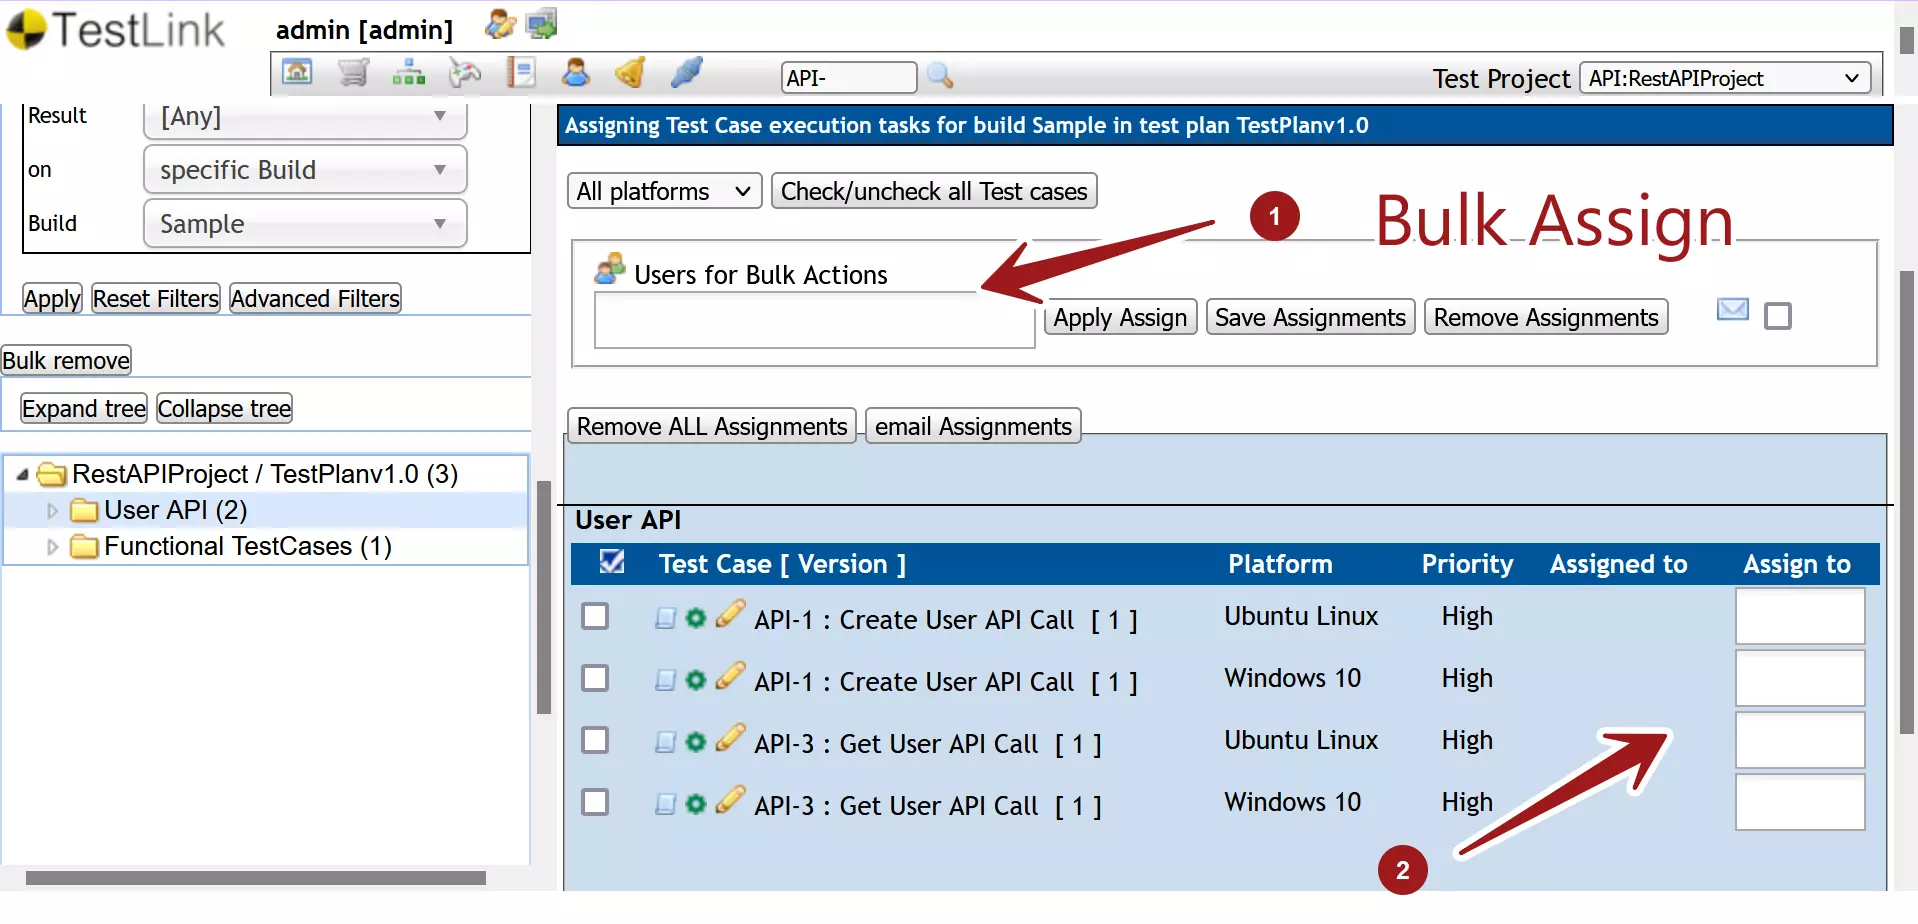
Select the planned user in the Users for Bulk Actions drop-down list. For example, to assign all the test cases in a Test Suite click on the Check/uncheck all Test cases button.
Select the Platforms to execute the test cases. The drop-down list will display all the available platforms for the Test plan. For example, to assign test cases on all platforms choose the option All platforms option.
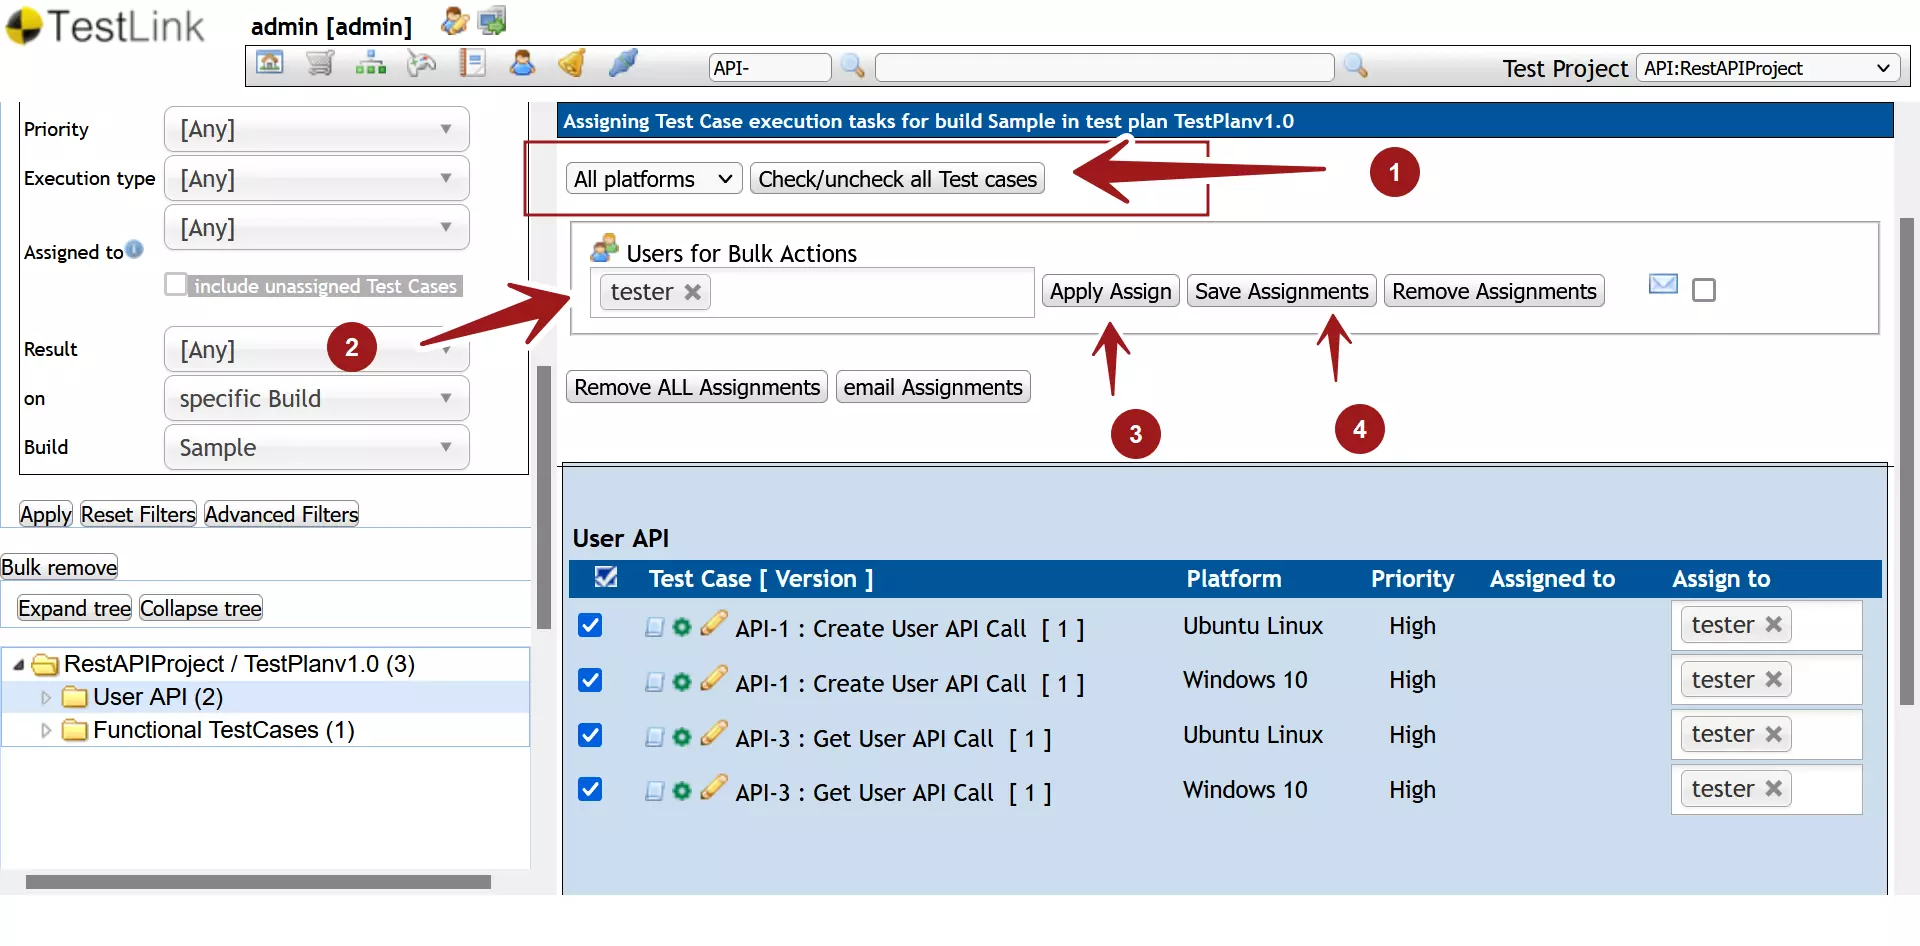
Click on the Apply Assign button to assign. This will add the user to all the test cases “Assign to” field.
Click on the Save Assignments button to save the test case assignment.
Assign Single Test Case
Select the Test case to assign.
Choose the user from the Assign to field drop-down list.
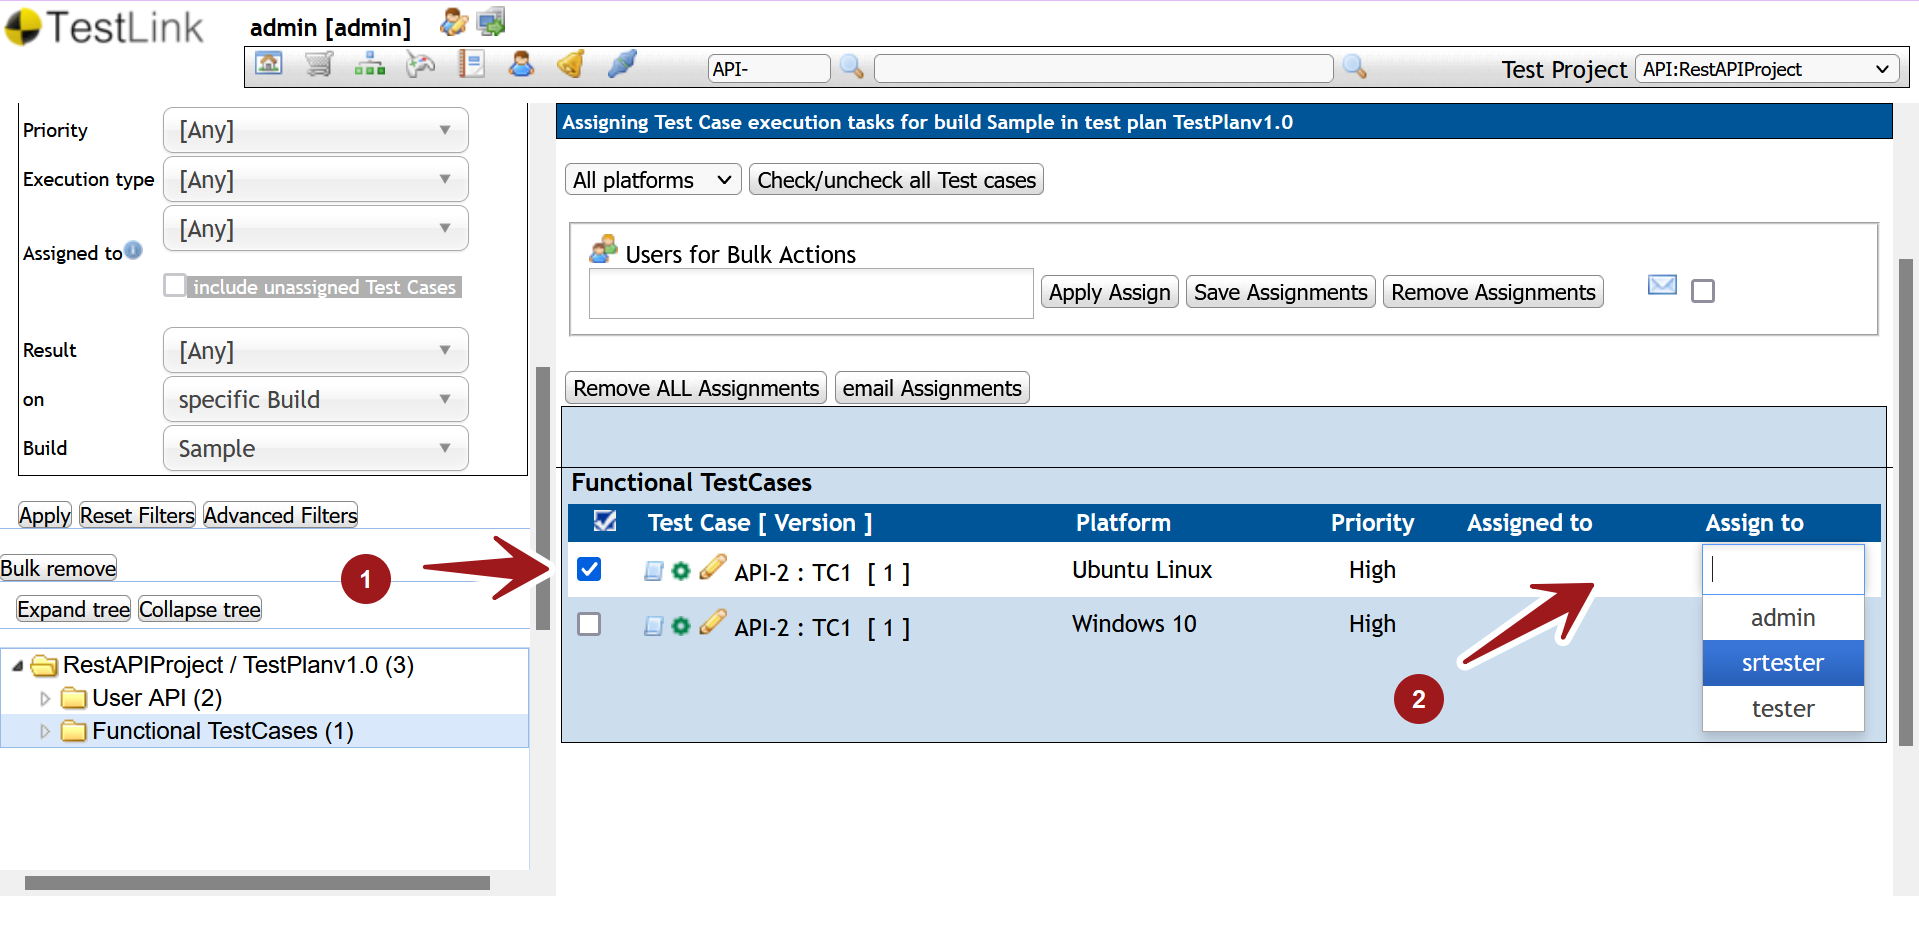
Click on the Save Assignments button.
—
TestLink Tutorials
TestLink Tutorial on this website can be found at:
https://www.testingdocs.com/testlink-tutorials/


