Build C++ Project in Code::Blocks IDE
Overview
In this tutorial, we will learn the steps to Build a C++ Project using Code::Blocks IDE. We can build and run the project once you are ready with the code.
Build C++ Project
We need to build the C++ project to compile all the source files. The main advantage of the Code::Blocks IDE is that we can build the entire project with a single command from the IDE, regardless of the number of source files.
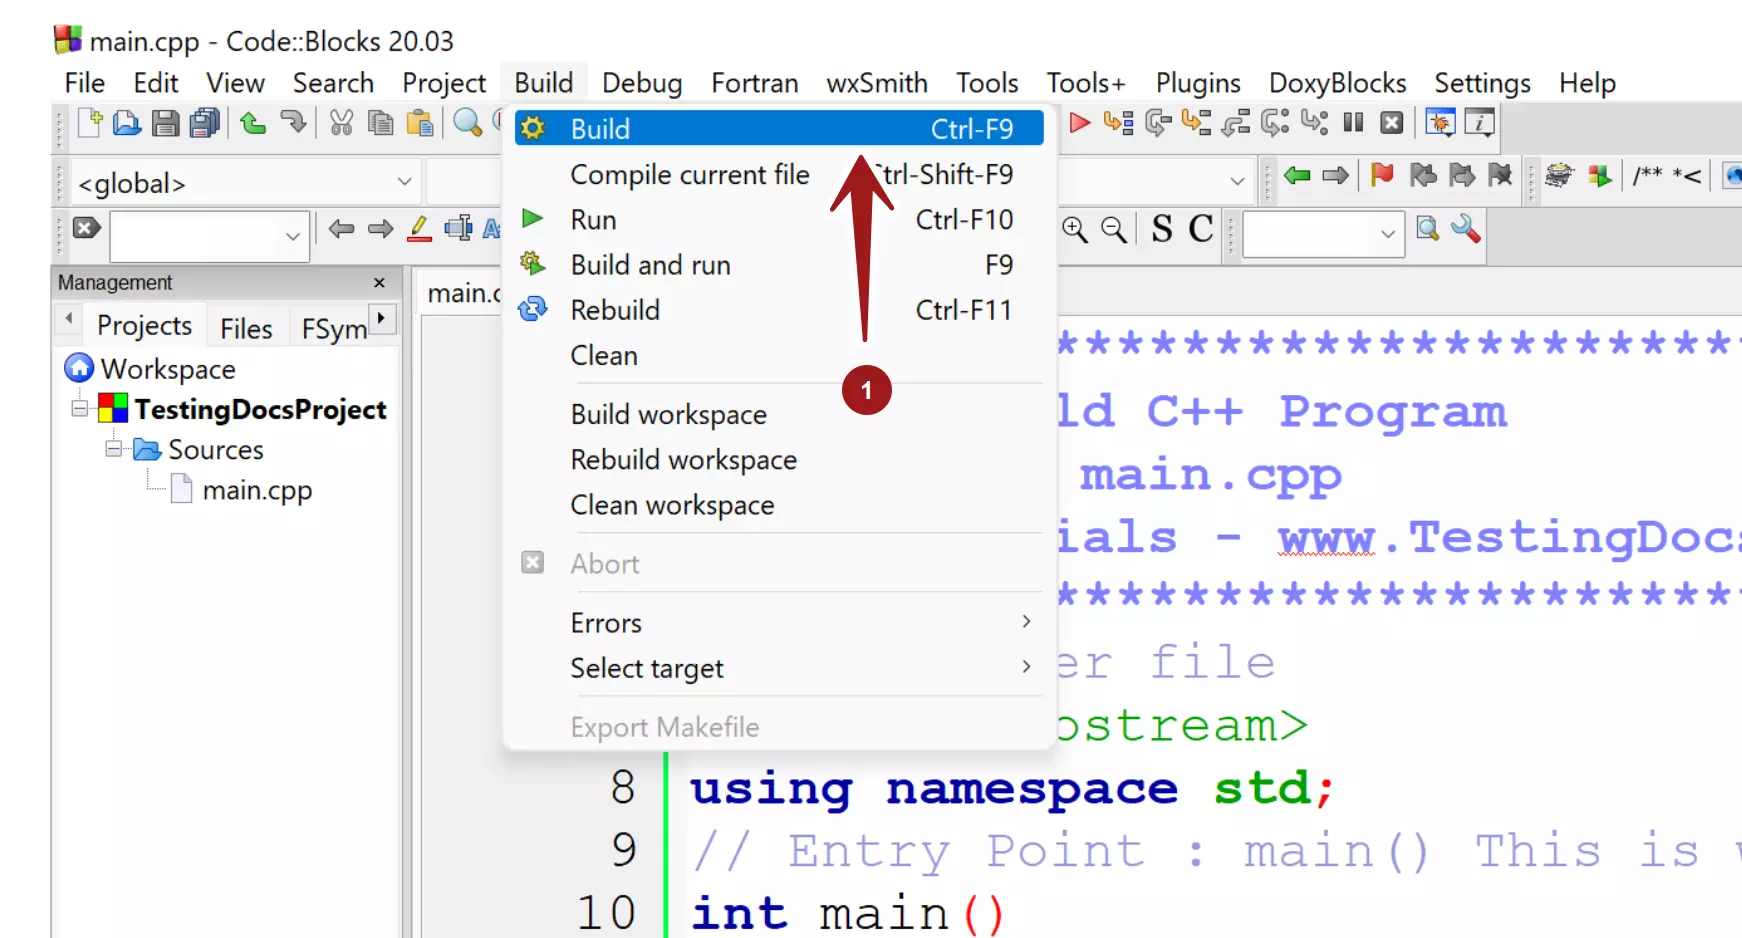
Choose the following menu option to build the entire project in Code::Blocks IDE:
Build >> Build
or
Right-click on the project name and choose the Build context-menu option.

The keyboard shortcut is Ctrl + F9. Press the Control key and the function key(Fn) and press the F9 key.
Alternatively, we can simply click on the wheel build icon in the toolbar.
![]()
Build Log
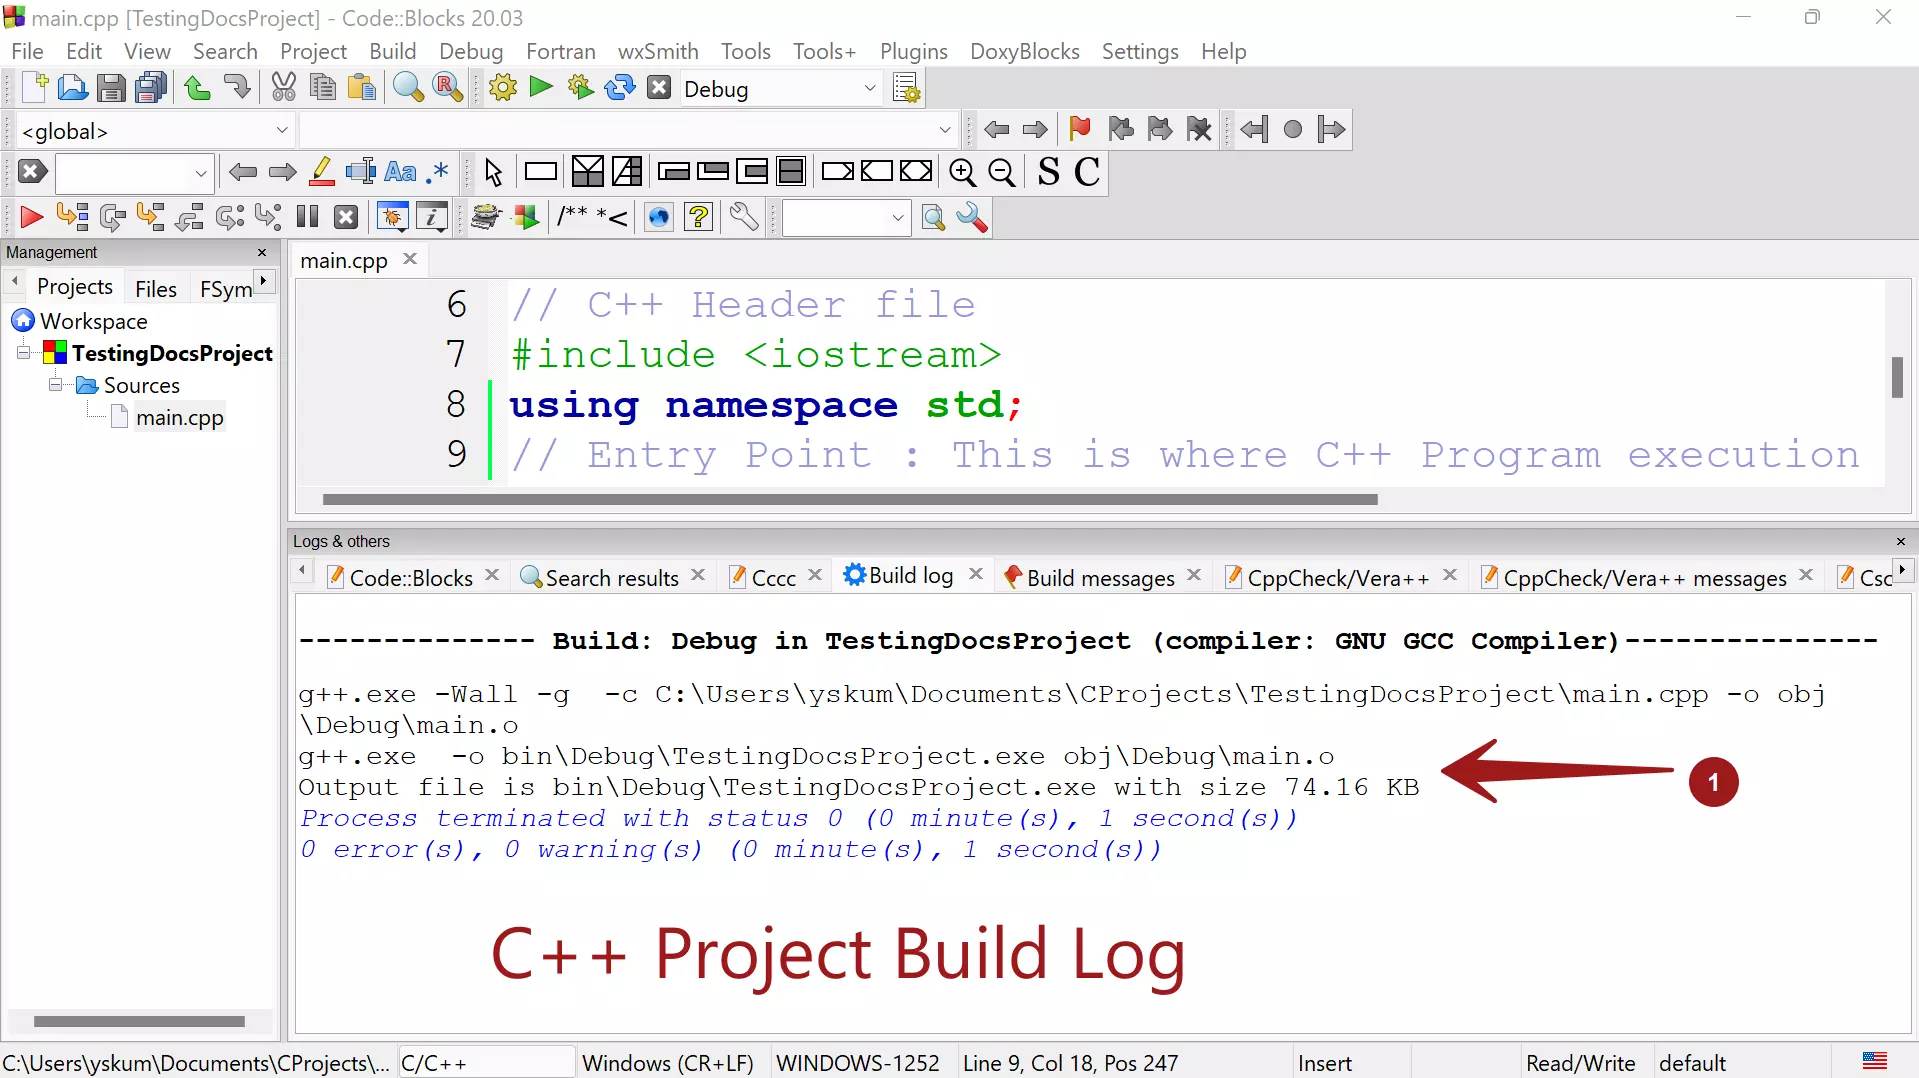
Build log window displays the project build status. Successful project build terminates with status 0. Build failure results in a non-zero status code.
Sample Build Log
————– Build: Debug in TestingDocsProject (compiler: GNU GCC Compiler)—————
g++.exe -Wall -g -c \Documents\CProjects\TestingDocsProject\main.cpp -o obj\Debug\main.o
g++.exe -o bin\Debug\TestingDocsProject.exe obj\Debug\main.o
Output file is bin\Debug\TestingDocsProject.exe with size 74.16 KB
Process terminated with status 0 (0 minute(s), 2 second(s))
0 error(s), 0 warning(s) (0 minute(s), 2 second(s))

Build log and Build messages windows display errors and warnings in the project. We can check the project build log for project-related errors and warnings in the Build log window. In case, of any errors in the build log, we need to resolve them and rebuild the project
That’s it. Next step, we can run the C++ project to execute the program.
Run C++ Project
https://www.testingdocs.com/run-c-project-using-codeblocks-ide/
—
Code::Blocks Tutorials
Code::Blocks Tutorials on this website can be found at:
https://www.testingdocs.com/code-blocks-tutorials/
For more information on Code::Blocks IDE, visit the official website:


